---
updatedAt: 2026-09-15T13:54:54.000Z
agentTools:
projectIndex: https://docs.customgpt.ai/llms.txt
---
# Connect your CustomGPT.ai account to Slack
This guide walks you through connecting your CustomGPT.ai account to Slack using OAuth. This replaces the need to generate and paste an API key.
## Before you start
* You have Owner or Admin access on your CustomGPT.ai account.
* You have permission to install apps in your Slack workspace.
***
## Steps
1. On your CustomGPT.ai agent, click the three dots menu and select **Deploy** icon.
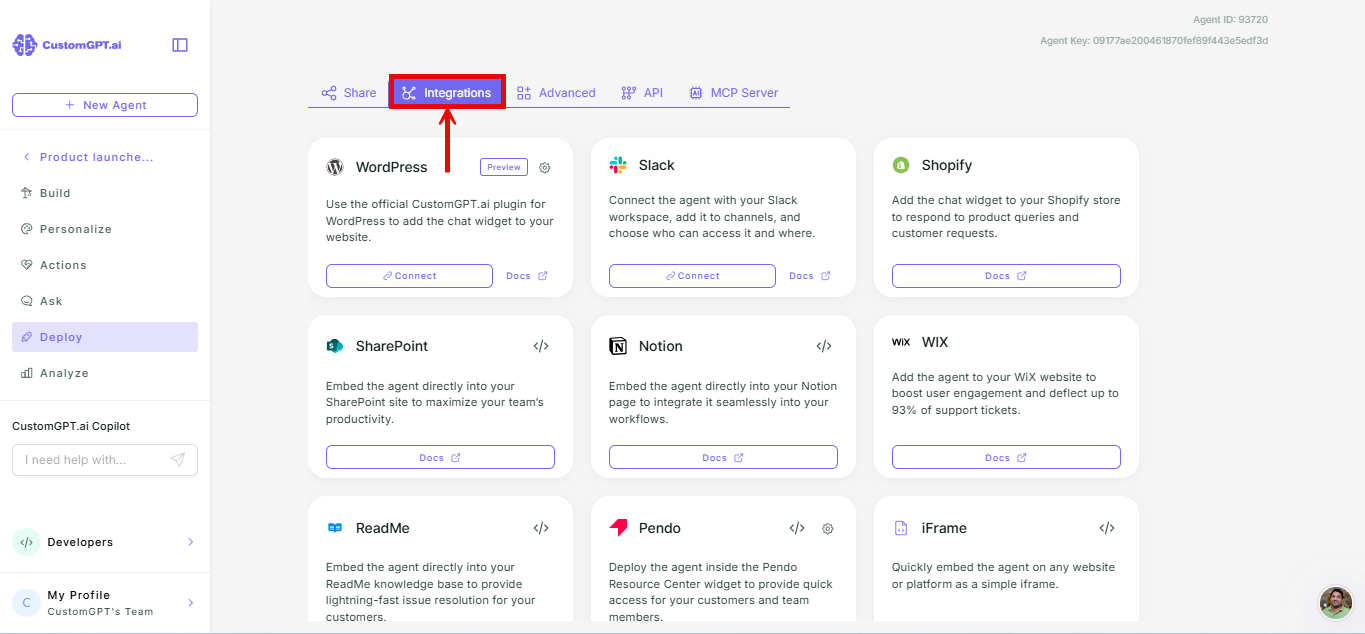
2. Go to the **Integrations **tab.
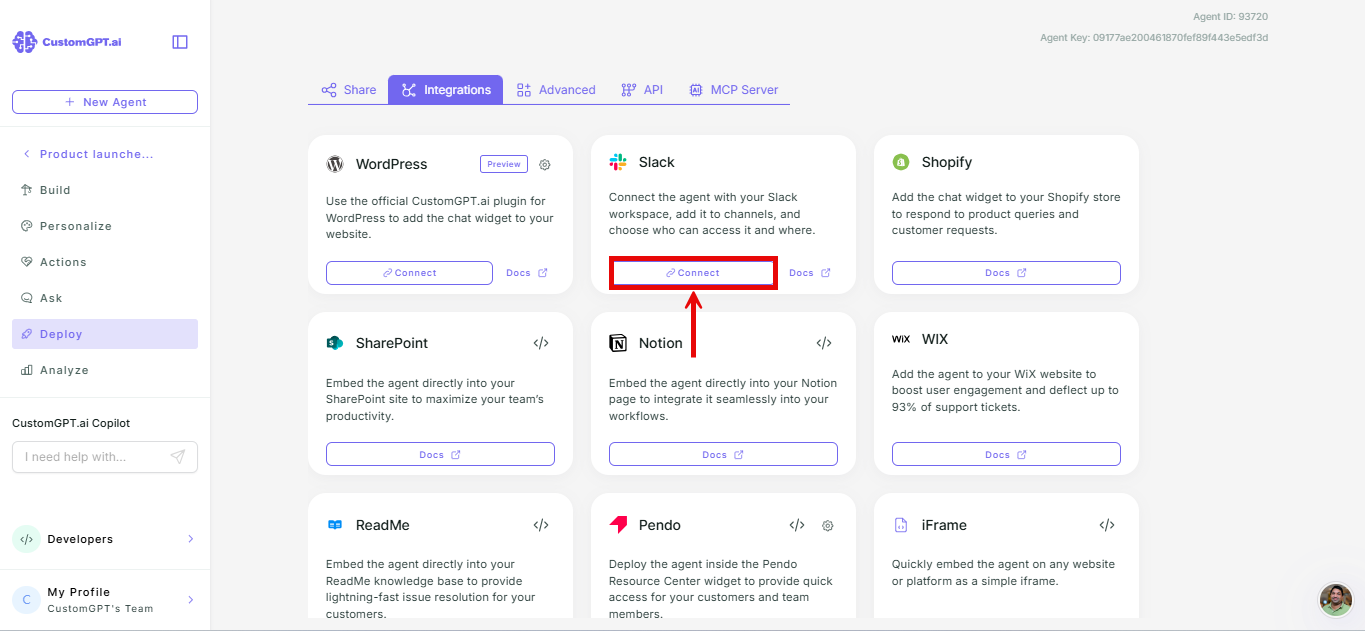
3. Find the **Slack** card and click **Connect**.
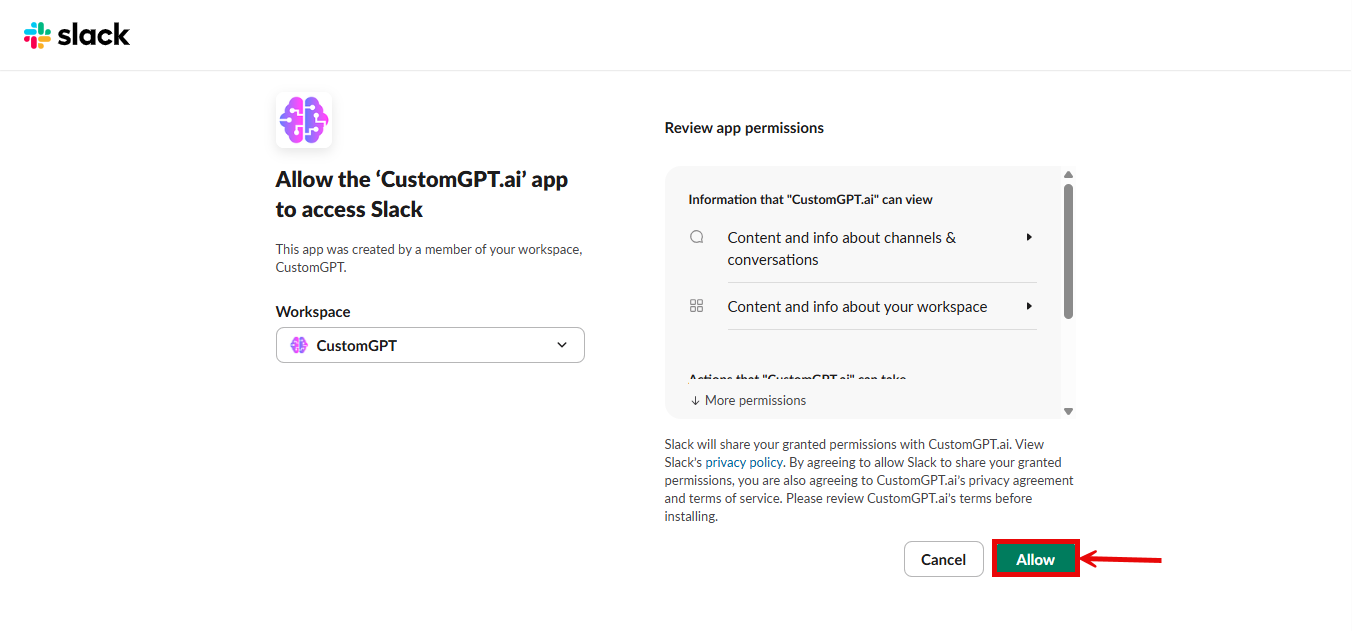
4. You're redirected to Slack. Click **Allow** to authorize the CustomGPT.ai app for your workspace.
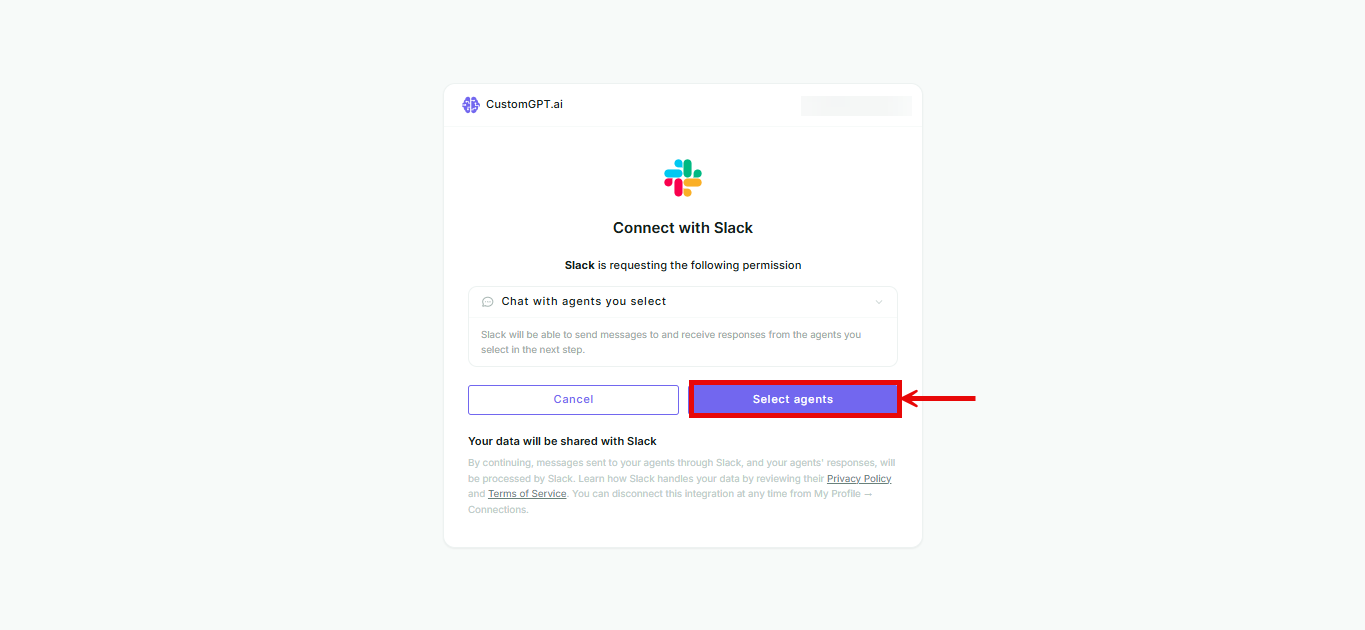
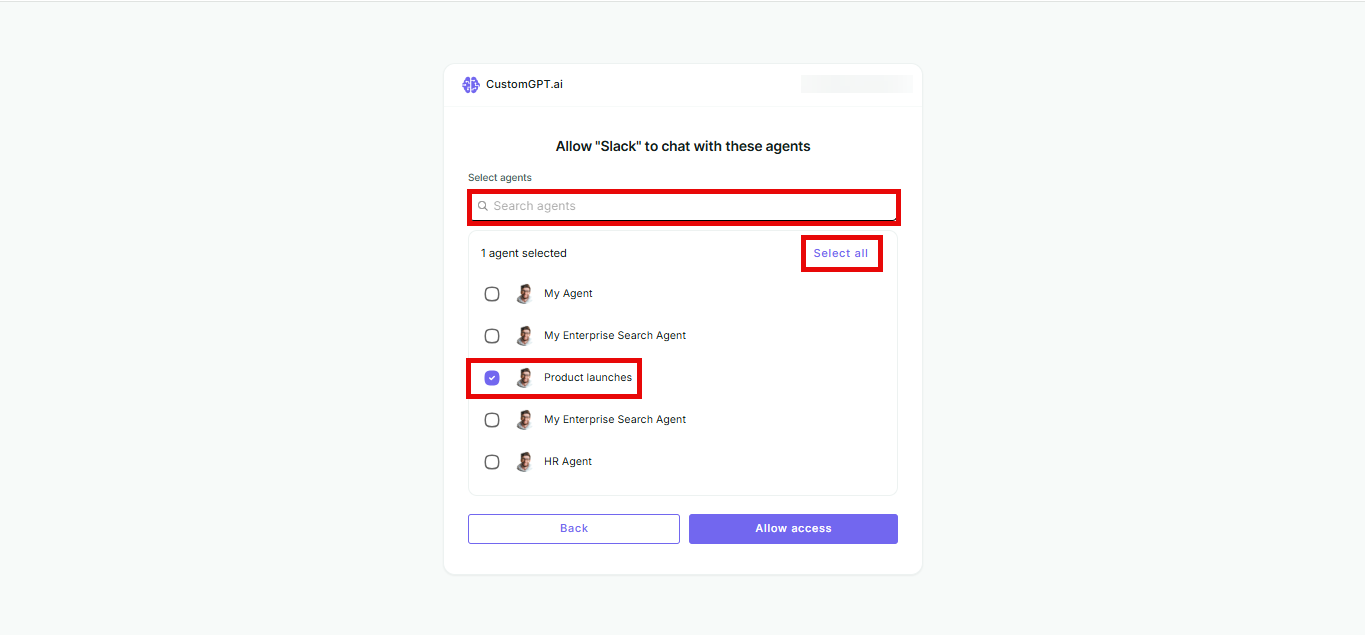
6. You're redirected back to CustomGPT.ai to the **Connect with Slack** screen, which asks for permission to chat with the agents you select. Click **Select agents**.
7. Select which agent(s) you want to connect to Slack.
* Use **Select all** to select every agent at once.
* Use the search bar to find a specific agent.
8. Click **Allow access**.
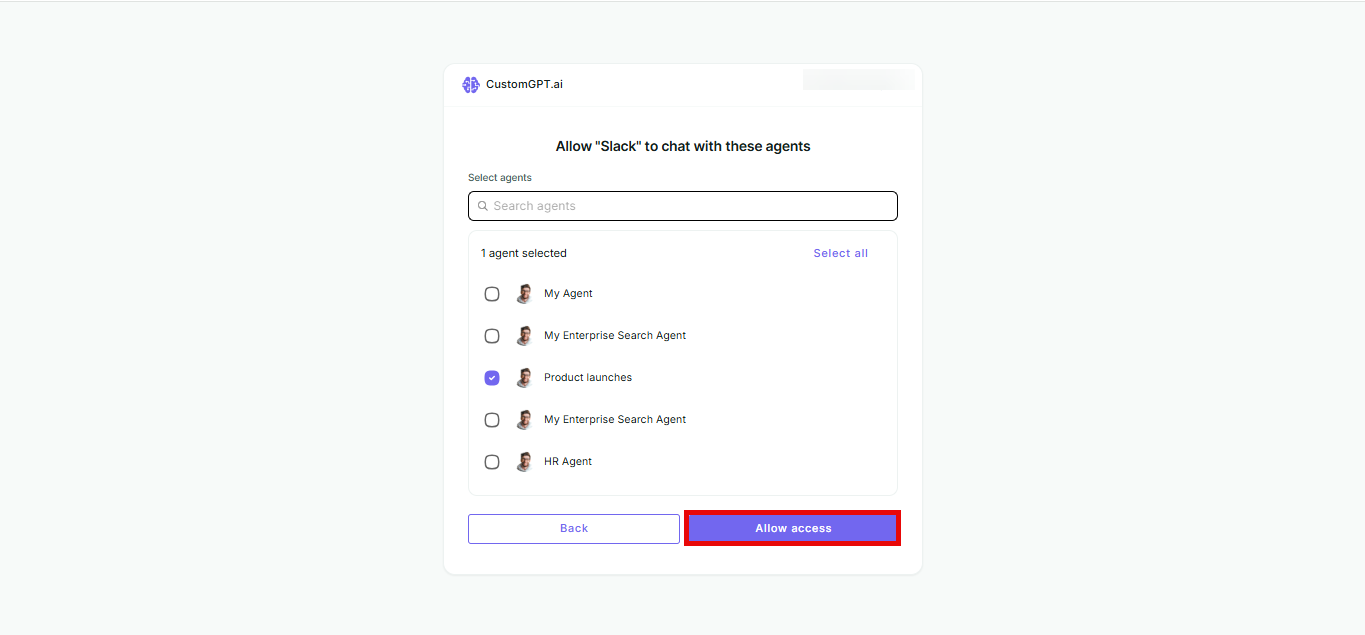
**Note:** Slack may prompt you to open its desktop app or continue in your browser.
You'll land on the CustomGPT.ai app in Slack. From here:
* To set a primary agent for the workspace and control who can talk to it, see [Set up primary Slack agent](https://docs.customgpt.ai/docs/setting-up-slack-primary-agent).
* To control who can invite agents to a channel, see [Configure agent access in Slack workspace](https://docs.customgpt.ai/docs/configure-project-access-in-slack-workspace).
***
## Existing connections made with an API key
If you connected to Slack before this update using an API key, that connection keeps working - you don't need to redo anything. See [Connect to Slack using an API key (Legacy)](#) if you still need to set up or troubleshoot that path.
***
## Turn on file uploads for an existing connection
If your agent isn't reading files sent in Slack, you may have connected to Slack before file uploads were supported. Turn on the extra Slack permission it needs:
1. In Slack, go to **CustomGPT** and click the **Connection** tab.
2. Scroll to the bottom and click **Click here to allow**.
New connections include this permission automatically. Refer to [How file uploads work in Slack](https://docs.customgpt.ai/docs/how-file-uploads-work-in-slack) for what your agent does with an uploaded file.
***
## Related articles
* [Manage your Slack connections](#)
* [Deploy to a Slack channel](https://docs.customgpt.ai/docs/deploy-your-project-to-slack-channel)
* [Configure Project Access in Slack Workspace](https://docs.customgpt.ai/docs/configure-project-access-in-slack-workspace)
* [Connect to Slack using an API key (Legacy)](#)