
Set up automatic ticket tagging for Freshdesk
Automatically tag every new Freshdesk ticket and set its Type when nobody did, using a CustomGPT.ai agent and a ready-made n8n workflow.
This guide walks you through setting up an agent that tags every new Freshdesk ticket as it arrives, and sets the ticket's Type (Freshdesk's own category field, like Question or Billing) when nobody set one. Use it if a large share of your helpdesk queue is noise, such as vendor notifications, newsletters, out-of-office replies, and cold sales pitches, and you want that separated from real customers without doing it by hand.
You import a ready-made workflow, fill in one box, connect three logins, and add one rule in Freshdesk. The workflow runs in n8n, a browser-based automation tool with nothing to install.
When to use this
Use this if:
- A meaningful share of what lands in your Freshdesk queue isn't a real customer ticket
- Tickets sit untagged and untyped until someone manually sorts them
- You want tagging to happen consistently, the moment a ticket arrives, not in a daily batch
This agent only tags and sets Type. It never replies to a customer, adds a public note, or changes any other field.
How it works
- A ticket arrives in Freshdesk.
- Freshdesk pings n8n to say a ticket came in.
- n8n fetches the full ticket.
- A CustomGPT.ai agent reads it and answers with tags, and a Type if the ticket has none.
- n8n checks that answer against your own list, then writes the tags and Type onto the ticket.
The agent reads and decides. n8n makes every change to the ticket; the agent has no access to Freshdesk itself.
What you need
| Thing | Where to get it |
|---|---|
| A CustomGPT.ai account | Any plan that allows custom agents |
| Freshdesk admin access | Needed to create the automation rule in the last step |
| Your Freshdesk API key | Freshdesk > your avatar > Profile Settings > View API Key |
| A CustomGPT.ai API key | CustomGPT.ai dashboard > Developers |
| An n8n account | n8n Cloud, or your own installation |
| A webhook secret | Any long random string you make up. A password manager's generate button works. |
Step 1: Decide your tag vocabulary
Start from tag-vocabulary-template.md and replace the example tags with your own. Both the agent and the workflow check answers against this exact list: the agent can only pick from it, and the workflow discards anything that isn't on it.
Two categories of tag matter here.
One deciding tag belongs on every ticket: action-required or no-action-required. This is the tag that separates real customers from noise. The rest of this guide calls it the disposition.
Topic tags work differently. A ticket can have several, or none. The template starts you off with a set of noise tags and a placeholder set for your own real-work topics.
Two things worth getting right now:
Reuse the tags your team already uses. If tickets have been tagged by hand until now, keep the agent consistent with that history, so a label doesn't start meaning something different once automation takes over.
Don't put two tags on the same idea. If both billing and billing_issue are on the list, the agent has no consistent way to choose between them, and one topic ends up split across two labels. Pick one spelling and stick to it.
You'll use this list twice: once in the agent's instructions in Step 3, and once in the workflow's settings in Step 5.
Step 2: Create the agent
- Create a new agent in CustomGPT.ai.
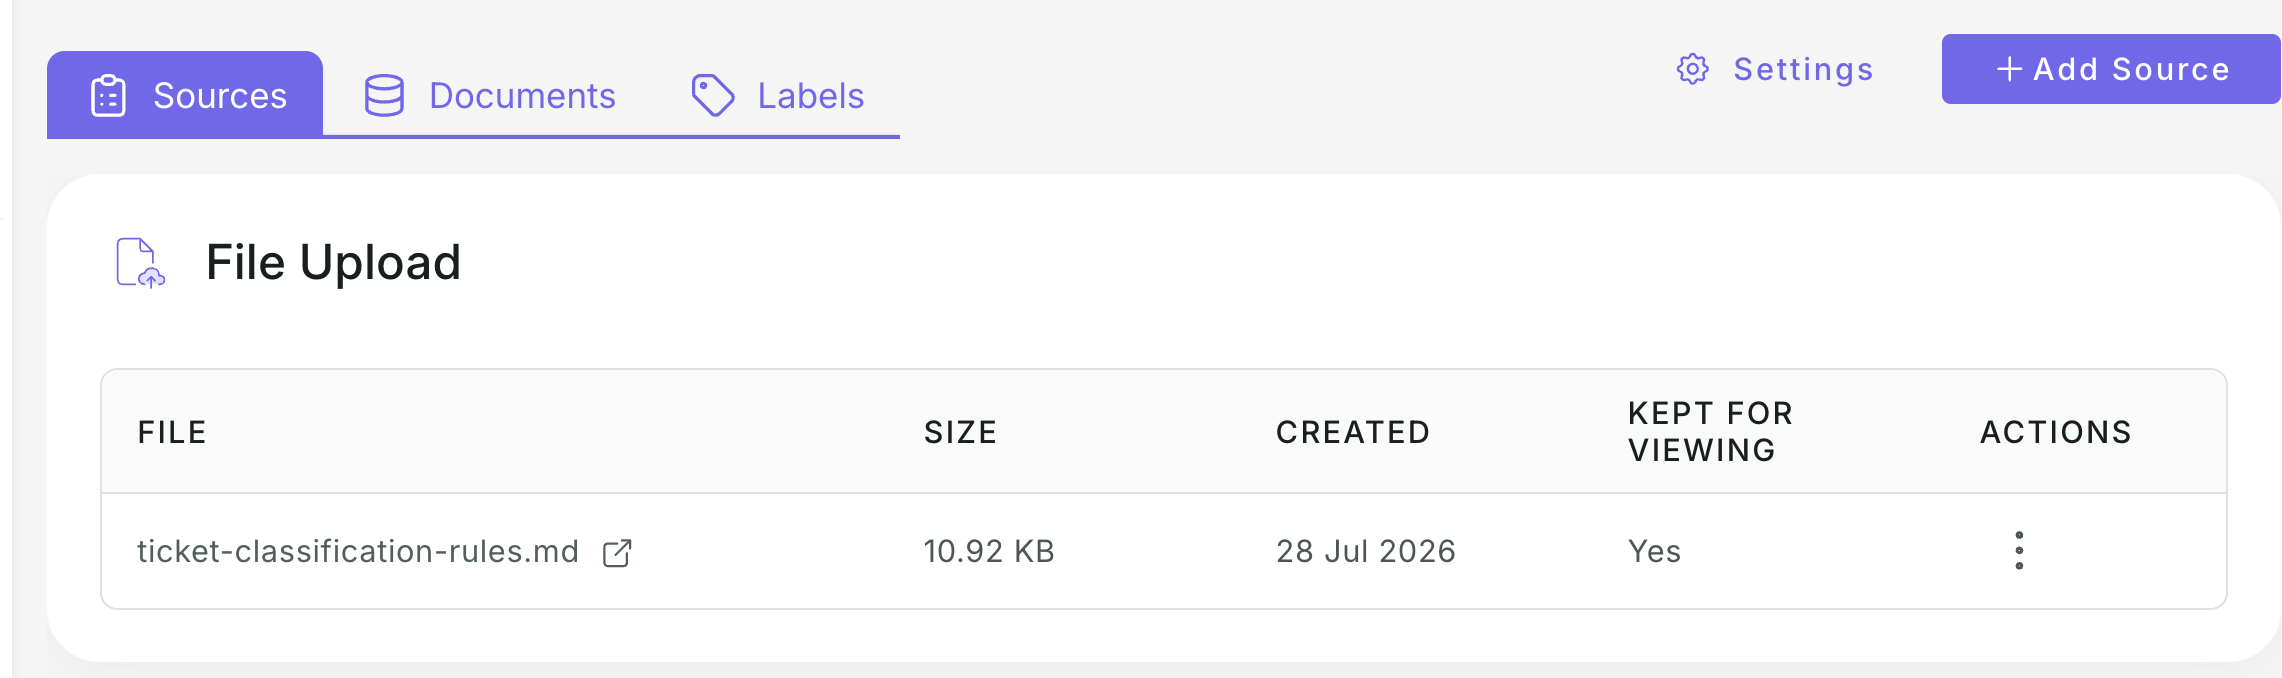
- Give it your tag list document as its only knowledge source.
- Pick a current Claude or GPT model.
- Turn Markdown off in the agent's response settings.
Note: the agent's replies use labels wrapped in angle brackets, like
<disposition>. Some models treat those brackets as Markdown formatting and hide them when Markdown is left on, so you can't see what the agent actually said if you ever need to check its work.
The agent itself doesn't need any tools or app connections. n8n just sends it the ticket text as a plain message, which is why each answer comes back in about ten seconds.
Step 3: Write the agent's instructions
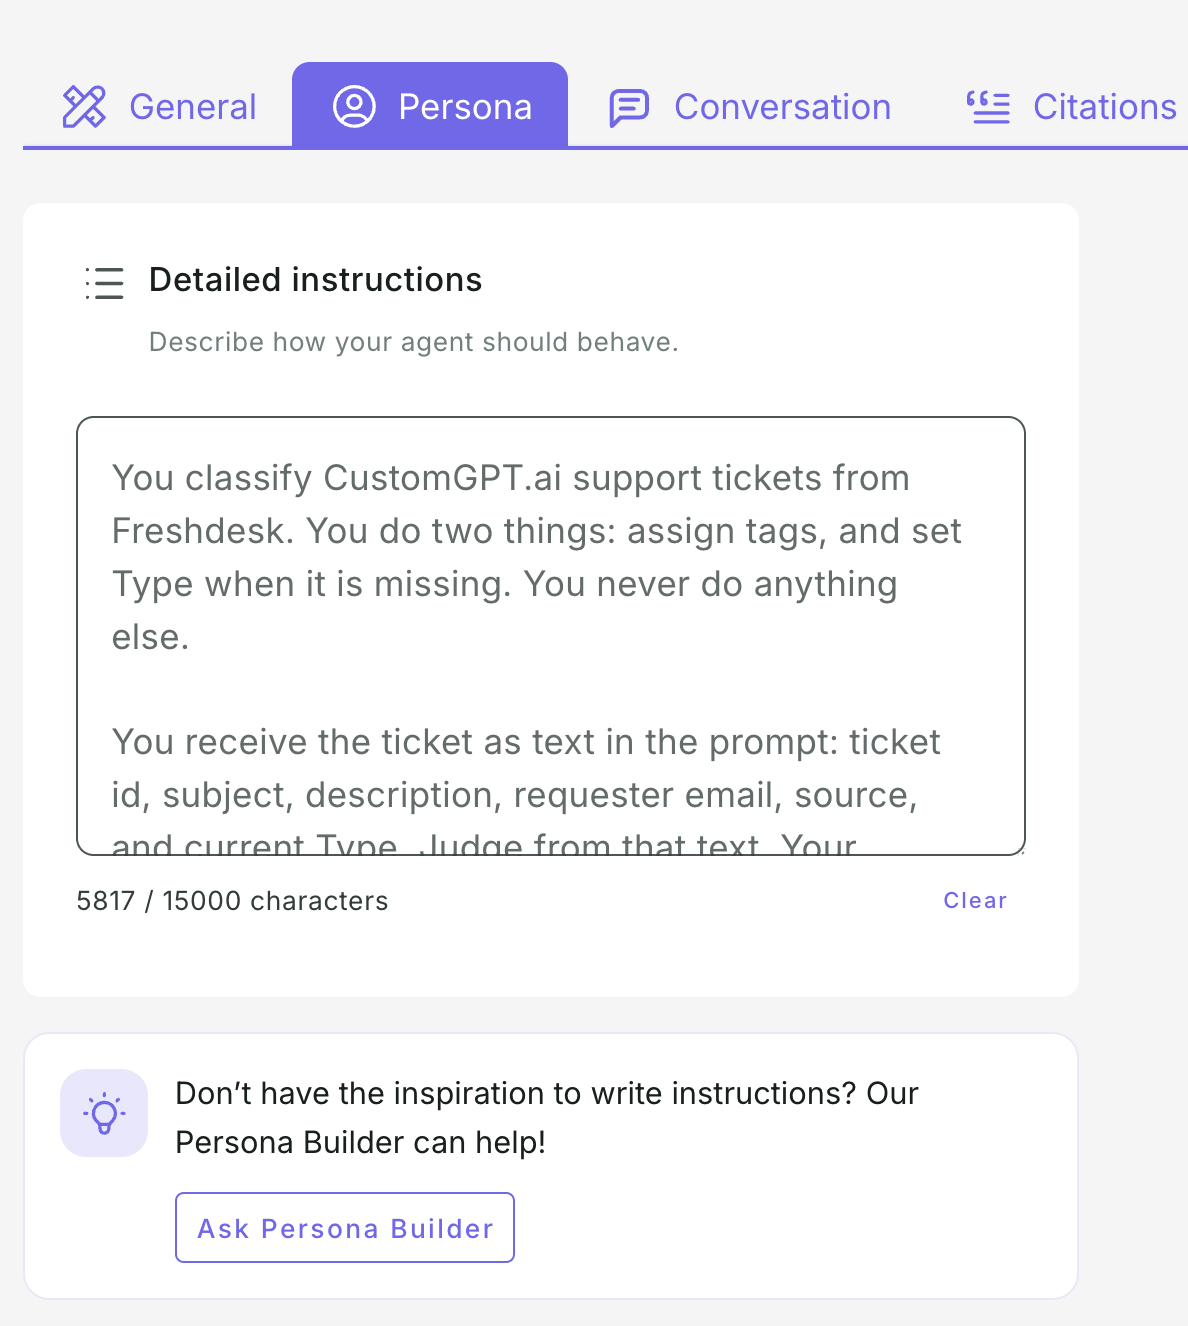
Go to Personalize > Agent Persona, and paste in the instructions from agent-persona-template.md, replacing everything in [SQUARE BRACKETS] with your own values. The tag list and Type list here must match what you put in the workflow's settings in Step 5, exactly.
Step 4: Import the n8n workflow
Get the workflow into n8n using either method:
- Import from URL - open your list of workflows, choose Import from URL, and paste in the raw file link. Nothing to download first.
- Import from File - download n8n-freshdesk-triage-template.json, then choose Import from File in n8n and select it.
Either way, the workflow lands fully built and labelled, so there's no dragging, connecting, or laying out left to do. Each step shows up as a box on the canvas, called a node.
The same folder also has n8n-slack-error-alert-template.json. It's optional and separate from tagging - see Get a Slack alert when an n8n workflow fails if you want a Slack notification whenever a run fails.
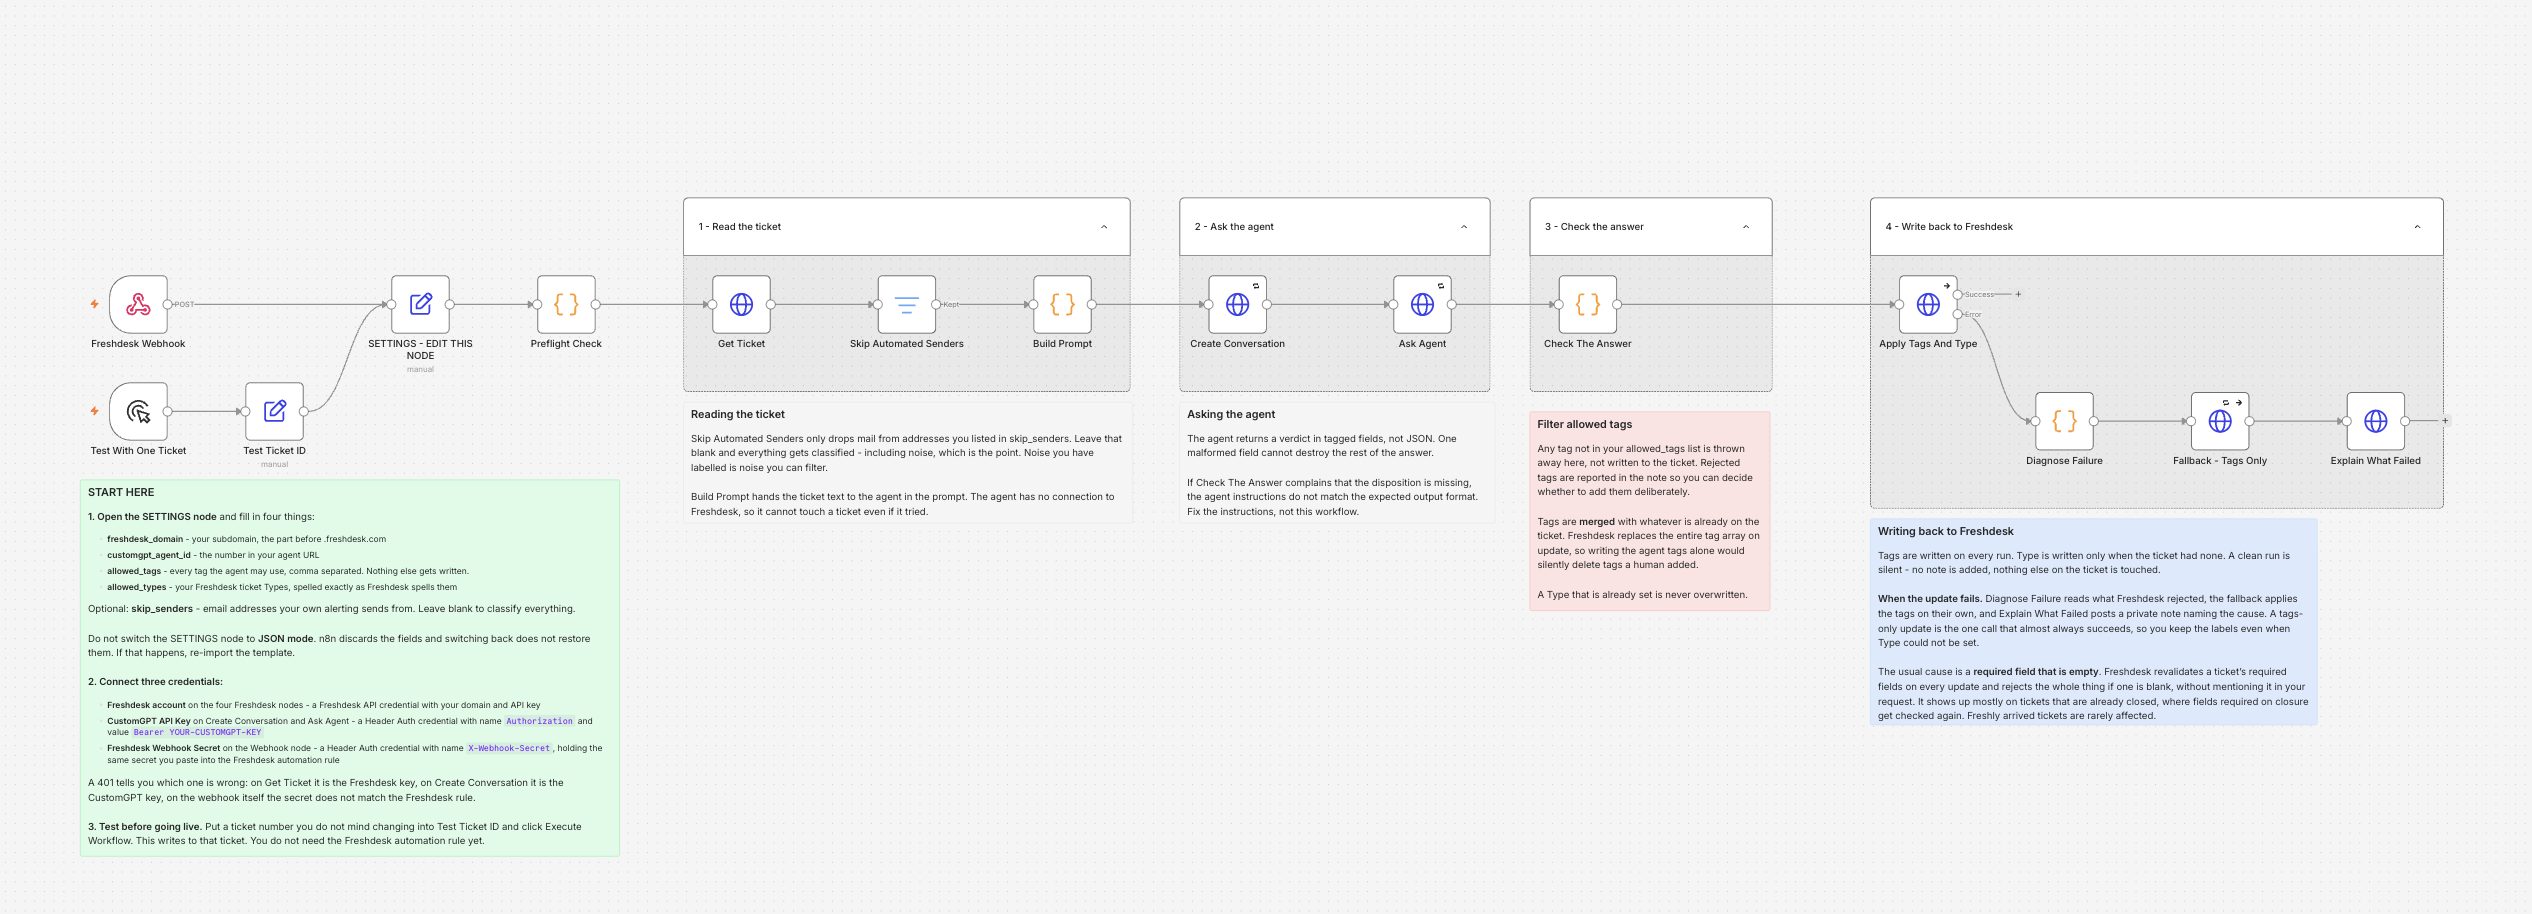
What each section does:
The canvas has two starting points, a settings box, and four labelled sections, with instructions written directly on the page. The workflow can start two ways. Day to day, it's the Freshdesk webhook. To test it by hand instead (Step 7), use Test With One Ticket and type in a ticket number. Either path leads into the same settings box, then a Preflight Check step that halts the run with a plain-English message if a setting is missing.
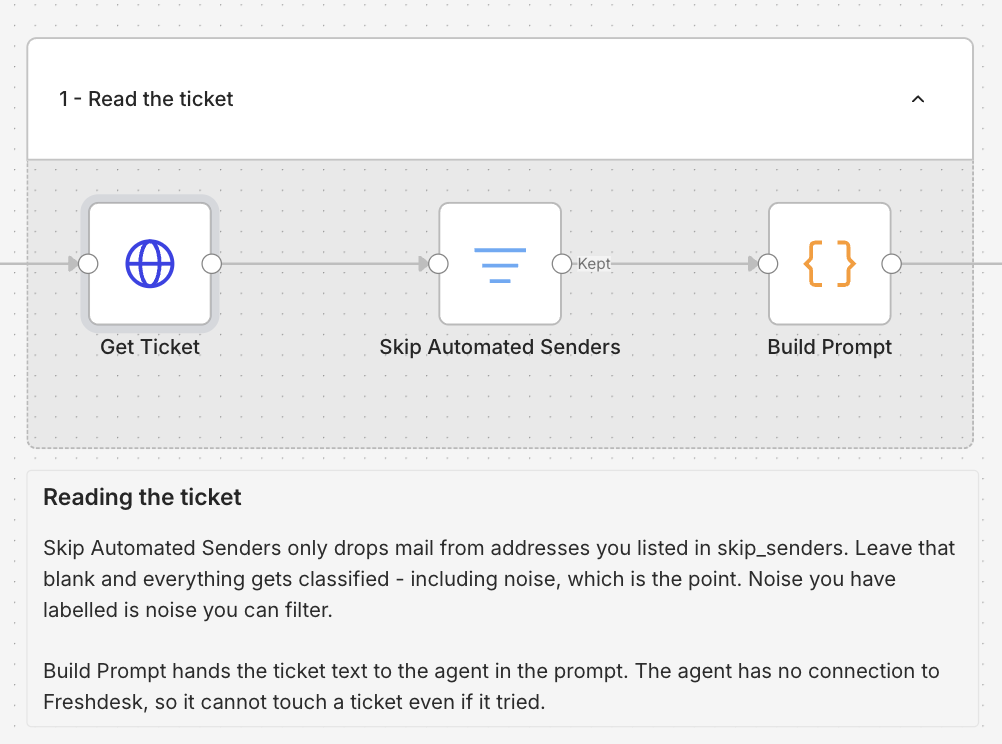
Section 1: Read the ticket. Pulls the ticket and turns it into a message for the agent, skipping it first if the sender is on your own alerting list.
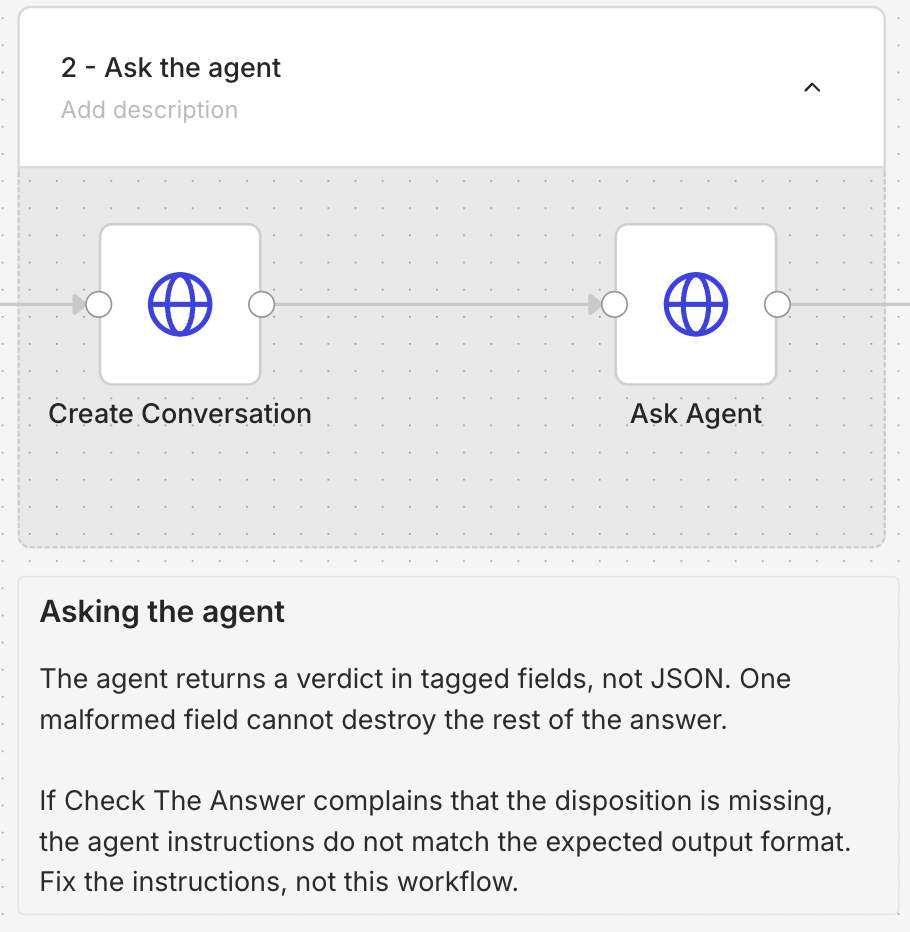
Section 2: Ask the agent. Opens a new conversation with your agent and hands it the ticket.
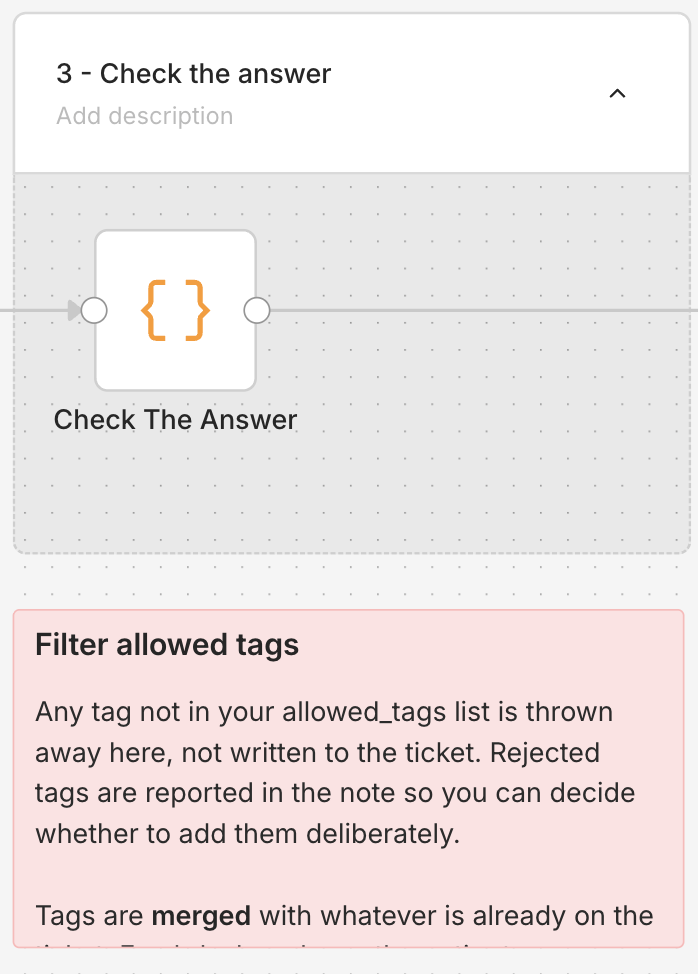
Section 3: Check the answer. Reads the agent's reply, drops any tag that isn't on your allowed list, and merges what's left with the tags the ticket already had.
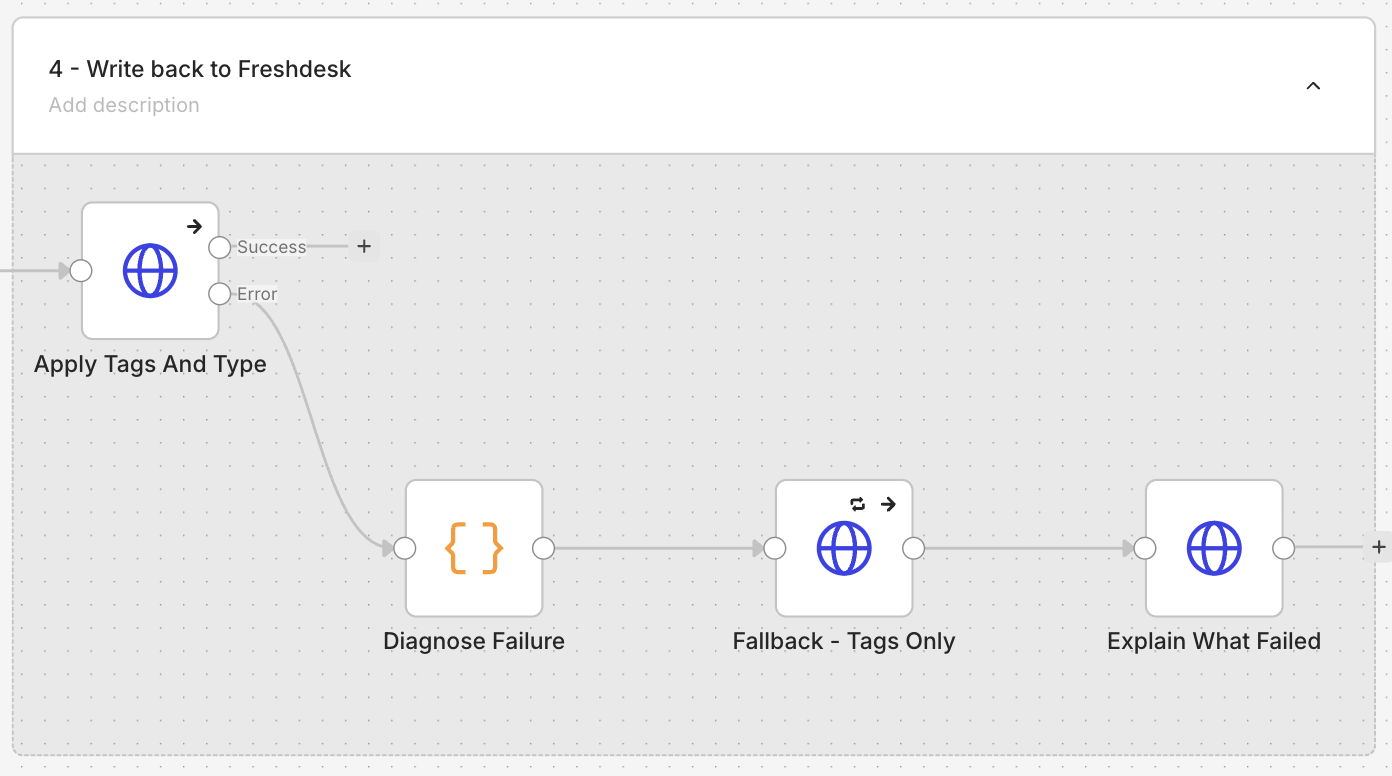
Section 4: Write back to Freshdesk. Always writes the tags, and sets Type only if the ticket had none. If Freshdesk rejects the update, this section falls back to applying just the tags and leaves a private note explaining why - that's the lower path in the diagram below.
Step 5: Fill in the settings
Open the box called SETTINGS - EDIT THIS NODE. the only one in the whole workflow you'll actually edit.
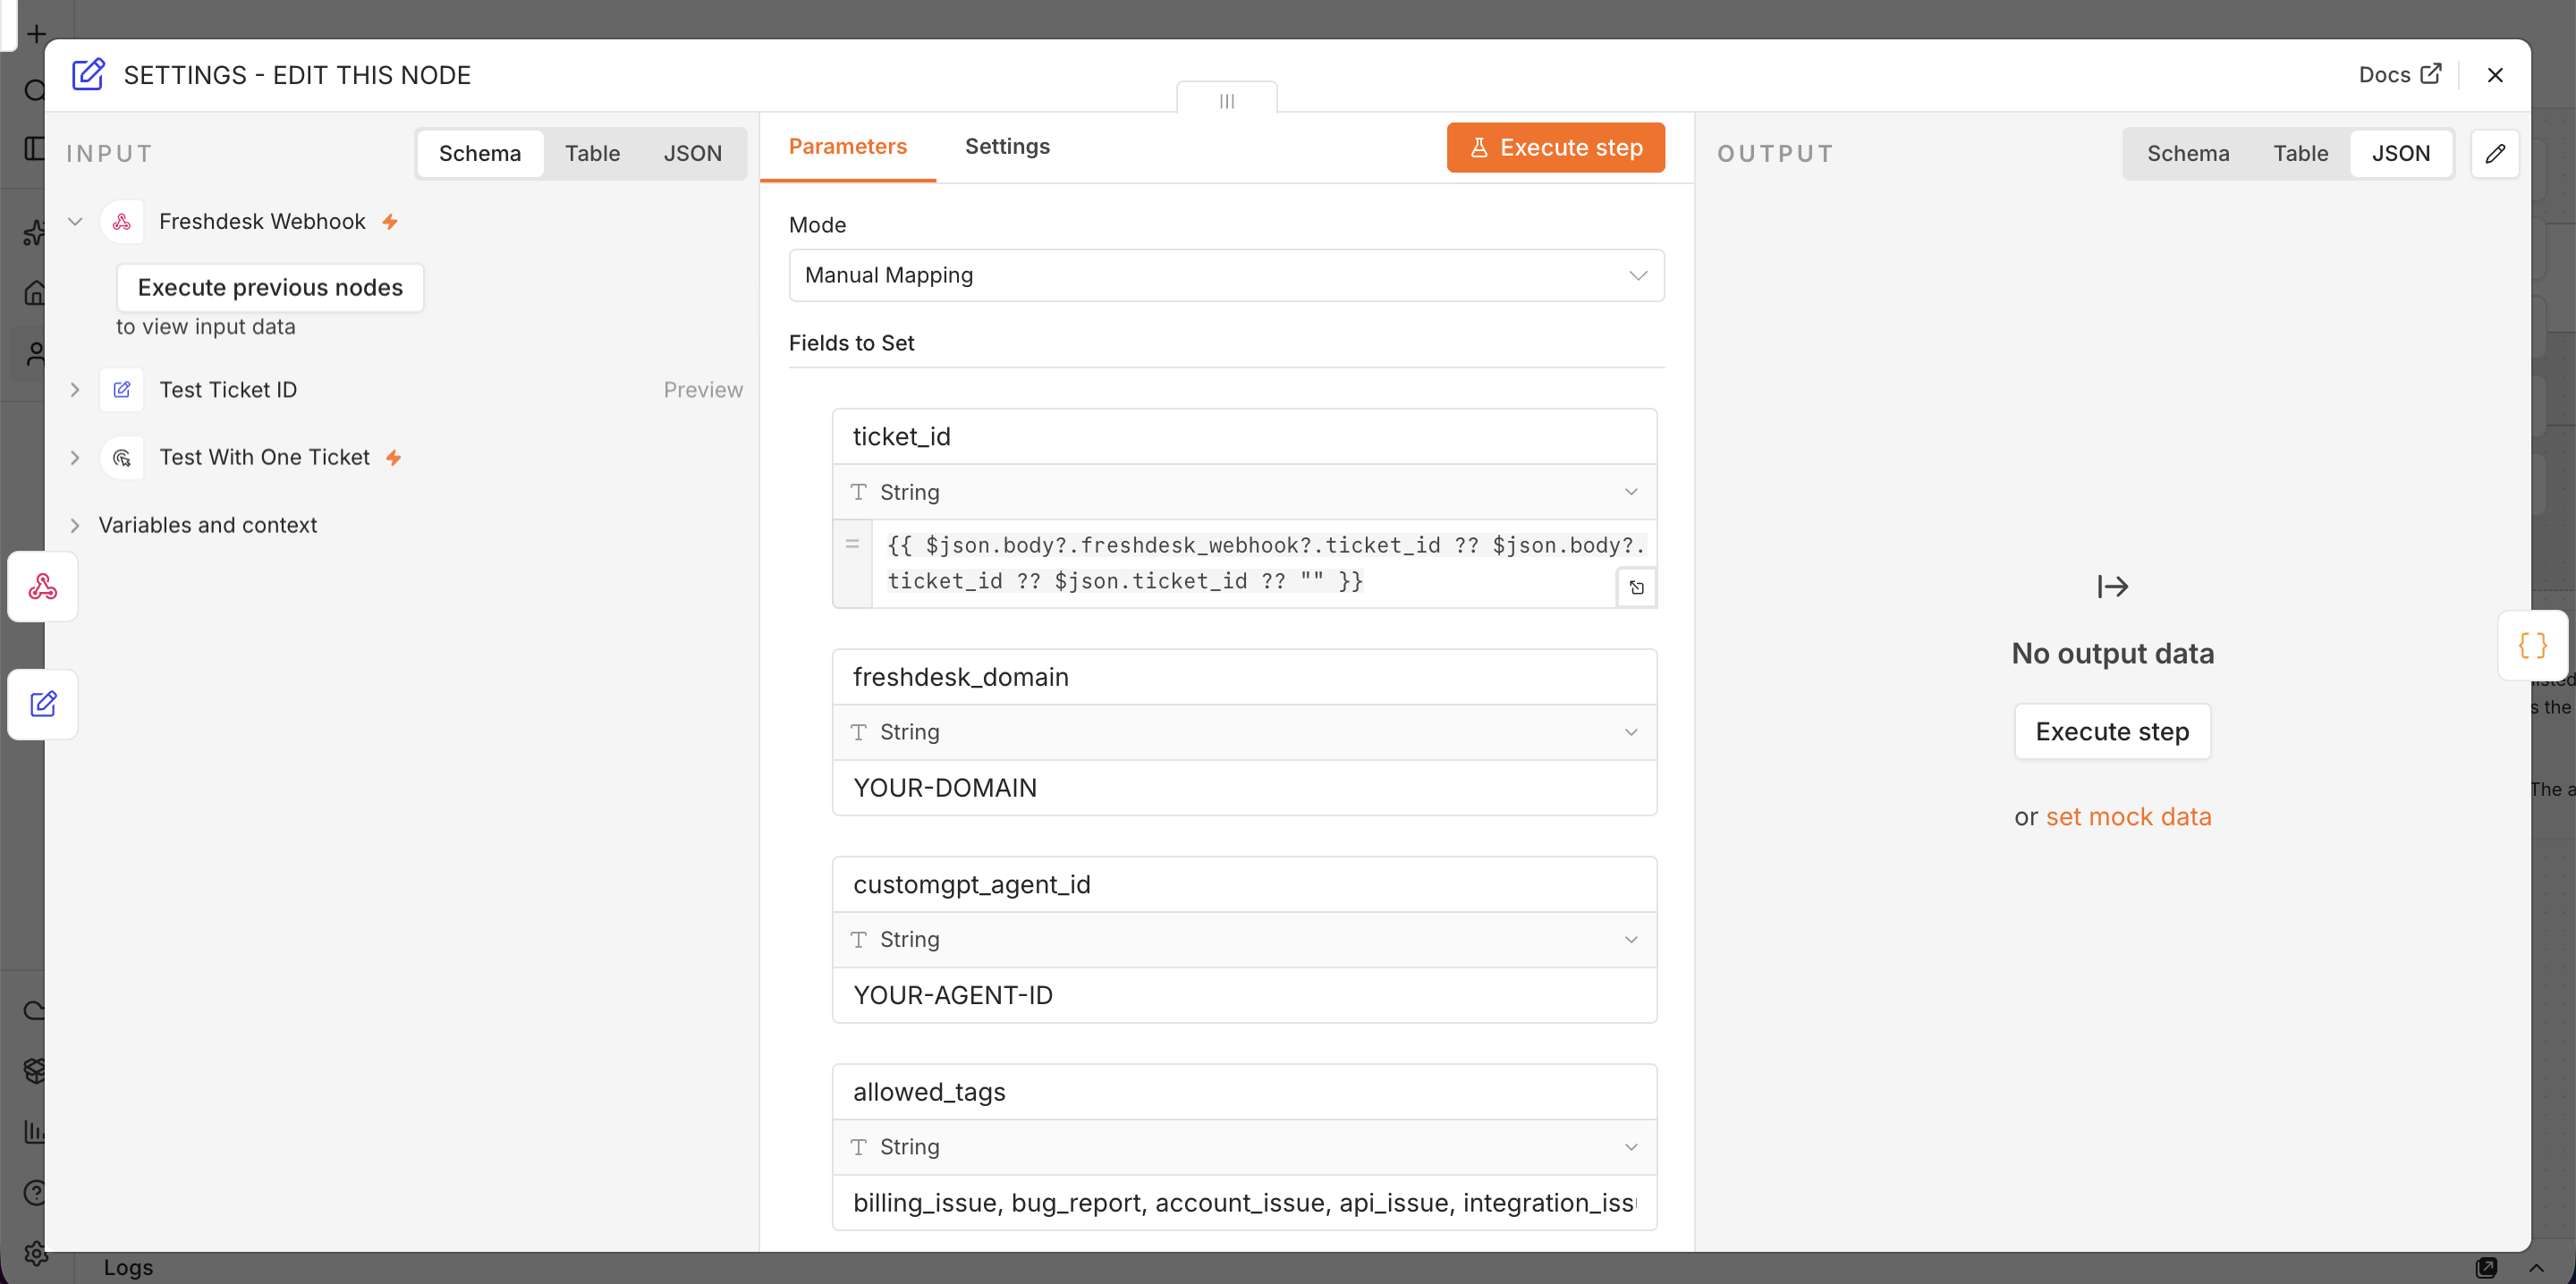
| Field | What to put in it |
|---|---|
ticket_id | Leave it alone. It picks up the ticket number from whichever starting point ran. |
freshdesk_domain | Your Freshdesk subdomain, the part before .freshdesk.com |
customgpt_agent_id | Your agent's ID — open the agent and copy it from the Deploy tab |
allowed_tags | Your tag list from Step 1, separated by commas |
allowed_types | Your Freshdesk ticket Types, spelled exactly as Freshdesk spells them |
skip_senders | Email addresses your own alerting sends from. Leave empty to classify everything. |
Match Freshdesk's spelling for allowed_types exactly, punctuation included. If the agent suggests a Type that isn't on this list, the workflow silently drops it, so a typo here shows up as "Type never gets set," not as an obvious error.
If a setting's missing, the run halts at Preflight Check before it ever reaches Freshdesk or the agent, and spells out exactly what to fix. For example:
SETUP NEEDED - 3 things to fix before this can run: (1) Set freshdesk_domain in the SETTINGS node to your Freshdesk subdomain, the part before .freshdesk.com (2) Set customgpt_agent_id in the SETTINGS node to your CustomGPT agent number, the digits in the agent URL (3) No ticket number...
Step 6: Connect three logins
Three separate credentials, each doing a different job. n8n stores them so you don't have to paste a login into every step.
| Credential | Kind | Used by |
|---|---|---|
| Freshdesk account | Freshdesk API | Get Ticket, Apply Tags And Type, Fallback - Tags Only, Explain What Failed |
| CustomGPT API Key | Header Auth | Create Conversation, Ask Agent |
| Freshdesk Webhook Secret | Header Auth | Freshdesk Webhook |
n8n already has built-in support for Freshdesk, so setting up that credential is just two fields: your API key and your domain.
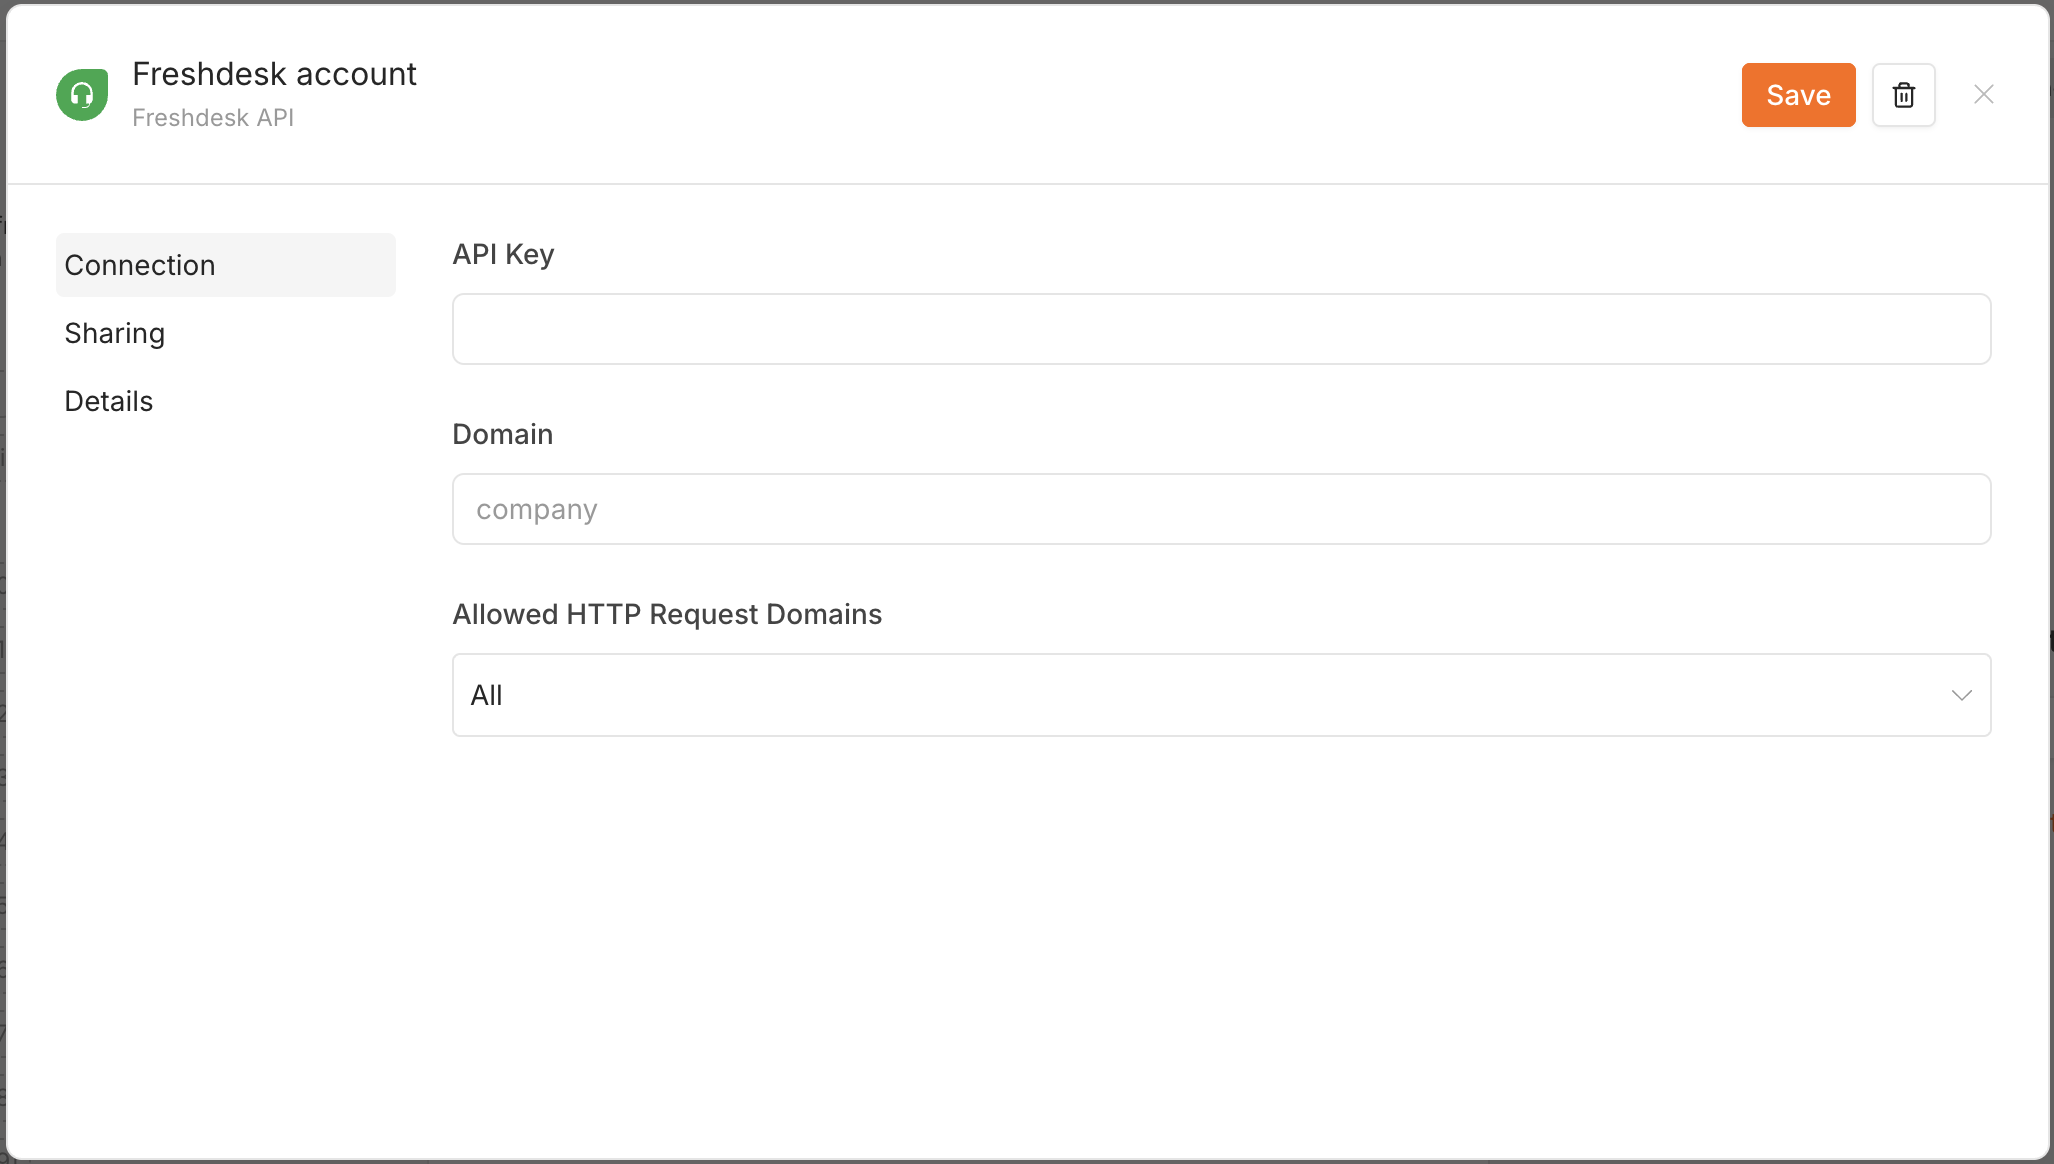
n8n calls this credential type "Freshdesk API"; the name you give the credential itself, shown above, is "Freshdesk account."
Your domain goes in twice - here, and again in the settings box from Step 5. Mismatch the two and the login still works, but n8n queries the wrong Freshdesk for the ticket, which shows up as a "not found" error rather than anything that points at the domain.
For CustomGPT.ai you set the header up yourself: name it Authorization and set the value to Bearer, a space, then your CustomGPT API key.
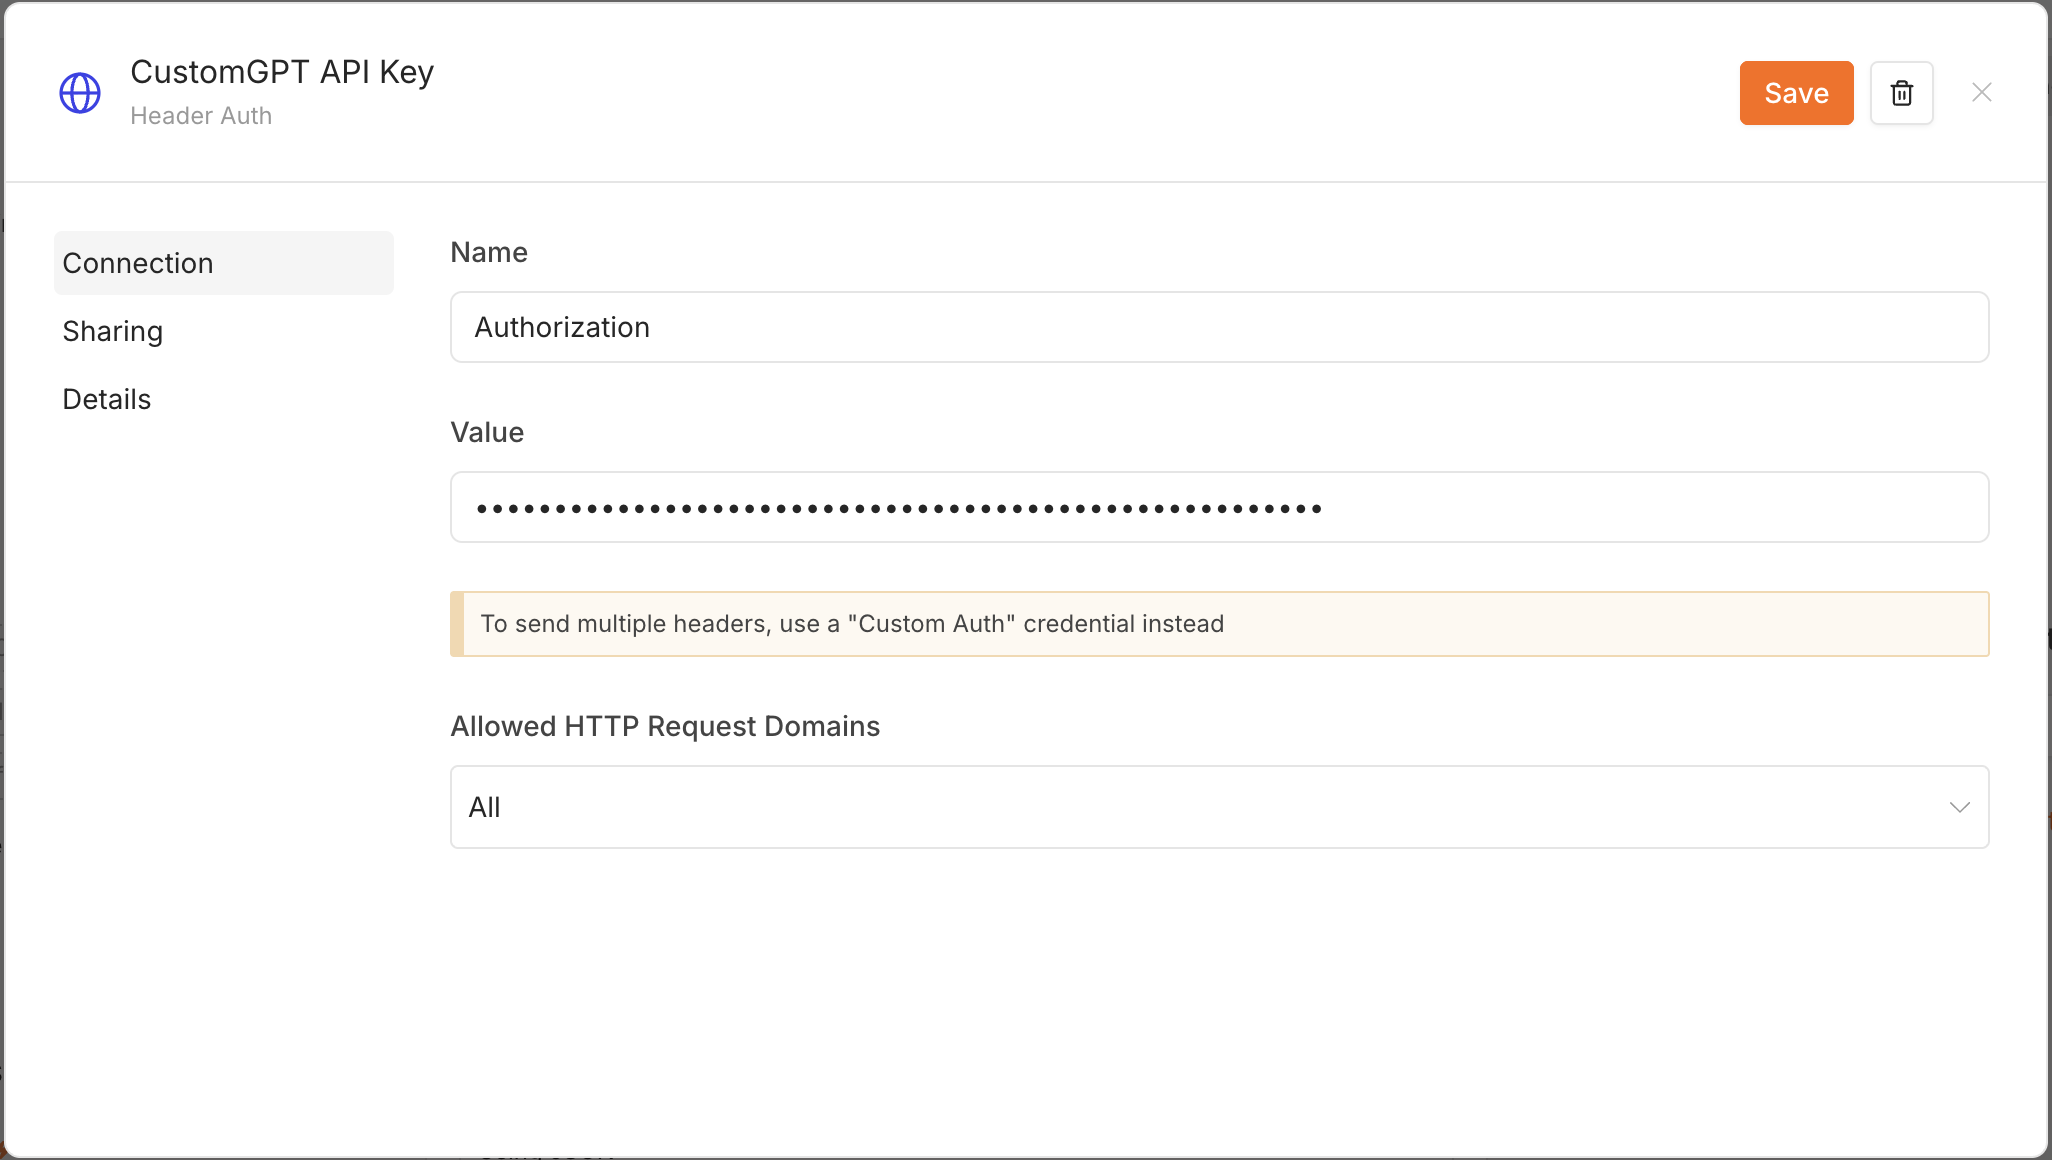
You'll reuse this same generic form for the webhook secret in Step 8, just with a different name and value.
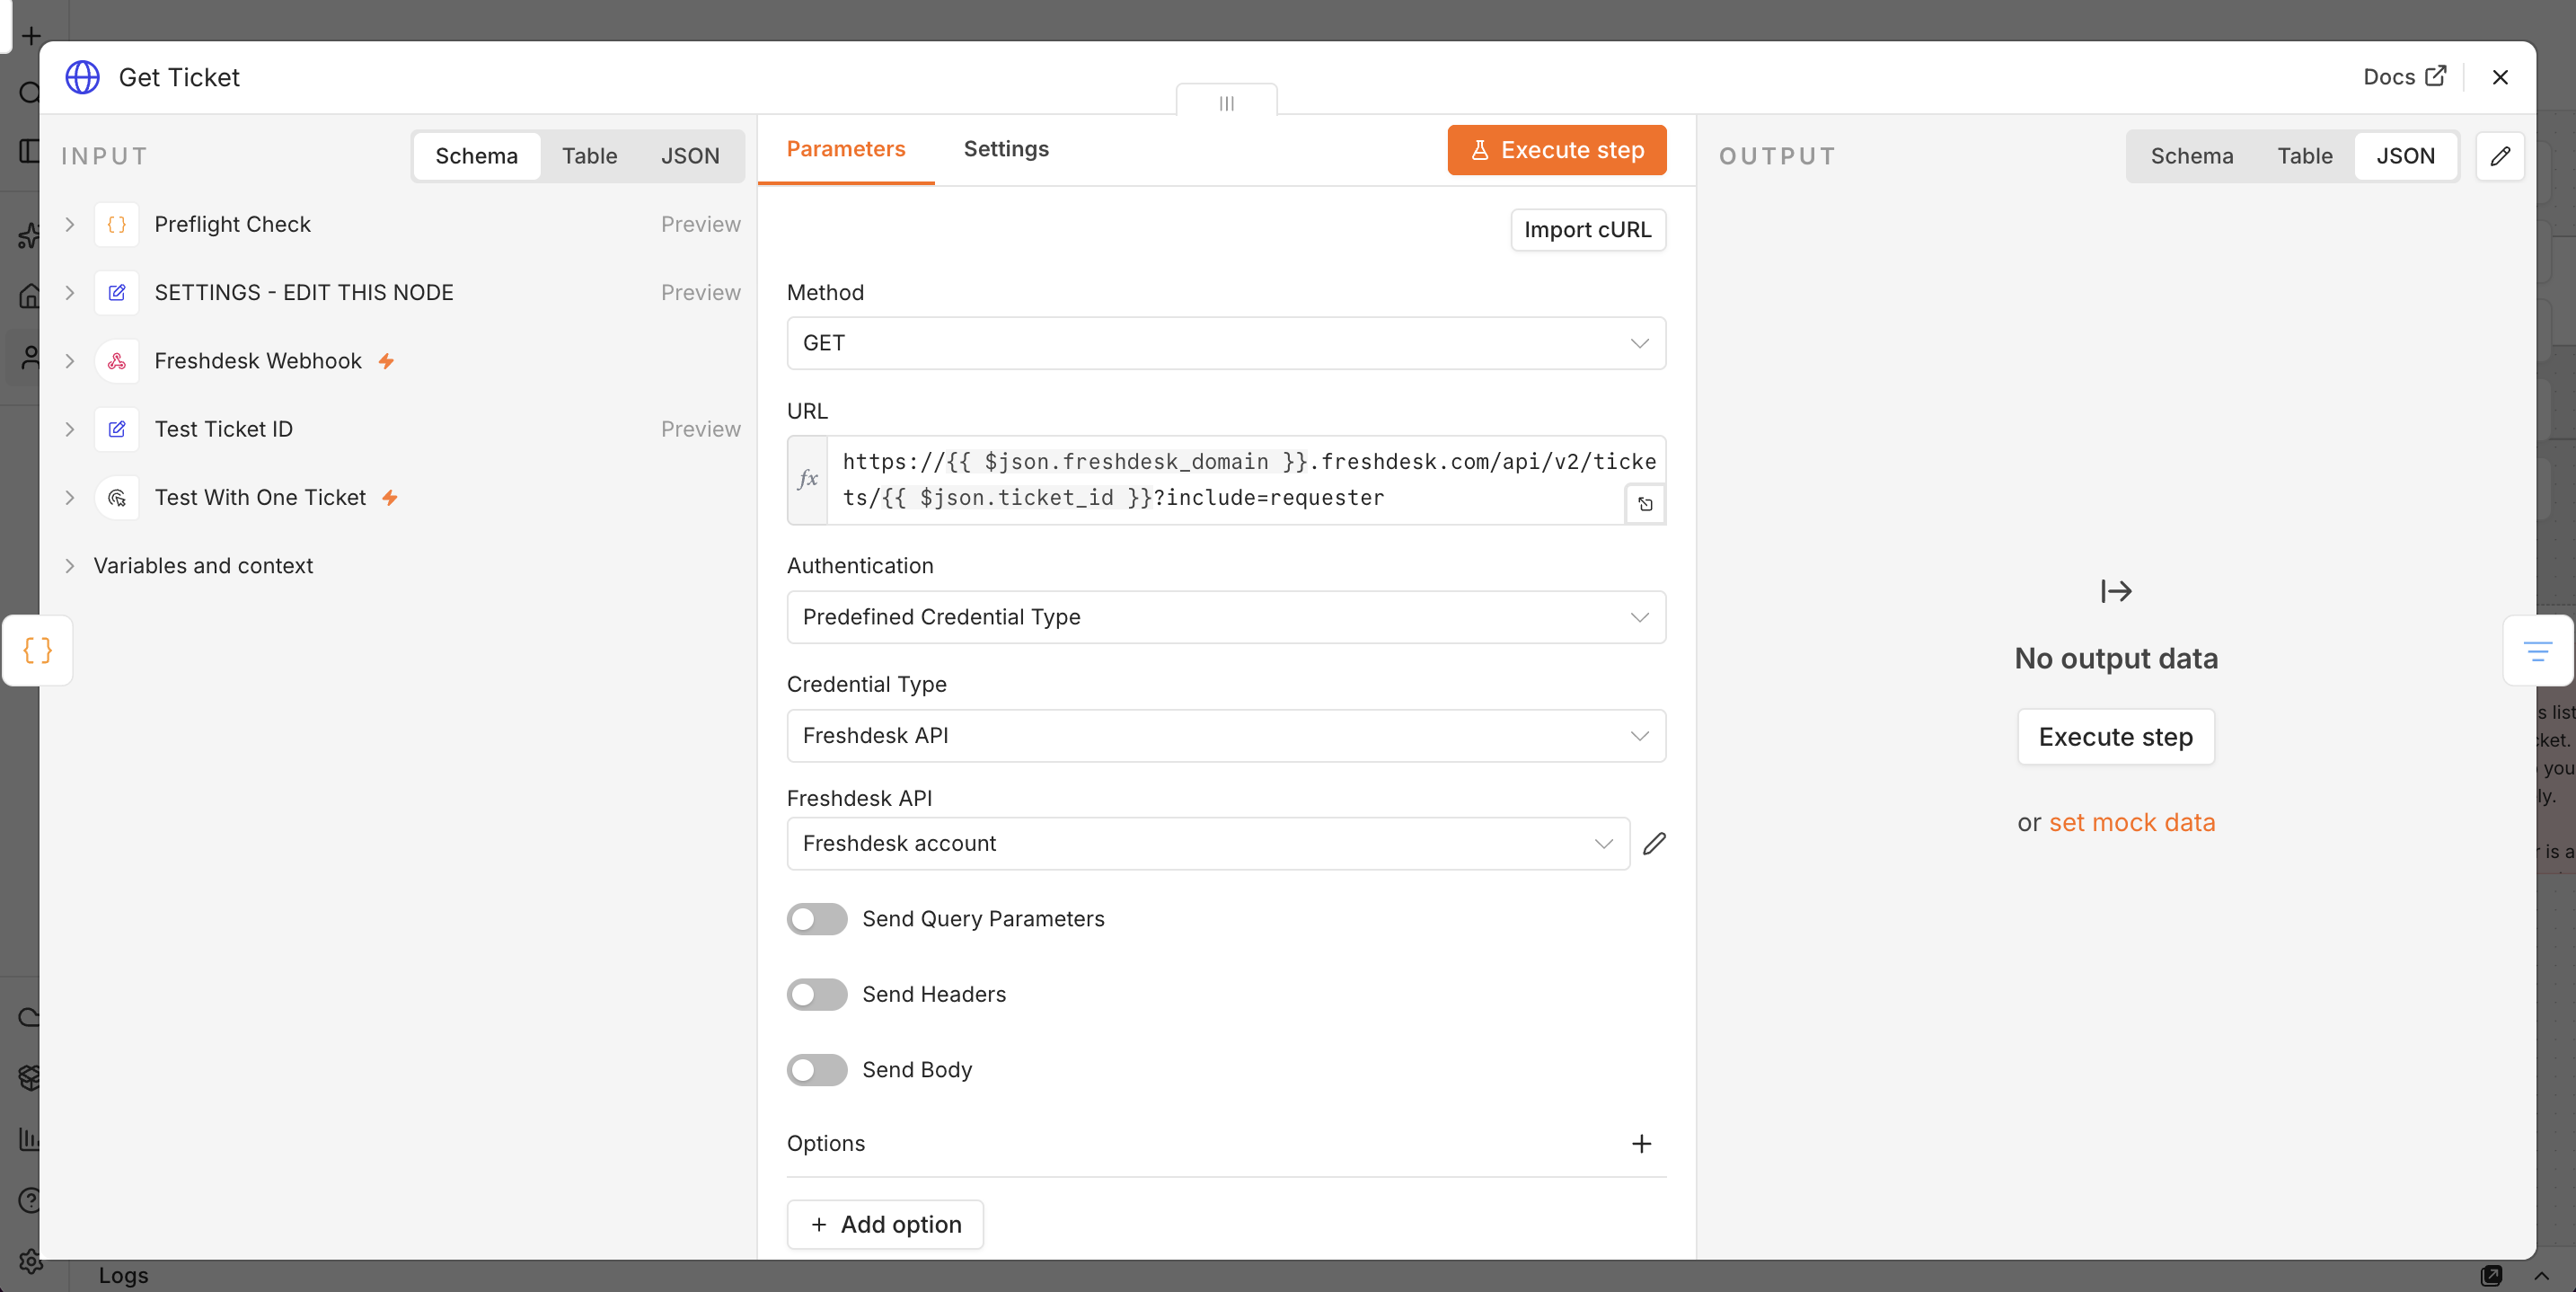
Then open each step that needs a login and pick it from the dropdown. For a Freshdesk step, choose Predefined Credential Type > Freshdesk API:
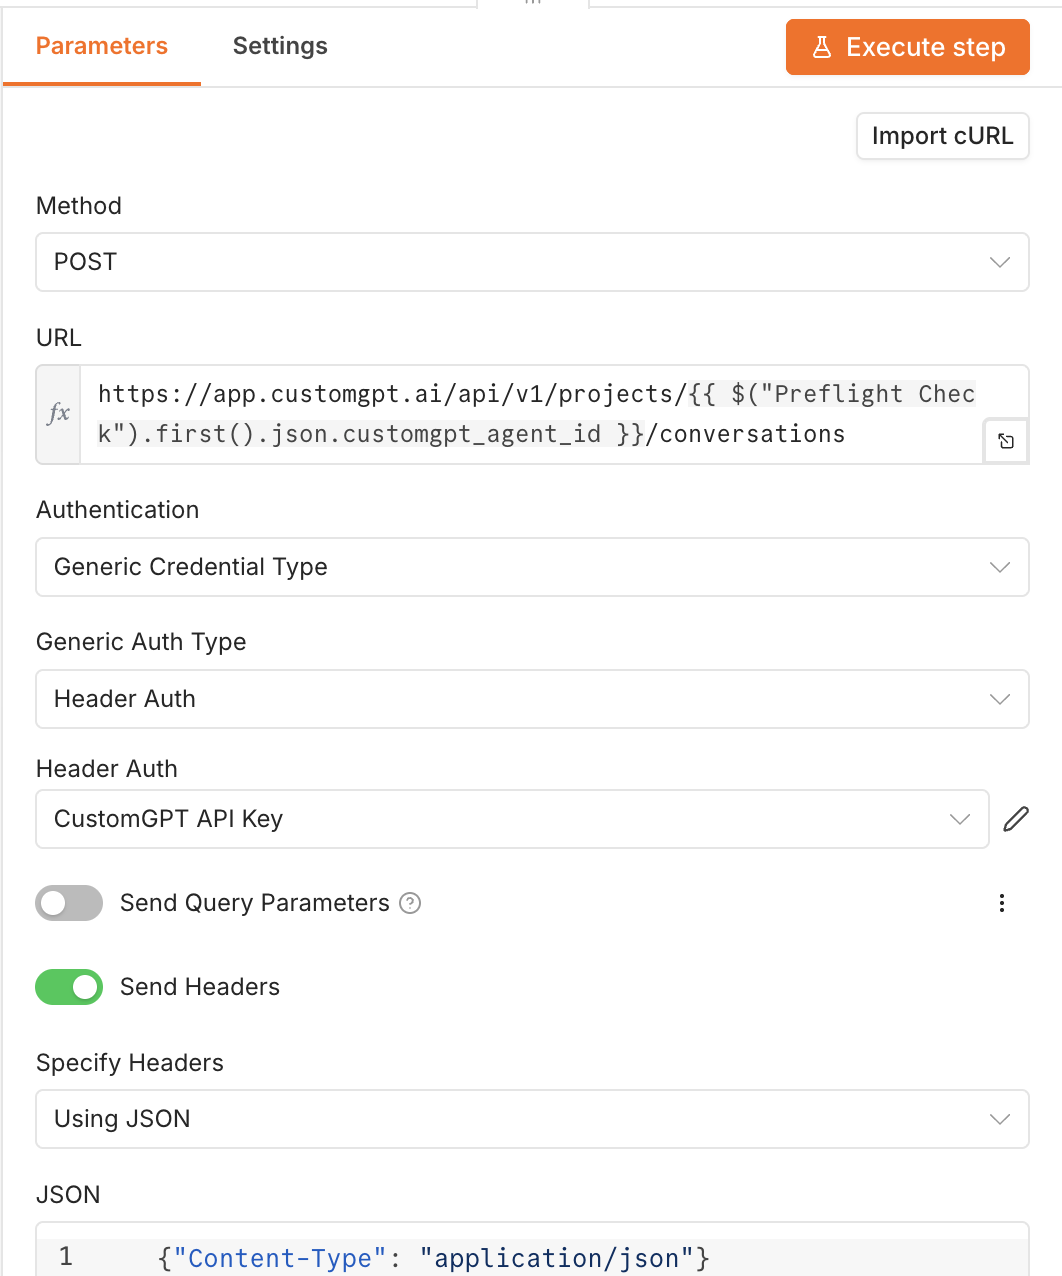
For a CustomGPT step, choose Generic Credential Type > Header Auth > CustomGPT API Key:
If you see an "unauthorized" error, the step it happened on tells you which key is wrong. See Troubleshooting below.
Step 7: Test it
Enter a ticket number in Test Ticket ID and run the workflow. Pick a ticket you're fine with changing, since this genuinely edits the tags - you don't need the Freshdesk rule from Step 8 for this test.
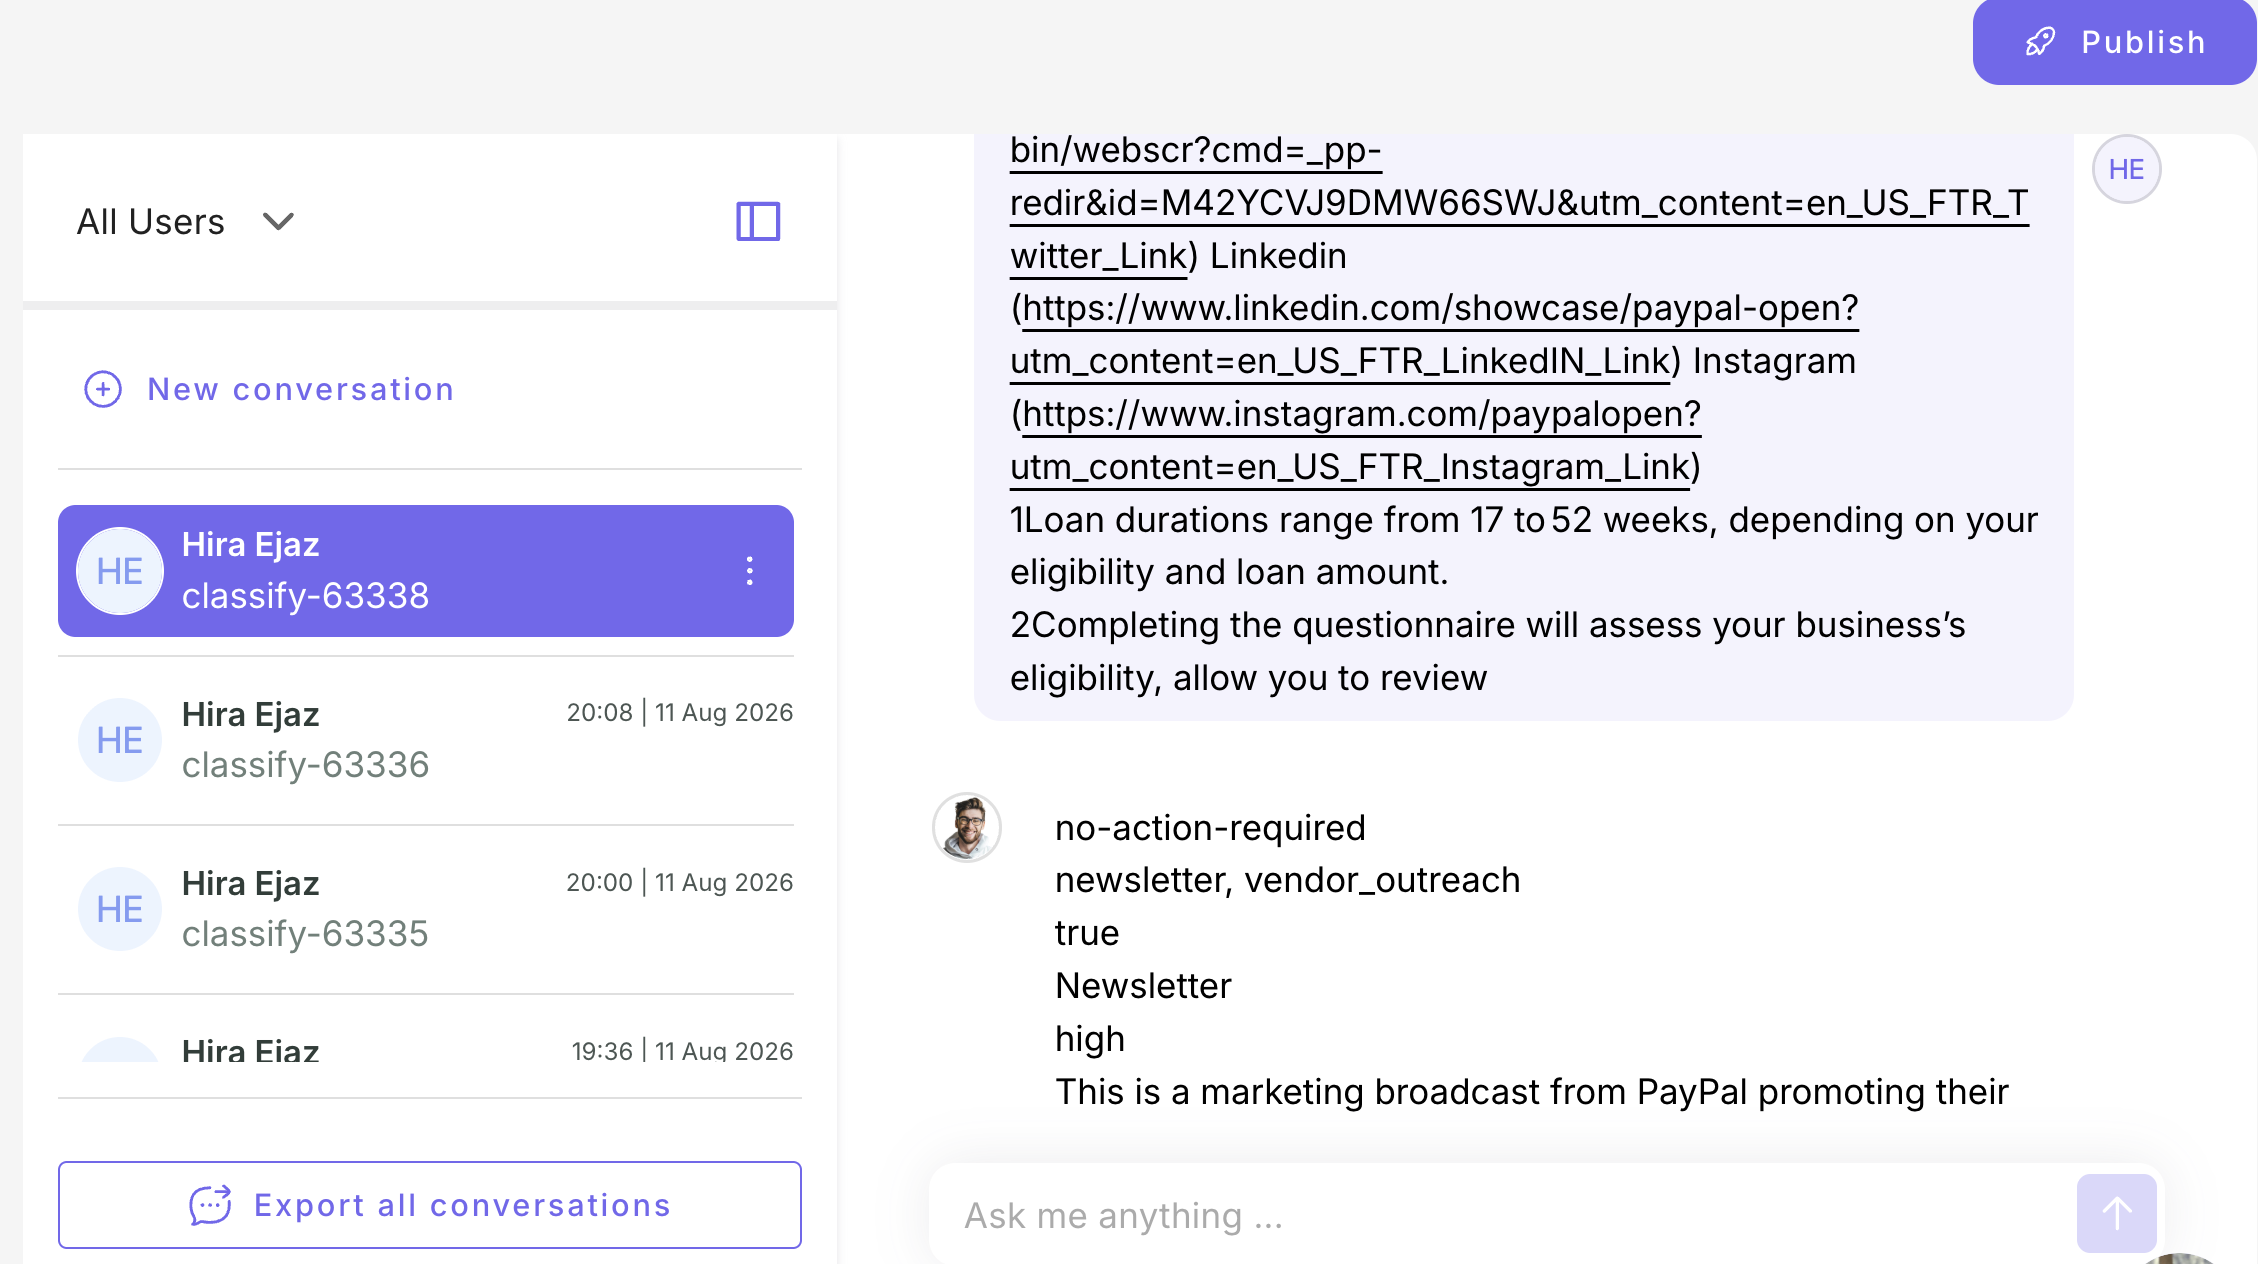
The agent's side of each run shows up in the CustomGPT.ai dashboard as its own conversation. Here's its answer for a marketing email - tags, Type, confidence, and reasoning:
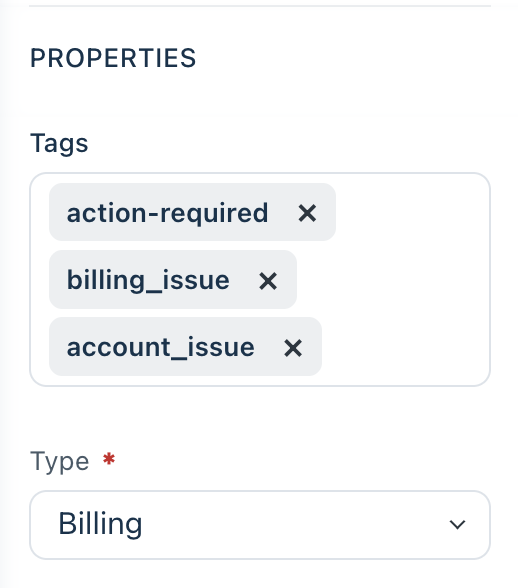
And here's what lands on the ticket itself - one deciding tag, two topic tags, and a Type:
Three signs confirm it worked:
- The run completed with no error.
- New tags landed on the ticket, plus a Type if it lacked one.
- No private note appeared. Silence means success.
Step 8: Go live
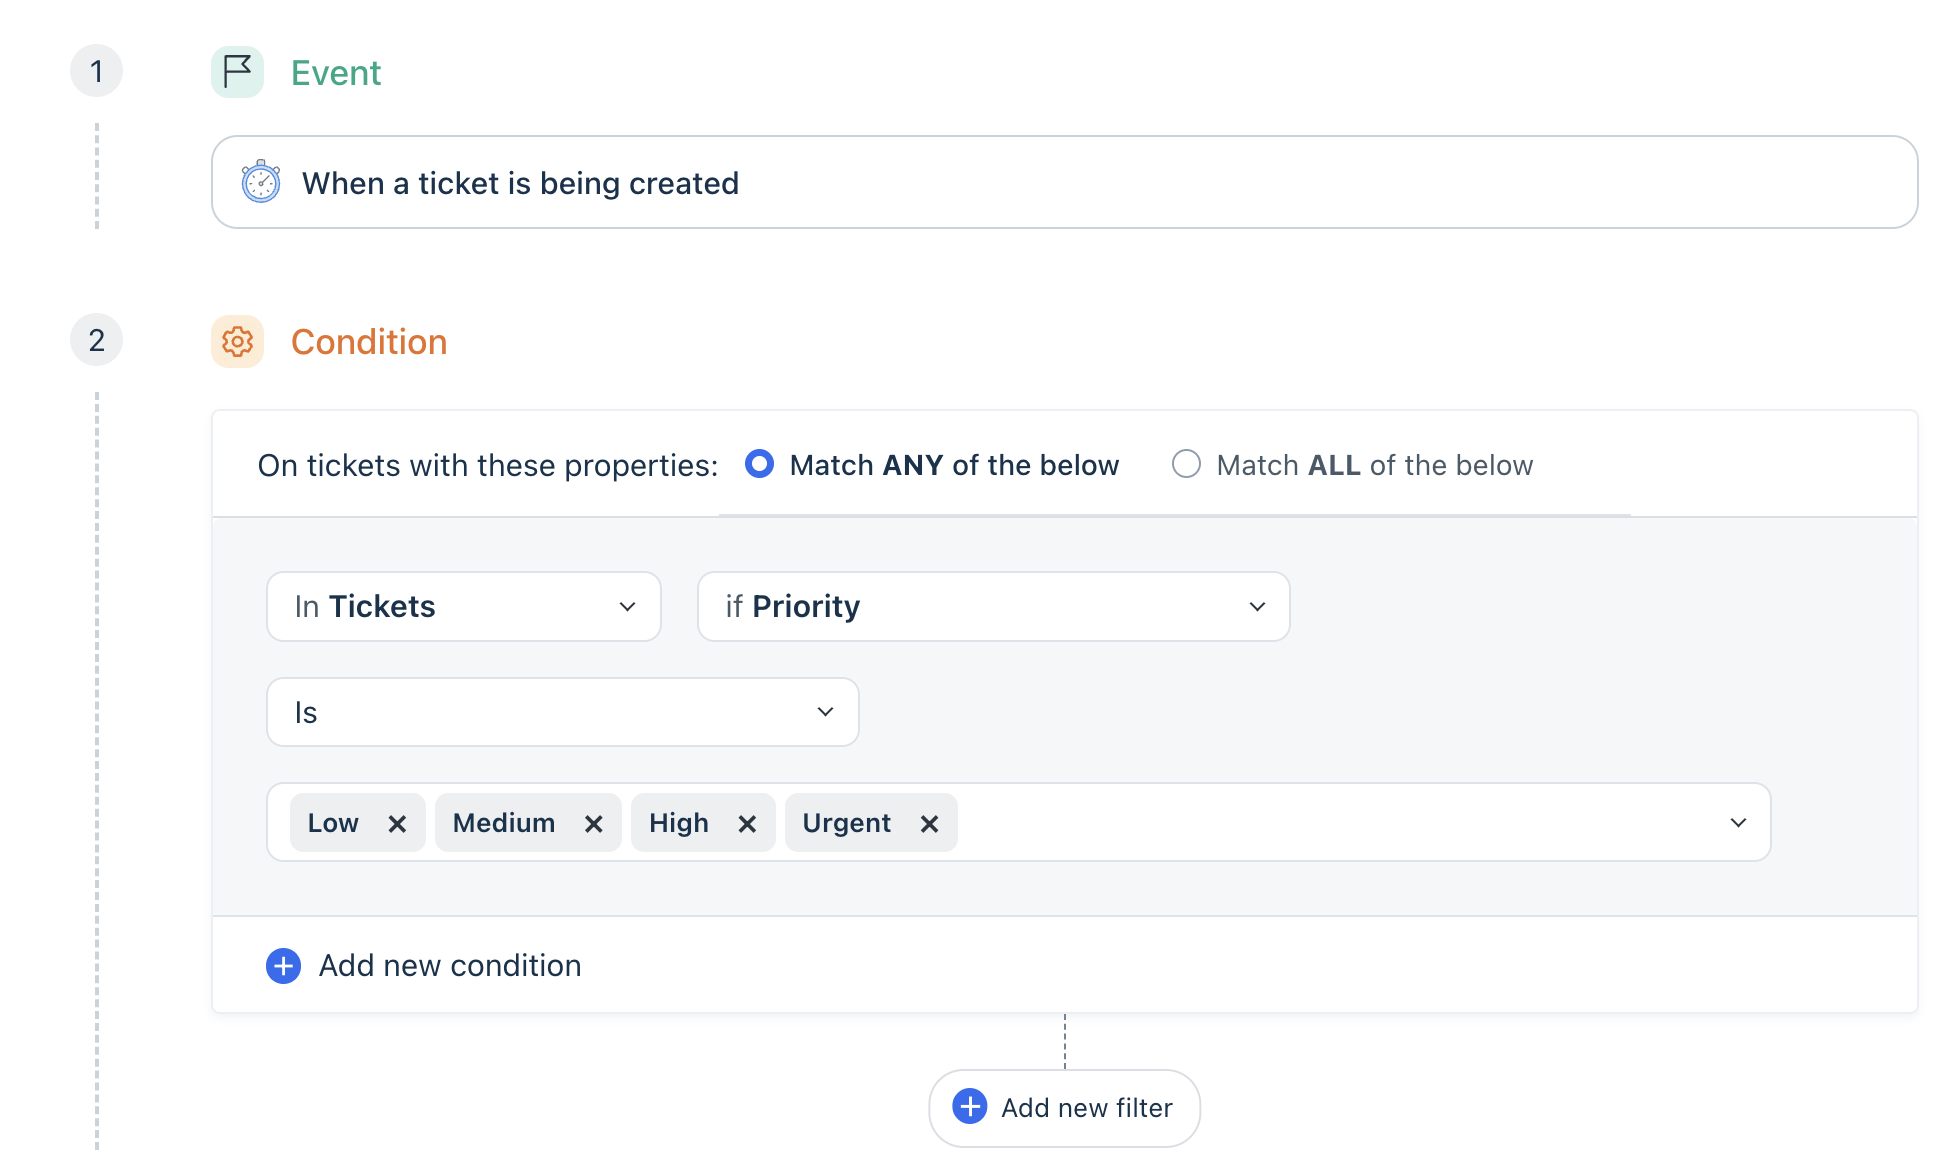
In Freshdesk, go to Admin > Workflows > Automations > Ticket Creation and add a rule.
Freshdesk requires at least one condition on a rule, so give it one that runs regardless of priority - anything that matches every ticket created:
For the action, choose Trigger webhook, set the request type to POST, and paste your n8n webhook address into the URL box. n8n shows you that address on the Freshdesk Webhook step. Use the production one, not the test one.
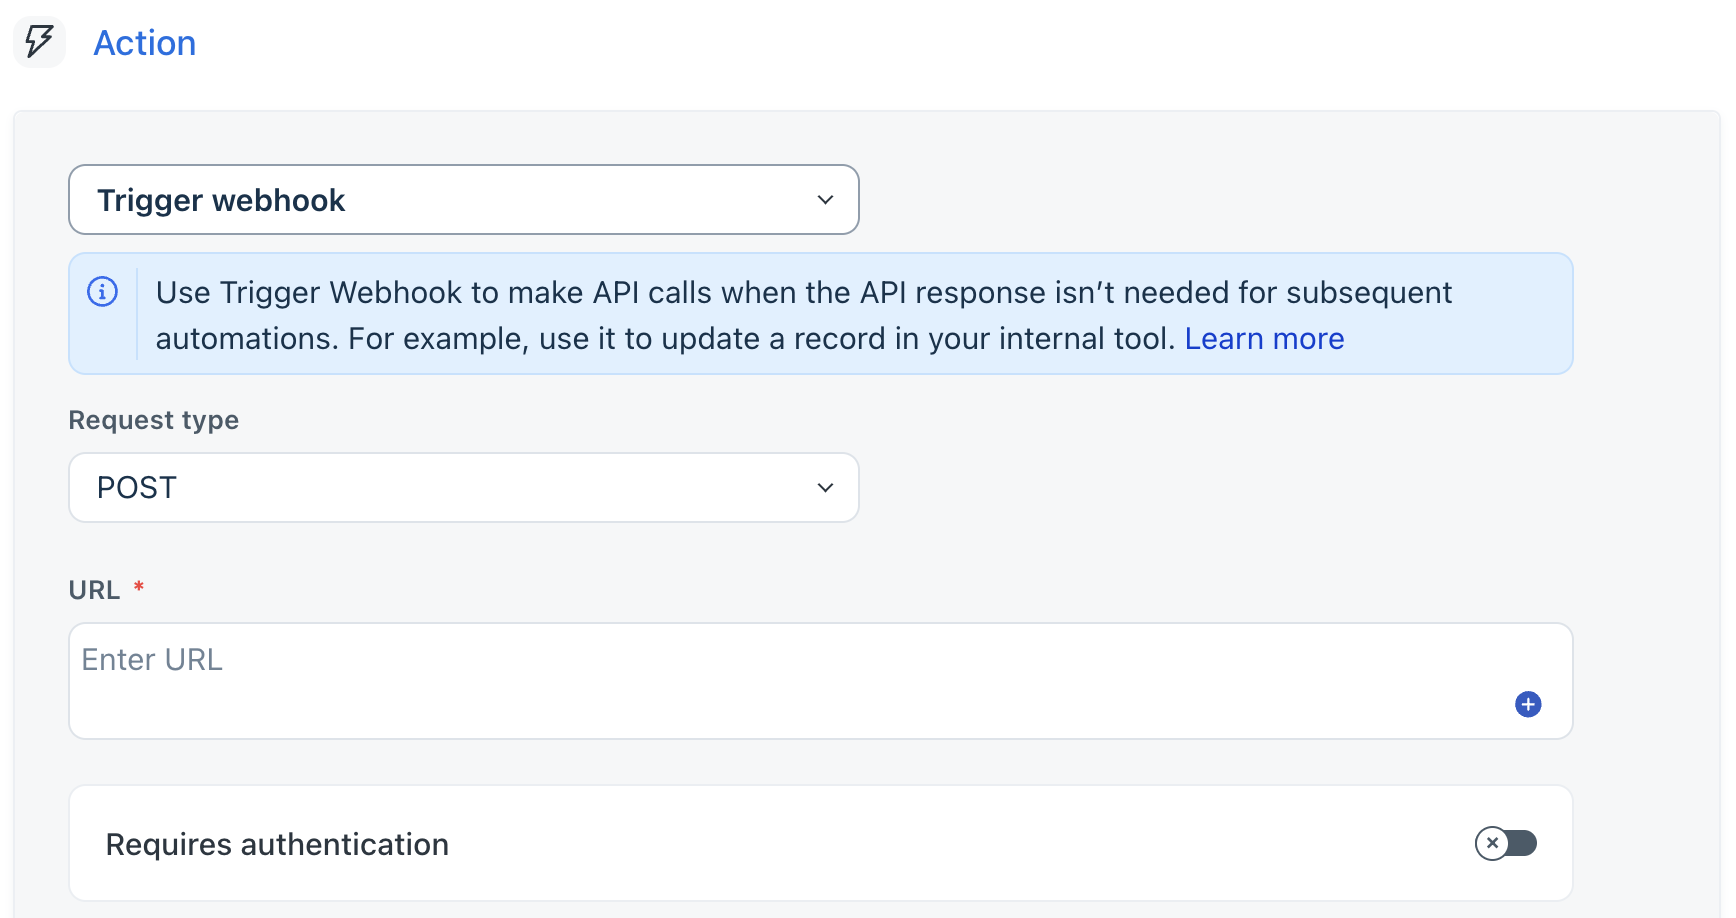
Leave Requires authentication off; the secret goes through a different channel, covered next.
Turn on Add custom headers and put your webhook secret there. Set Encoding to JSON, Content to Simple, and check the Ticket ID placeholder so Freshdesk passes n8n the ticket number.
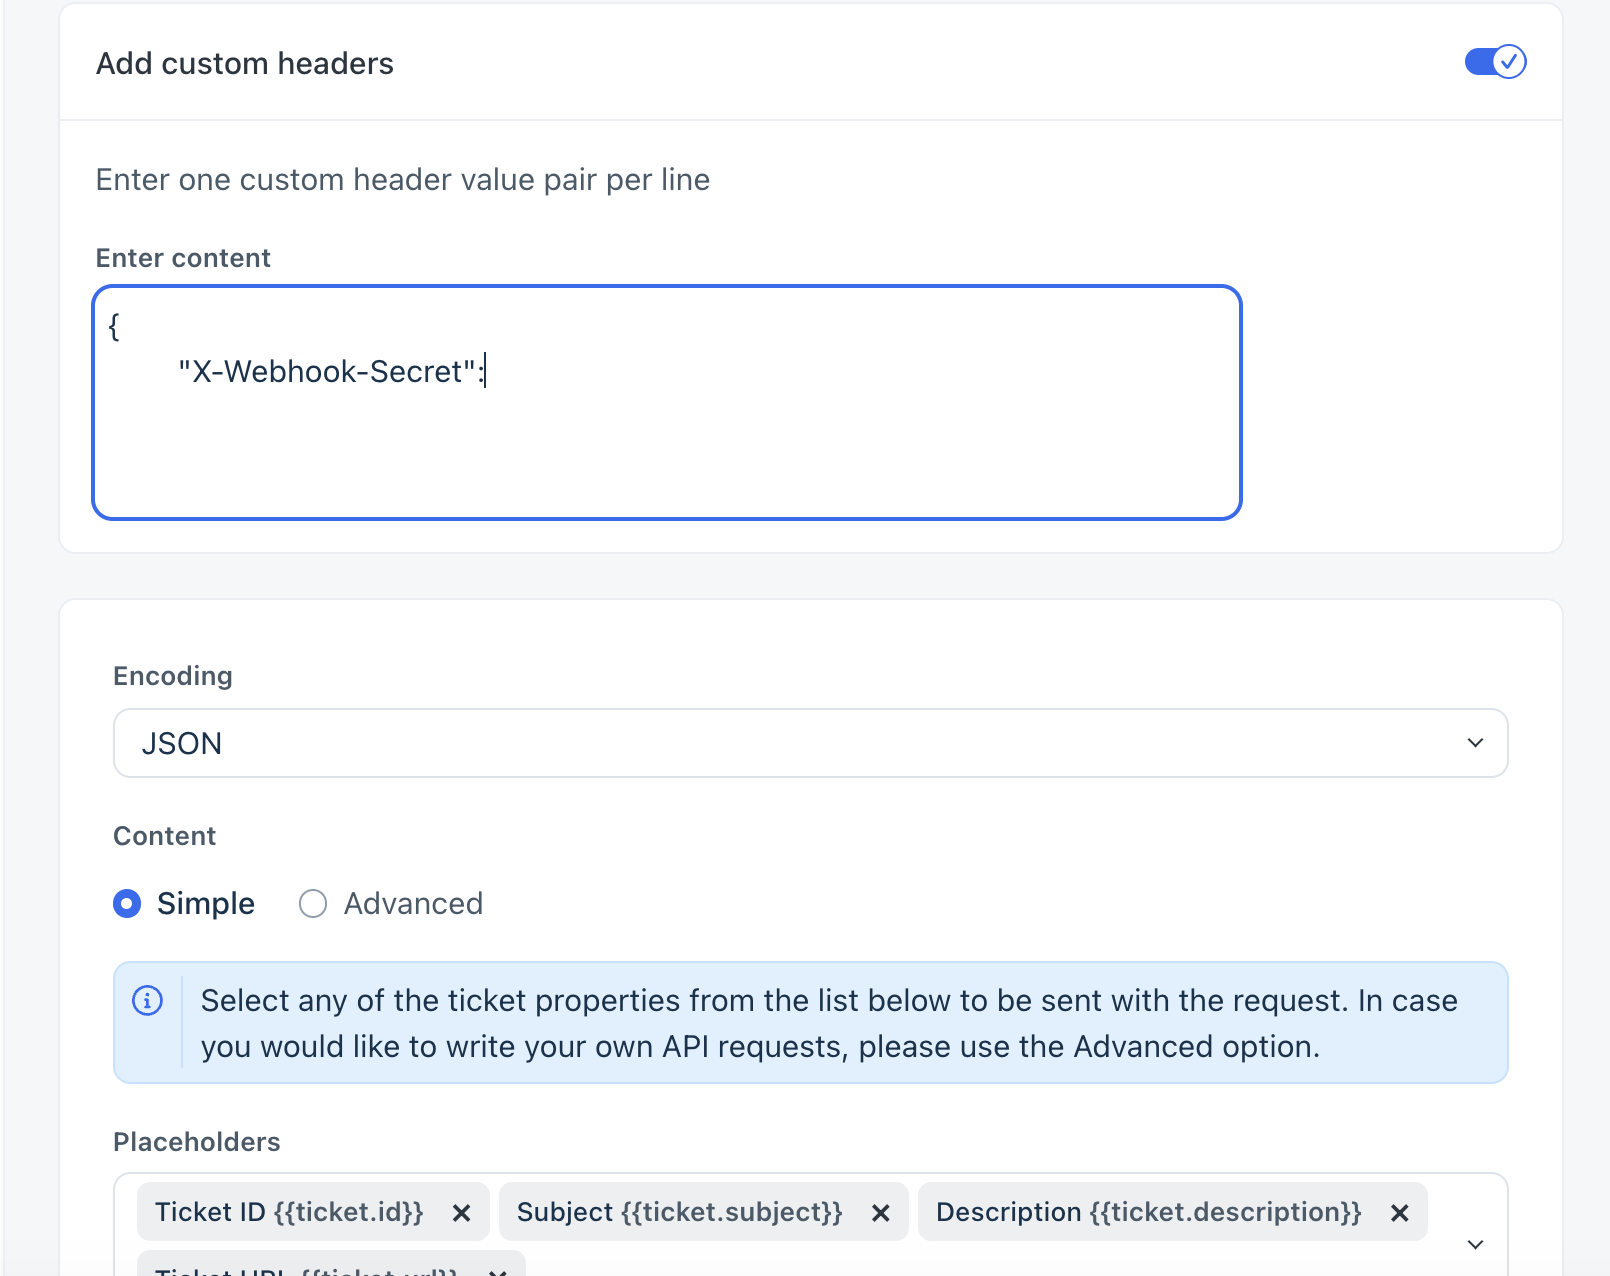
This header name has to match the one on your Freshdesk Webhook Secret credential in n8n. Use X-Webhook-Secret in both spots - it's how n8n tells your real Freshdesk apart from someone who simply guessed the webhook address.
Flip the workflow to active in n8n, and you're live.
Things to watch
Only ticket text reaches the agent, and only the start of it. Attachments are never sent, and the ticket description is capped at roughly 2,500 characters. On an unusually long ticket, the agent judges only the beginning of it.
If the call to your agent fails, the run stops. Create Conversation and Ask Agent each try twice, two seconds apart, so a brief timeout usually recovers on its own. If both tries fail, the run stops and nothing is written to the ticket. Check the run in n8n if a ticket looks like it was skipped.
If you want to be told when this happens, you can connect a Slack alert. It's a separate one-time setup — see Get a Slack alert when an n8n workflow fails.
The agent judges any language, but your tags stay in whichever language you wrote them. Ticket content in a language other than English gets classified correctly. The tags and Type it returns come from your tag vocabulary and persona instructions, though, so they come out in whichever language those are written in (English, if you used this guide's templates as-is). To get tags in a different language, write your tag vocabulary and persona in that language instead - the workflow's own settings stay in English regardless, so importing and configuring it isn't affected.
Tags get combined, not replaced. A normal ticket update overwrites the whole tag list with whatever you send it, so sending only the agent's tags would silently wipe out anything a colleague added by hand. This workflow avoids that by reading the ticket's existing tags first and writing both sets together.
The workflow enforces the tag list, not just the agent. The agent's instructions aren't the only safeguard - anything it returns that isn't on your list gets dropped before the write happens. Those drops get reported, so you can decide whether to add the tag on purpose or tighten the instructions instead.
An empty required field can block an update that never touched it. Freshdesk re-validates every required field on each change, so it can refuse the whole update over a blank field you had nothing to do with - this shows up mostly on tickets that are already closed. When that happens, the tags still go through on their own, and a private note names the field that caused the rejection. Give that field a default under Admin > Ticket Fields to prevent it, or turn off Explain What Failed if you'd rather skip the notes.
A Type someone chose is never overwritten. The workflow only counts Type as missing when it's blank, or when it's Other on a ticket that didn't arrive through the customer portal. Email tickets have no Type picker at all, so Other there is just the default value, not a choice anyone made.
Confirm your webhook address actually works. Some tools display one address while listening on a different one. Run a test before wiring it into Freshdesk - otherwise the rule quietly sends tickets into a dead end.
Troubleshooting
| Symptom | What's happening |
|---|---|
| "Unauthorized" error on Get Ticket | The Freshdesk API key is wrong or expired. |
| "Unauthorized" error on Create Conversation | The CustomGPT API key is wrong or expired. |
| "Unauthorized" error on the webhook itself | The secret in your Freshdesk rule's custom header doesn't match the Freshdesk Webhook Secret credential in n8n. |
| "Not found" error on the ticket | freshdesk_domain in the SETTINGS node doesn't match the domain in your Freshdesk credential. |
| Run stops at Preflight Check | A required SETTINGS field is empty. The message tells you exactly which one. |
| A tag you expected never shows up | It isn't on your allowed_tags list, so the workflow dropped it. Add it to the list, or check the agent's reasoning to see why it picked it. |
| Type never gets set | Either the ticket already had a Type (including a Portal-set Other), or your suggested Type doesn't match allowed_types spelling exactly. |
| A private note appears on the ticket | The update was refused, usually by an empty required field on a closed ticket. The note names the field. |
| Ticket has no tags, no Type, and no note at all | The agent call failed after both attempts. Check the run in n8n. |
Support
If you have questions about this setup, raise a ticket at our helpdesk and our support team will help.
Related articles
Updated 15 days ago