
SSO setup with Microsoft Entra ID
Learn how to add CustomGPT.ai to your Microsoft Entra ID through your identity provider settings. Follow our step-by-step guide for a seamless setup.
- Go to https://entra.microsoft.com/.
- Search for and go to Enterprise Applications.

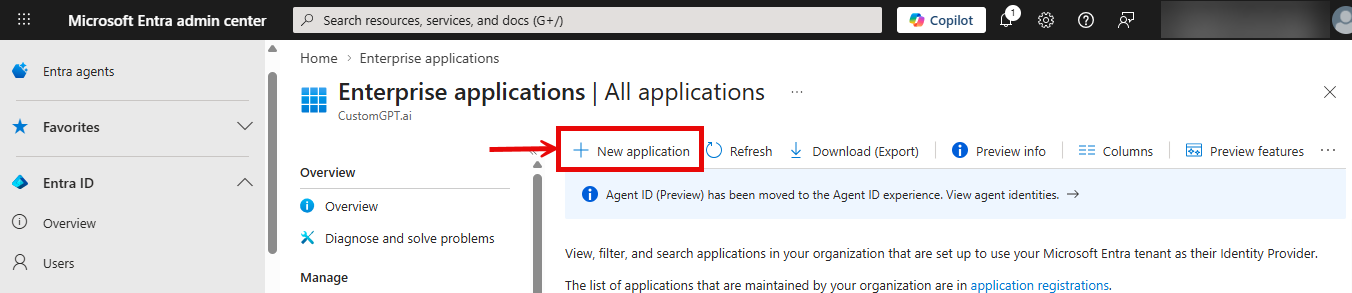
- Click on + New Application.
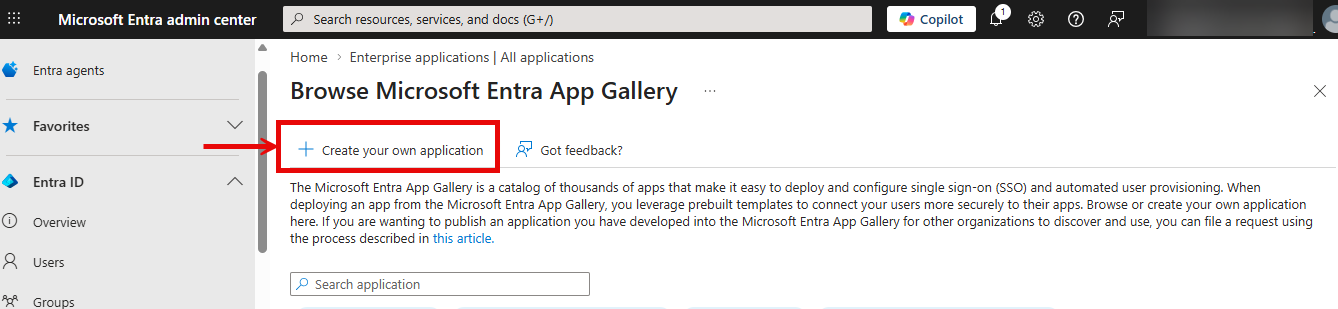
- Click on Create your own application.
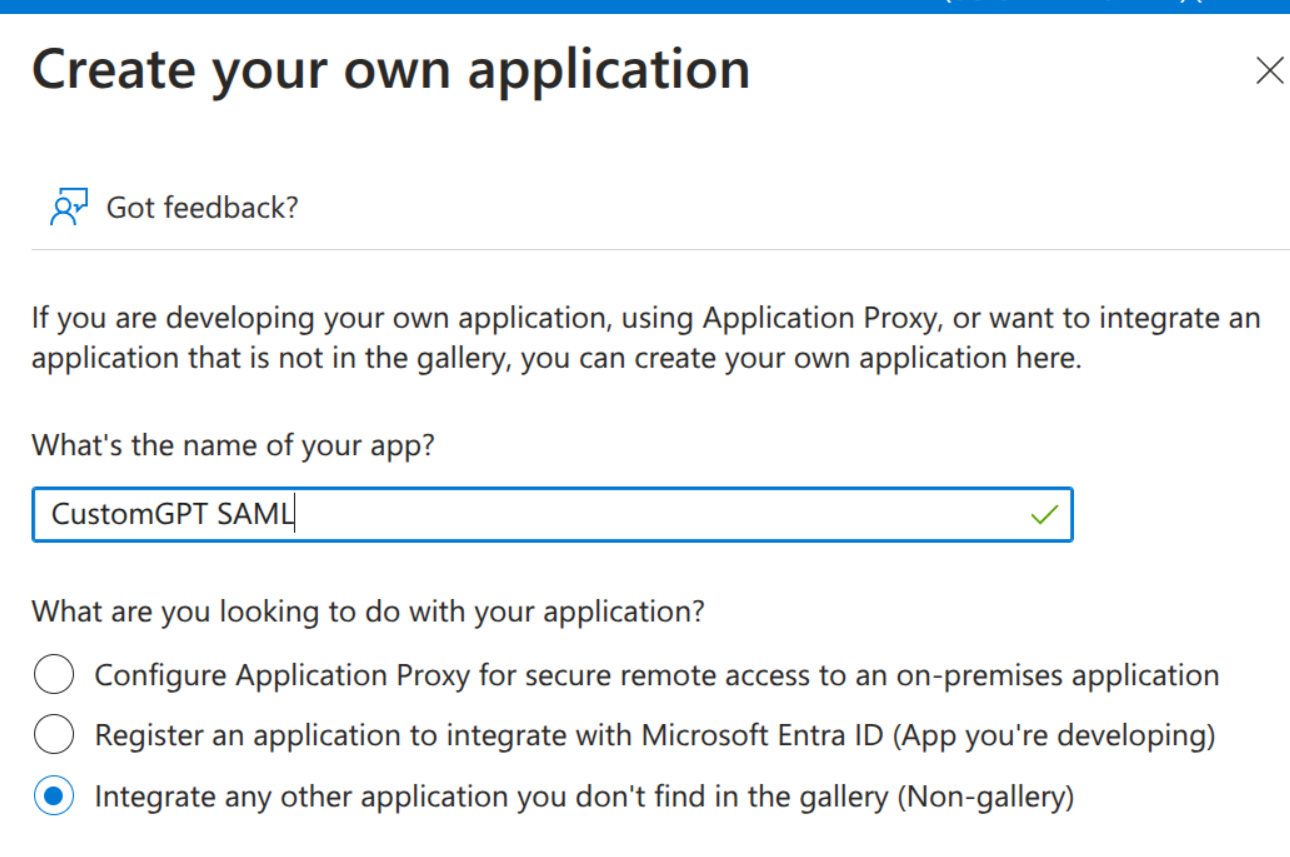
- Enter a name for the application, select Integrate any other application you don't find in the gallery (Non-gallery), and then click Create.
- Under Getting Started go to Assign users and groups.
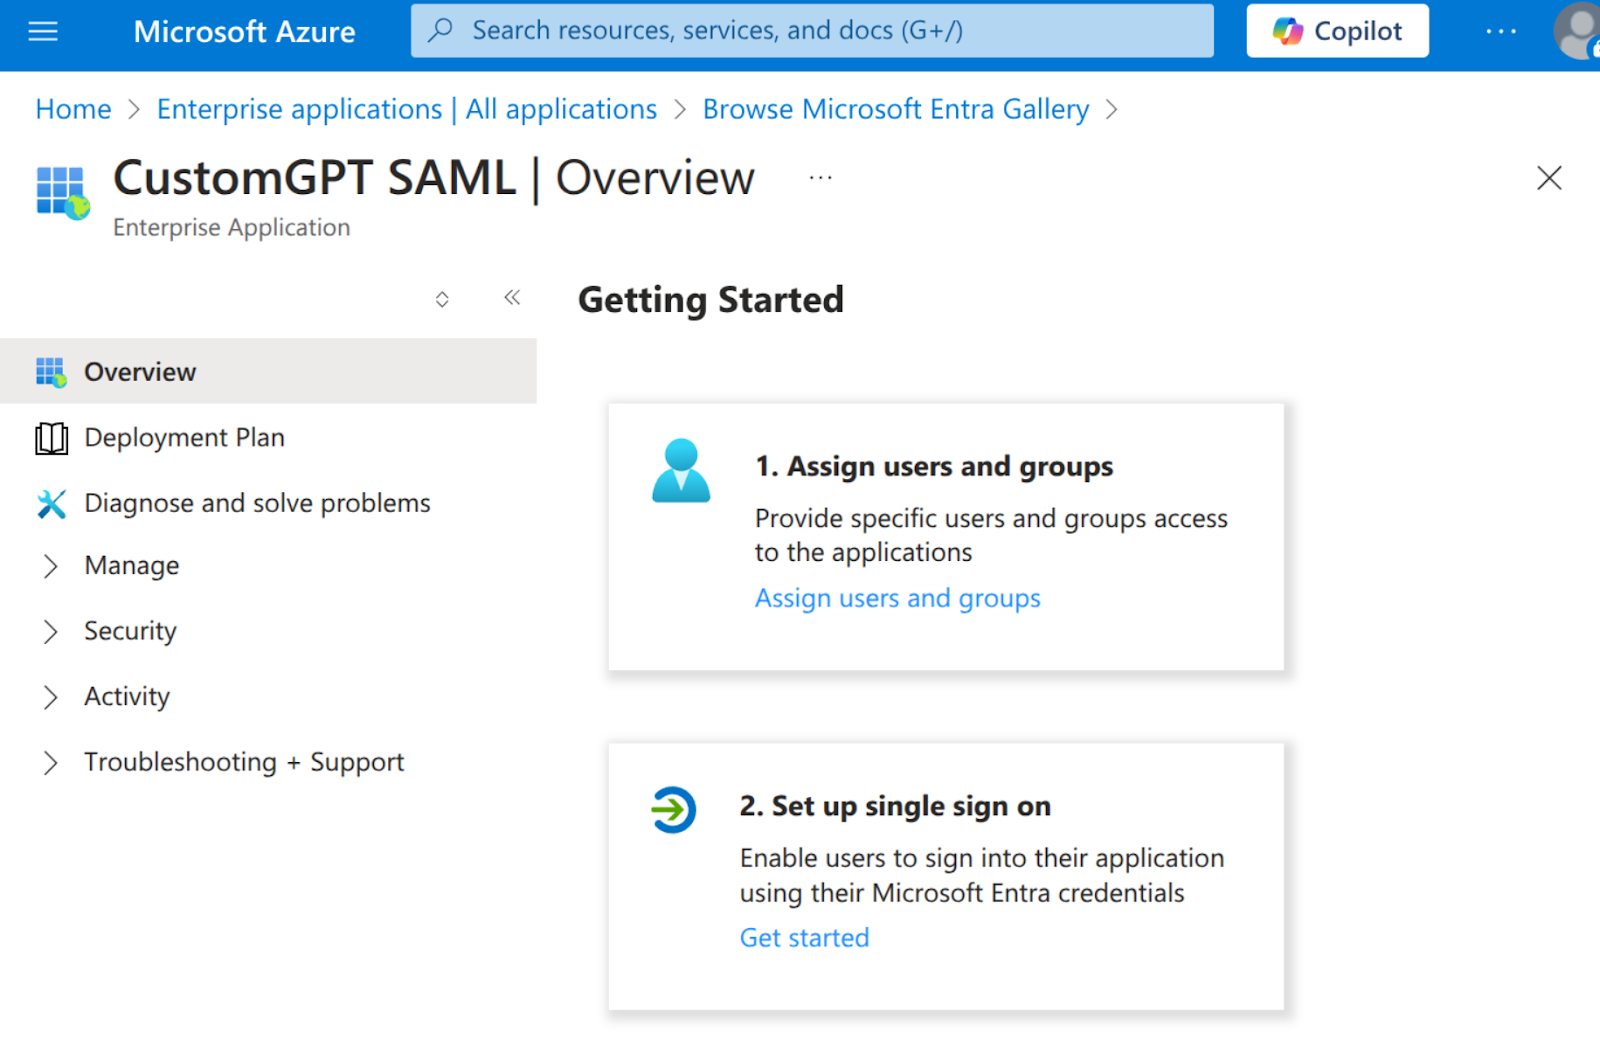
Note:Only the users and groups that are assigned in the steps will be able to access the CustomGPT.ai application.
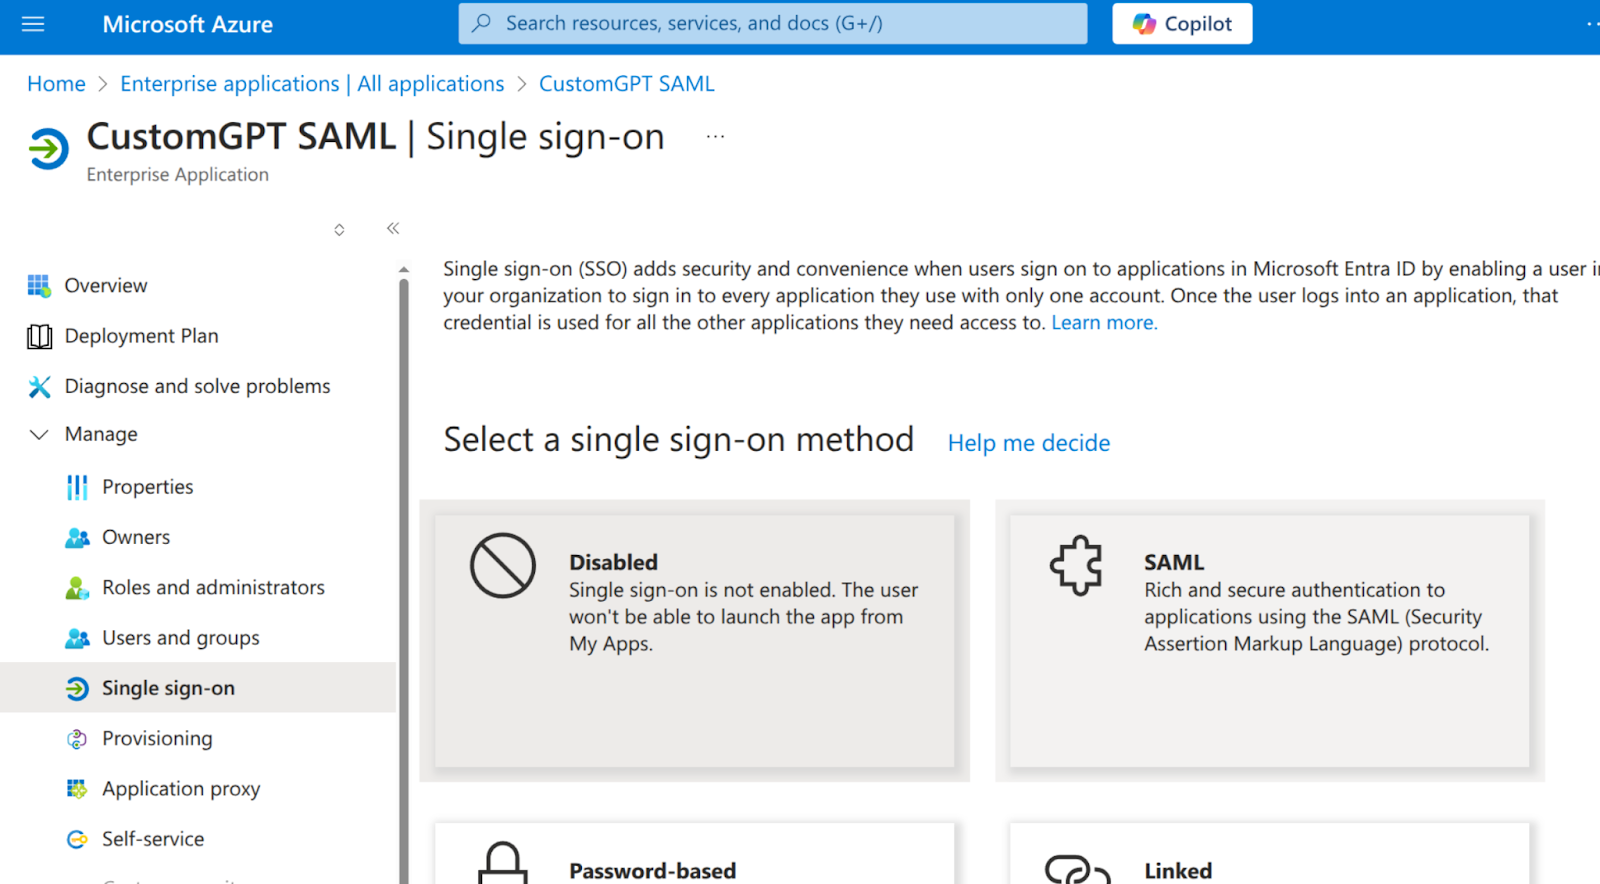
- Go to Single sign-on, through Manage->Single sign-on In the sidebar, and click on the SAML.
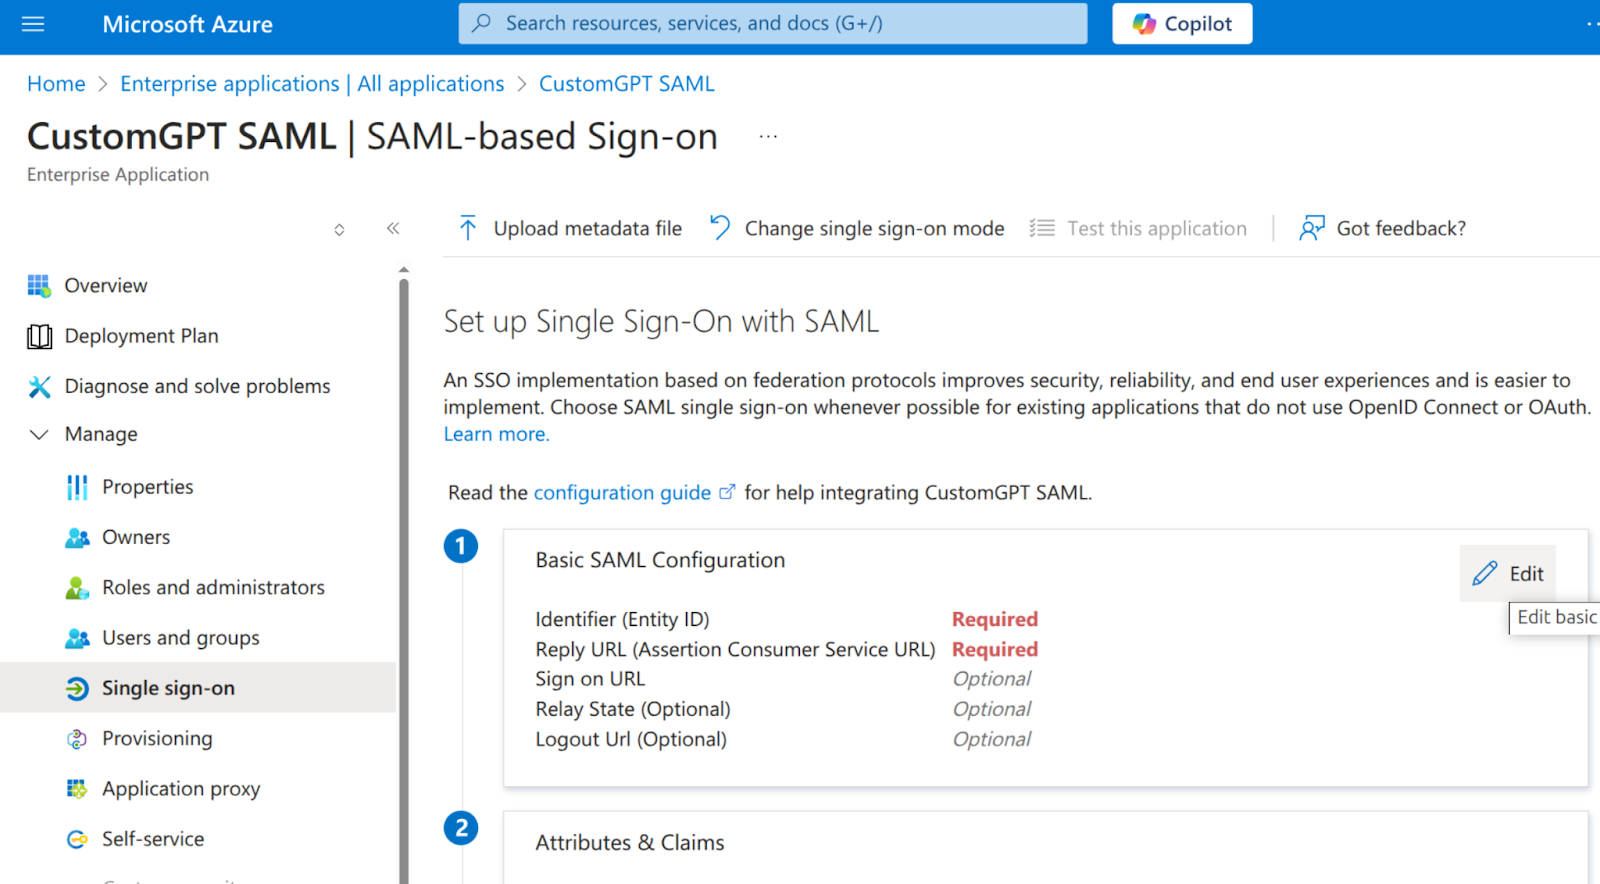
- Click on Edit in the Basic SAML Configuration.
- Go to https://docs.customgpt.ai/docs/sso-setup and complete steps 1-4:
- Copy Entity ID from CustomGPT and save it as “Identifier (Entity ID)” in Azure.
- Copy ACS URL from CustomGPT and paste it as “Reply URL (Assertion Consumer Service URL)” in Azure.
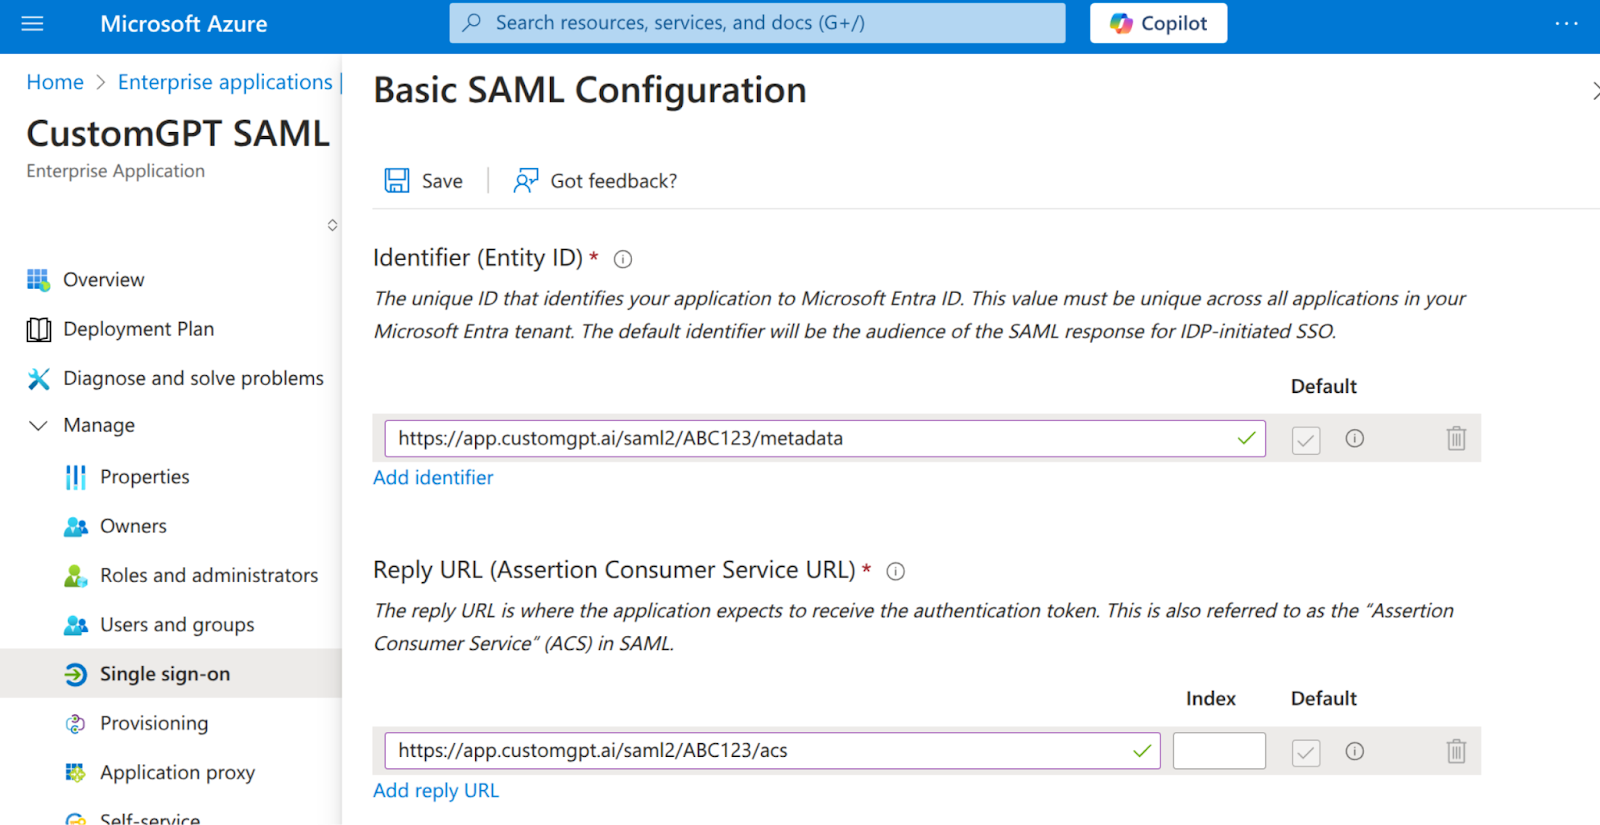
- Click on Save in top-left corner.
- Click on Close Icon in the top-right corner.
- Scroll down to Attributes & Claims and click on Edit.
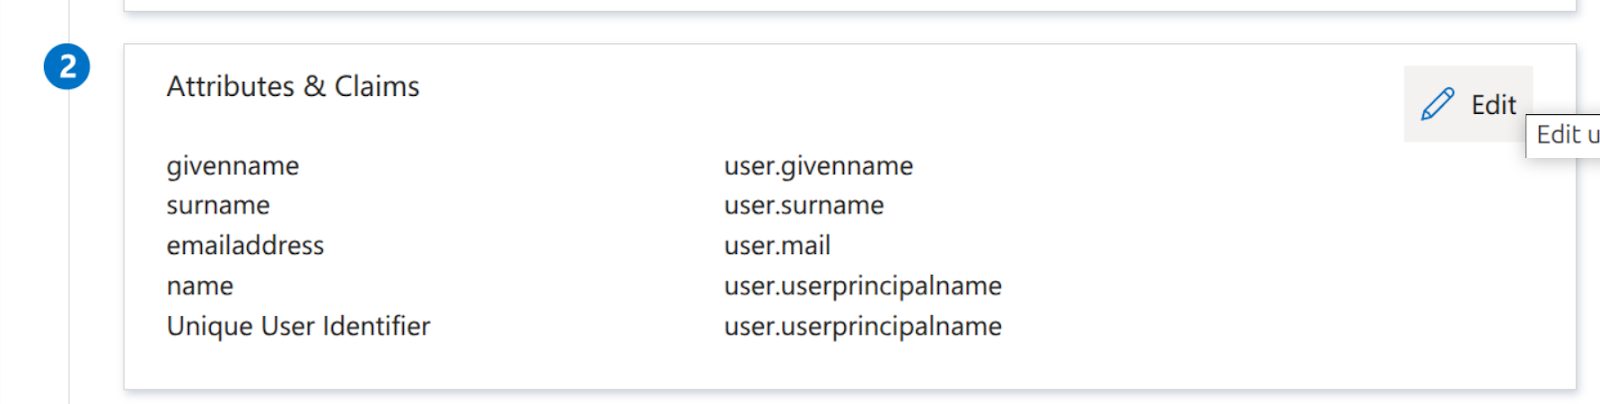
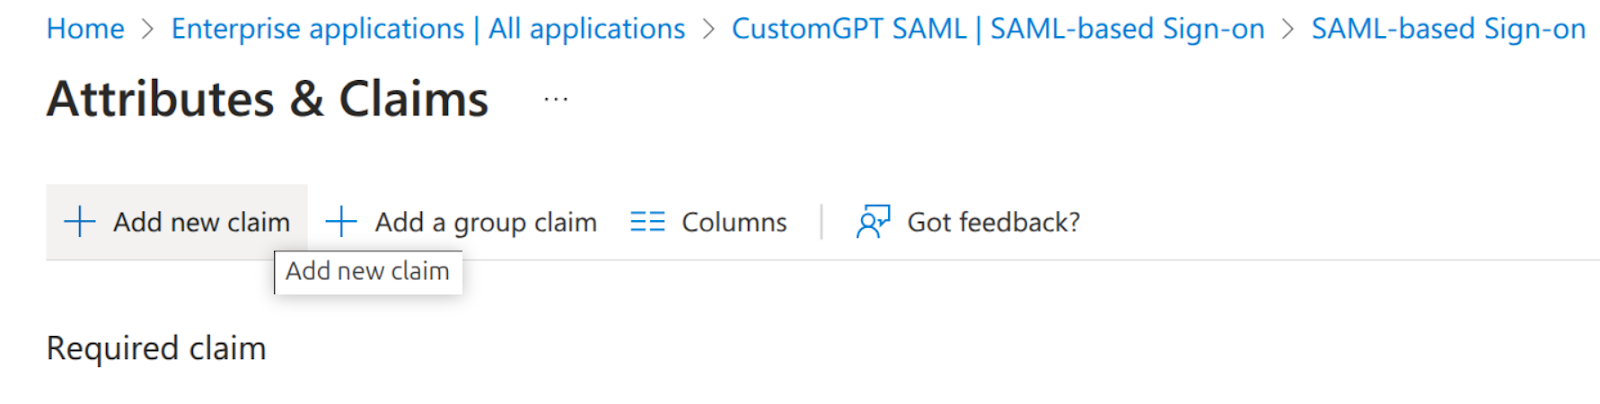
- Click on Add new claim, add
email = “user.principalname”and click on Save.
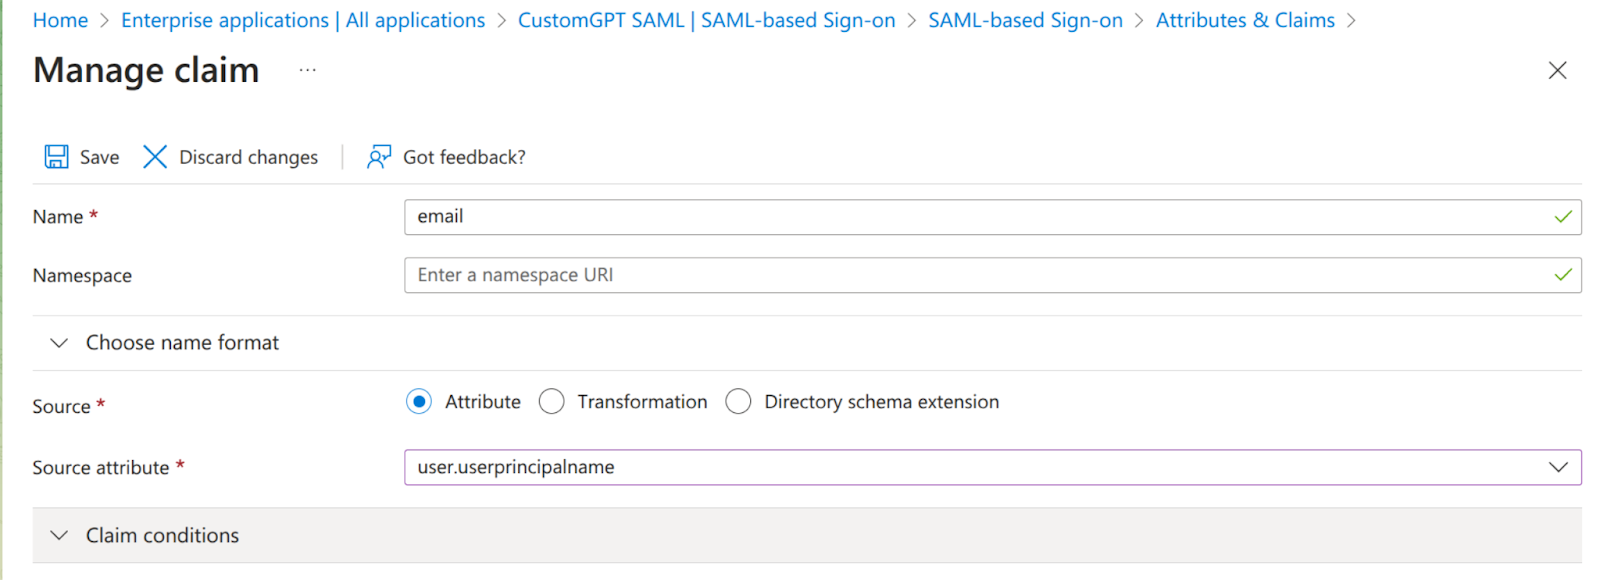
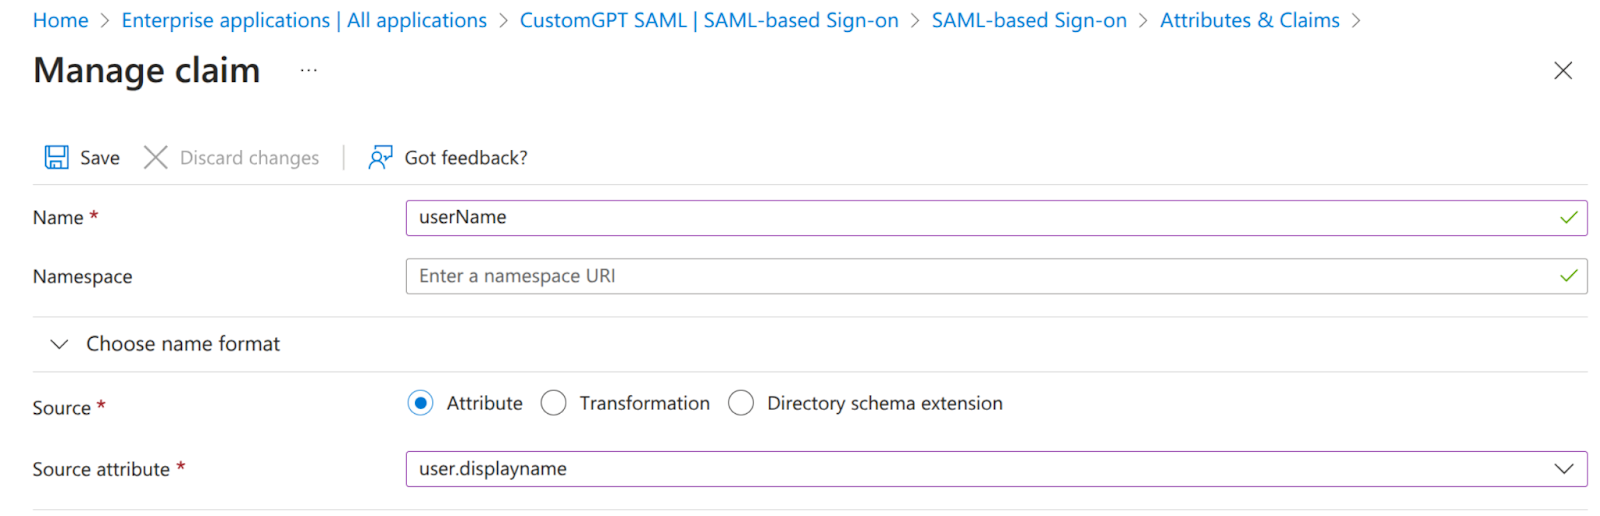
- Add
userName = user.displaynameclaim in the same way:
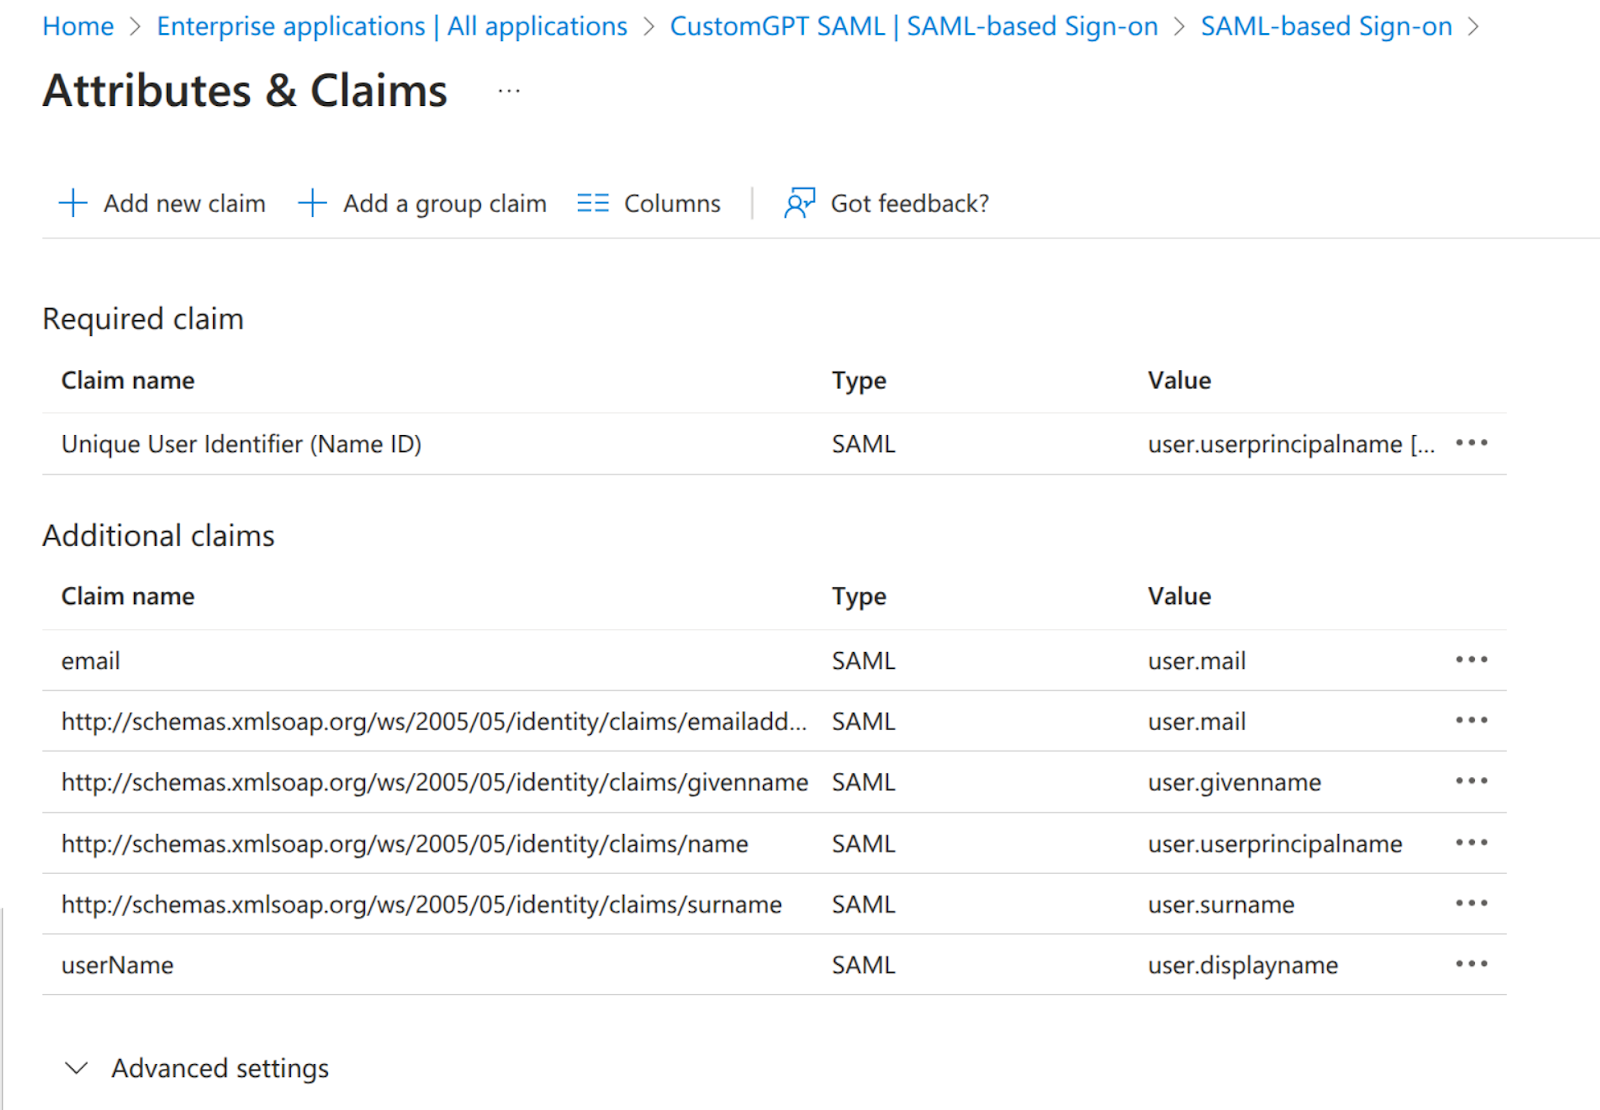
- Email and user name should be listed in Claims list as below:
- Click on Close Icon in the top-right corner.
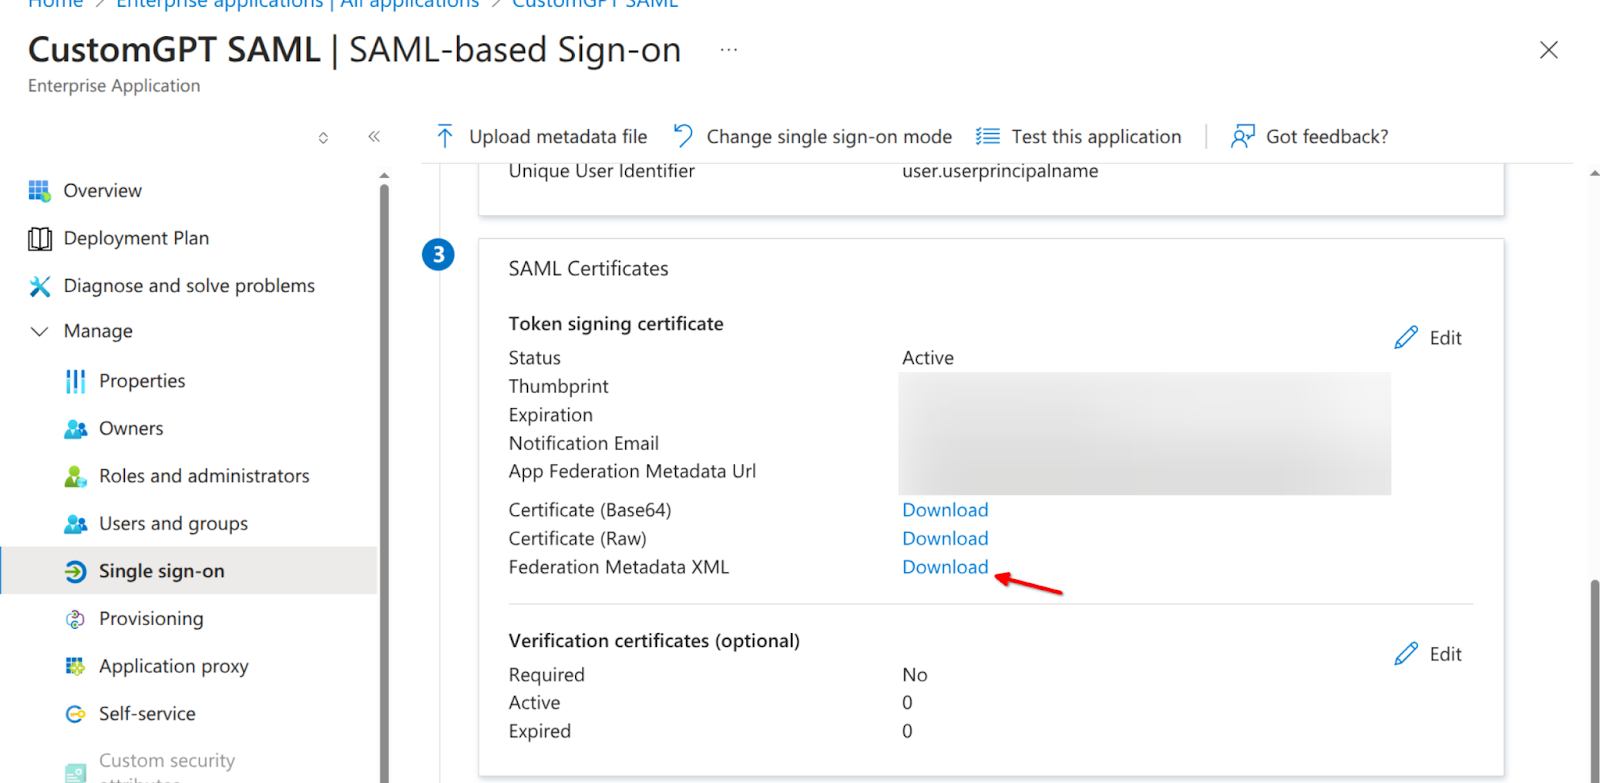
- Scroll down to SAML Certificates section and download certificate in XML format.
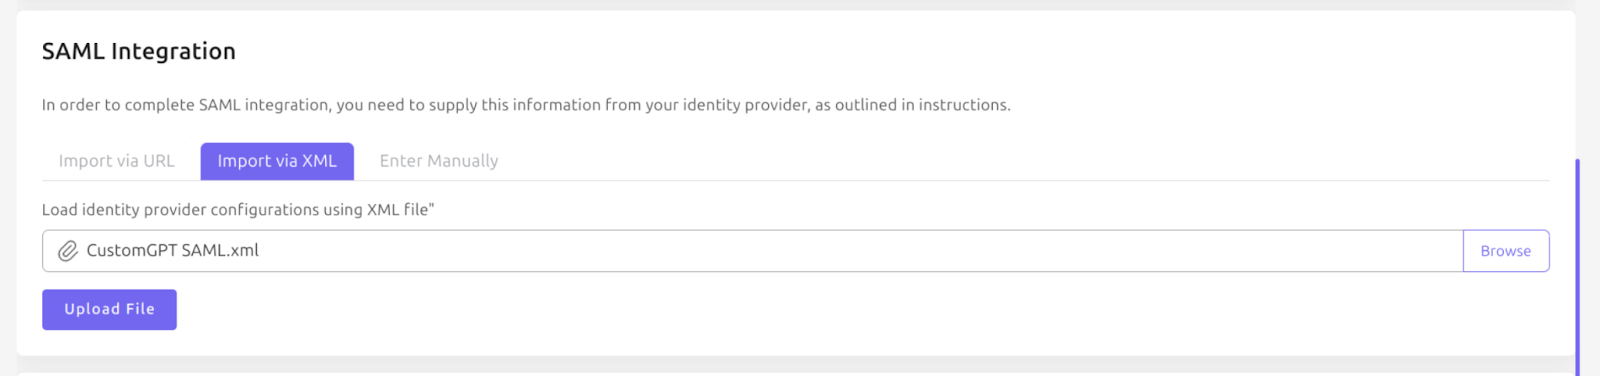
- Go back to CustomGPT.ai app and upload downloaded XML Certificate in SAML Integration section.
Updated 5 months ago
Did this page help you?