Getting started with CustomGPT's API is quick and easy.
This quickstart guide aims to facilitate the process of getting you prepared for your first API call. If you are looking for our application, visit https://app.customgpt.ai/
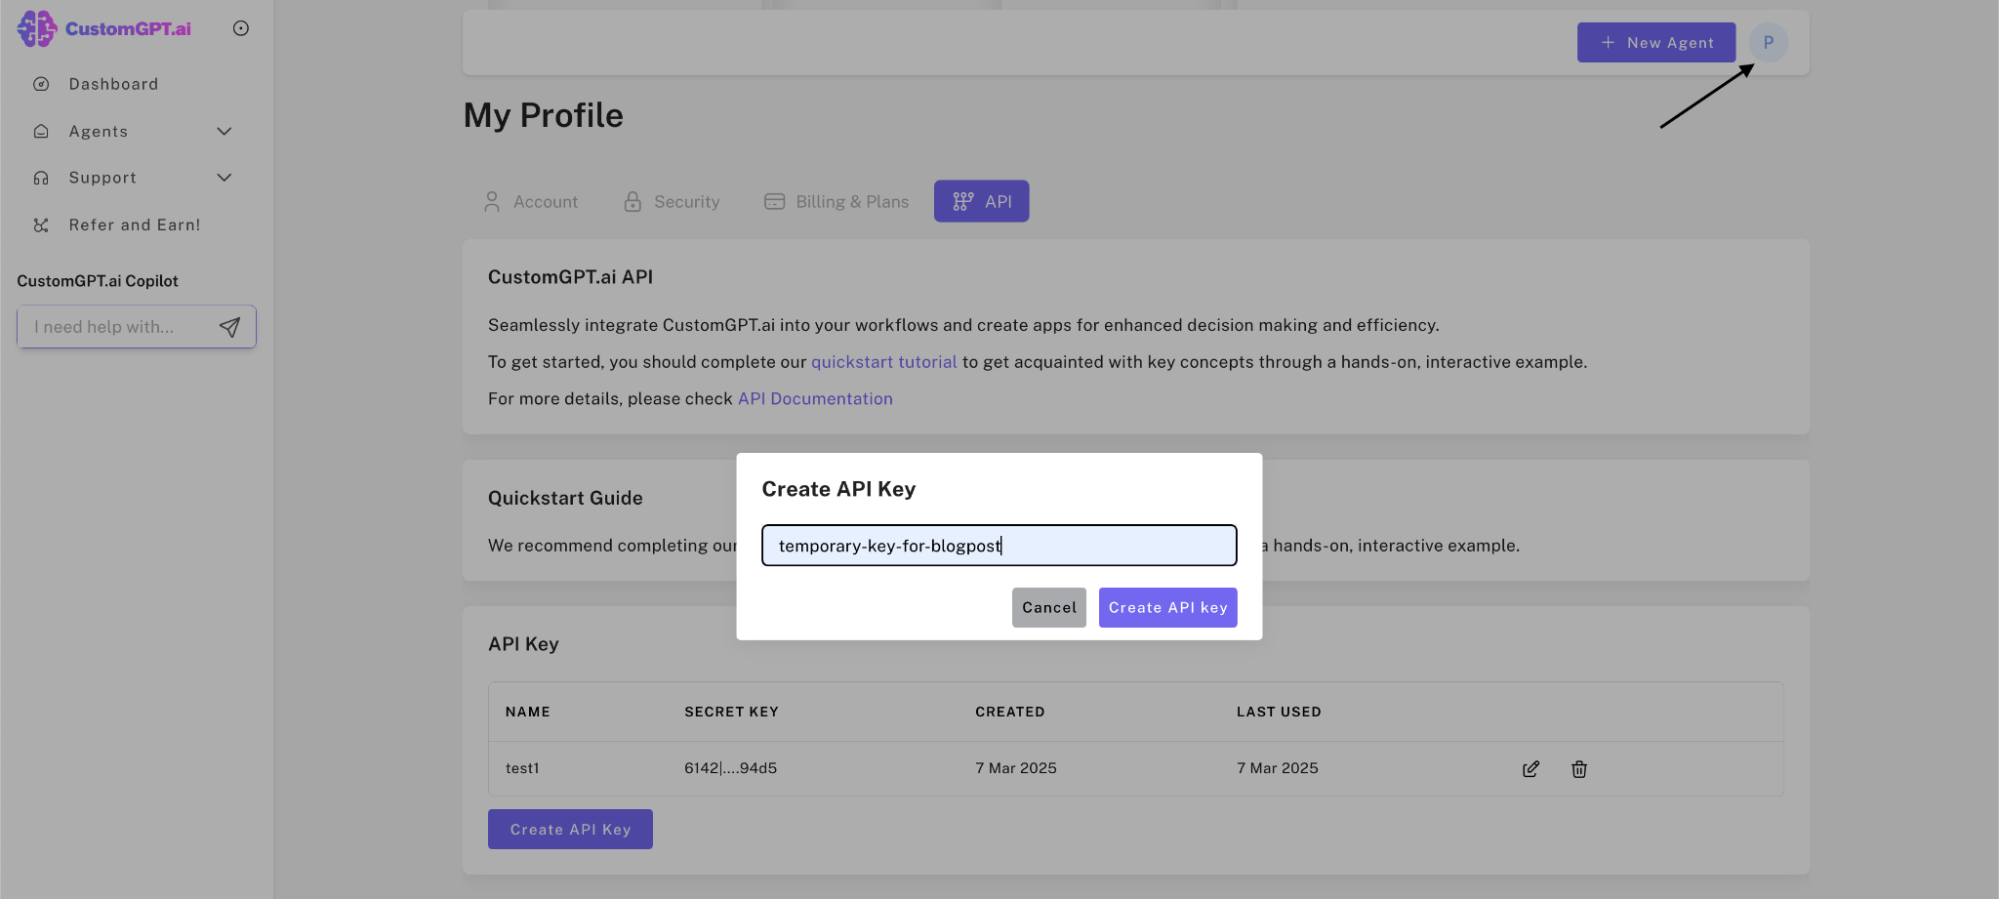
Create API key
As a whole, getting started with the CustomGPT API goes as follows:
- Create an Account or Log In
- Acquire your API Key
- Create an Agent
- Create a Conversation
- Send a Message to the Conversation
This guide will walk you through the above workflow in a bit more detail. Feel free to look around our documentation hub for more information on any part listed.
Step 1: Create an Account or Log In
To use the CustomGPT website and API, you'll need to sign up for an account.
Sign up or log in here.
For more information, see our guide on creating an account and logging in.
Step 2: Acquiring the API key
- From the app, click on the circle in the top right corner of the dashboard and select the "My Profile" option from the dropdown menu that appears.
- Select the API tab and press the Create API Key button to generate a new API key.
Step 3: Create an Agent
API Terminology: Agents vs. Projects
In the CustomGPT.ai API, agents are referred to as projects in endpoint URLs, request/response structures, and parameters. While our platform has fully transitioned to using the term agents across the UI and documentation, the API retains the legacy terminology for backward compatibility.
When interacting with the API, any reference to "projects" in endpoints, request bodies, query parameters, or responses corresponds to "agents" in the current system.
Authentication to the API is performed via HTTP Basic Auth. To authenticate with CustomGPT API endpoints, you must provide the API Key in the header, as shown below.
'authorization: Bearer Your_API_KEY' For example, you will use the POST - Create new agent endpoint to create a new project. In this scenario, you can send an API request by adding your API Key in the Authentication header and the sitemap you wish to use as a data source in the sitemap_path as shown below:
curl --request POST \
     --url 'https://app.customgpt.ai/api/v1/projects' \
     --header 'accept: application/json' \
     --header 'authorization: Bearer Your_API_KEY' \
     --header 'content-type: application/json' \
     --data '
{
  "project_name": "Test",
  "sitemap_path": "https://example.com/sitemap.xml"
}
'
If you require assistance, or have additional feedback on the API or its documentation, reach out to [email protected]
Step 4: Create a Conversation
A conversation object represents a forum for communication between a user and the Agent. Conversations can be created every time a new message is sent, or messages can be sent to an existing conversation via the sessionID.
curl --request POST \
     --url https://app.customgpt.ai/api/v1/projects/projectID/conversations \
     --header 'accept: application/json' \
     --header 'authorization: Bearer Your_API_KEY' \
     --header 'content-type: application/json' \
     --data '
{
  "name": "New Conversation Name"
}
'
Step 5: Send a Message
Now that a conversation has been created, you can send a message to that conversation. The response you will receive is the response from your AI Agent. To send a message to the conversation, you will need the sessionID and the projectID.
curl --request POST \
     --url https://app.customgpt.ai/api/v1/projects/ProjectID/conversations/SessionID/messages \
     --header 'accept: application/json' \
     --header 'authorization: Bearer API-KEY' \
     --header 'content-type: application/json' \
     --data '
{
  "response_source": "default",
  "prompt": "Hello world"
}
'
CustomGPT.ai API & Developer Features Overview
API Overview
CustomGPT.ai offers a #1-ranked RAG (Retrieval-Augmented Generation) API that transforms business data into intelligent AI agents. The serverless platform provides enterprise-grade security (SOC 2 Type 2), handles billions of words, and delivers 34% faster response times than competitors with 13% higher accuracy and 10% lower hallucination rates.
Make sure you have read our Getting Started with CustomGPT.ai for New Developers blog to get an overview of the entire platform.
Key Capabilities:
- RESTful API with comprehensive endpoints
- Python SDK with sync/async support
- Select frommodels - GTP-5, GPT-4o, GPT-4o mini, GPT-4.1, GPT-4.1 mini, Claude, etc
- Hosted MCP Support for Claude web, Claude Desktop, Cursor, ChatGPT, Windsurf, Trae, etc
- OpenAI Compatibility with CustomGPT.ai RAG API and SDK
- Real-time streaming responses
- 1400+ file format support
- 100+ Integrations : Including Google Drive, Dropbox, SharePoint, HubSpot, Salesforce, WordPress, Shopify, Slack, Notion
API Base URL: https://app.customgpt.ai/api/v1/
1. Core Agent Management
POST   /projects                                    # Create agent (sitemap/file upload)
GET    /projects                                    # List agents (paginated, 10/page)
DELETE /projects/{projectId}                        # Delete agent permanently
GET    /projects/{projectId}/settings               # Get agent configuration
2. Data Source Management
POST   /projects/{projectId}/sources                # Add data sources
PUT    /projects/{projectId}/sources/{sourceId}/instant-sync  # Sync sitemap
DELETE /projects/{projectId}/pages/{pageId}         # Remove specific page
3. Conversation Management
POST   /projects/{projectId}/conversations          # Create conversation
GET    /projects/{projectId}/conversations          # List conversations
POST   /projects/{projectId}/conversations/{sessionId}/messages  # Send message
4. Analytics & Citations
GET    /projects/{projectId}/reports/analysis       # Analytics data
GET    /projects/{projectId}/citations/{citationId} # Citation metadata
5. OpenAI Compatibility (Beta)
POST /projects/{project_id}/chat/completions # OpenAI-compatible endpointNote: "Projects" in API = "Agents" in UI (backward compatibility)
Authentication
Authorization: Bearer YOUR_API_KEYGet all the endpoints here -API Docs
Get API Key
Setup:
- Login → My Profile → API tab
- Click "Create API Key"
- Store securely (one-time view)
Security Features:
- Bearer token authentication
- Project-scoped access
- SSL/TLS encryption in transit
- 256-bit AES encryption at rest
- SOC 2 Type 2 certified
API and SDK Examples
Get the entire CustomGPT.ai API endpoint to play with here on our public postman collection.
SDK code snippets
1. Python Installation & Basic Usage
pip install customgpt-clientfrom customgpt_client import CustomGPT
import uuid
# Setup
CustomGPT.api_key = "YOUR_API_KEY"
# Create agent
response = CustomGPT.Project.create(
project_name='My AI Agent',
sitemap_path='https://example.com/sitemap.xml'
)
project_id = response.data.id
# Send message
session_id = uuid.uuid4()
stream_response = CustomGPT.Conversation.send(
project_id=project_id,
session_id=session_id,
prompt="What services do you offer?"
)
answer = stream_response.parsed.data.openai_response2. Async Operations
response = await CustomGPT.Project.acreate(
    project_name='Test Agent',
    sitemap_path='https://example.com/sitemap.xml'
)
3. Streaming Responses
# Add ?stream=true to message endpoint
stream_response = CustomGPT.Conversation.send(
    project_id=project_id,
    session_id=session_id,
    prompt="Your question",
    stream=True  # Enable real-time streaming
)
4. cURL Example
curl -X POST https://app.customgpt.ai/api/v1/projects
  -H "Authorization: Bearer YOUR_API_KEY"
  -H "Content-Type: application/json"
  -d '{"project_name": "Test", "sitemap_path": "https://example.com/sitemap.xml"}'
Integrations
1. OpenAI SDK Compatibility
Drop-in replacement for existing OpenAI applications:
from openai import OpenAI

client = OpenAI(
    api_key="CUSTOMGPT_API_KEY",
    base_url="https://app.customgpt.ai/api/v1/projects/{project_id}/"
)

response = client.chat.completions.create(
    model="gpt-4",  # Ignored - uses project's model
    messages=[{"role": "user", "content": "Hello"}]
)
Limitations:
- Only chat.completions endpoint supported
- No token usage metrics
- Many parameters ignored (temperature, max_tokens, etc.)
- No embeddings, audio, or fine-tuning support
2. Hosted MCP Support
Model Context Protocol for AI Clients:
- Endpoint:
https://mcp.customgpt.ai/projects/<PROJECT_ID>/sse?token=<TOKEN> - Protocol: Server-Sent Events (SSE) over HTTPS
- Compatible Clients: Claude Desktop, Cursor, Windsurf, n8n, Zapier
Claude Desktop Configuration:
{
  "mcpServers": {
    "customgpt-mcp-server": {
      "command": "npx",
      "args": [
        "-y", "supergateway", "--sse",
        "https://mcp.customgpt.ai/projects/<PROJECT_ID>/sse",
        "--header", "Authorization: Bearer <TOKEN>"
      ]
    }
  }
}
Direct SSE Clients (Cursor/Windsurf):
{
  "mcpServers": {
    "customgpt-mcp-server": {
      "url": "https://mcp.customgpt.ai/projects/<PROJECT_ID>/sse?token=<TOKEN>"
    }
  }
}
3. Pre-built Integrations (100+)
- Cloud Storage: Google Drive, Dropbox, Box, SharePoint
- Documentation: Notion, Confluence, GitHub (via API)
- CRM/Support: HubSpot, Salesforce, Zendesk, Intercom
- CMS/E-commerce: WordPress, Shopify, Wix, Webflow
- Communication: Slack, Teams (via Zapier, Connector and API)
- Automation: Zapier (bi-directional), n8n, Make
More - CustomGPT.ai Integrations
Model Support
CustomGPT.ai uses proprietary RAG models optimized for business accuracy:
- Automatic model selection based on use case
- No manual model configuration required
- Focus on grounded responses from your data
- Anti-hallucination algorithms built-in
- #1 ranked accuracy in independent benchmarks
LLM Models:
Use models like GPT-4.1-mini, GPT-4.1, or GPT-o4, GPT-o4 mini, Claude 3, 3.5 sonnet.
Developer Tools
1. Postman Collection - LINK
- Public workspace with all endpoints
- Pre-configured authentication
- Environment management (prod/staging)
- Built-in test scripts
- Fork to sync with updates
Import:
- Open CustomGPT.ai Postman workspace
- Fork (don't import) the collection
- Set jwt_token in environment
- Start testing immediately
2. GitHub Resources
- Cookbook -LINK
- Examples: Python SDK usage, personas, integration patterns
3. Customer Intelligence & Analytics
Export Capabilities:
- Conversation logs with metrics
- JSON, Excel, CSV format exports
- Real-time data updates
- Advanced filtering
Analytics Features:
- Performance metrics dashboard
- User sentiment analysis
- Intent classification
- Content gap identification
- Query tracking and monitoring
4. Additional Developer Features
API Capabilities:
- 3-line code integration
- Sub-second response configurations
- Real-time data ingestion
- Webhook support for events
- Batch operations
- Rate limiting (scales with plan)
Development Resources:
- Comprehensive API documentation
- Sandbox environment for testing
- Error handling guides
- 58+ step-by-step tutorials [YouTube]
- Community Slack channel
- Email support: [email protected]
Security & Compliance:
- Multi-factor authentication (MFA)
- GDPR Compliant Read more
- Enterprise-grade infrastructure that can autoscale when needed.
- Data isolation between agents
That’s the wrap for this little guide highlighting our API capabilities. See you around.