How to Enable SharePoint Auto-Sync
Follow this guide to easily enable the SharePoint Auto-Sync feature, ensuring your data is always automatically updated and synchronized.
Note: SharePoint Auto-Sync is available only on the Enterprise plan.
Step 1: Sign In
a) Visit https://app.customgpt.ai and sign in to your account.
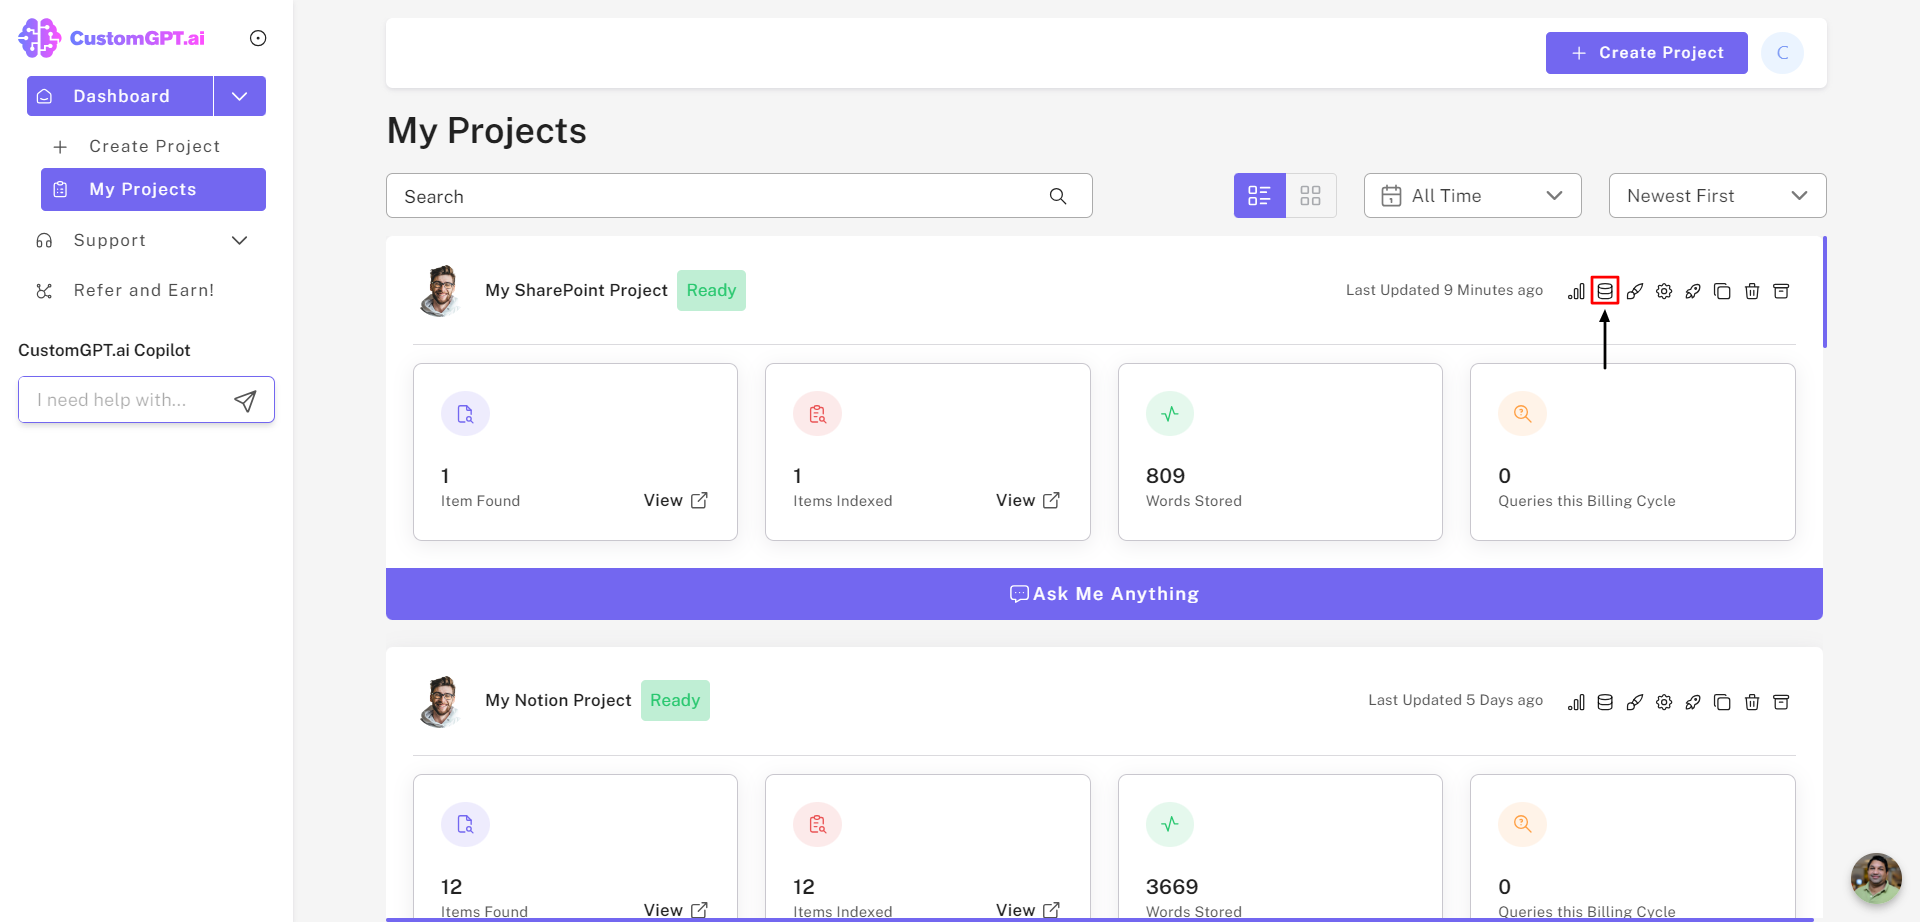
Step 2: Access Data Settings
a) Select your project linked to SharePoint and click on the "Data to access the data management settings.
Step 3: Configure SharePoint Settings
a) Scroll down to the "SharePoint" section within the Data settings.
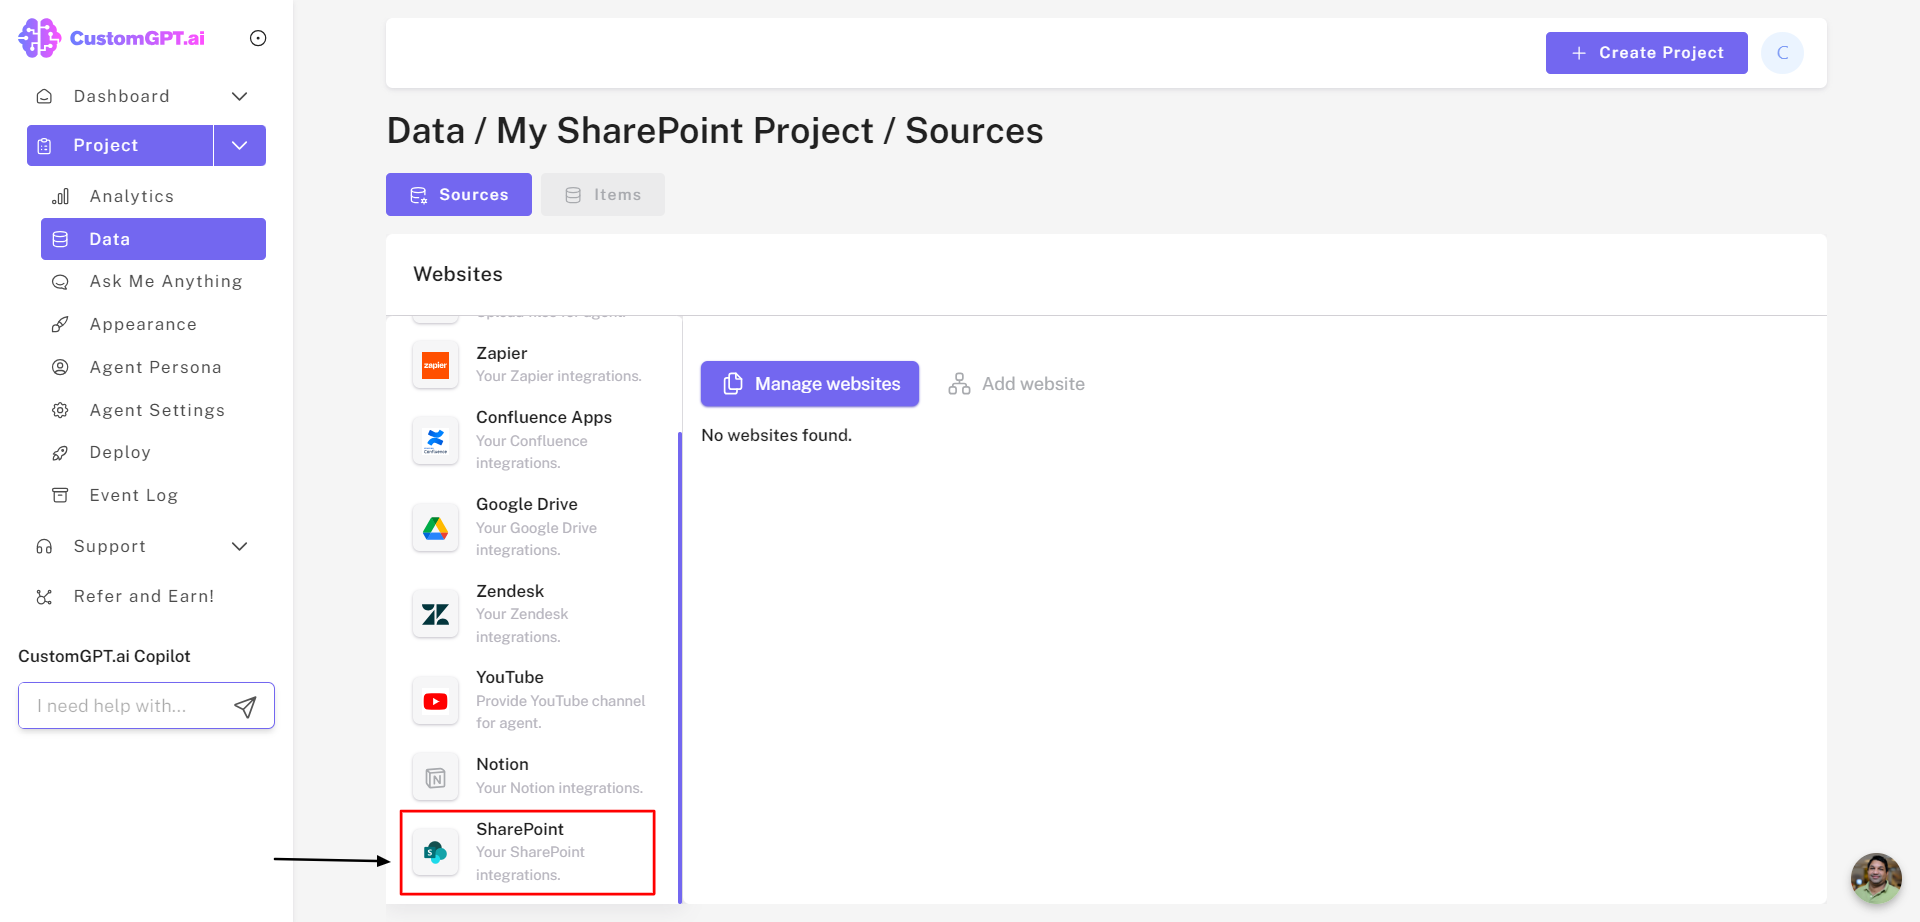
b) Click on the "Settings icon" to access integration options.
Step 4: Enable Auto-Sync
a) Toggle the "Auto Sync Enabled" switch to the right to activate the Auto-Sync feature.

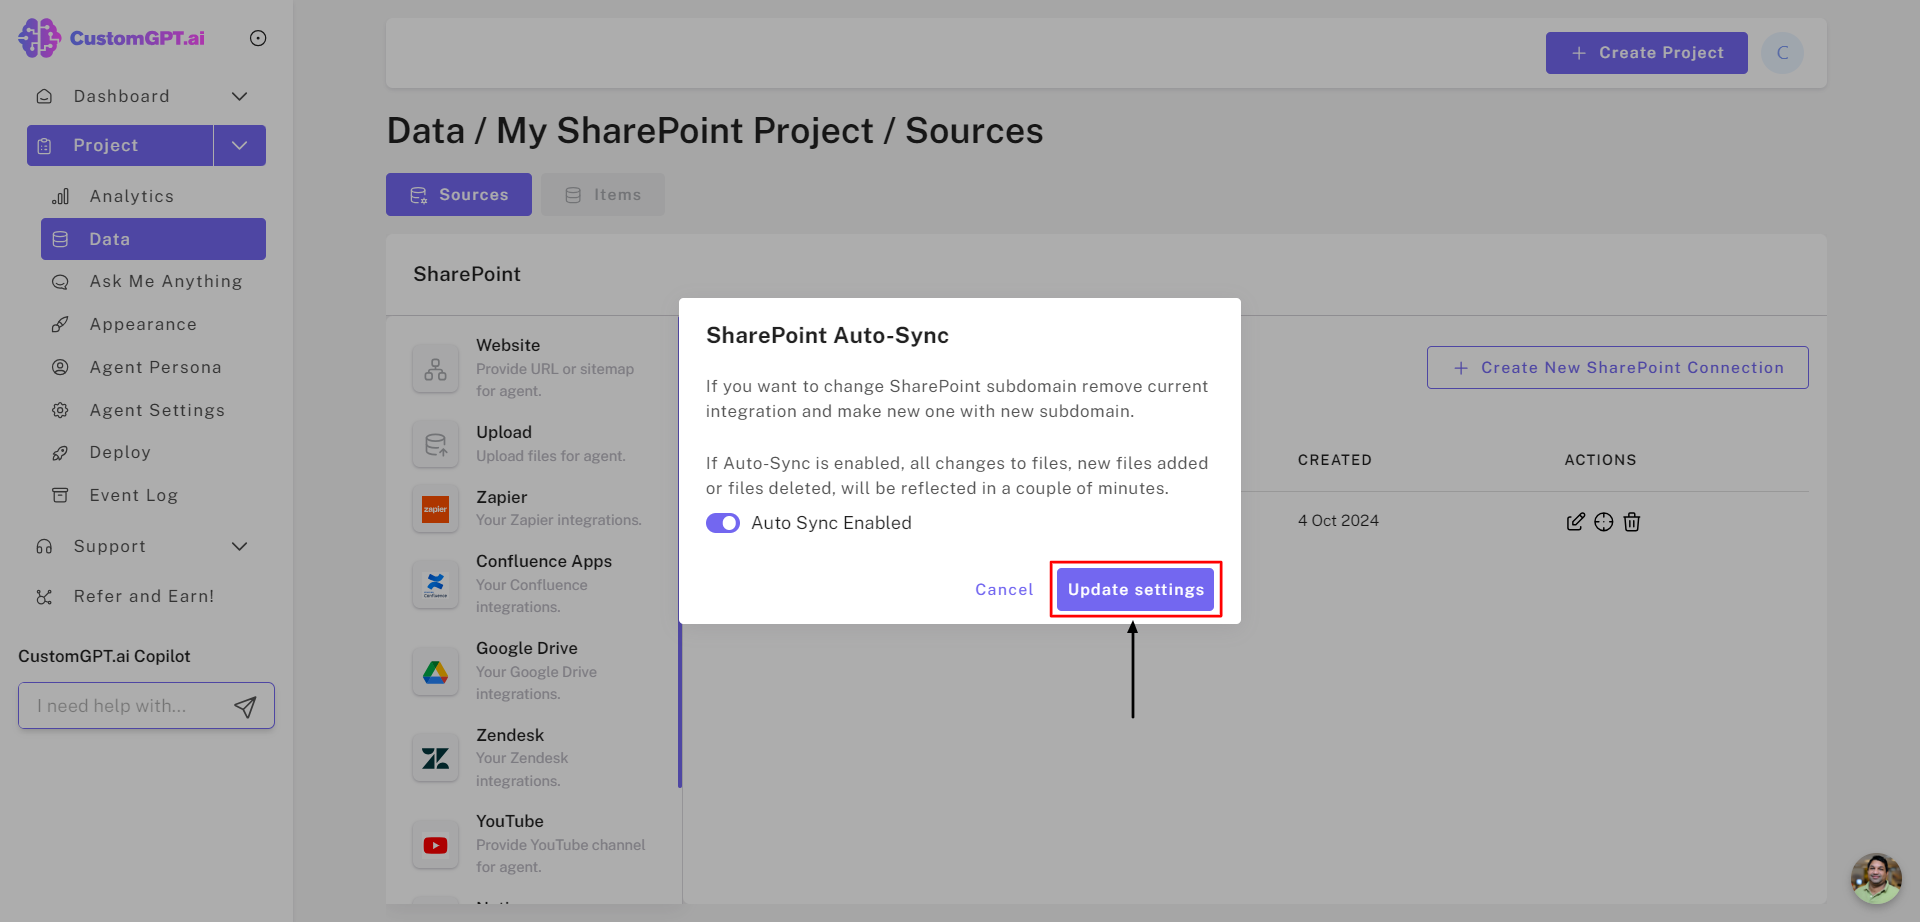
Note: Once Auto-Sync is enabled, any changes, additions, or deletions to your files will be reflected within a few minutes.
Congratulations! Your project is now set to automatically sync with SharePoint. Any changes made in SharePoint will sync with your AI agent in near real-time, keeping your data up-to-date.
Updated about 12 hours ago