SSO setup with Google Workspace
Learn how to add CustomGPT.ai to your Google Workspace through your identity provider settings. Follow our step-by-step guide for a seamless setup.
- Log in to your Google Admin Console.
- Go to Menu > Apps > Web and mobile apps.
- Click Add App > Add custom SAML app.
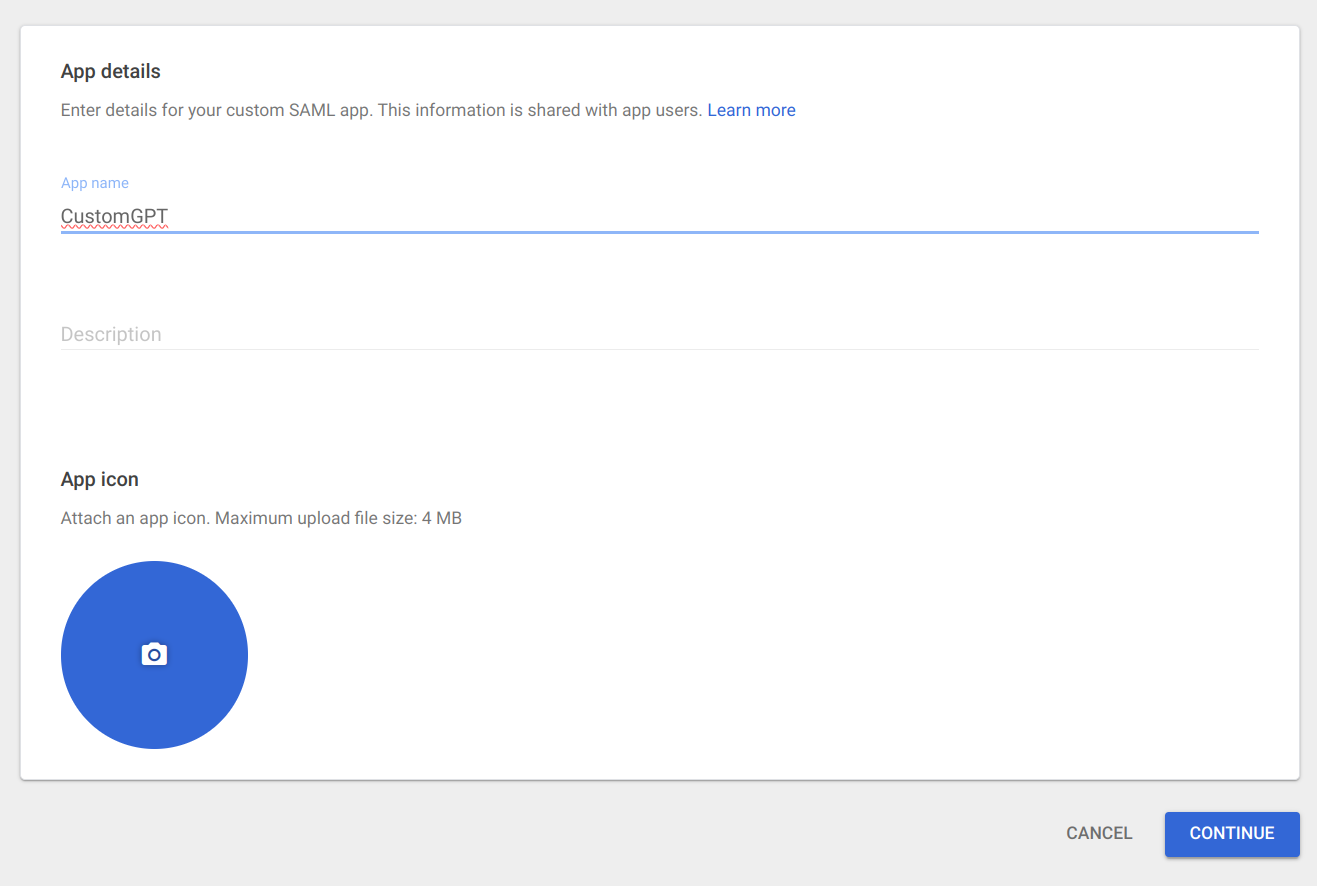
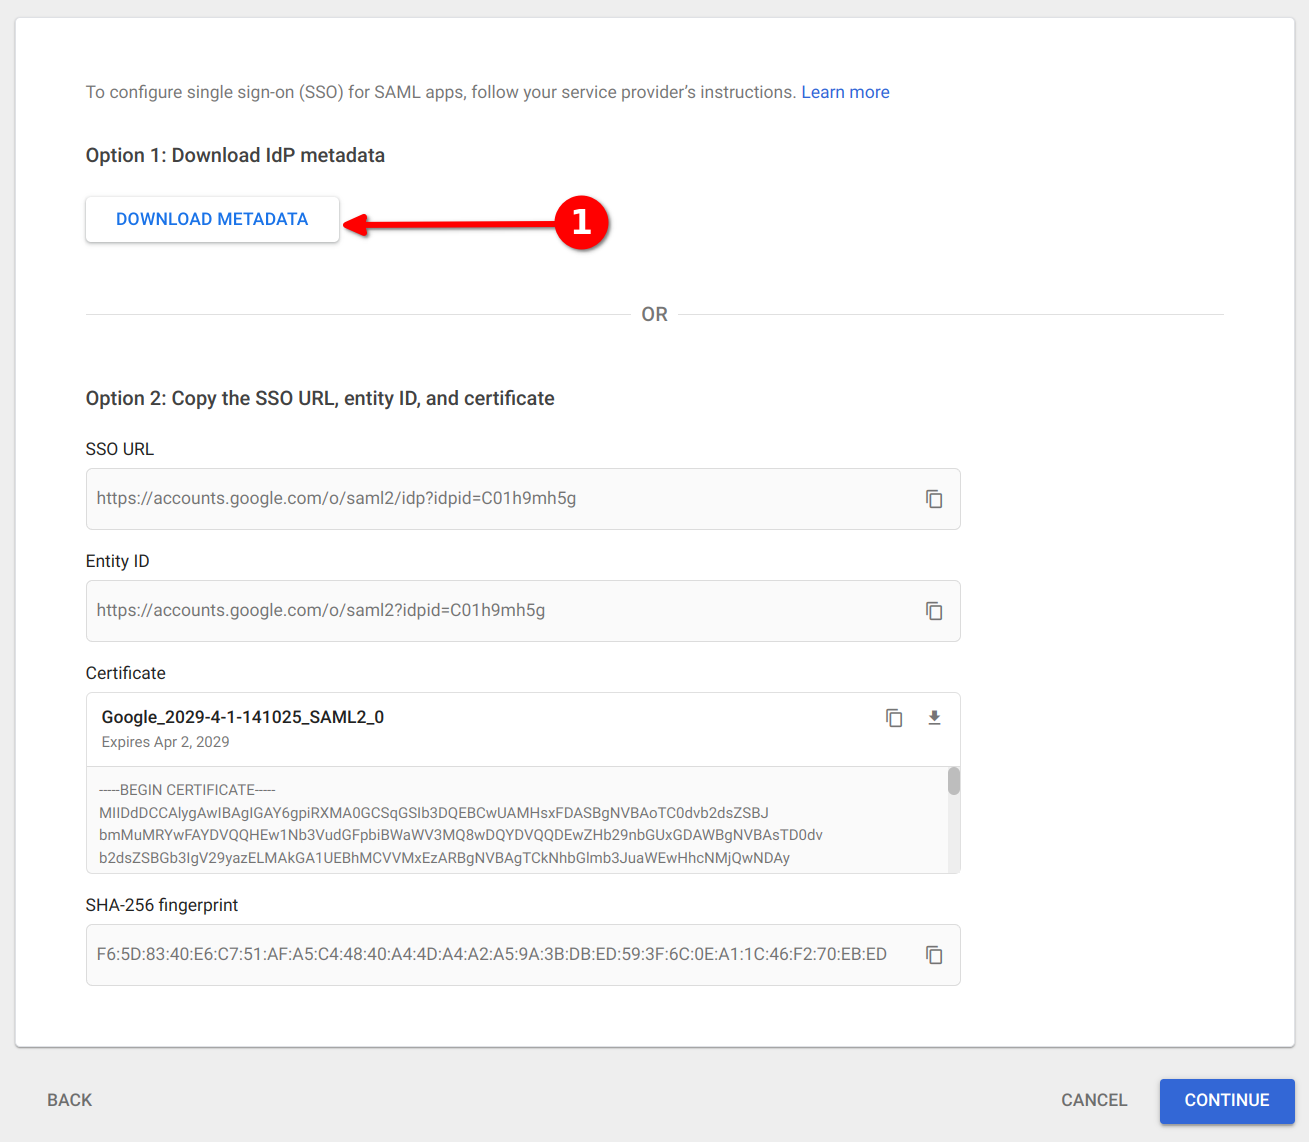
- Enter an app name and click Continue and proceed to download metadata.
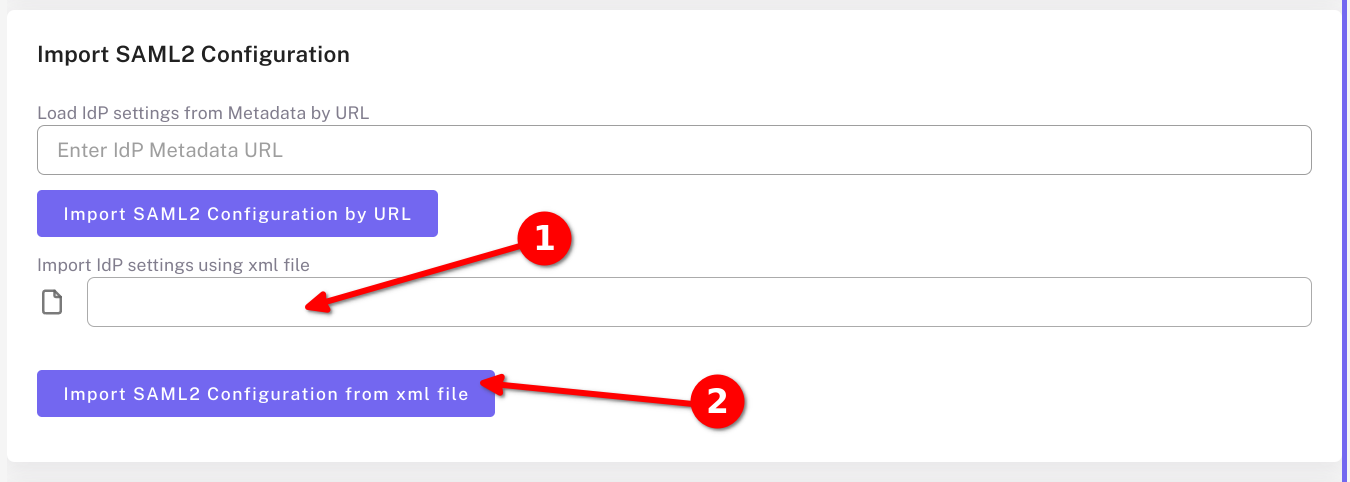
- Open https://app.customgpt.ai and go to My Profile > Single Sign On. In the Load SAML2 Configuration section, upload this file and click continue.
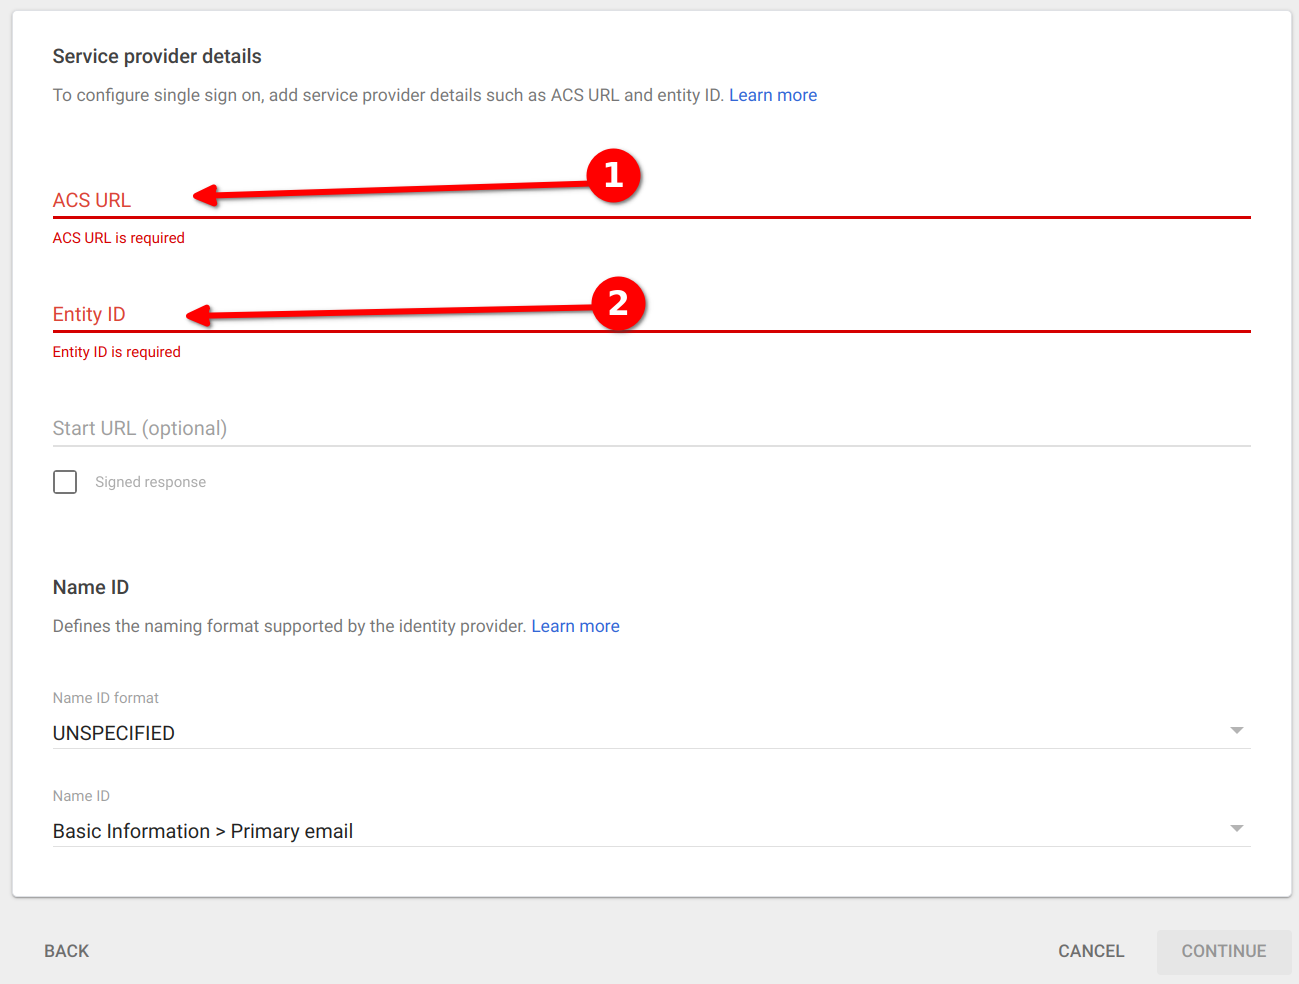
- Copy the ACS URL and Entity ID from the top of the SSO page.
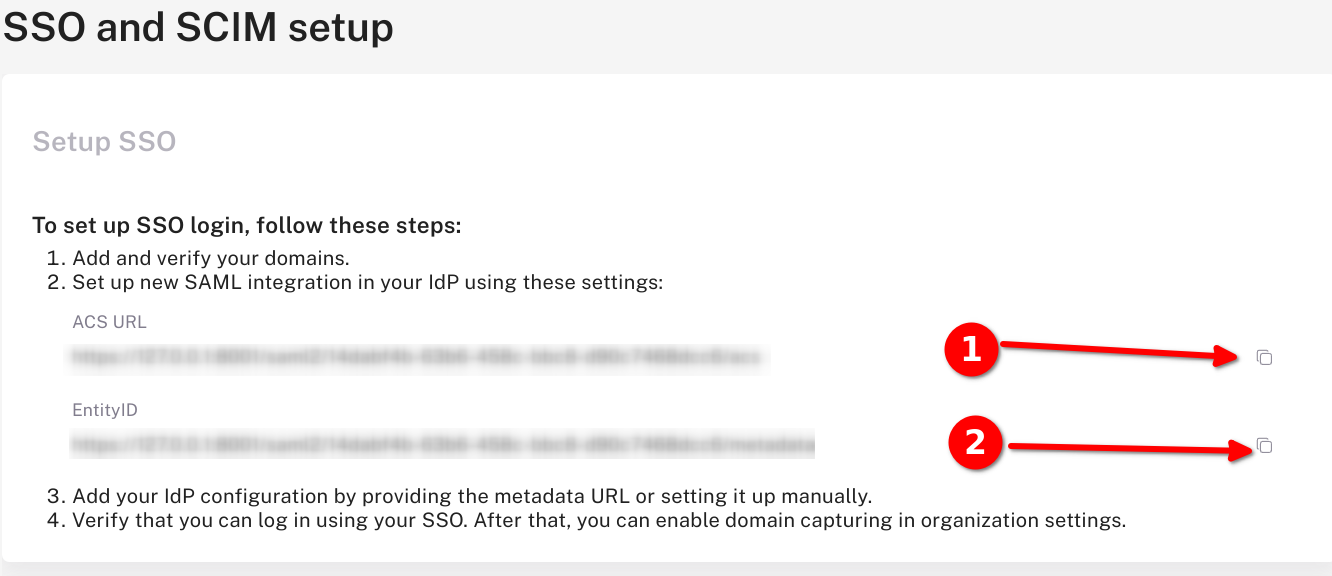
- Paste the ACS URL and Entity ID into the matching fields in the Google Admin Console and click contiune.
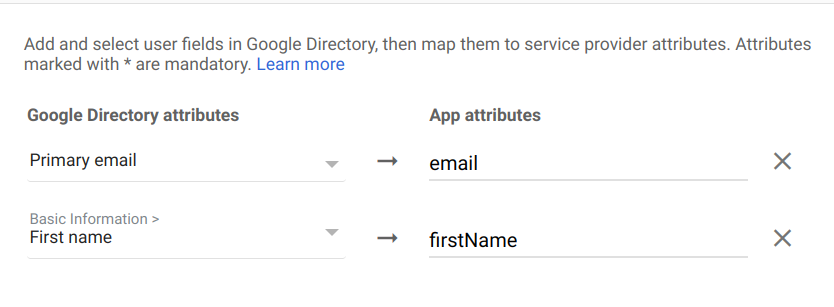
- Click ADD MAPPING. Fill values “Primary email -> email” and “First name -> firstName”
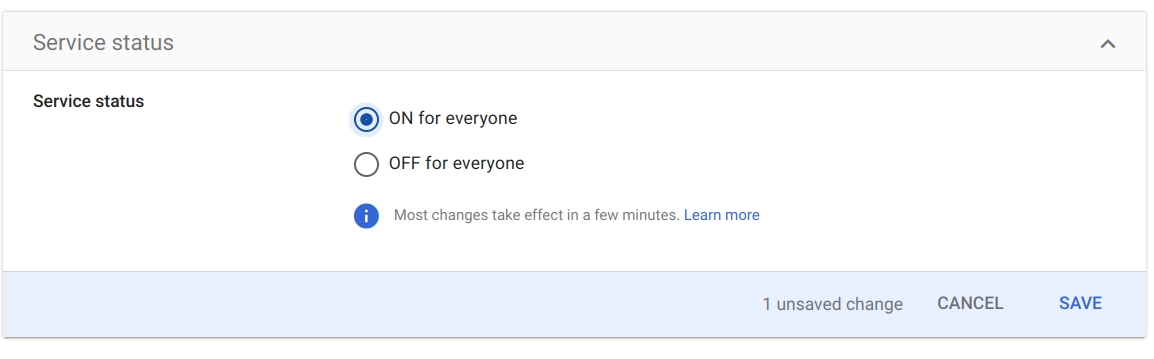
- Click FINISH and click on "User access card" and Turn On your new app.
Updated about 1 year ago
Did this page help you?