SSO setup with PingOne
This guide explains how to configure Single Sign-On (SSO) and SCIM provisioning between CustomGPT.ai and PingOne using SAML.
Add SSO
- Go to My Profile and then Single Sign On tab.
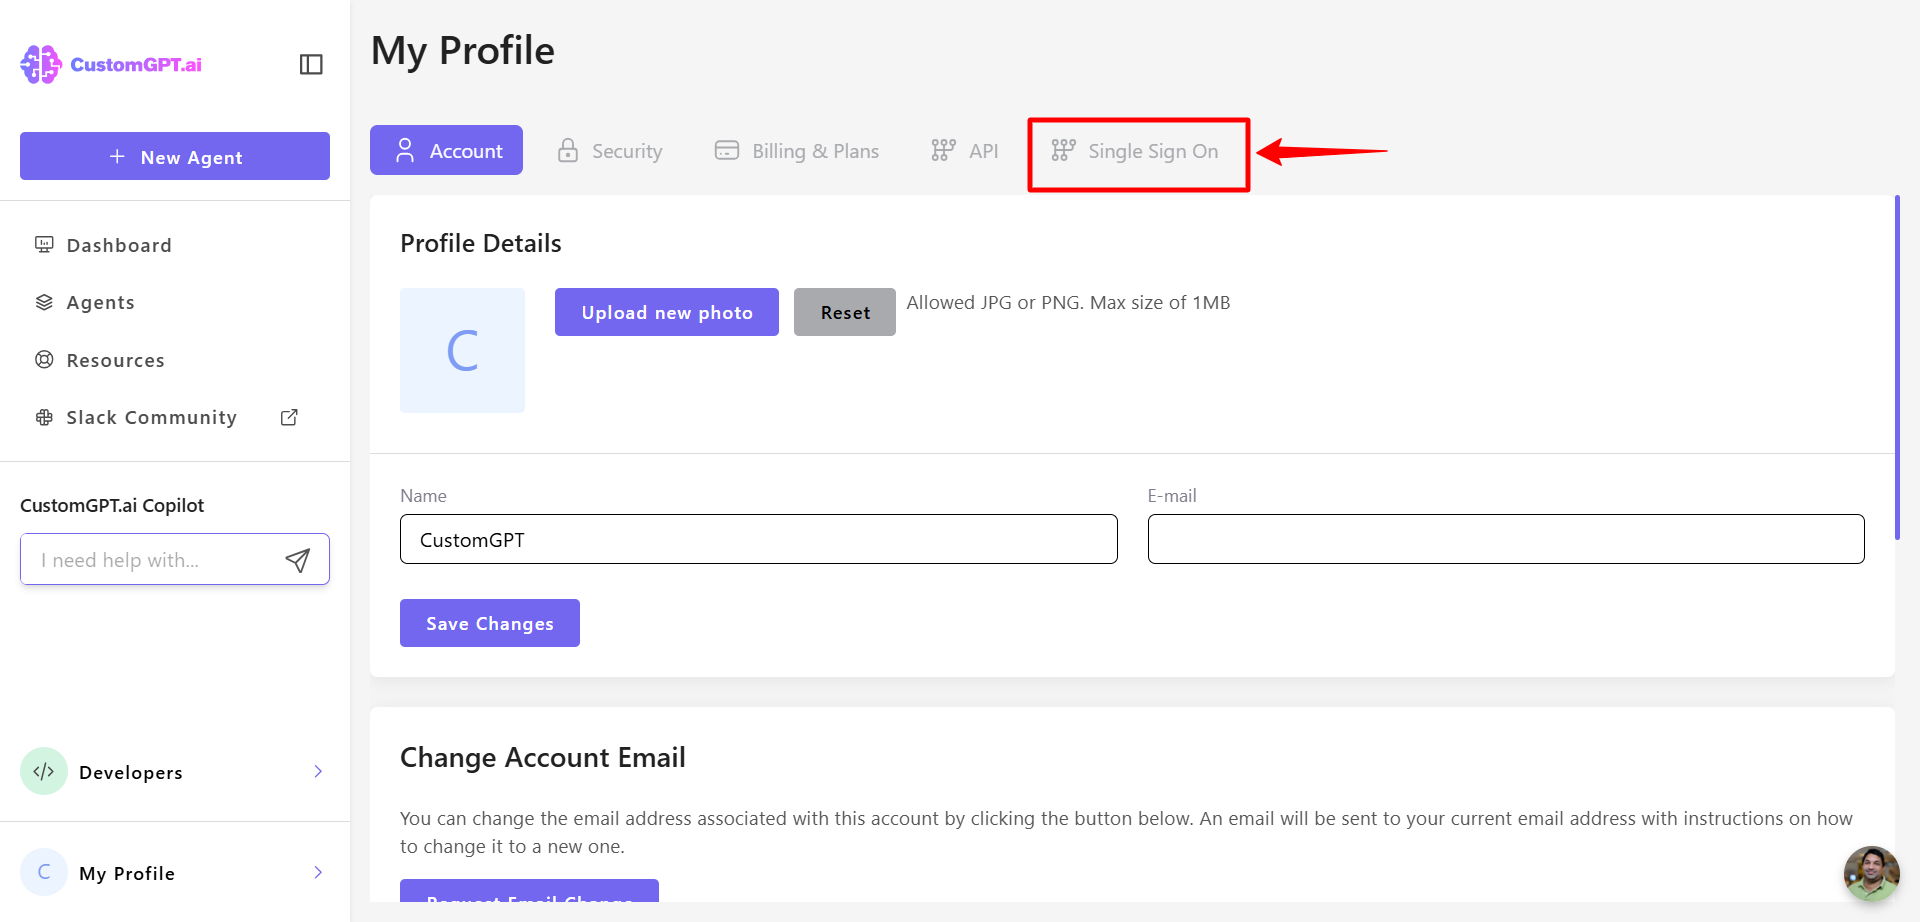
- Add and verify company domain. For verify you should update DNS records with given TXT value
- Go to PingOne admin dashboard. Section Application and add new SAML Application
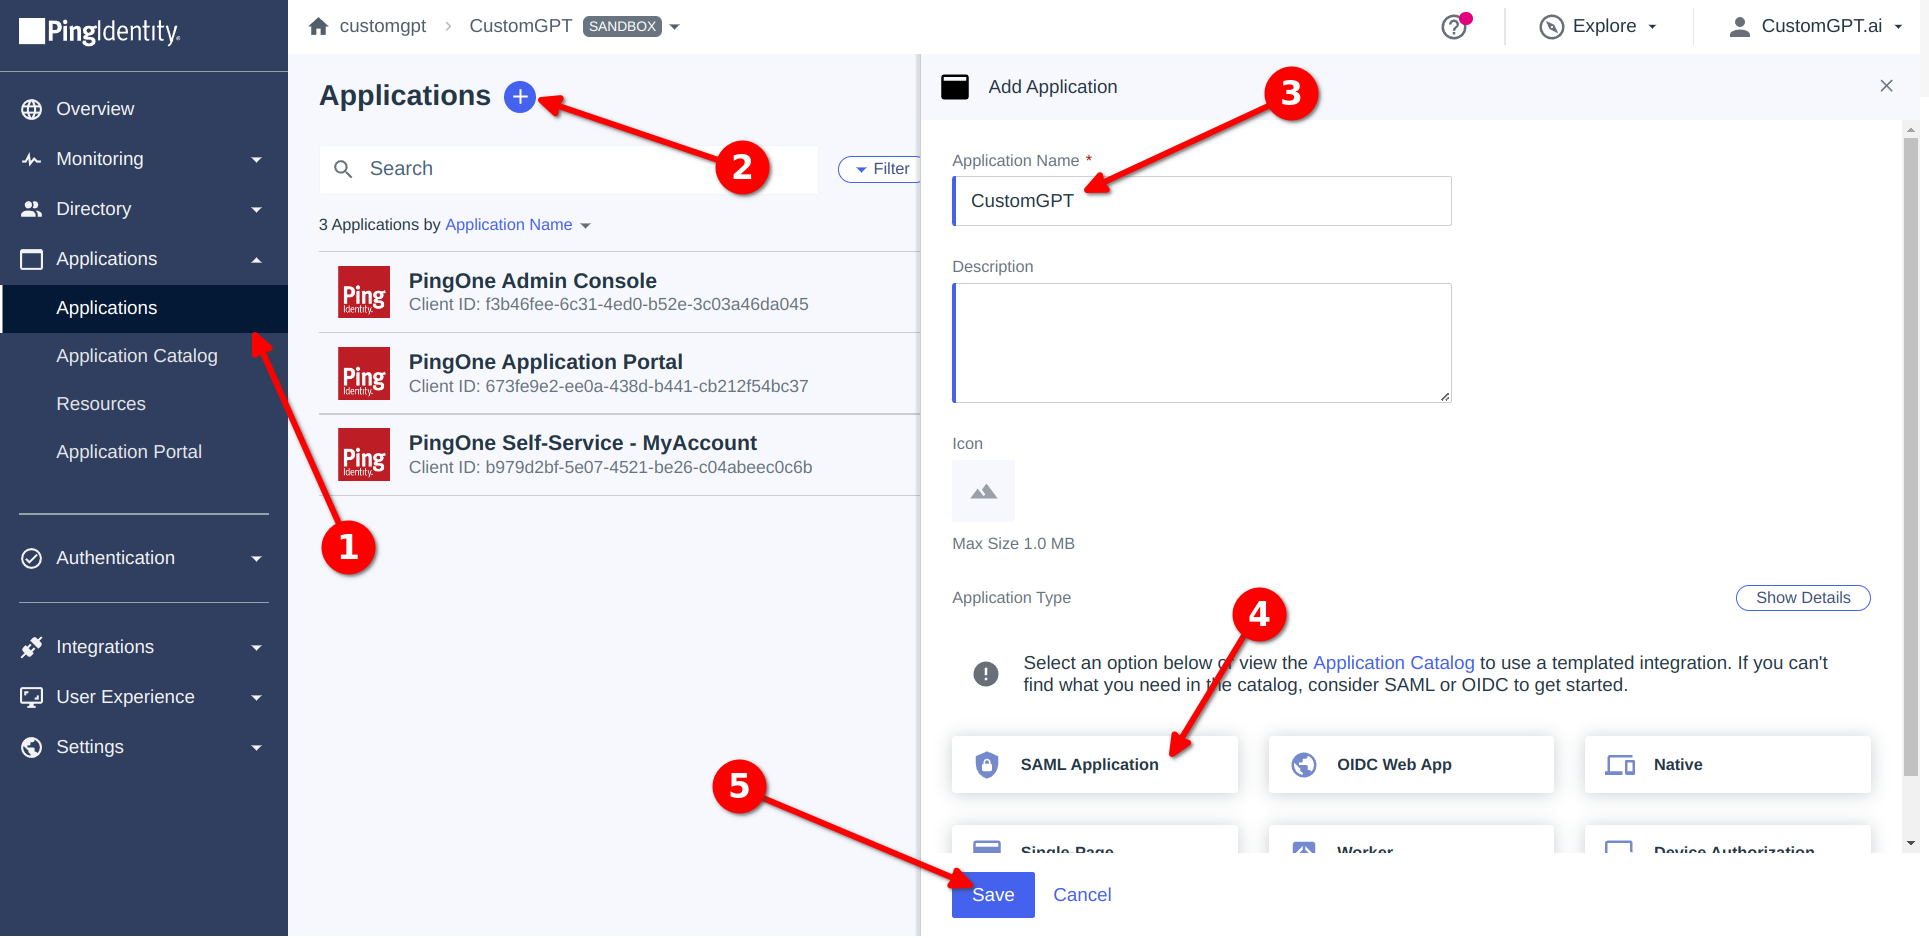
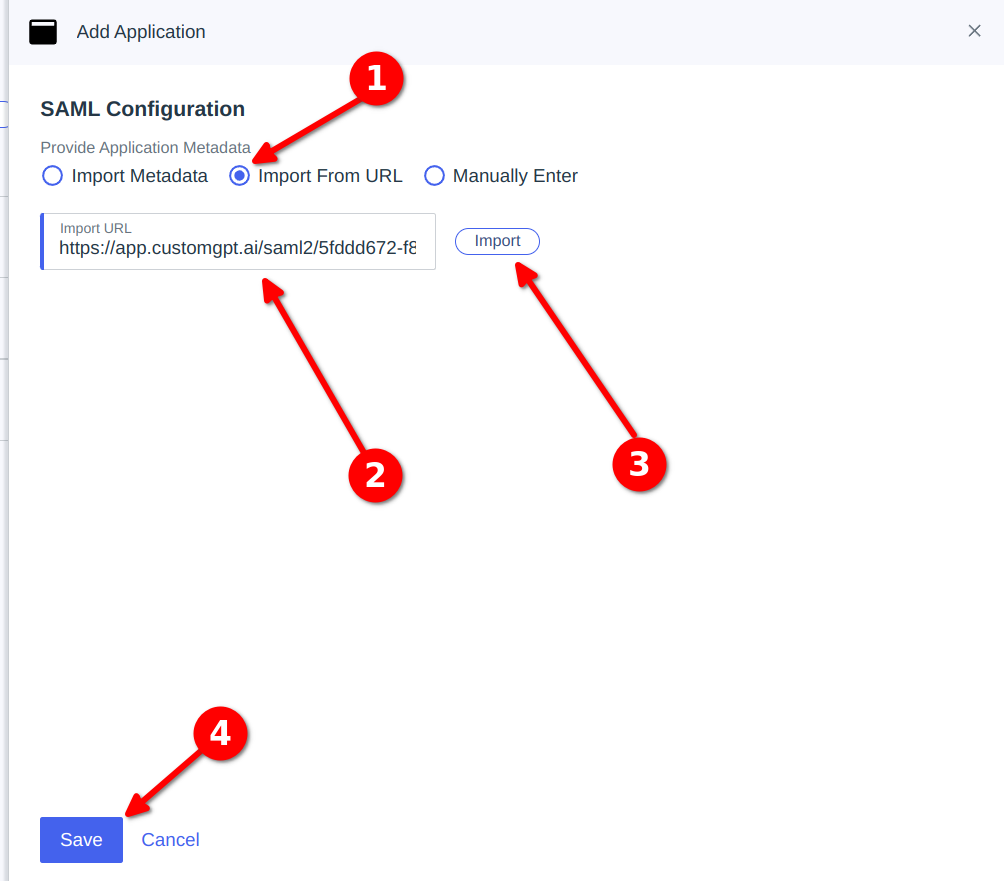
- Click on Import from URL and paste Entity ID from CustomGPT SSO settings page:
- Then fill SAML Configuration values with settings from
CustomGPT Set up SSOpage (ACS URL and EntityID)
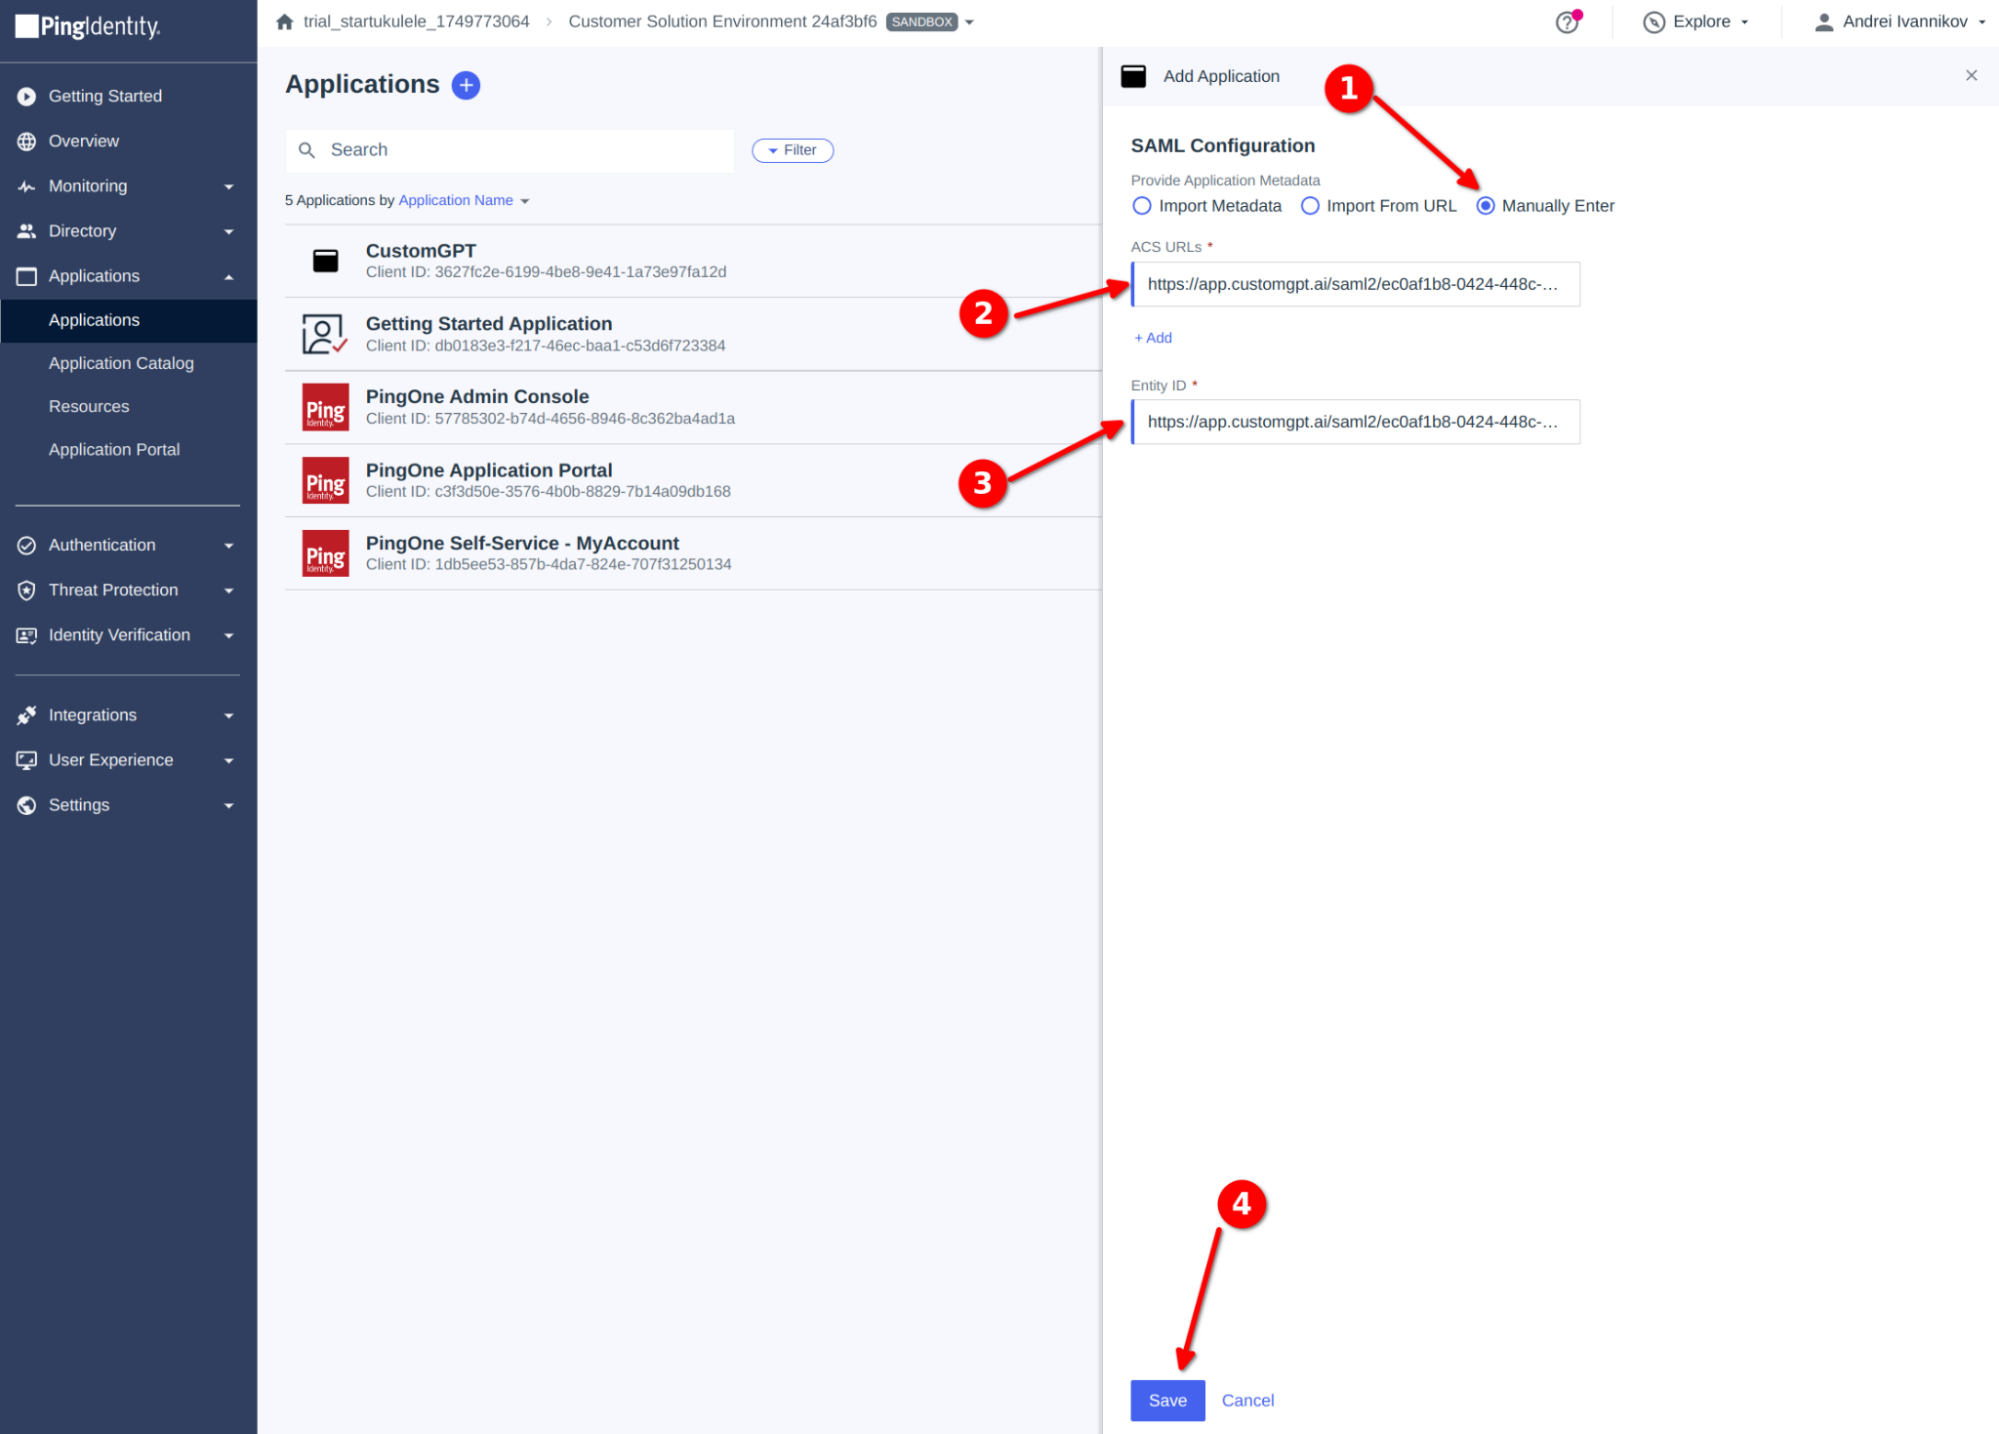
- After saving open Configuration tab, copy
IDP Metadata URLand enable your new Application.
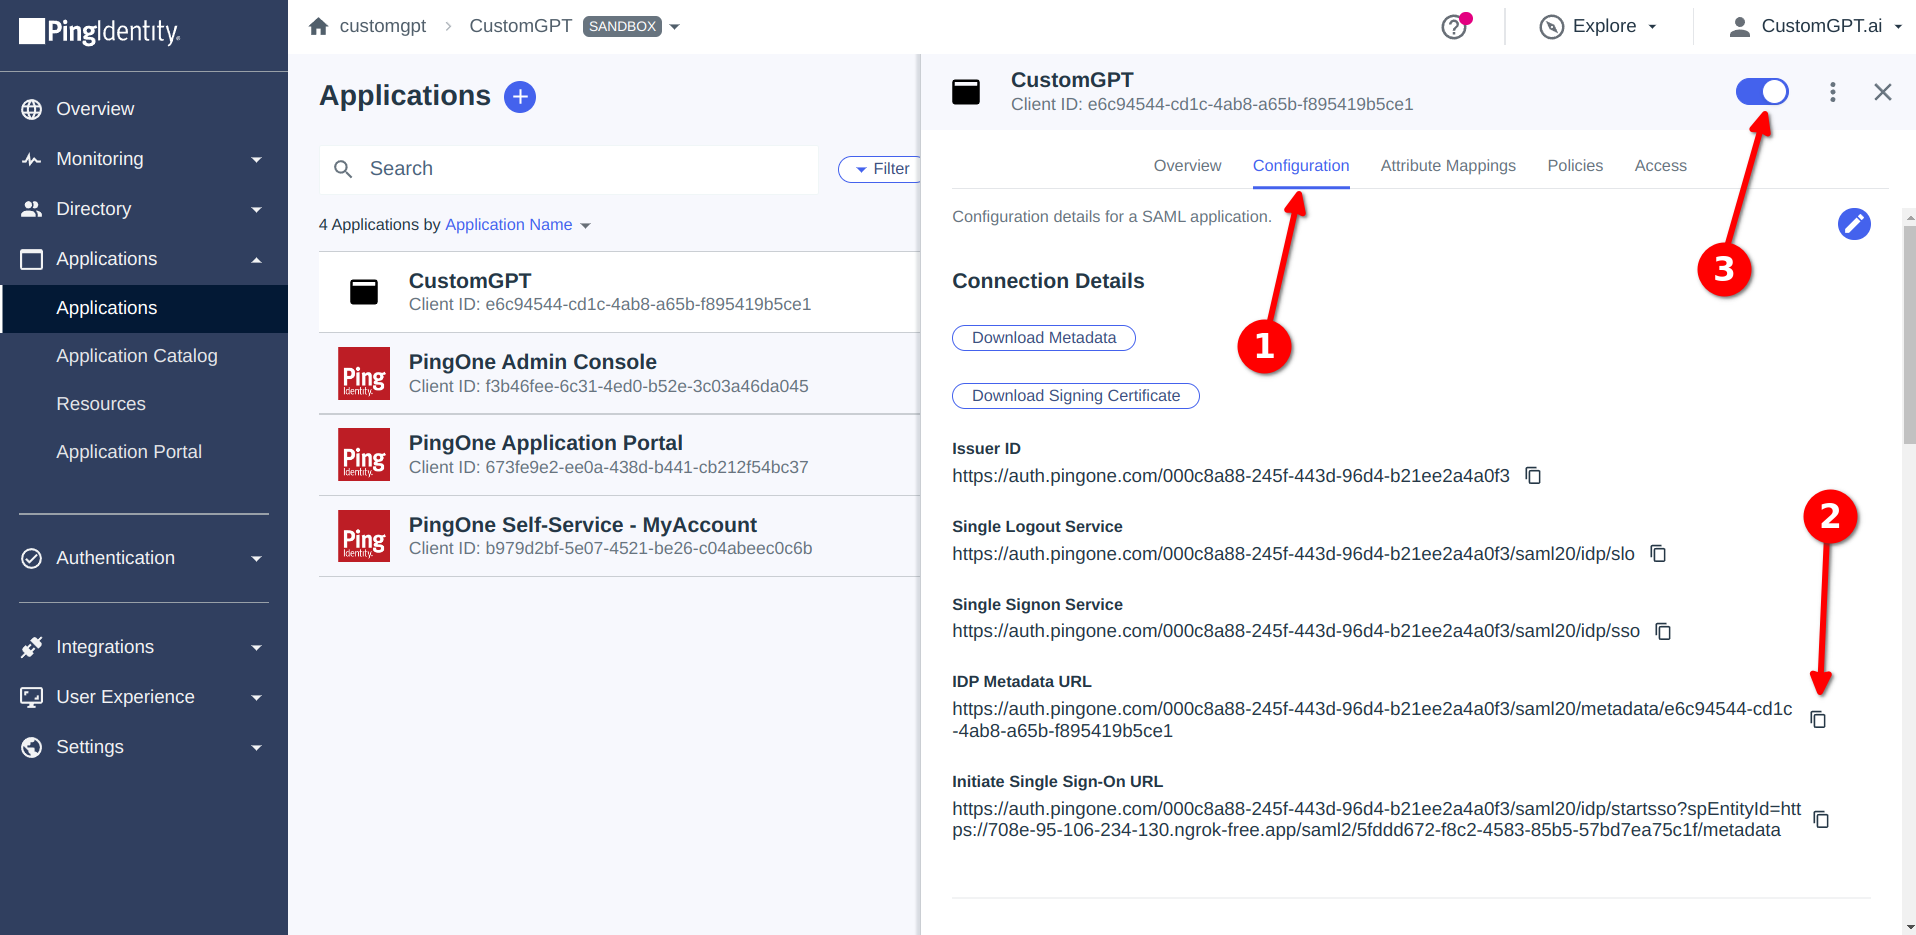
- Click on Attribute Mappings and than on edit:
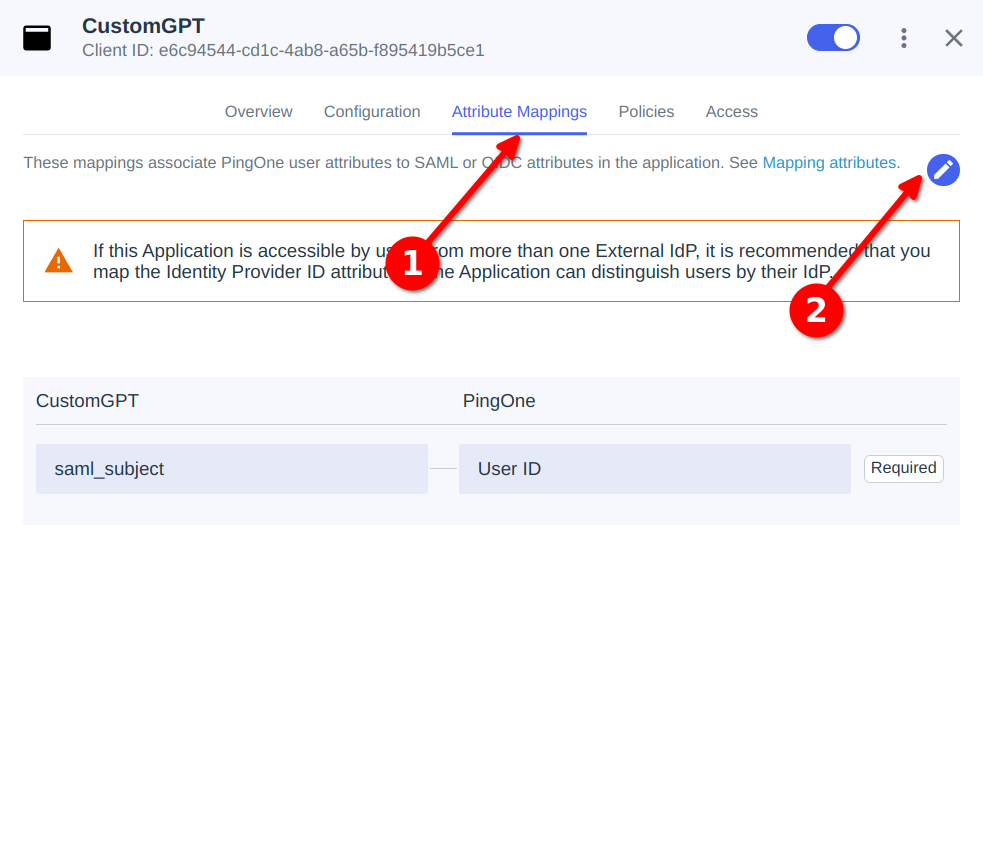
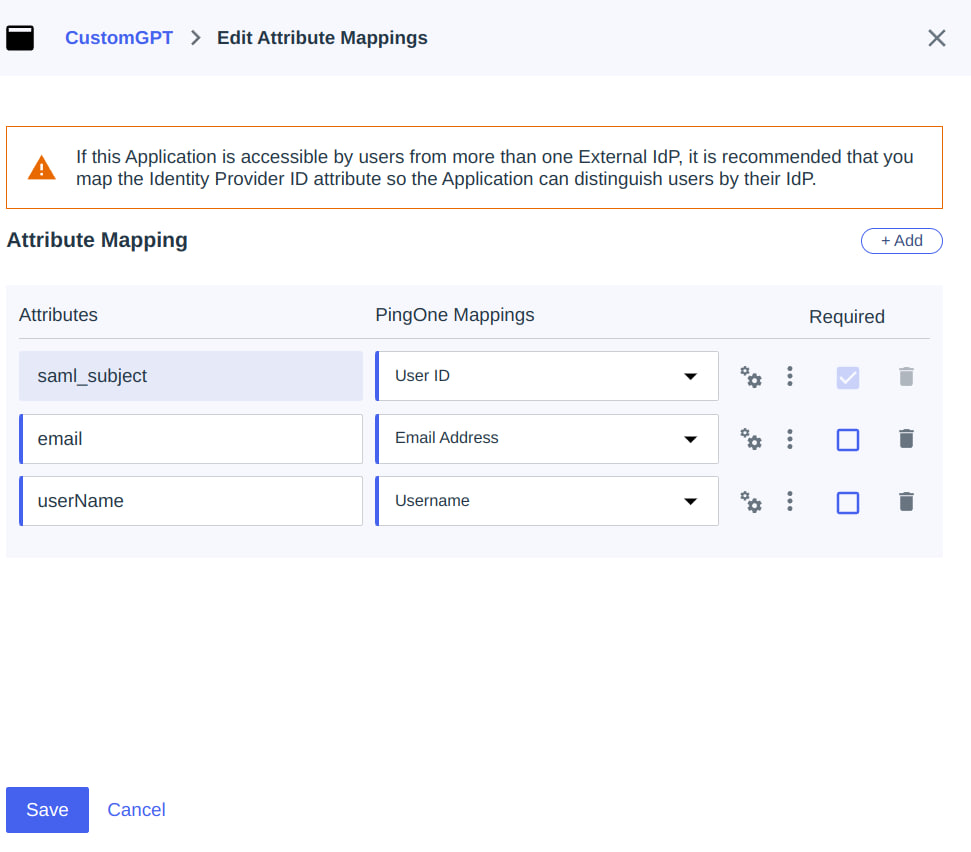
- Add two new attributes:
- email => Email address
- userName => Username
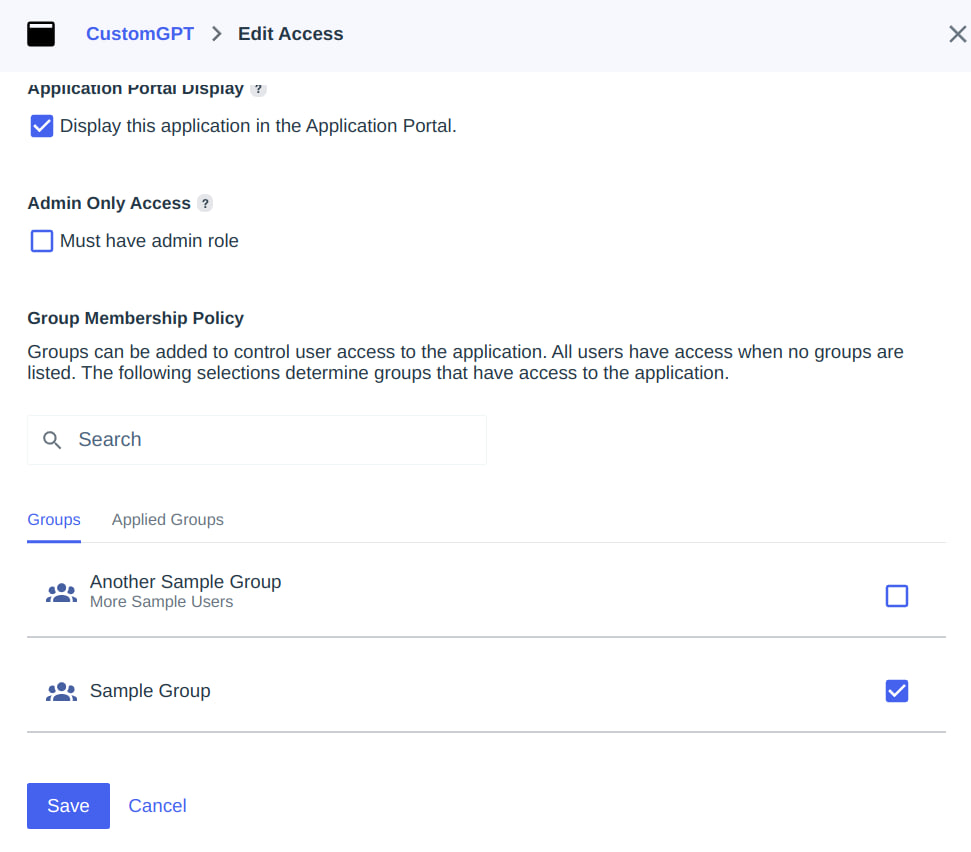
- You can add some custom access rules on rules tab if you need them (i.e. restrict access for SSO only for some user groups).
- Return back to
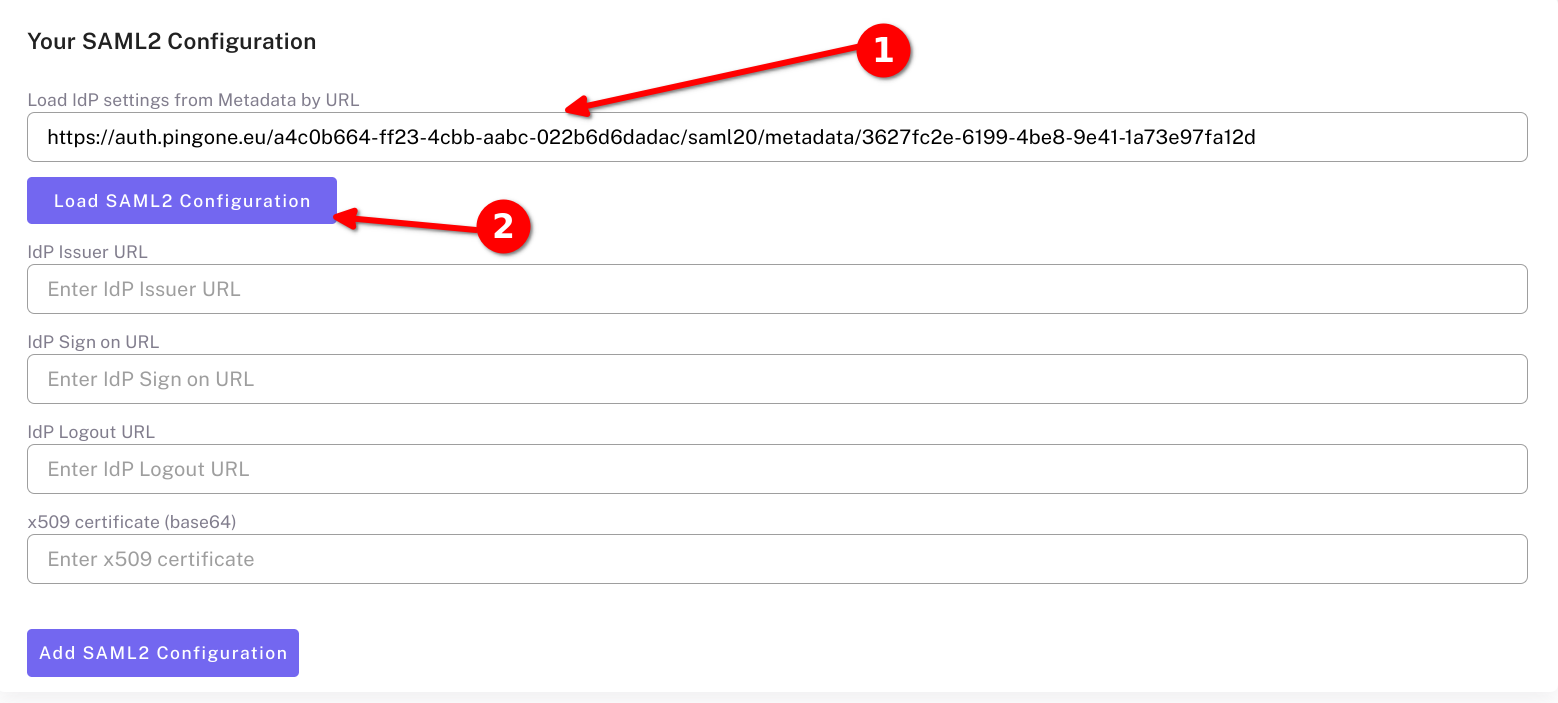
CustomGPT Set up SSOpage, scroll down toYour SAML Configurationand paste copied IDP Metadata URL. Than click Load SAML Configuration
Add SCIM
- Enable SCIM integration in CustomGPT on SSO Settings page.
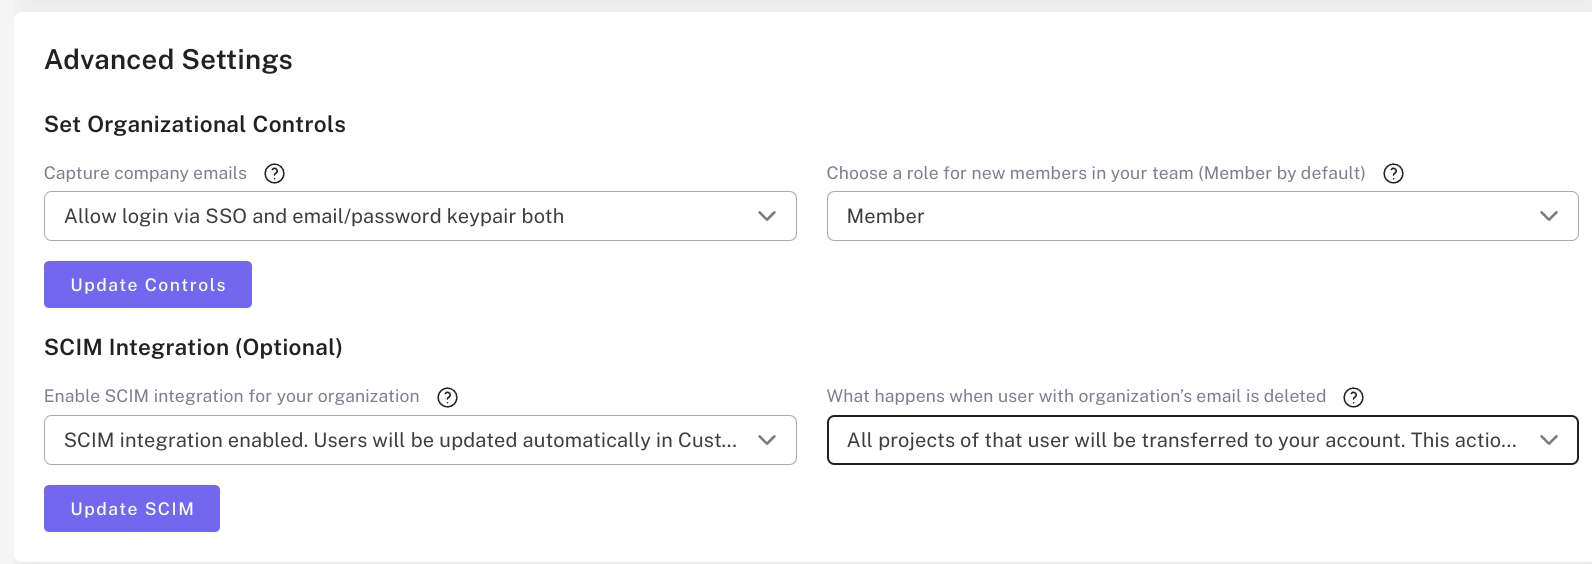
- Supported provisions: create users, update user attributes, deactivate users
- Go to PingOne admin dashboard
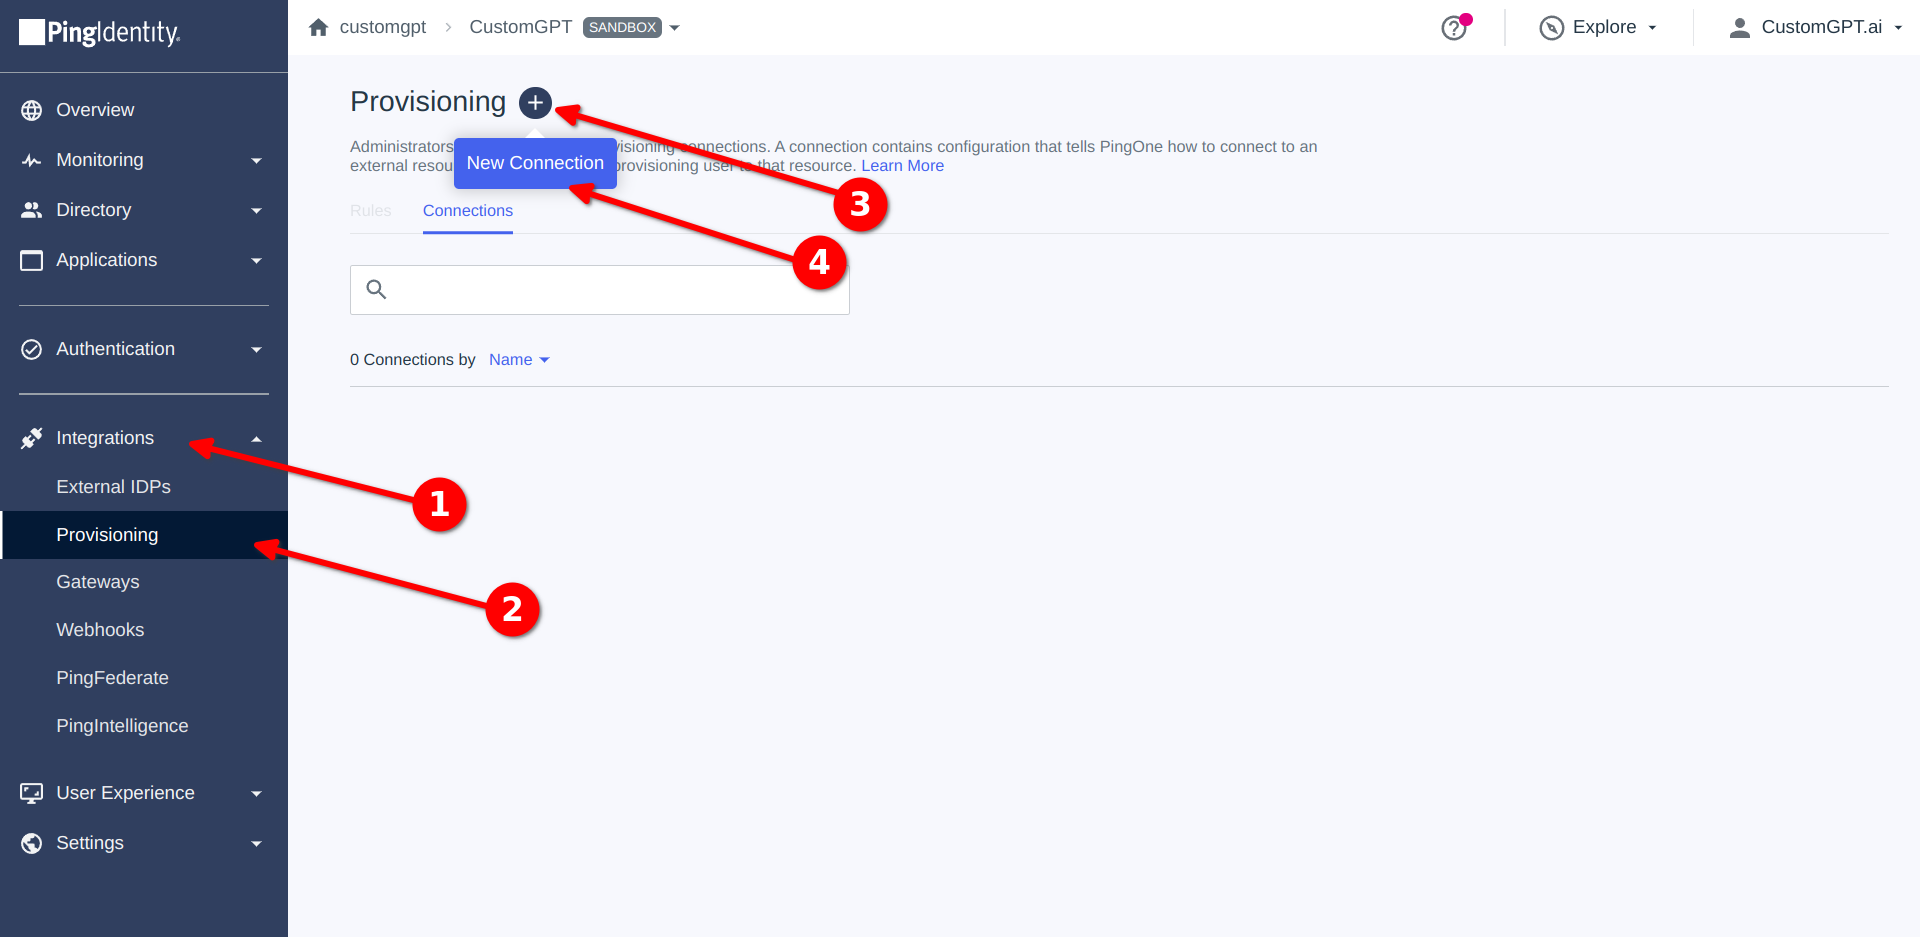
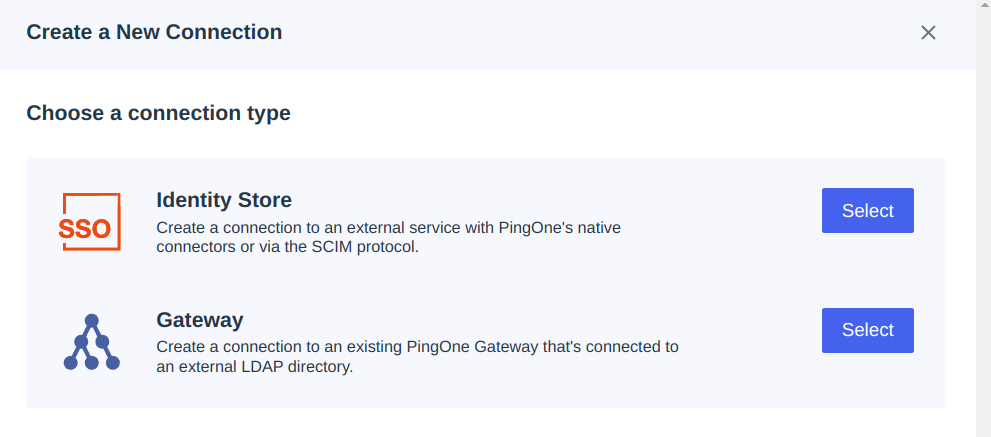
- Select Identity Store.
- Enter SCIM in the search box and select
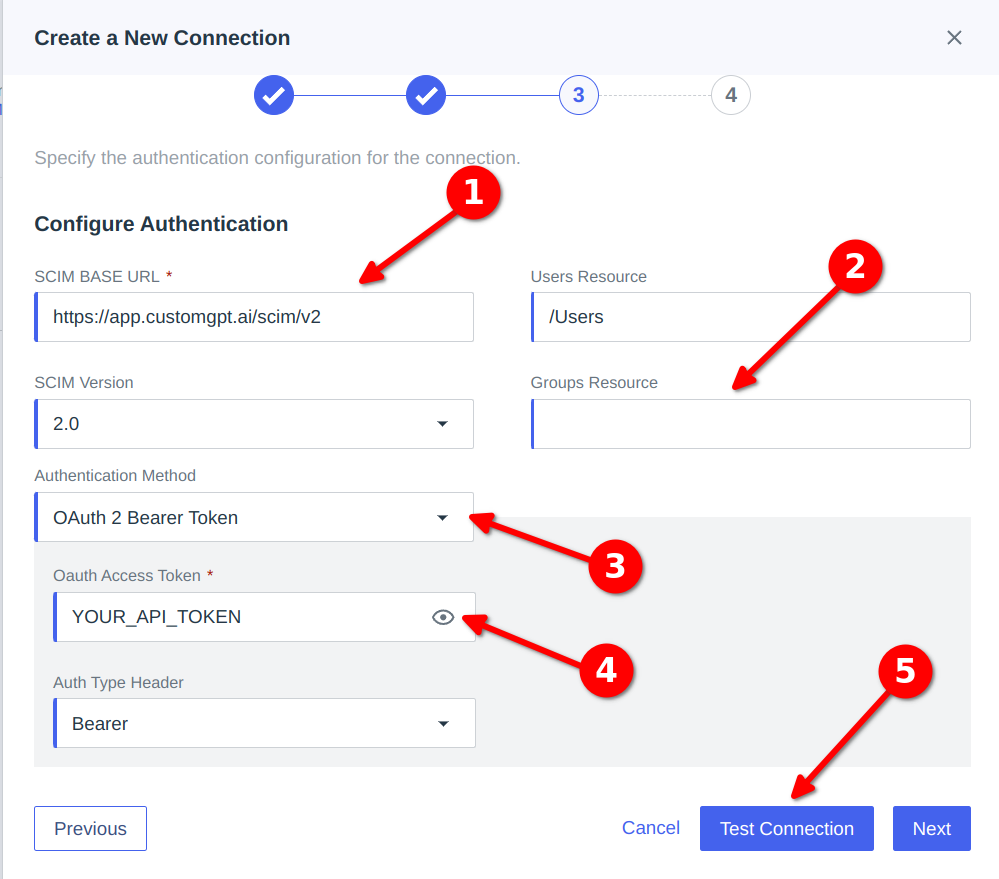
SCIM Outbound. Click Next. Fill name and click Next. - On Next Step:
- Fill base URL for SCIM - https://app.customgpt.ai/scim/v2
- Leave Group Resources input field with empty value
- Select Bearer as Authentication method, add your API token
- Test Connection.
- If everything fine click Next
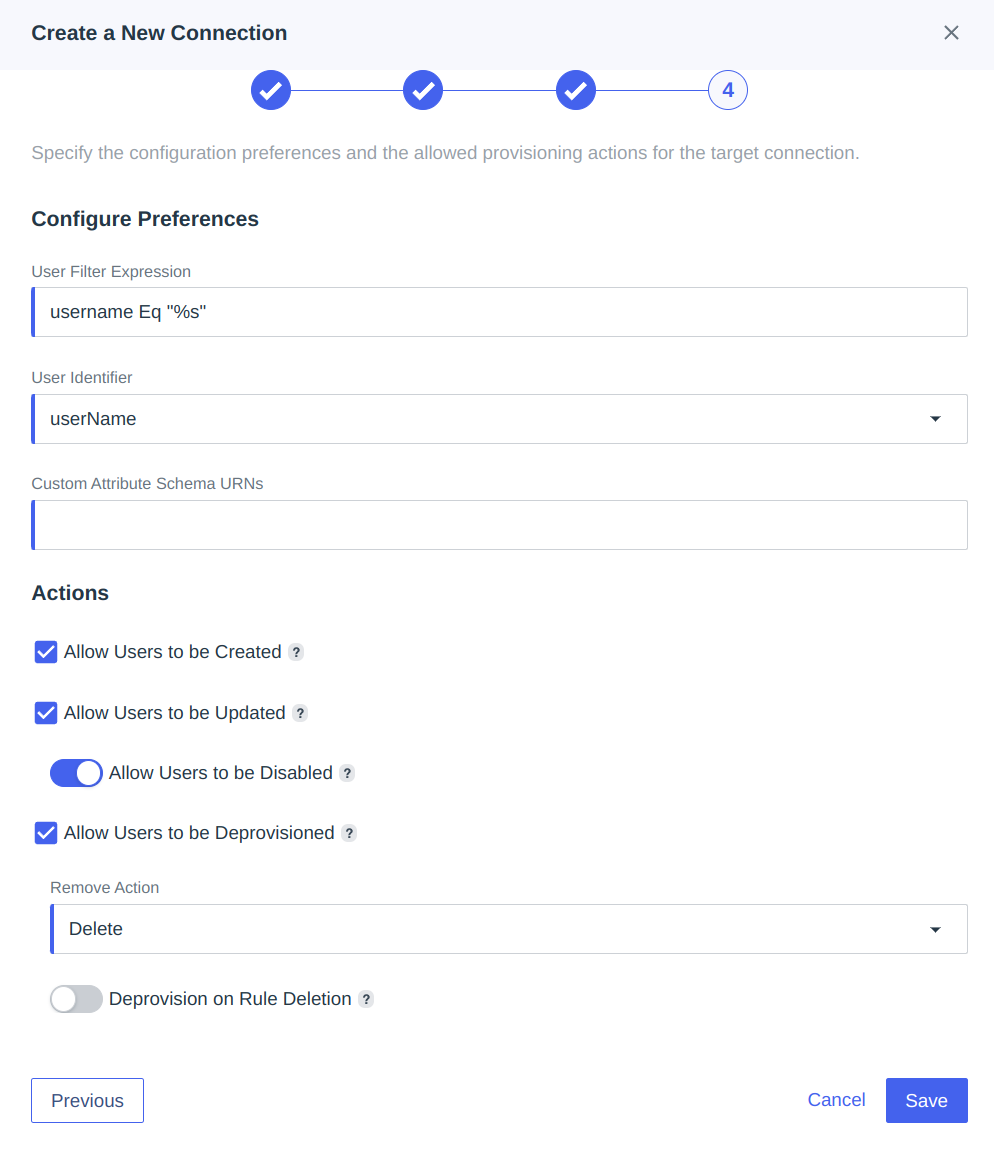
- Check that field on next step filled like an screenshot
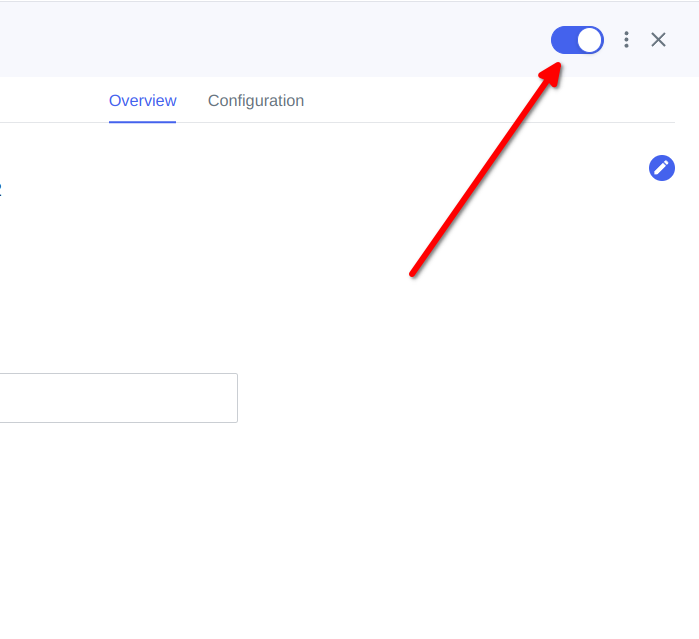
- Click Save and Enable your new connection:
- Return back to Integrations->Provisioning and add
New Rule
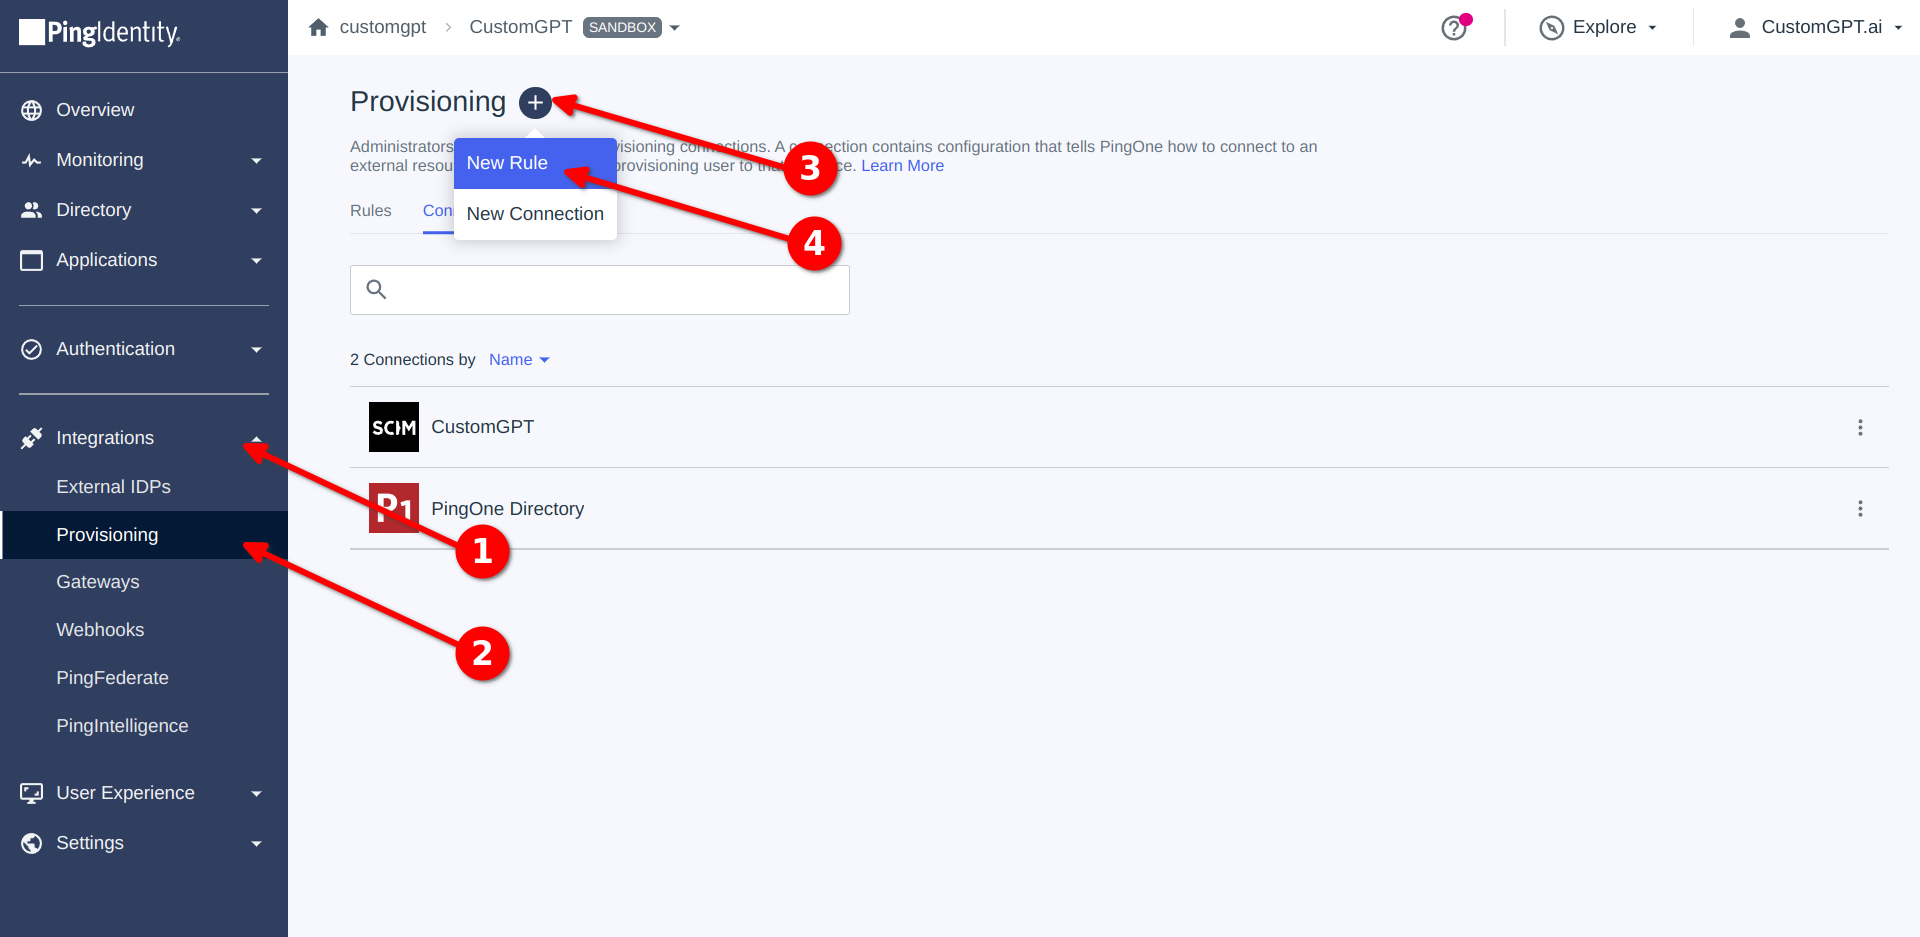
- Fill Name and click Create Rule.
- Select your connection and click Save.
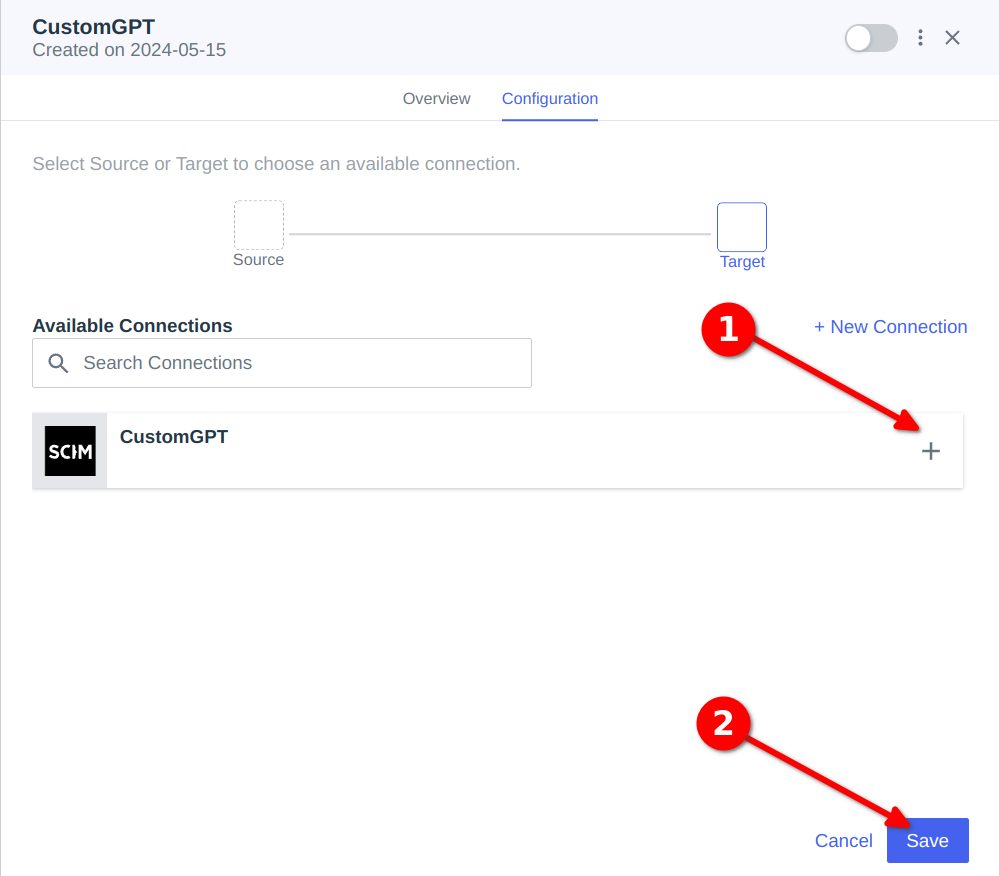
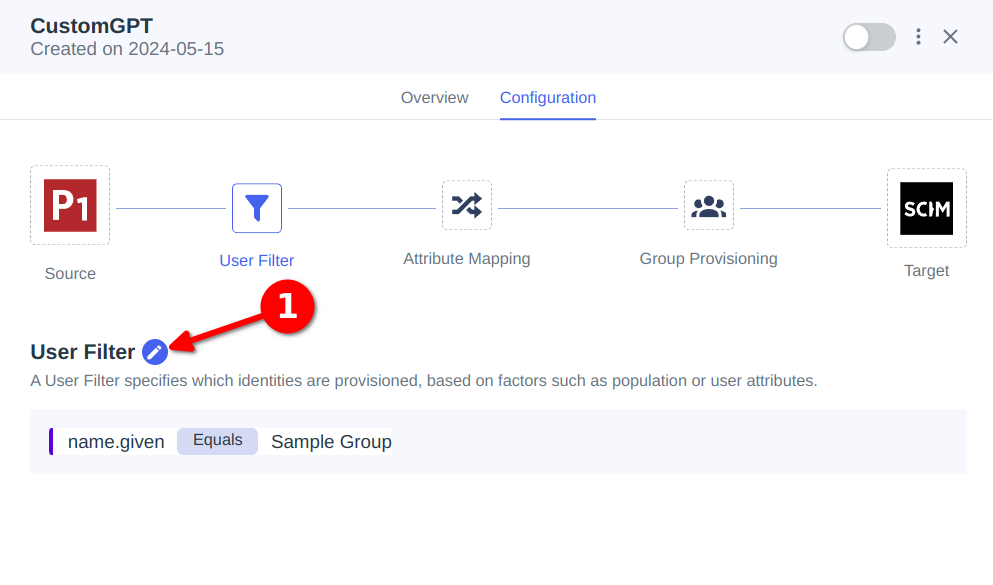
- Edit the user filters as per your organization’s requirements. User filter decides which users will get syncing to CustomGPT app.
NOTE:PingOne doesn't support wildcards for user filters.
This is required step, without filters PingOne wouldn’t send requests via SCIM to CustomGPT.
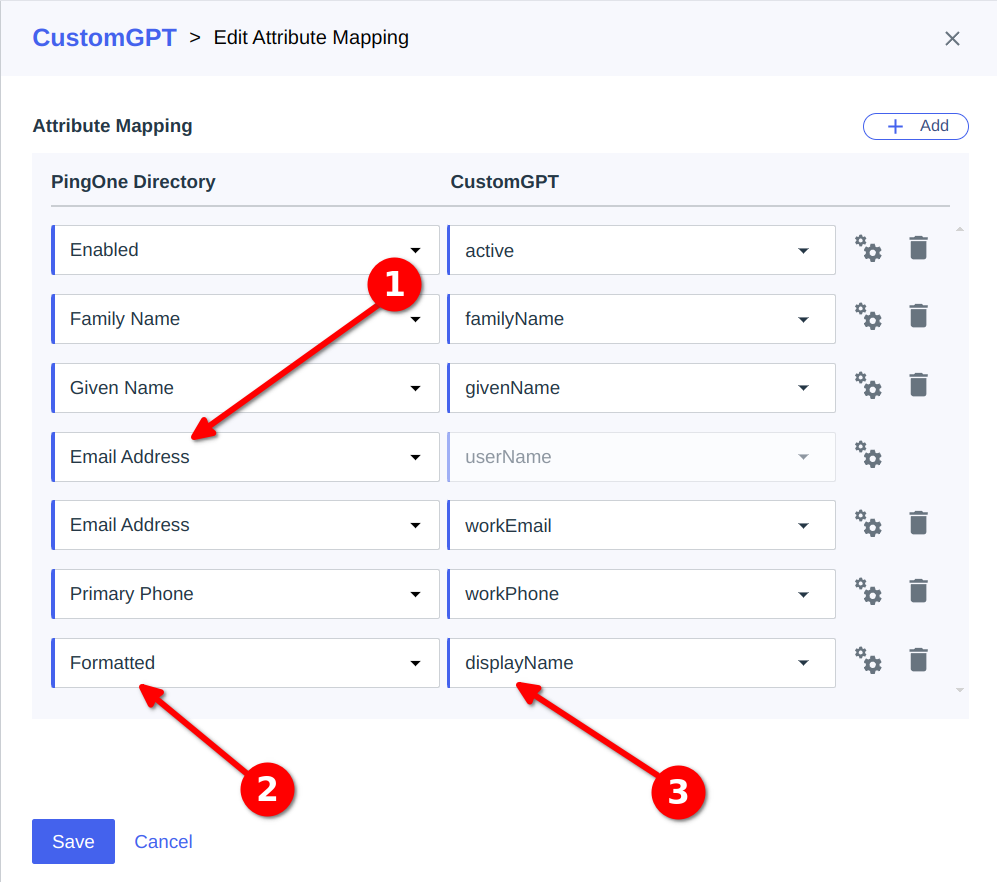
- Click on Edit icon new Attribute Mapping and change Username -> userName to Email Address -> userName add new mapping Formatted -> displayName
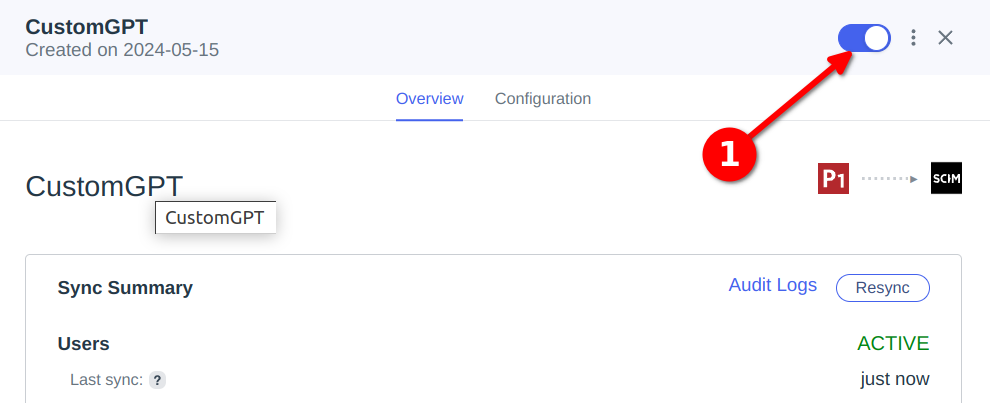
- Enable the SCIM integration.
Updated 8 months ago
