SSO setup with Okta
This step-by-step guide explains how to configure Single Sign-On (SSO) and SCIM provisioning between CustomGPT.ai and Okta.
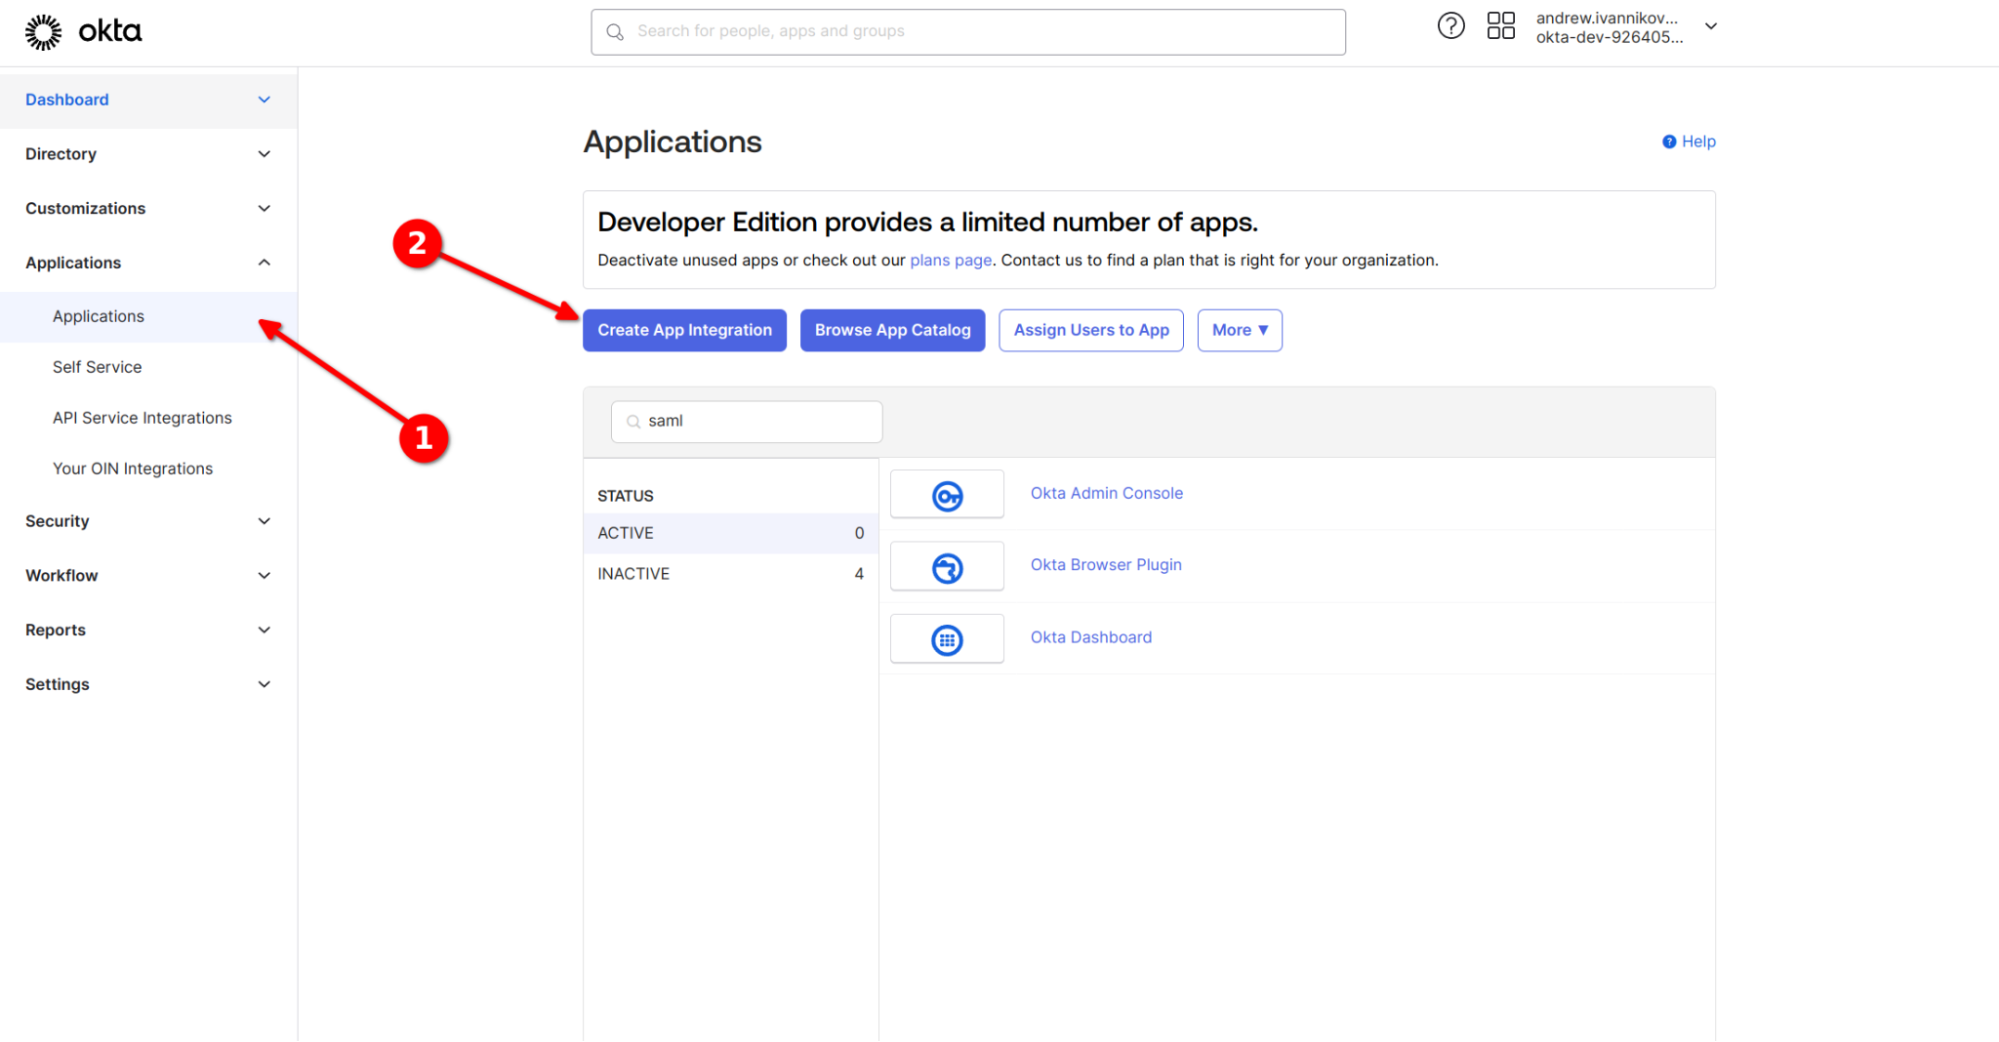
- Sign in to your Okta Admin Console.
- Go to Applications and click Create App Integration.
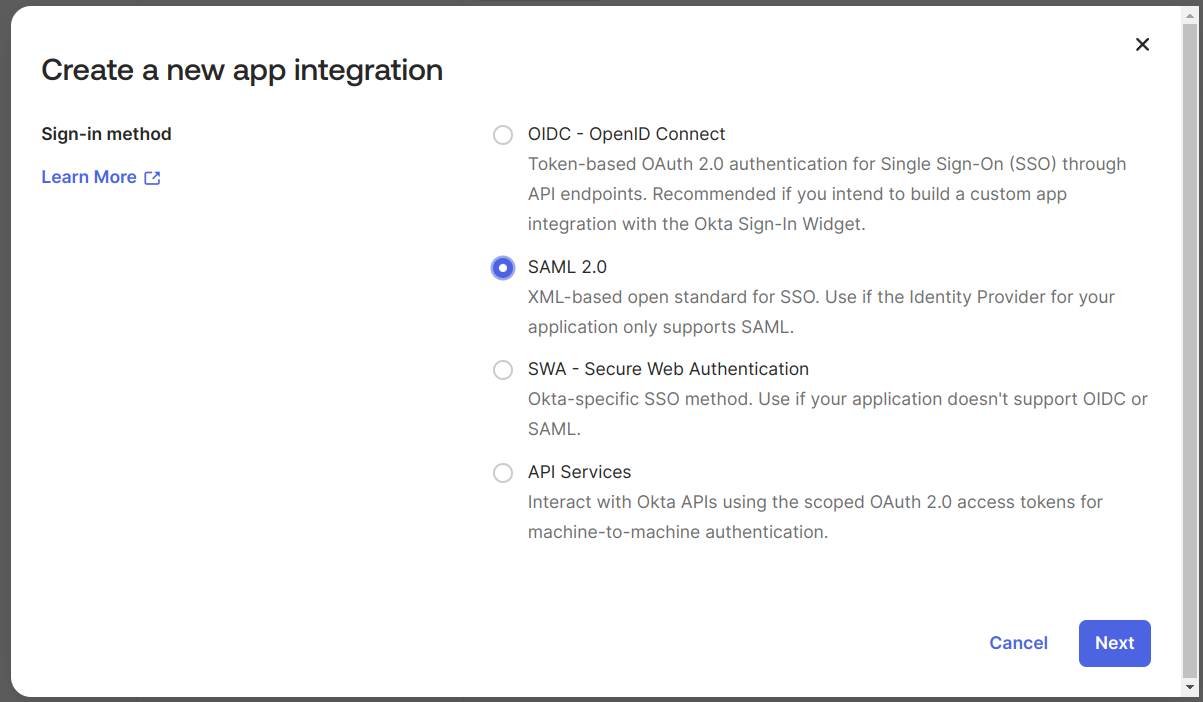
- Select SAML 2.0 and click Next.
- Enter an app name and click Next.
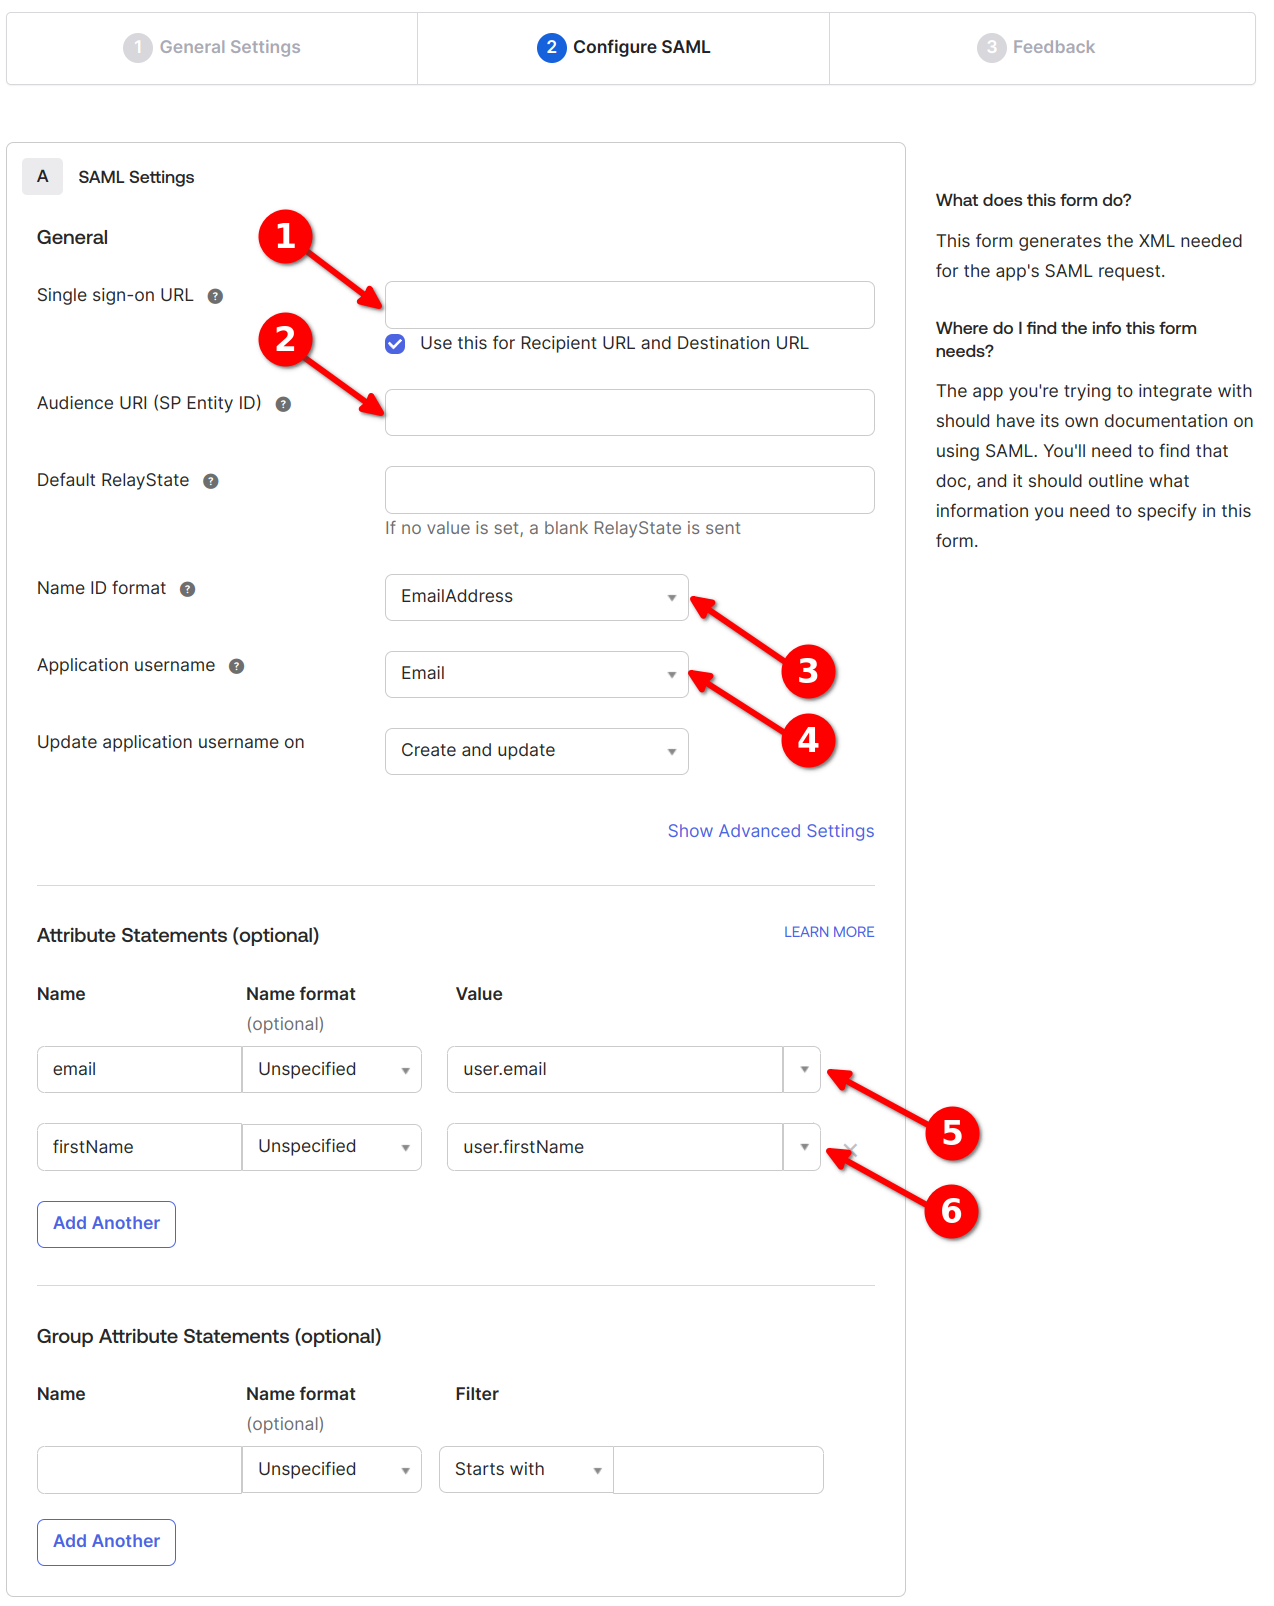
- In the SAML settings form, fill in the following: Fill form as on screenshot where (1) and (2) are ACS and EntityID values from CustomGPT SSO page, for (3) you should select EmailAddress, for (4) you should select Email, for (5) you should use values email, Unspecified and user.email, and for (6) you should use values firstName, Unspecified, user.firstName.
- Click Next, then click Finish.
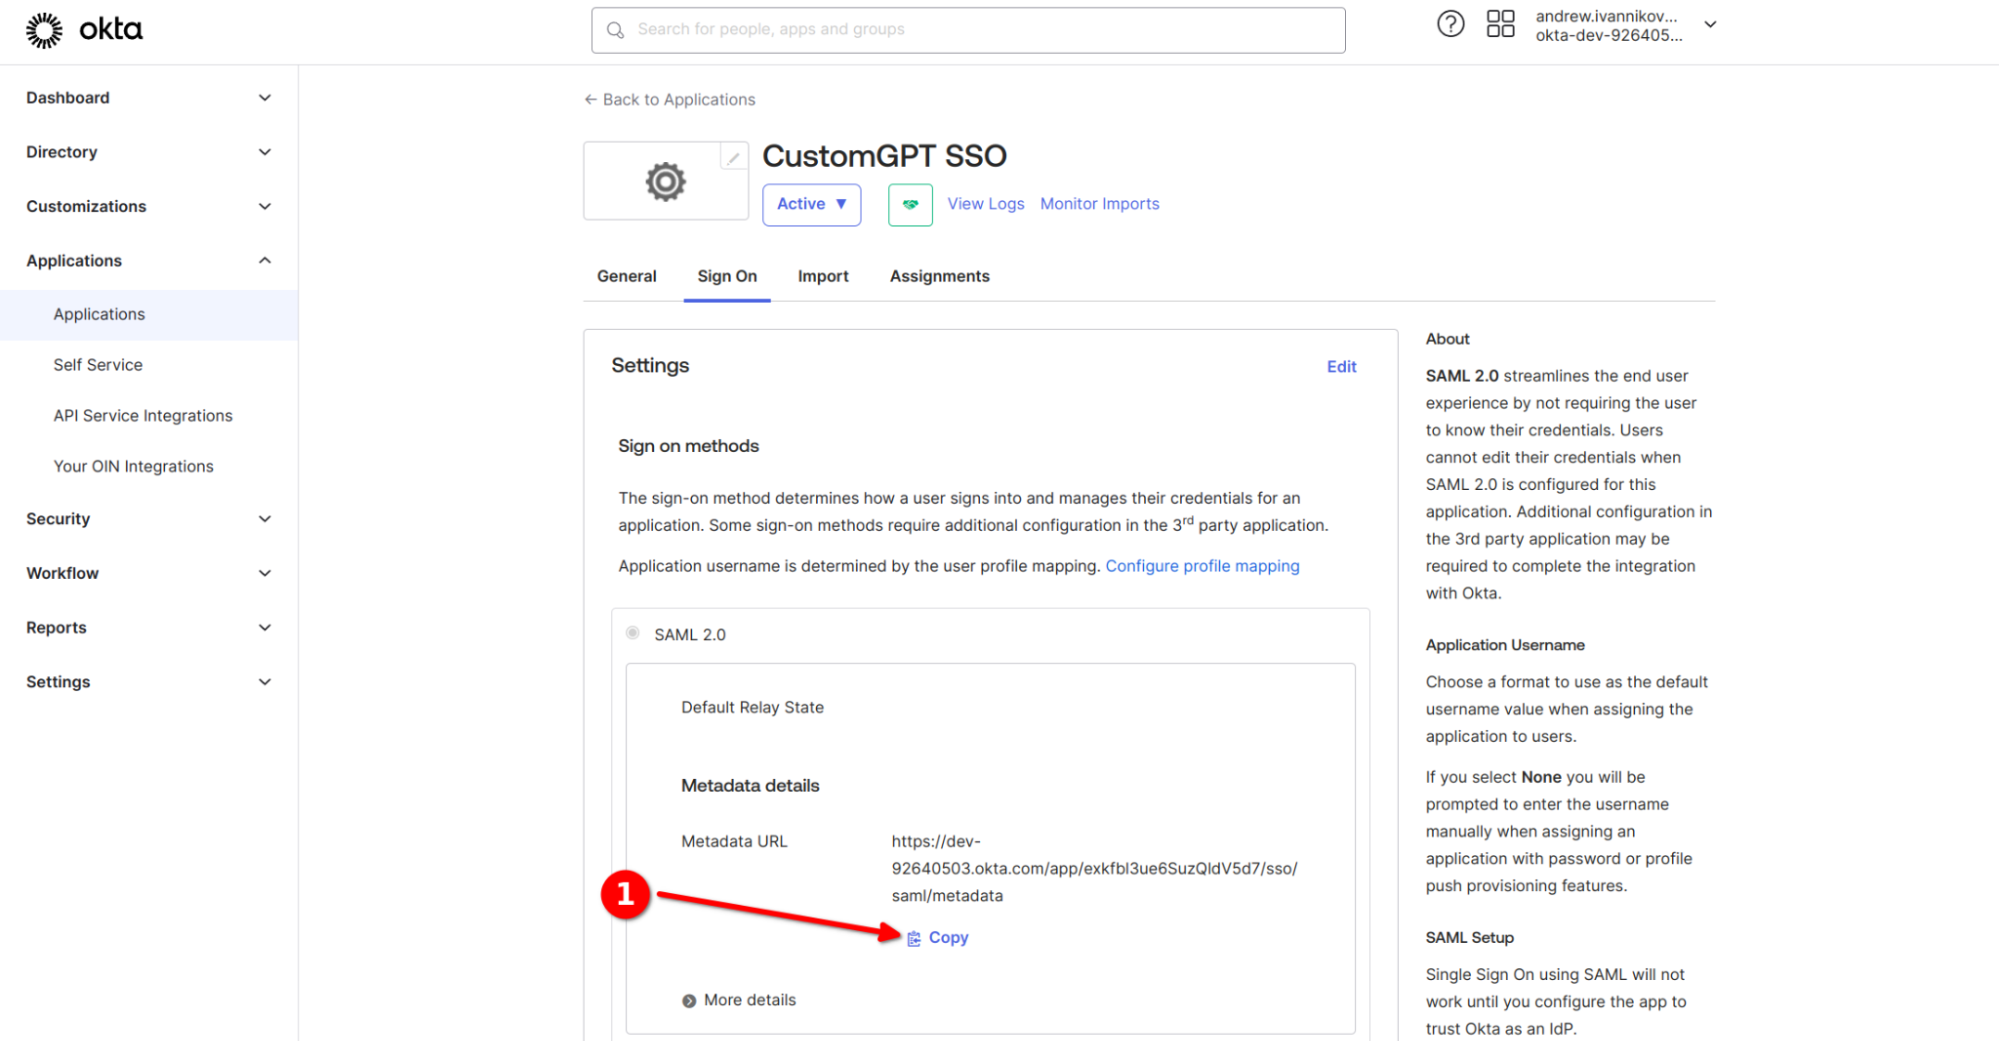
- Copy the metadata URL from Okta.
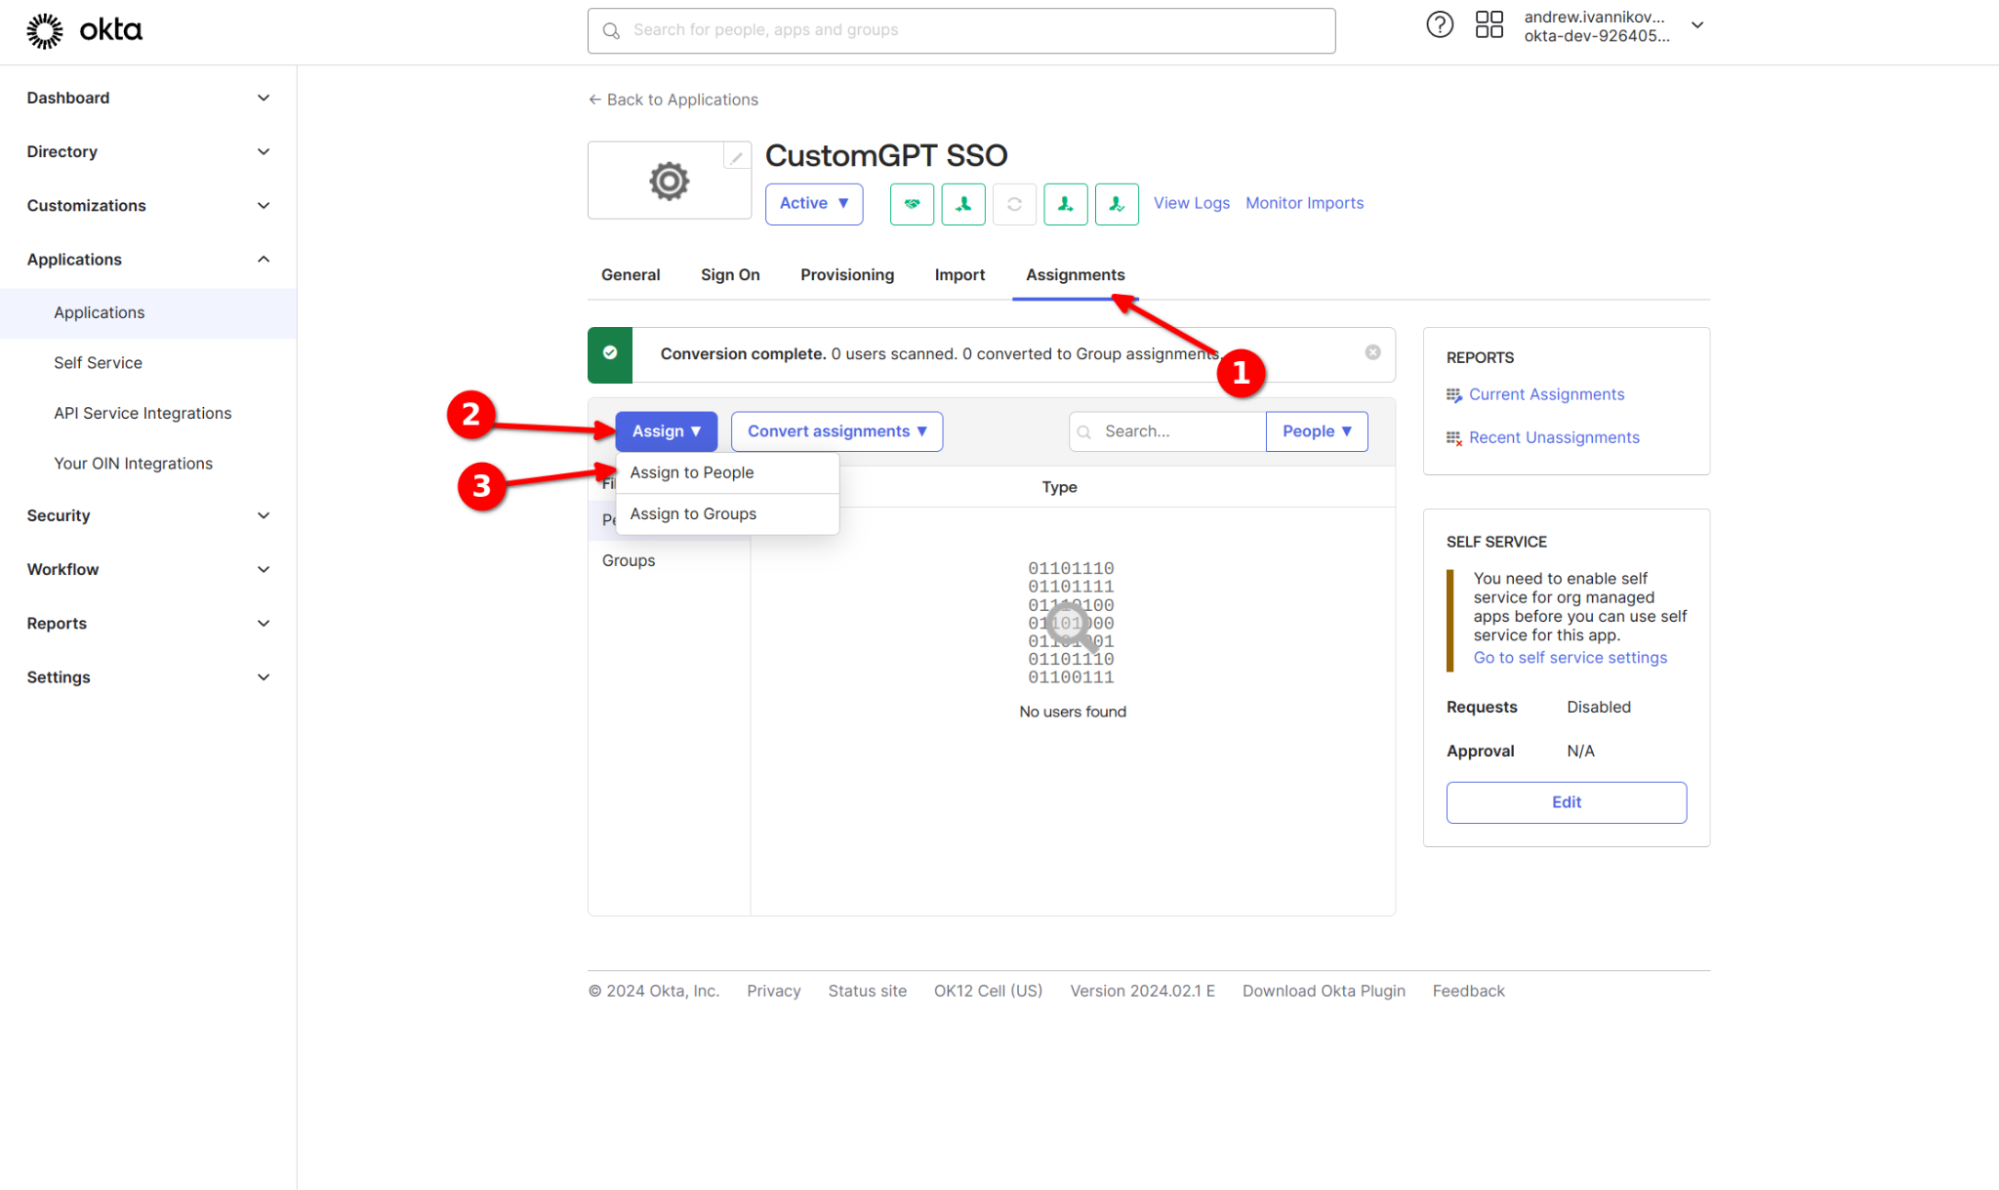
- Go to Assignments Tab and Assign users from your IdP to your new Application.
- Go to https://app.customgpt.ai, open My Profile > Single Sign On, and paste the metadata URL in the Load SAML2 Configuration section.
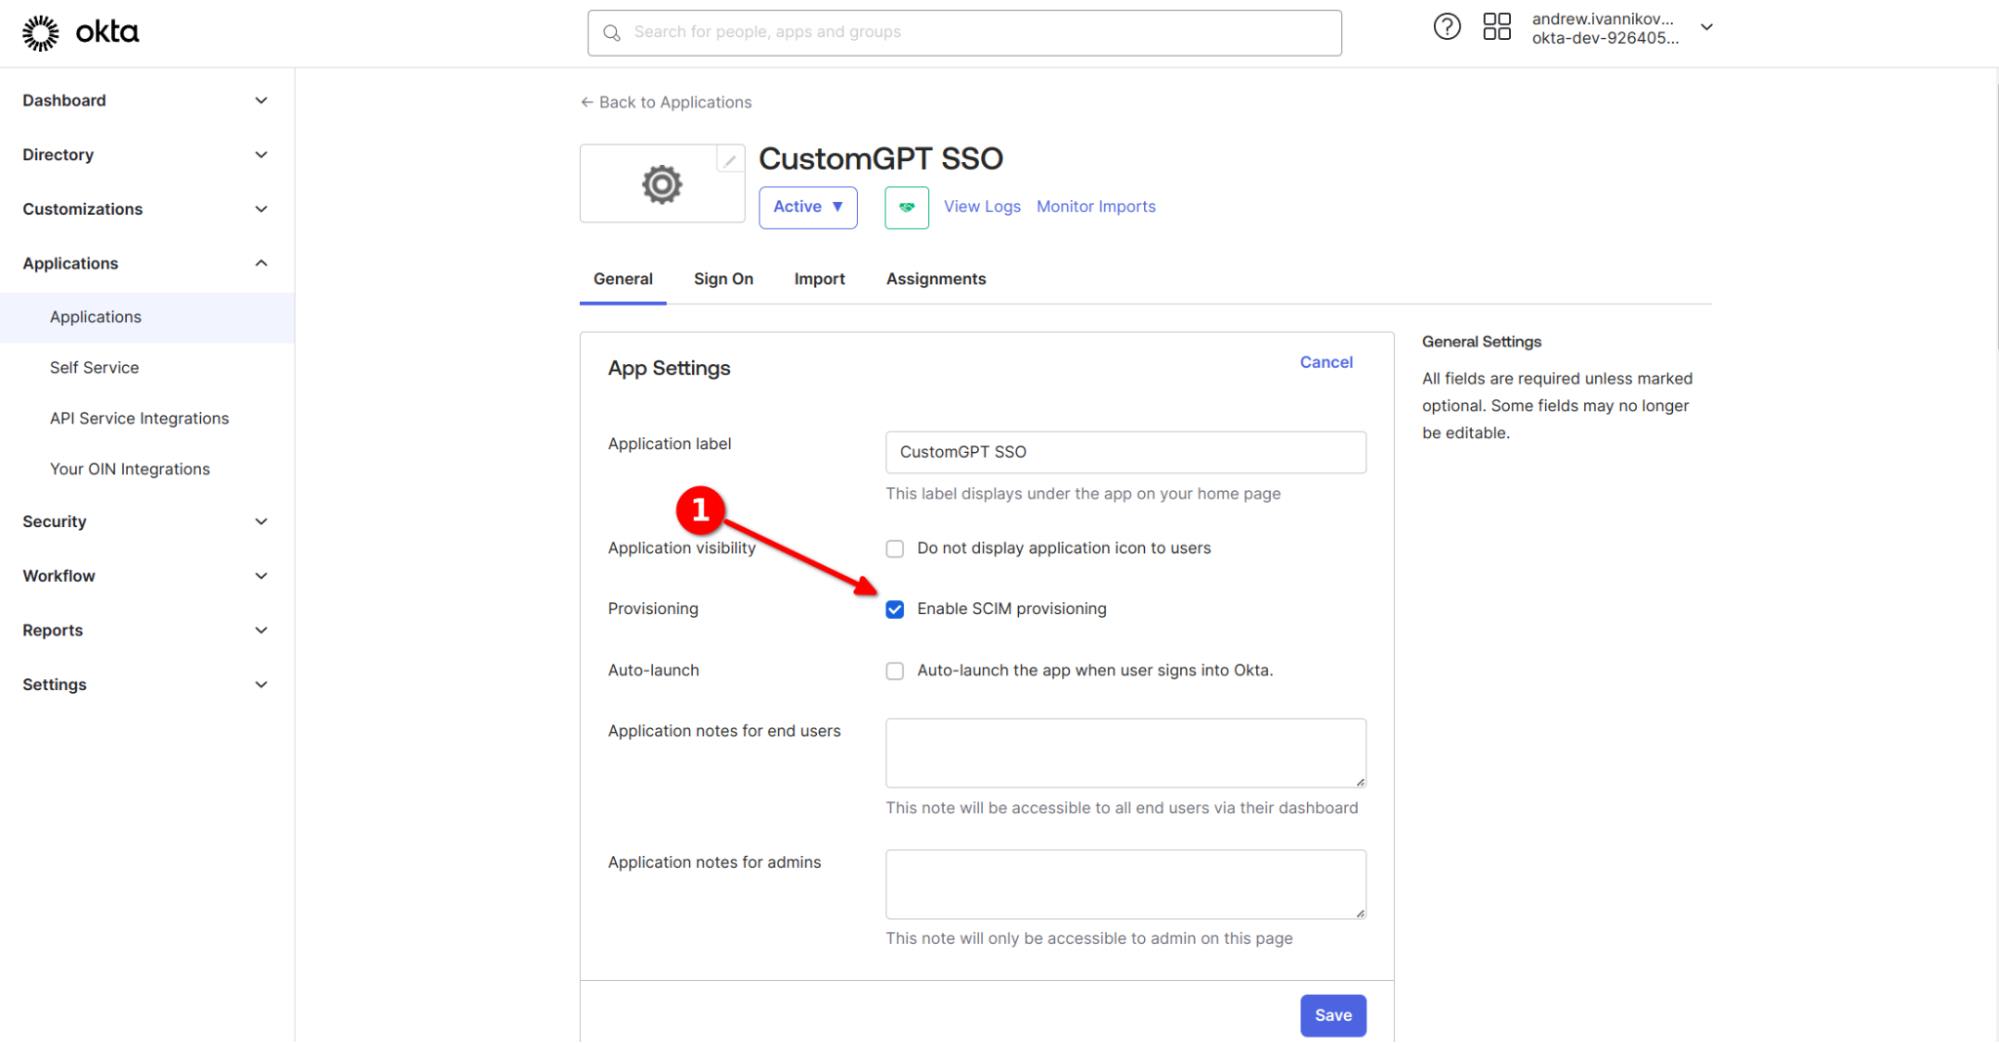
- Go to General tab in your Okta app, click on Edit and Enable SCIM
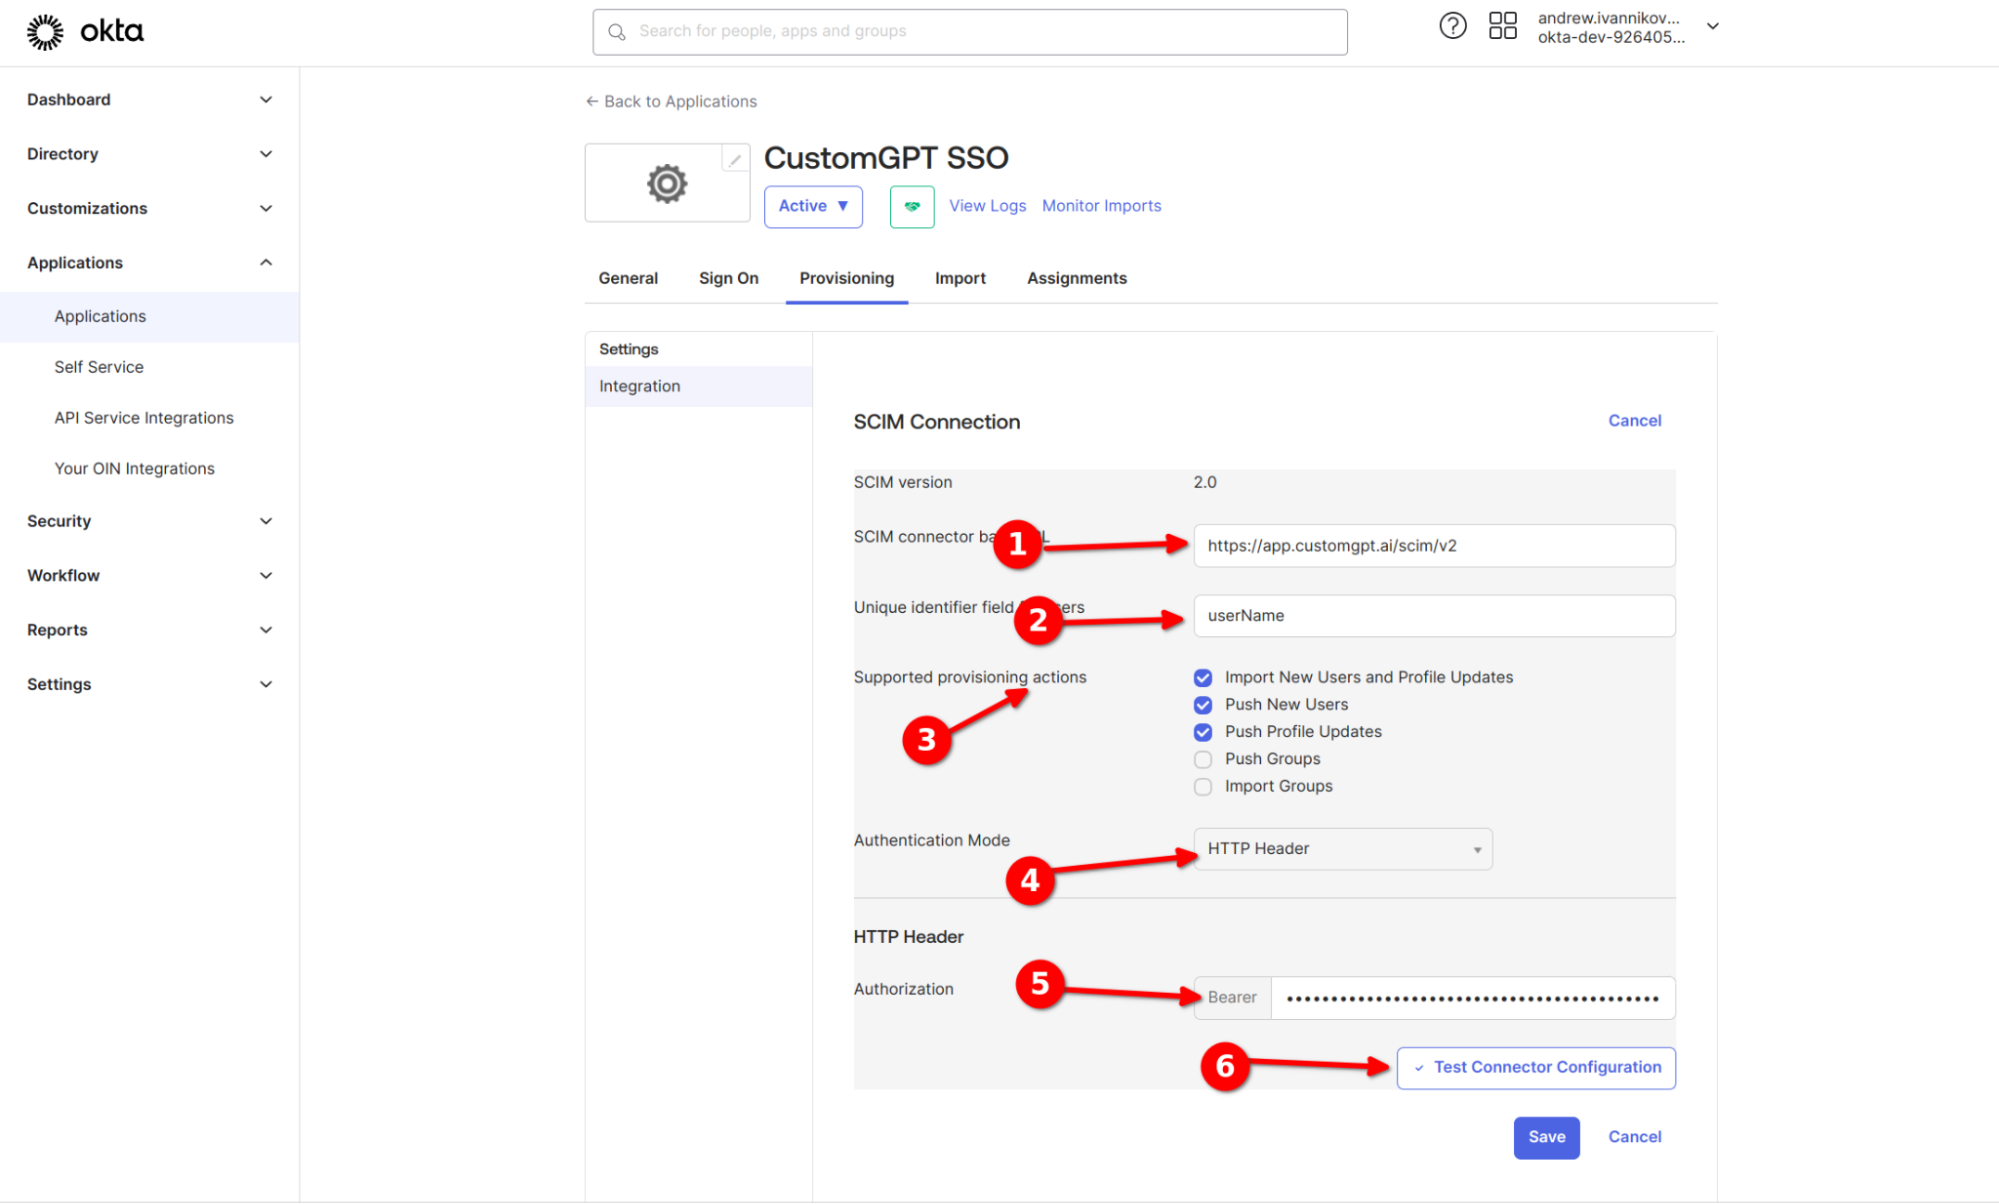
- Go to Provisioning tab and fill form with these values, like on the screenshot:
- https://app.customgpt.ai/scim/v2
- userName
Then paste your CustomGPT API token in Bearer field. Click on Test connection, if everything fine click on Save.
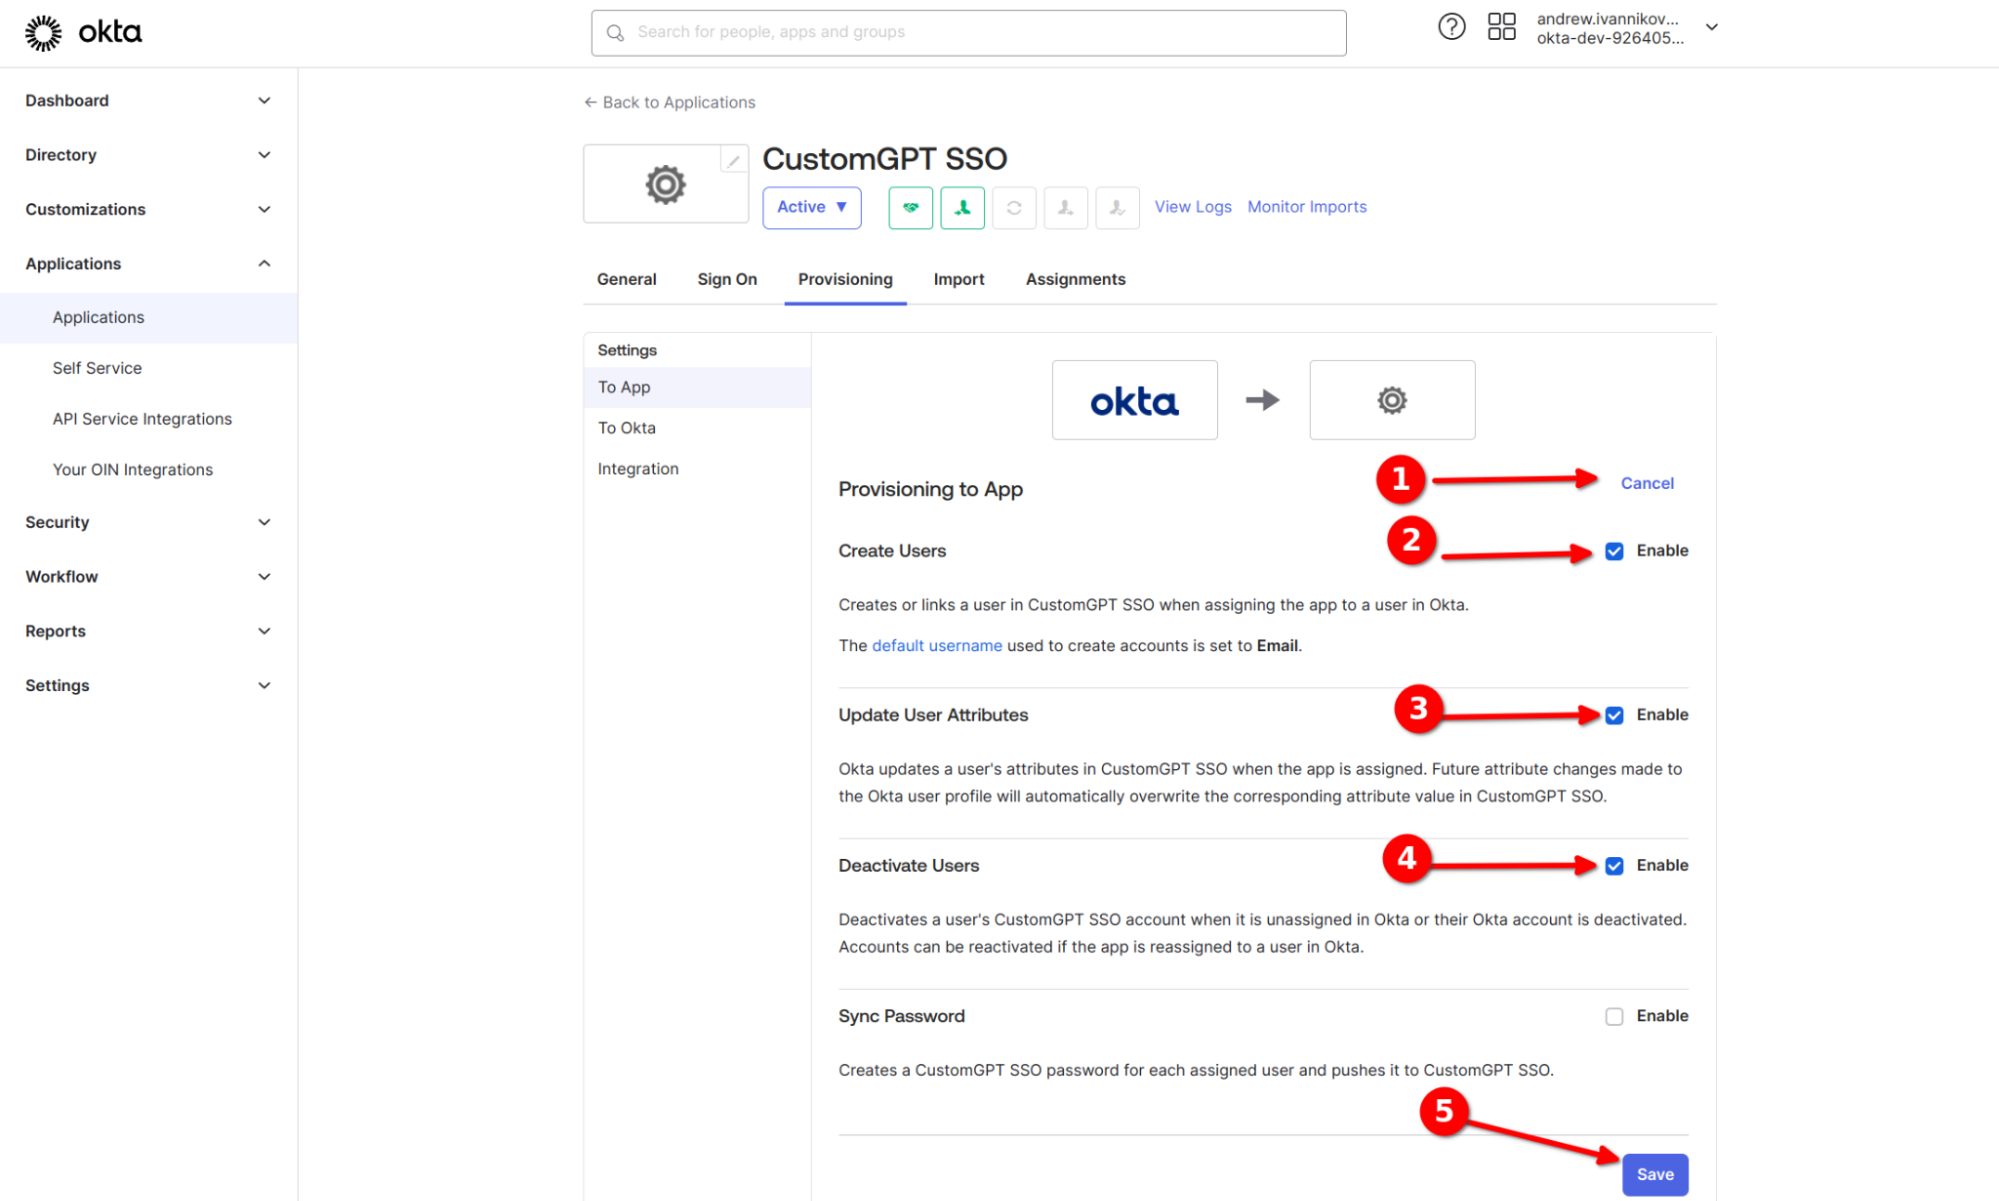
- Click on Edit and check Create, Update and Deactivate users. Than click on "Save".
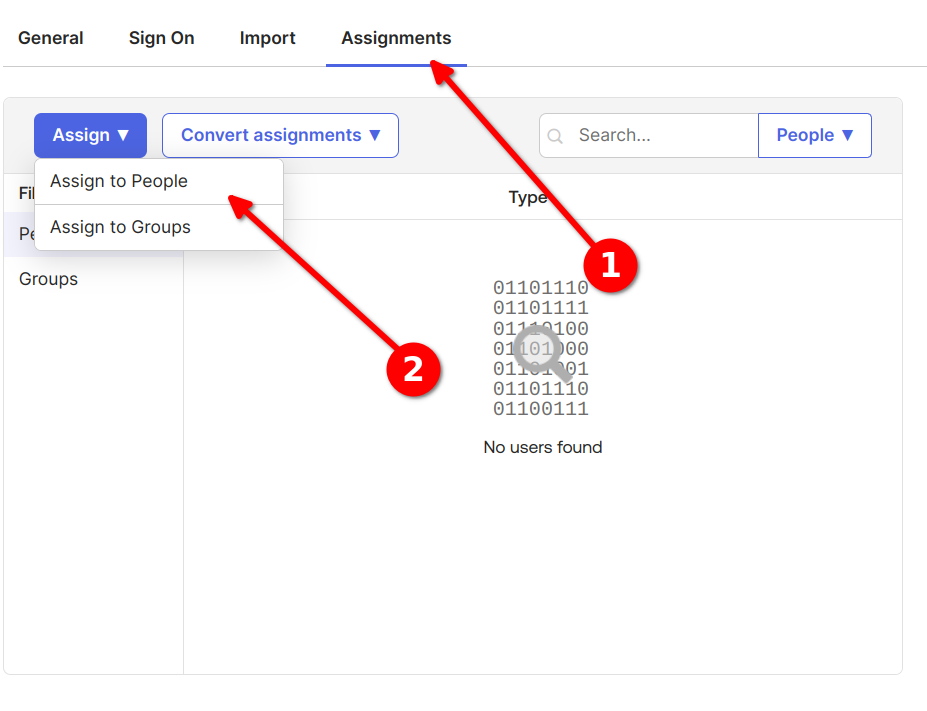
- Go to Assignments Tab and Assign users from your IdP to your new Application
Updated about 1 year ago
Did this page help you?