Edit metadata of your uploads
This step-by-step guide explains how to edit the metadata of your uploaded documents.
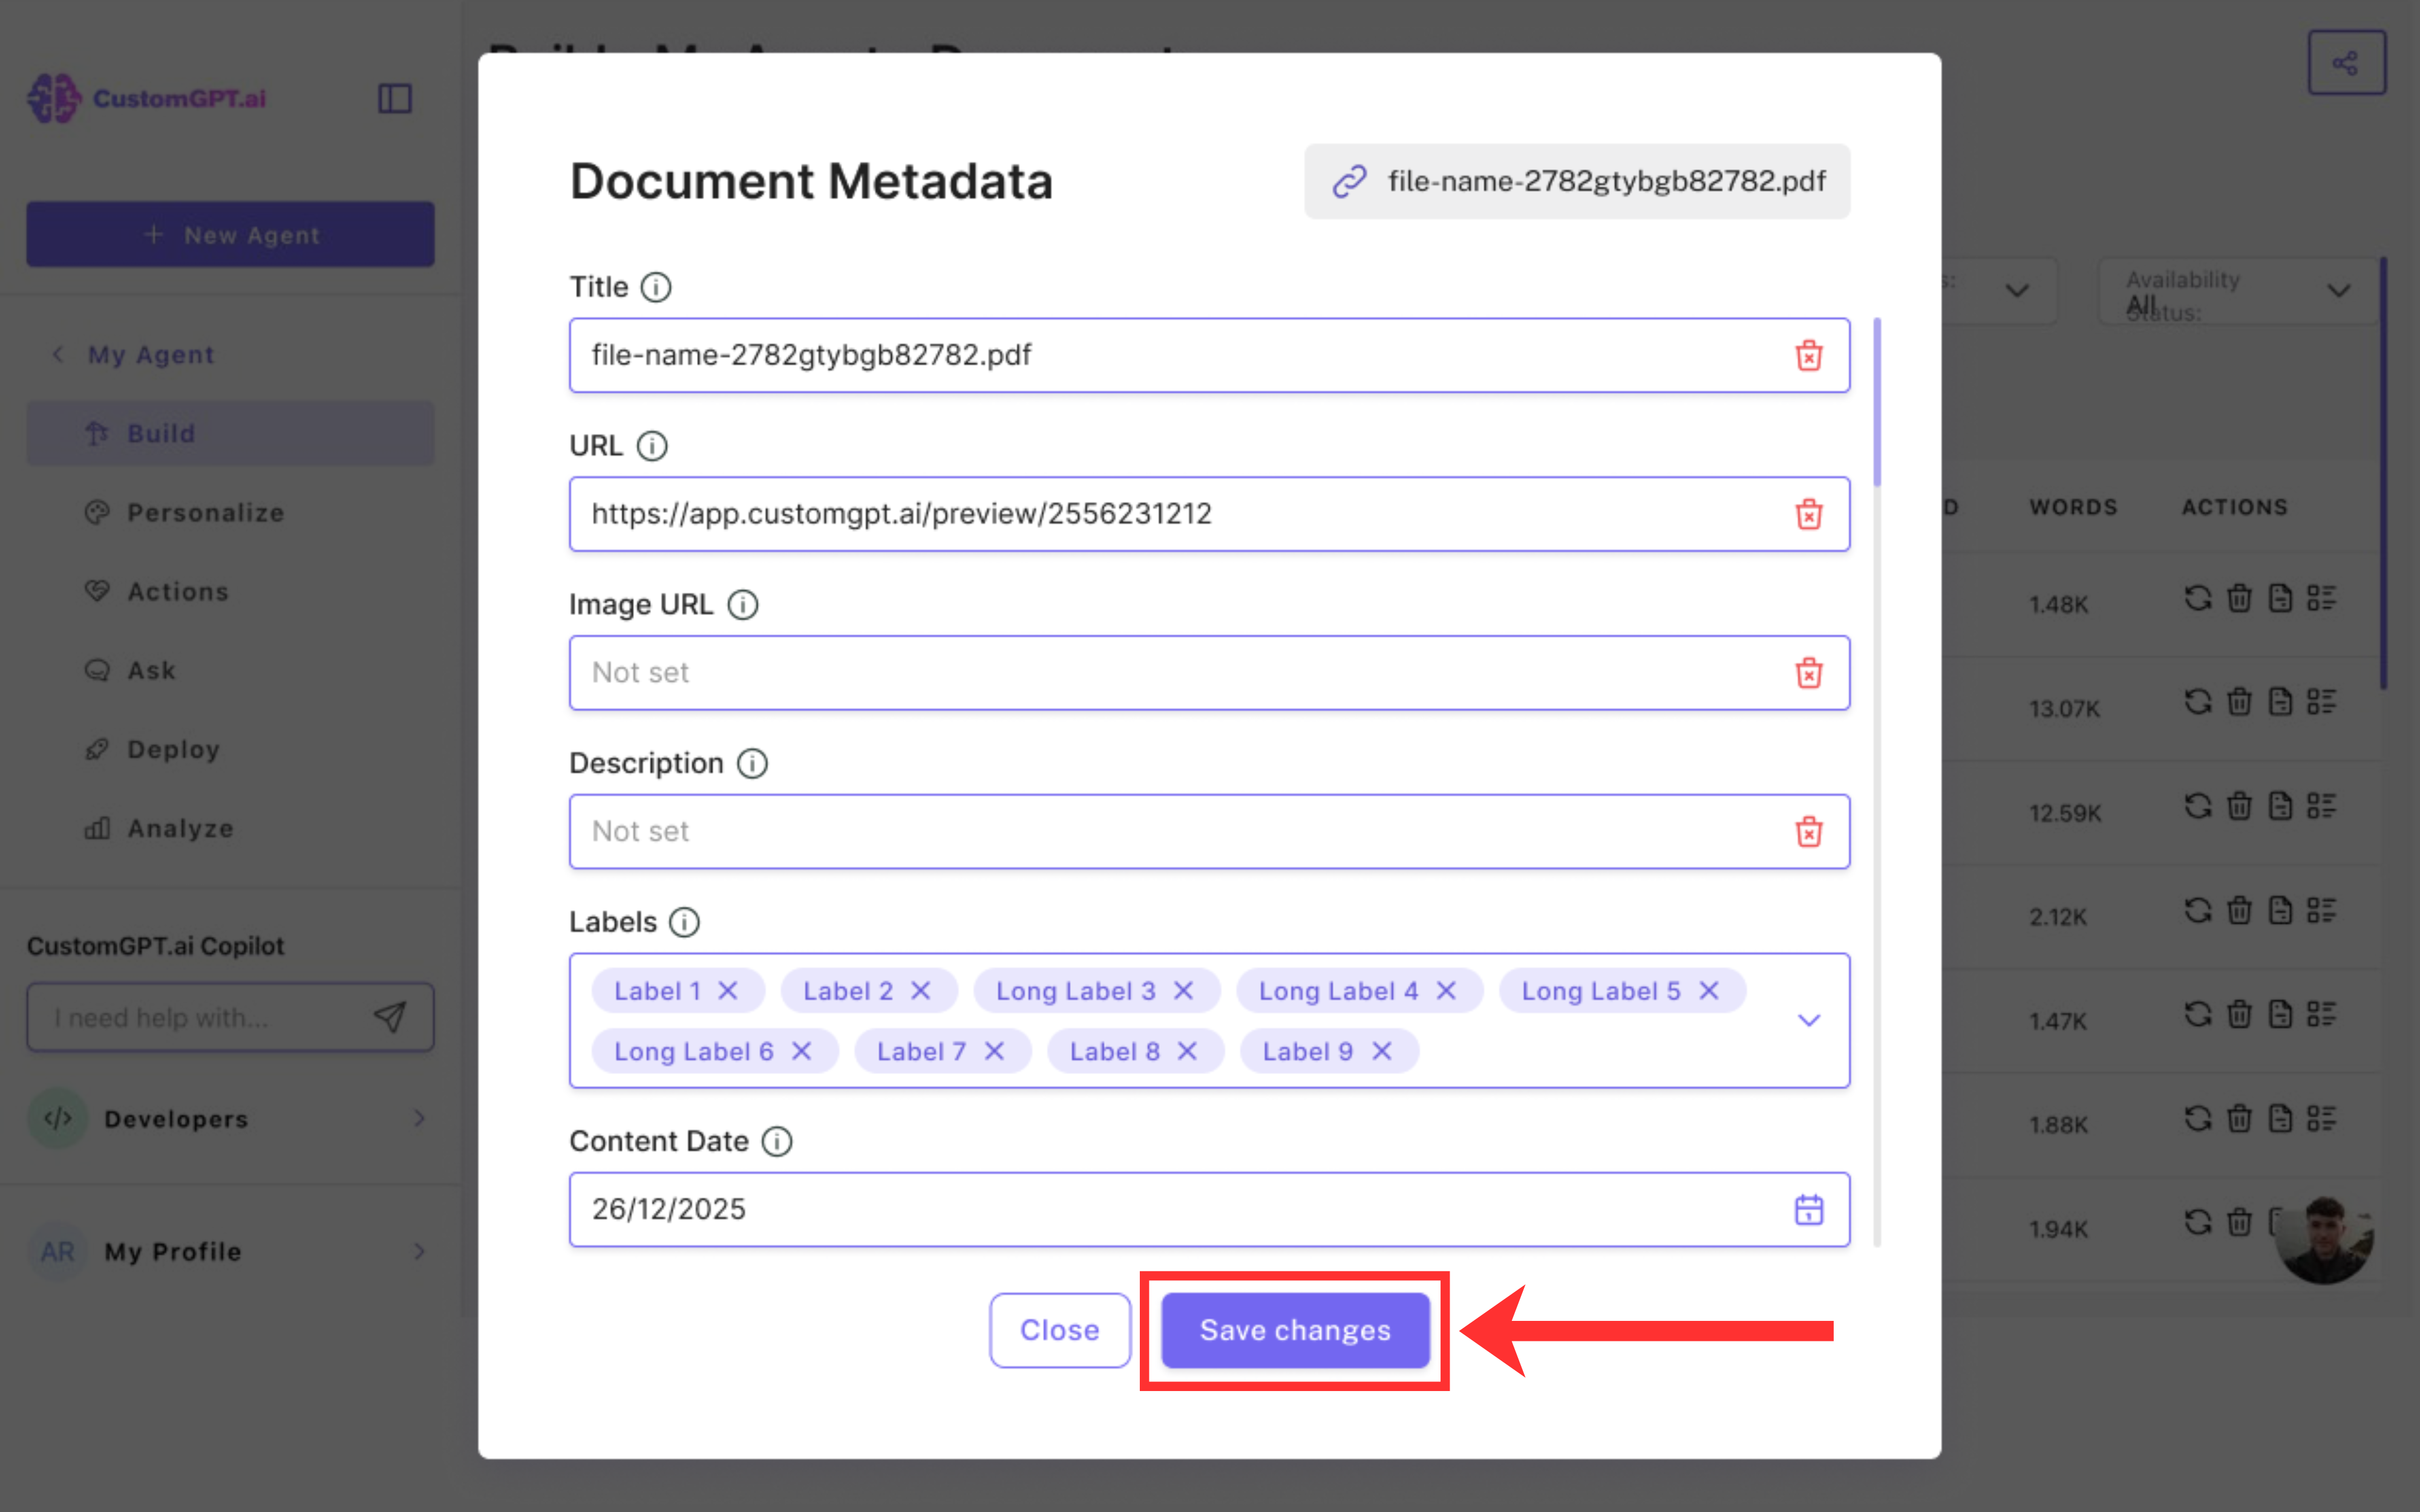
Edit Metadata
- Under Agents, click arrow for the agent whose uploads you want to edit.
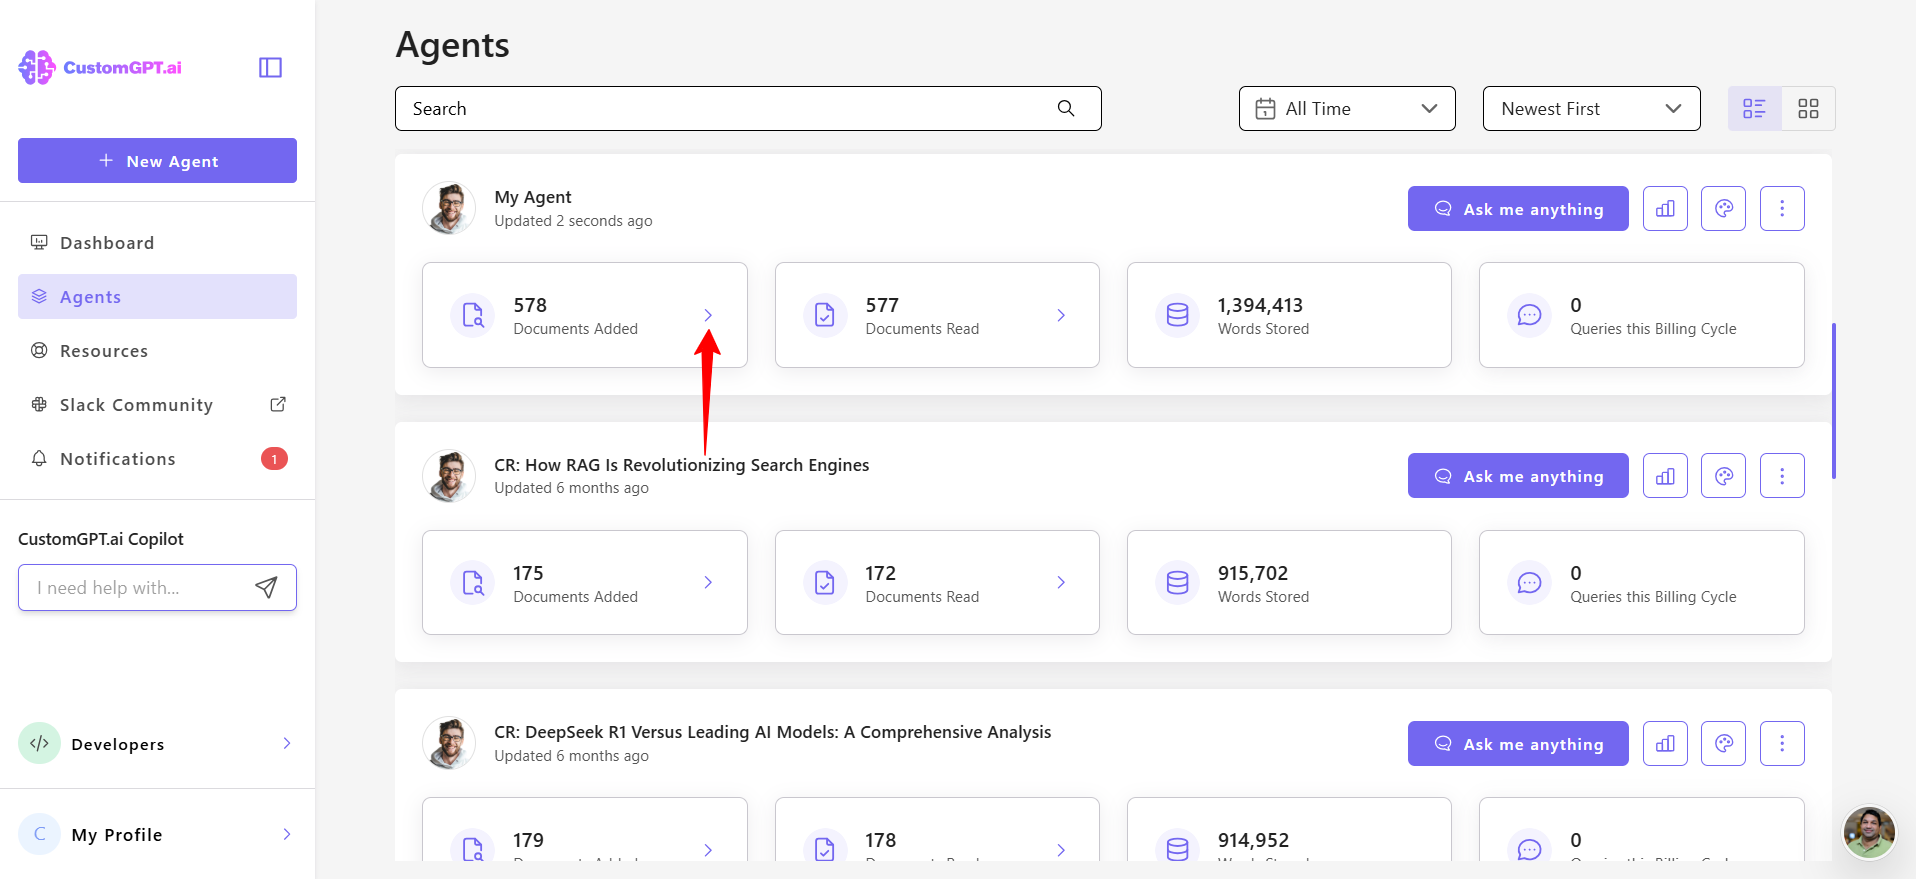
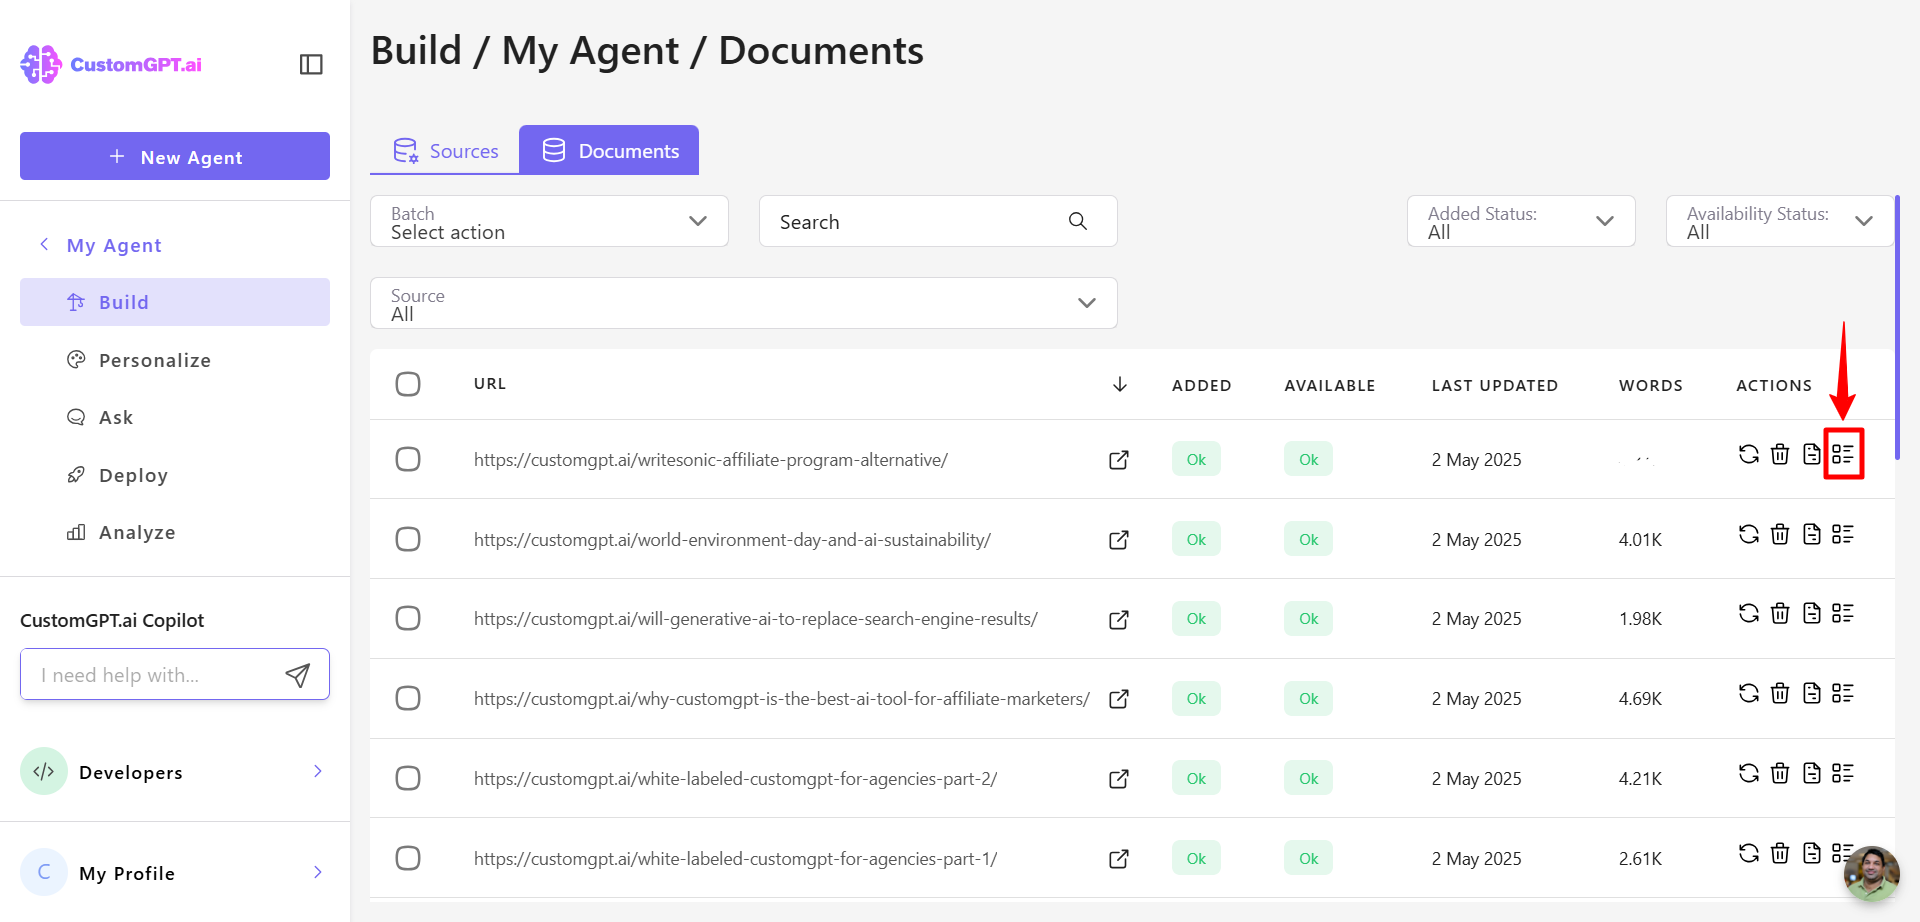
- Click the Metadata icon next to the file you want to update.
- The metadata modal will open.
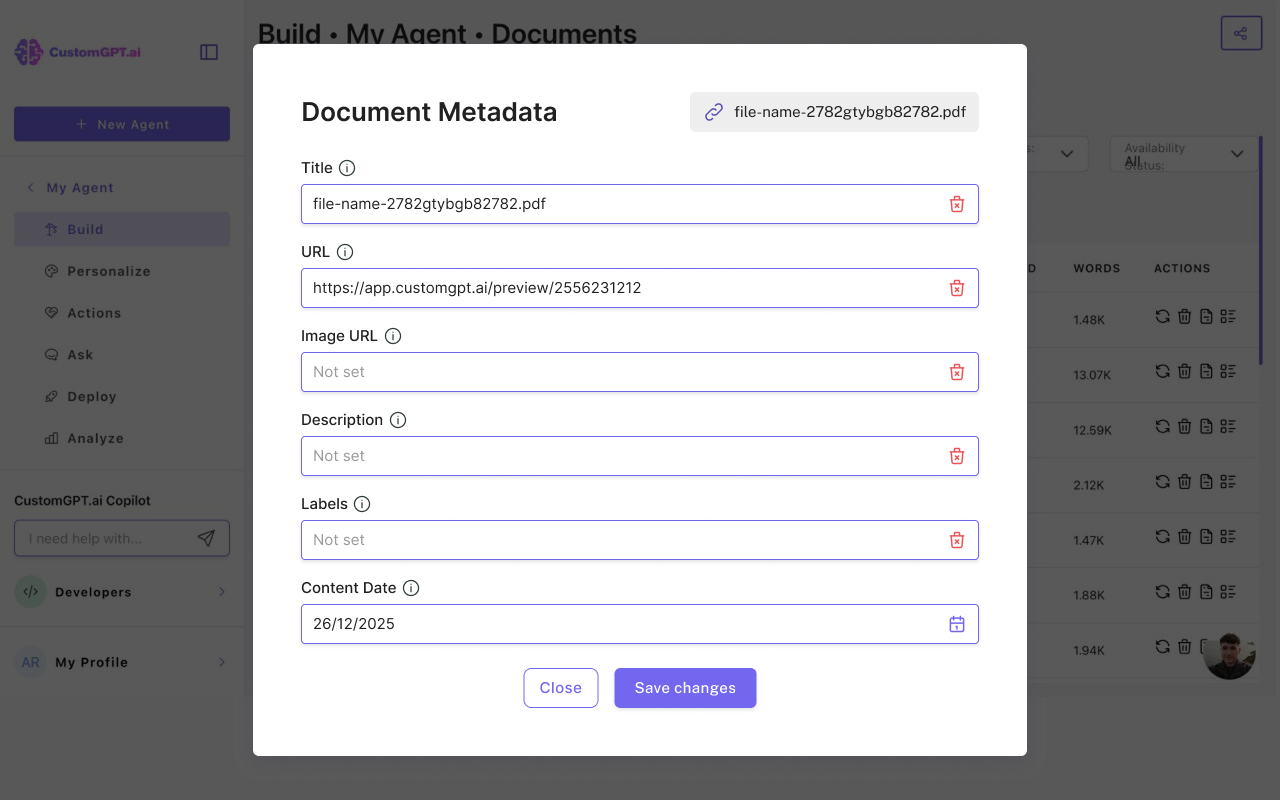
- Update the metadata as needed.
- Click Save changes to apply your changes.
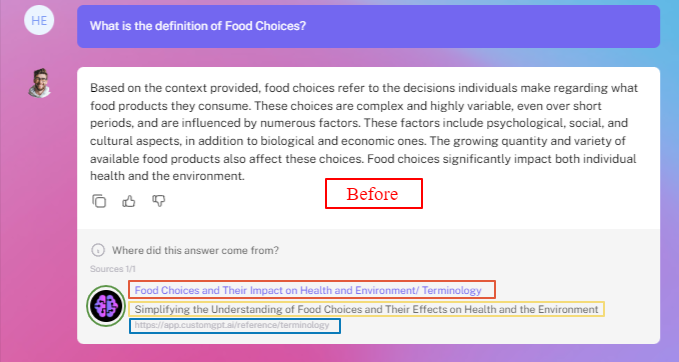
Example: Before and after
- Identify that the current metadata doesn’t match your desired presentation.
- Open the metadata editor to review the current settings.
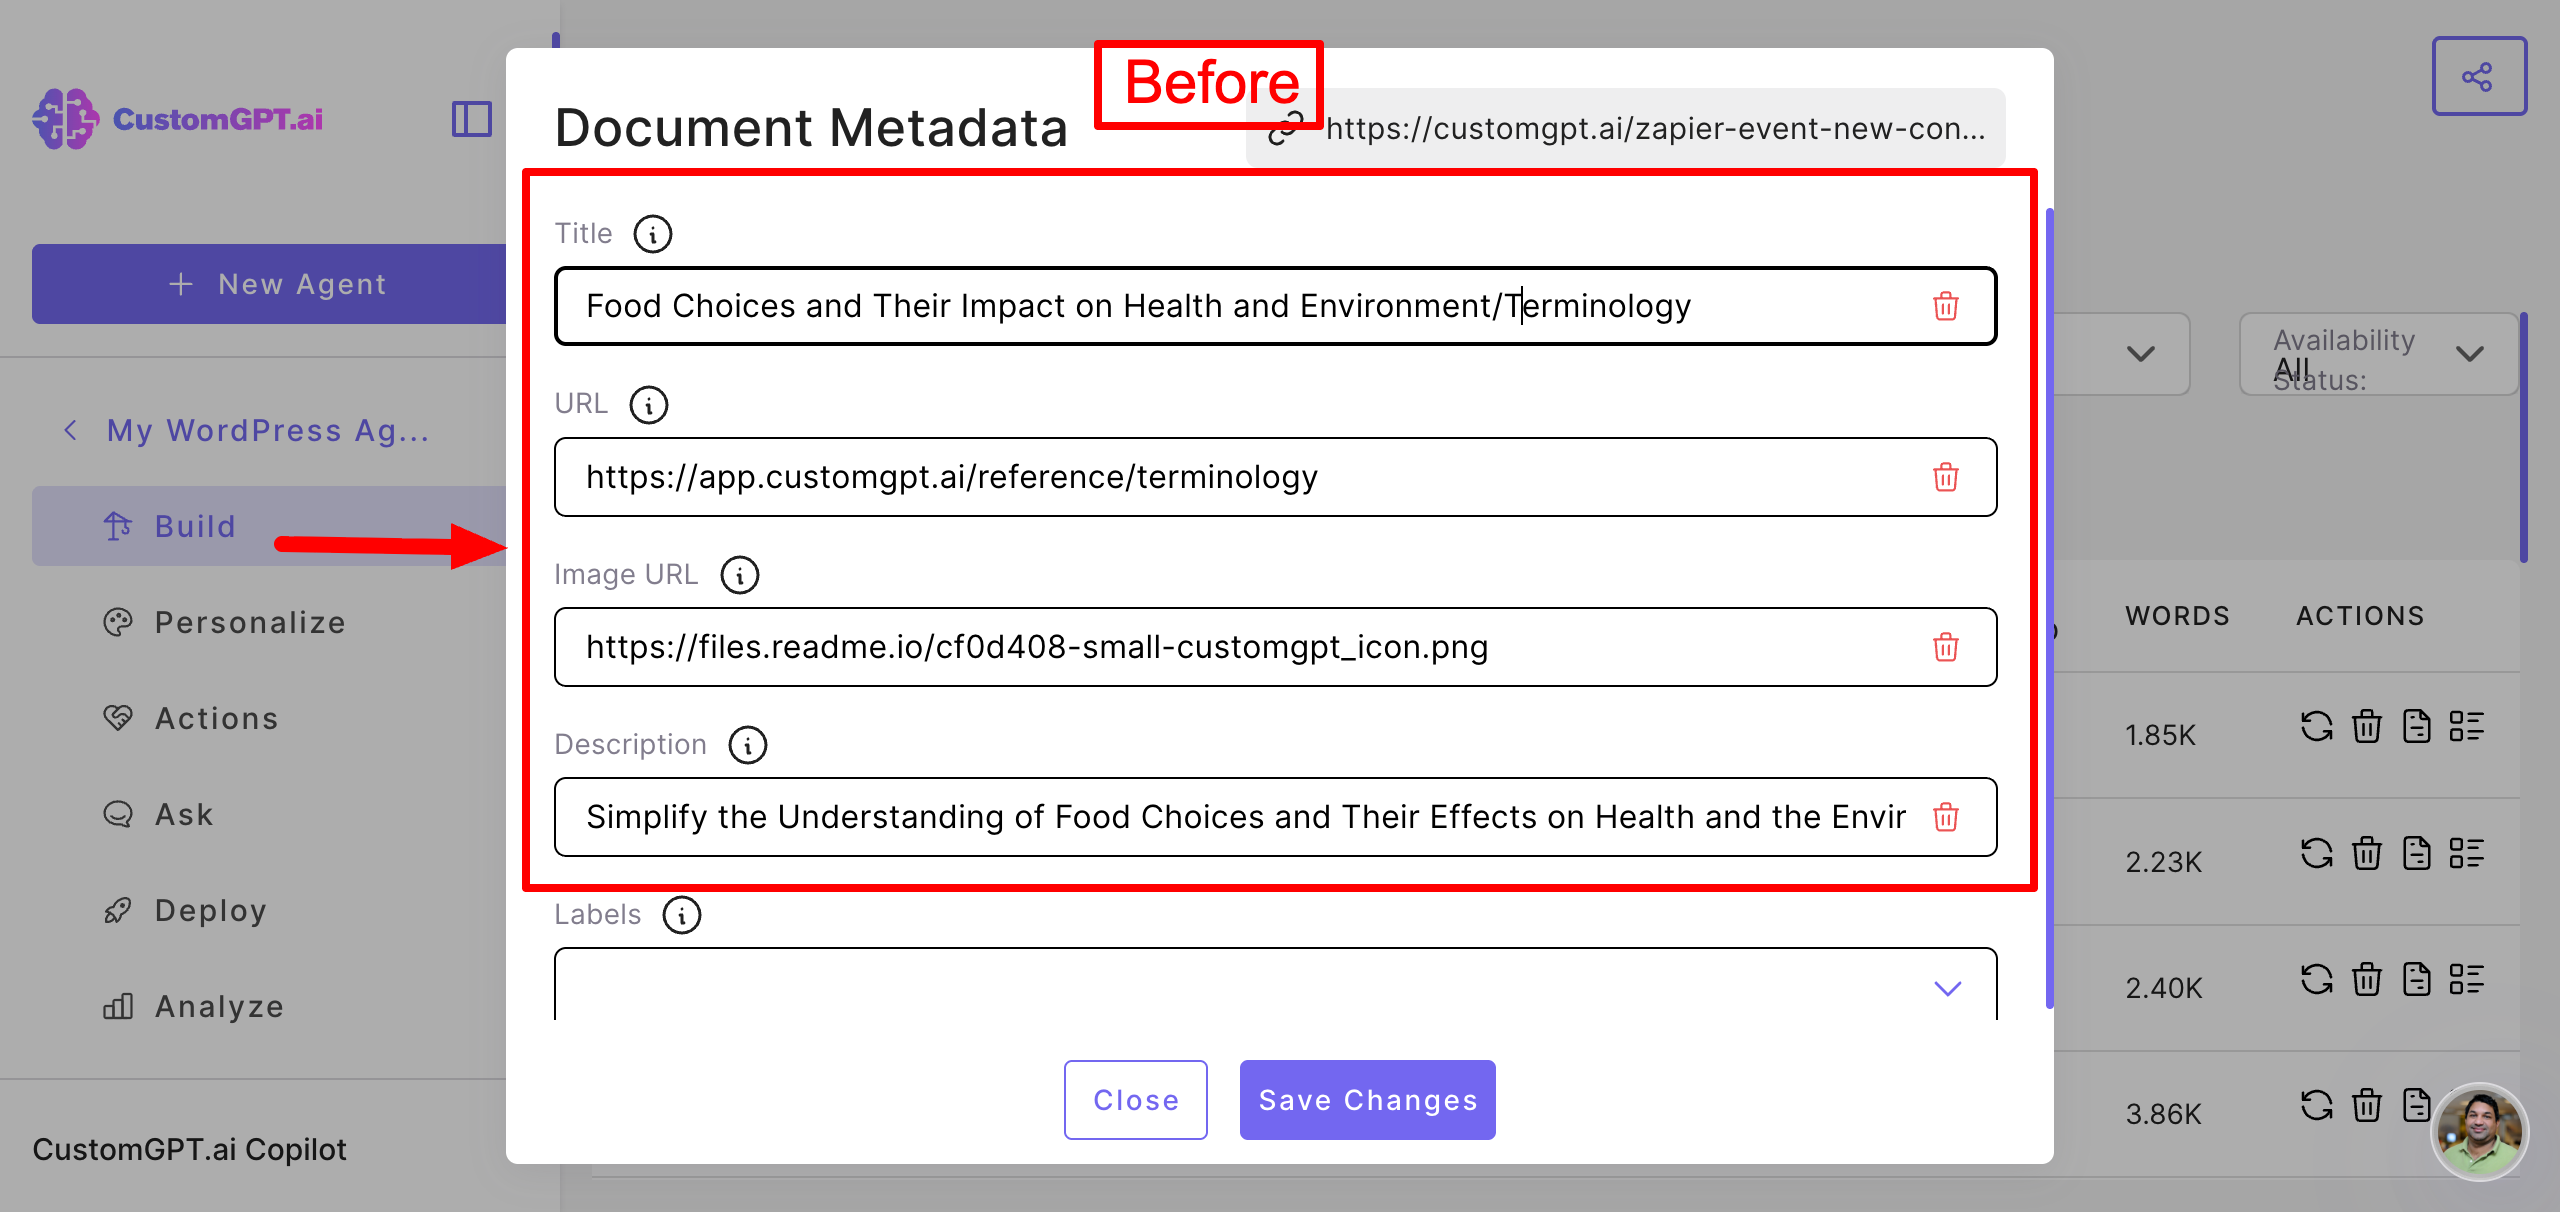
- Make and save changes:
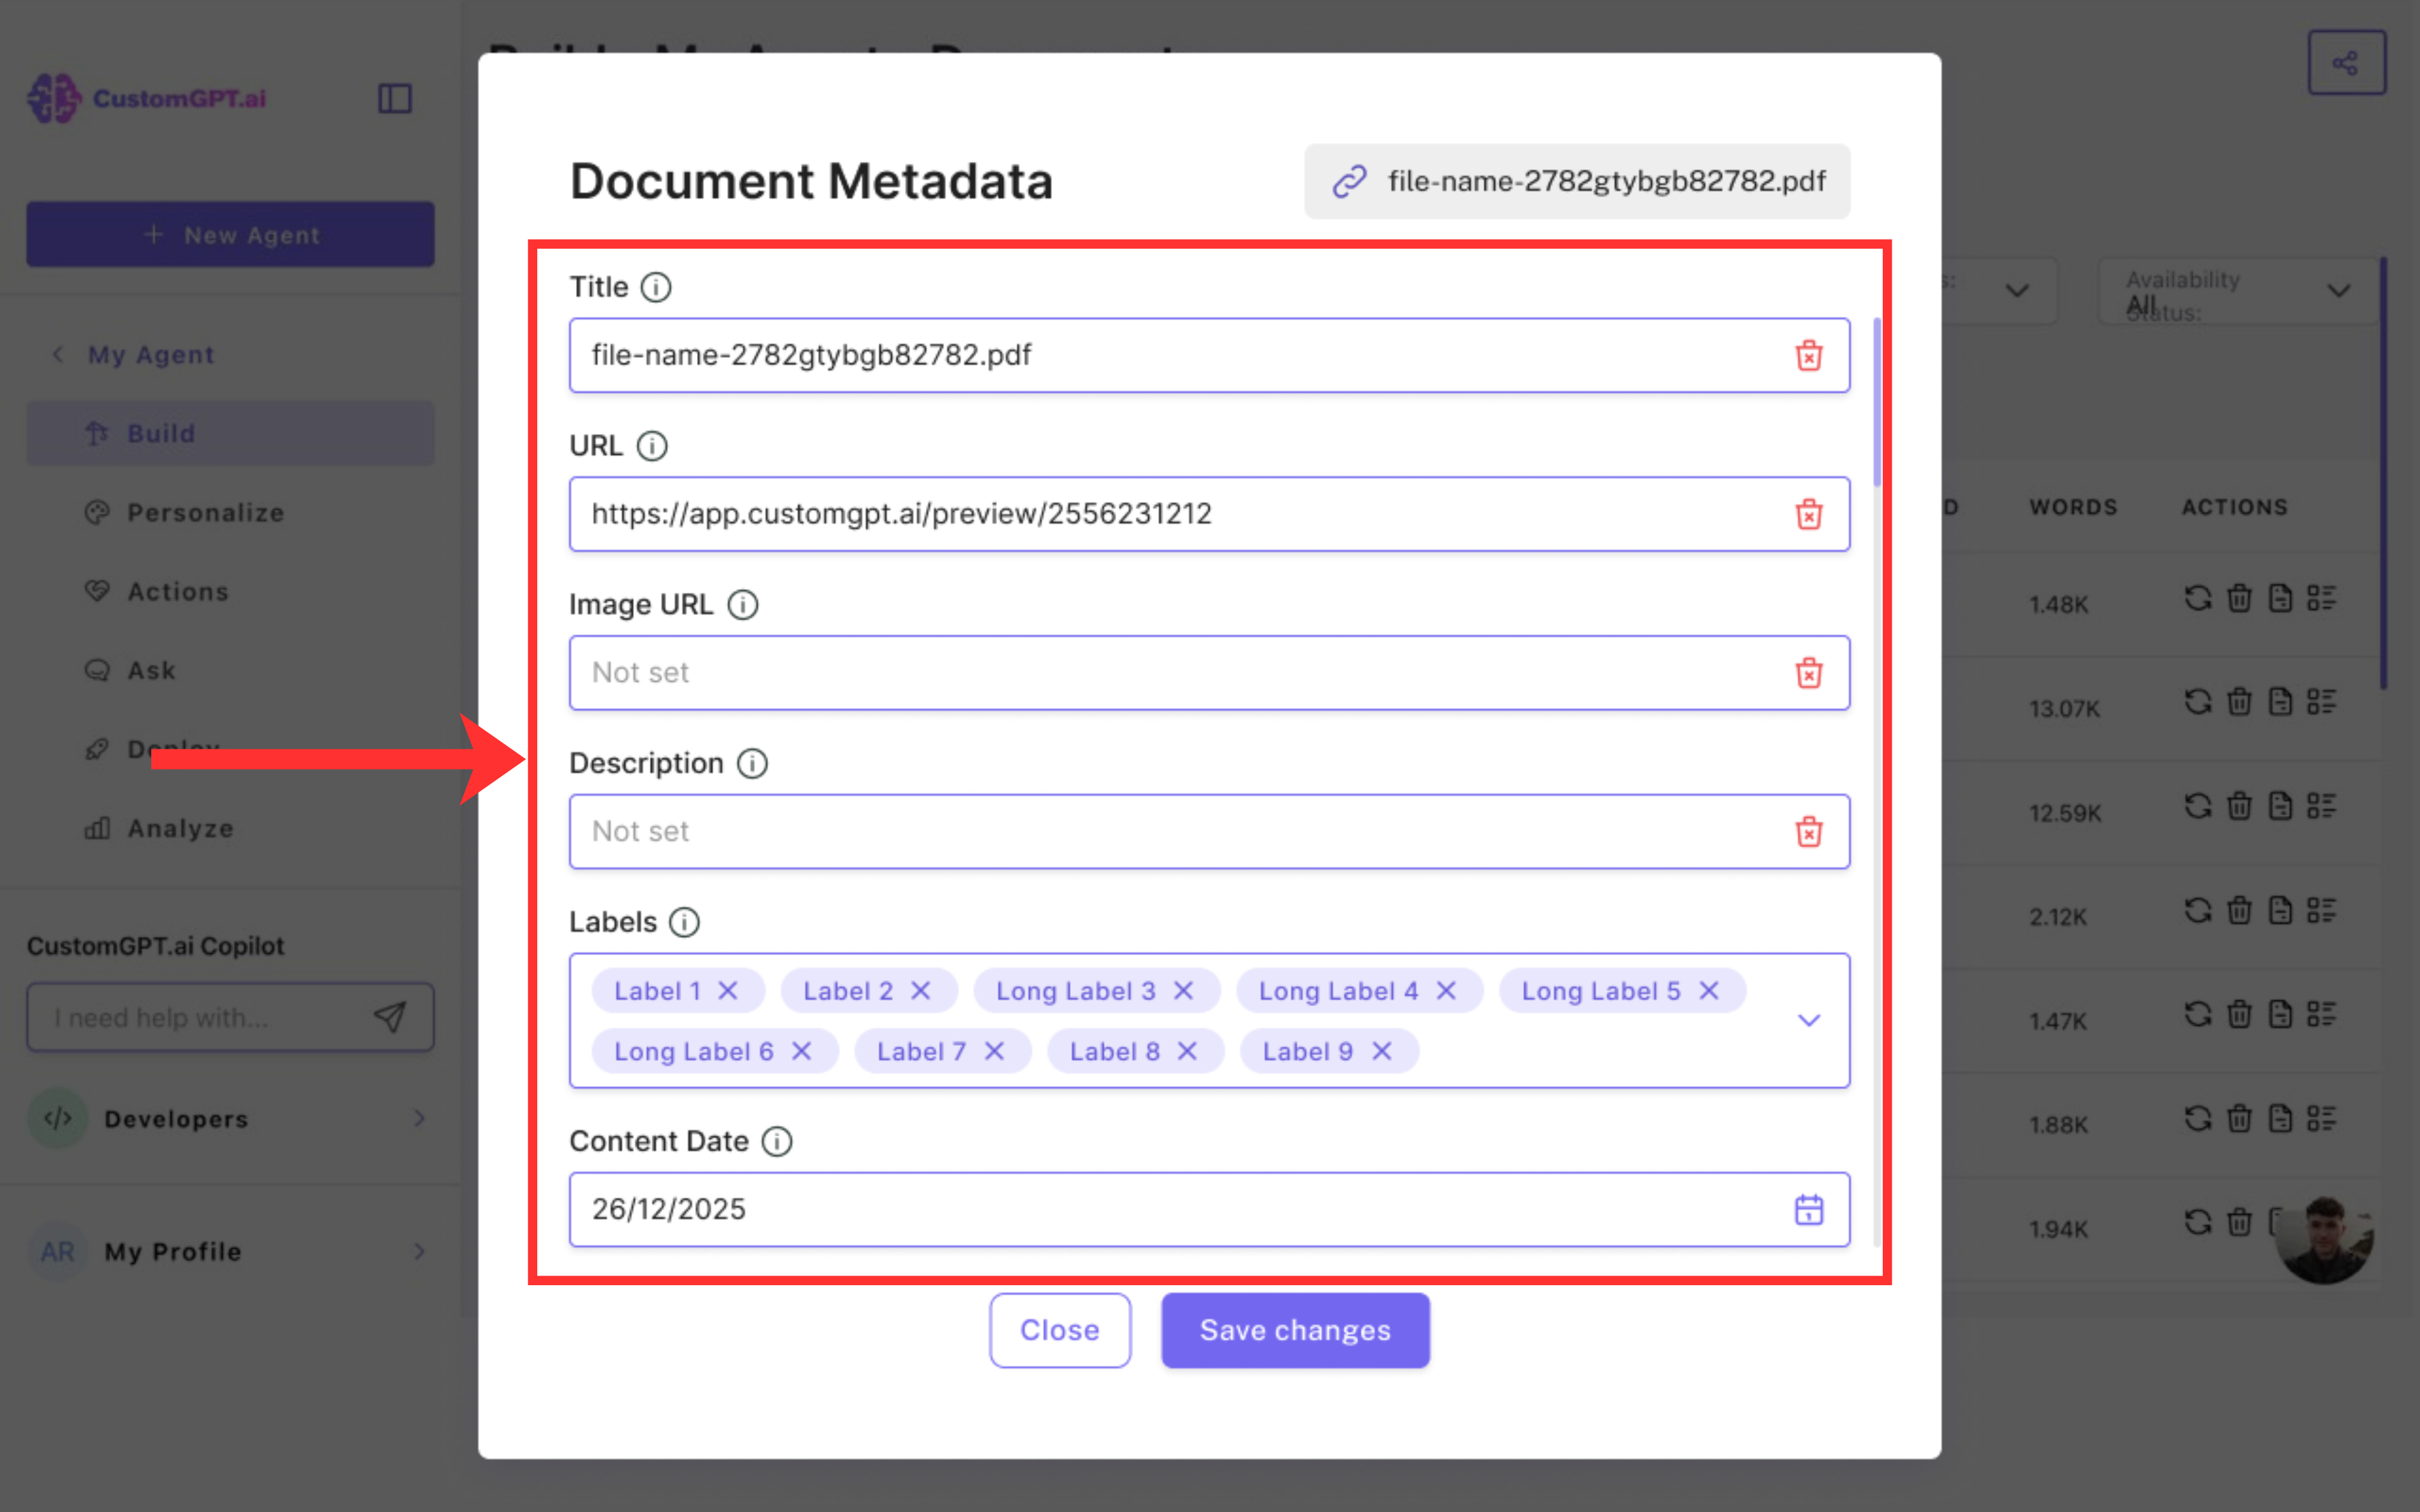
- Title: Remove unnecessary text.
- URL: Link directly to the main API reference page.
- Image URL: Replace the default logo with an icon of a book.
- Description: Make the description more concise.
Note:
The preview under the “Page / Metadata” section updates as you make changes.
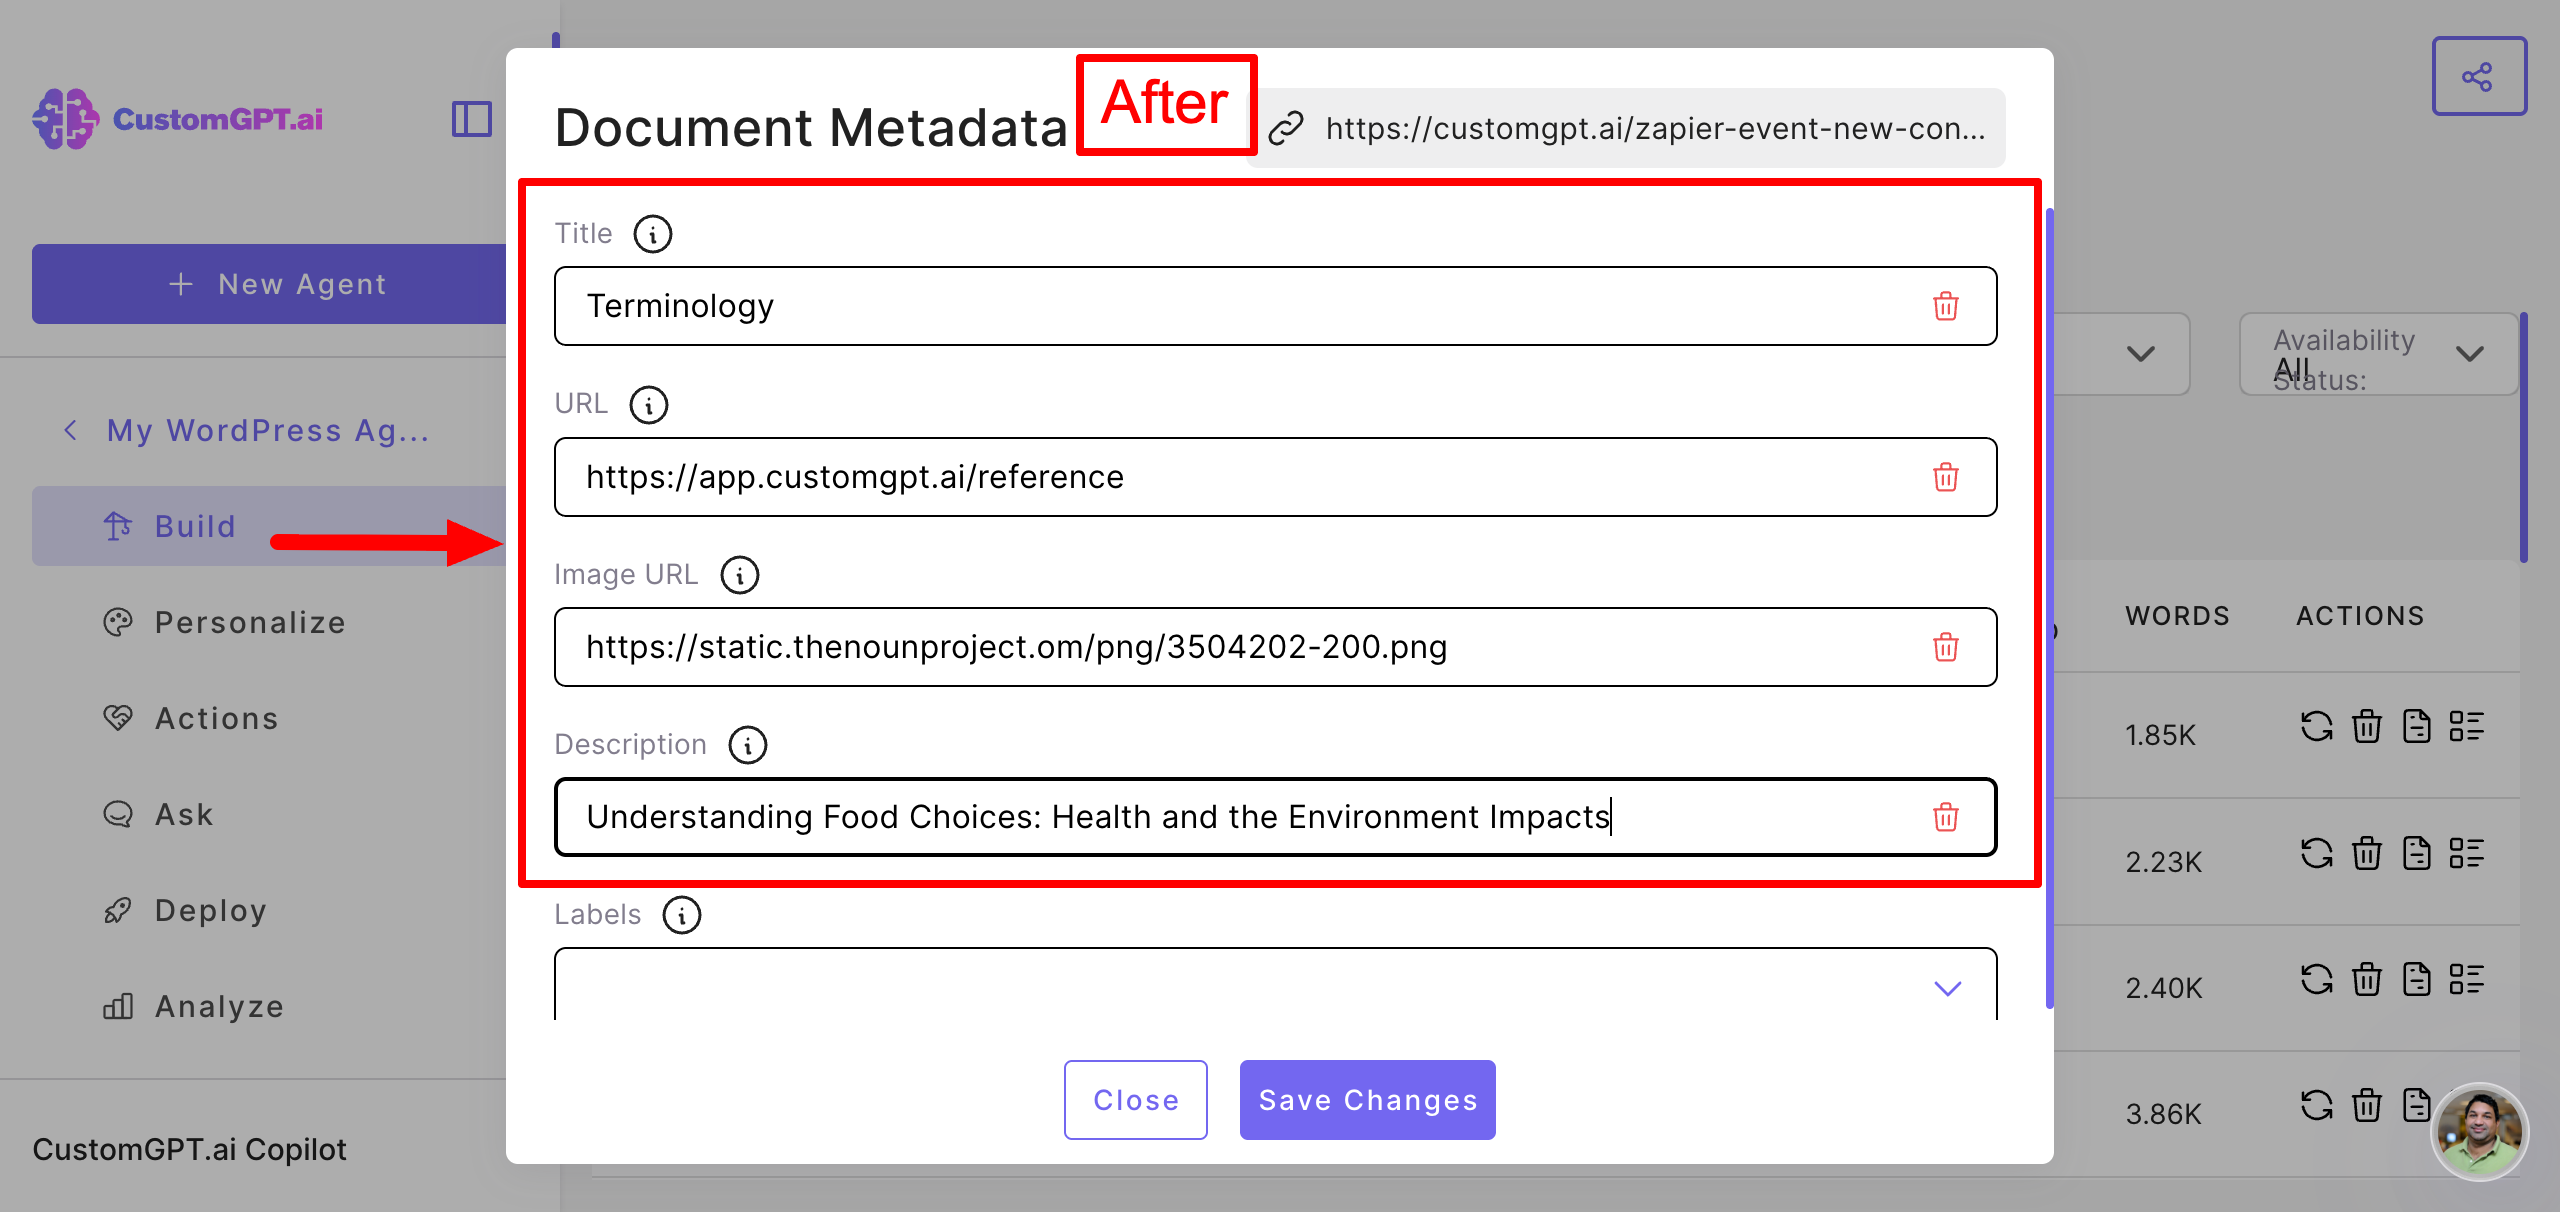
- Review the result to confirm the metadata now looks and behaves as intended.

Pro tip:Improve conversions by updating the URL of paywalled uploads to direct users to your payment page.
Updated 5 months ago
Did this page help you?