Deploy to a Slack channel
This step-by-step guide explains how to deploy your CustomGPT.ai agent to a Slack channel so your team can start interacting with it directly.
First, make sure you’ve connected your CustomGPT.ai account to Slack. If not, follow this guide: How to Connect Your CustomGPT.ai Account with Slack Workspace
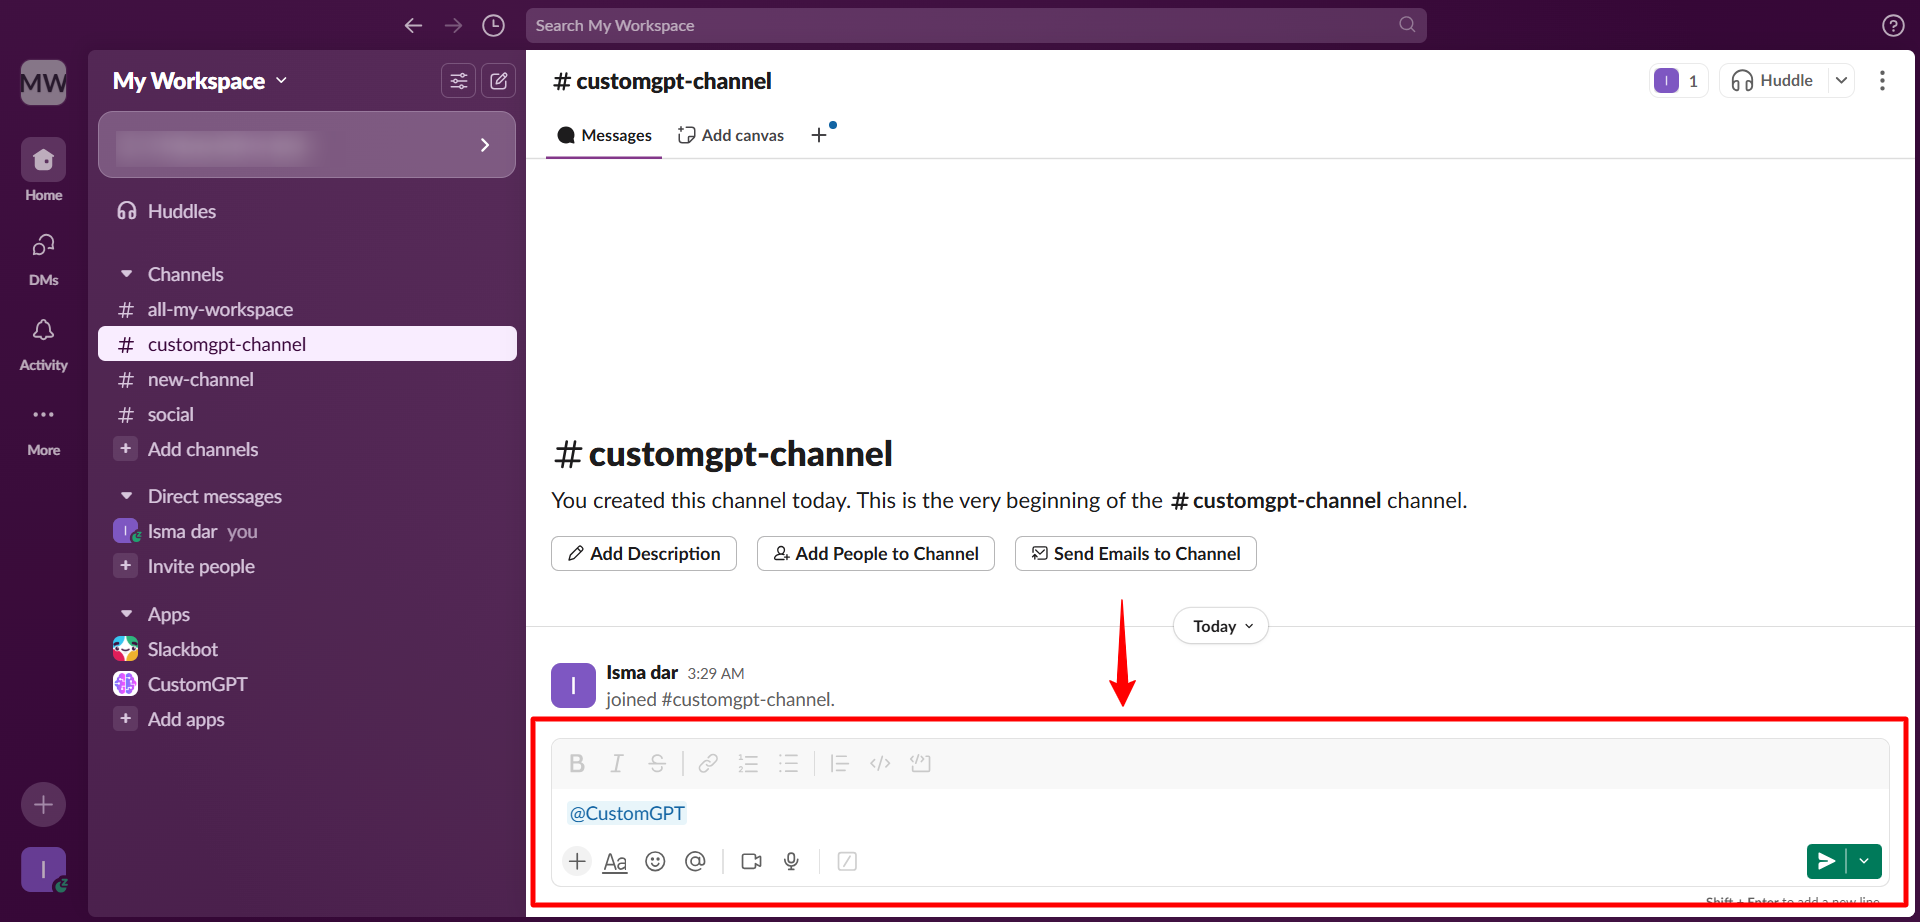
- Go to any Slack channel where you want to add your agent and mention
@CustomGPTin the message field.
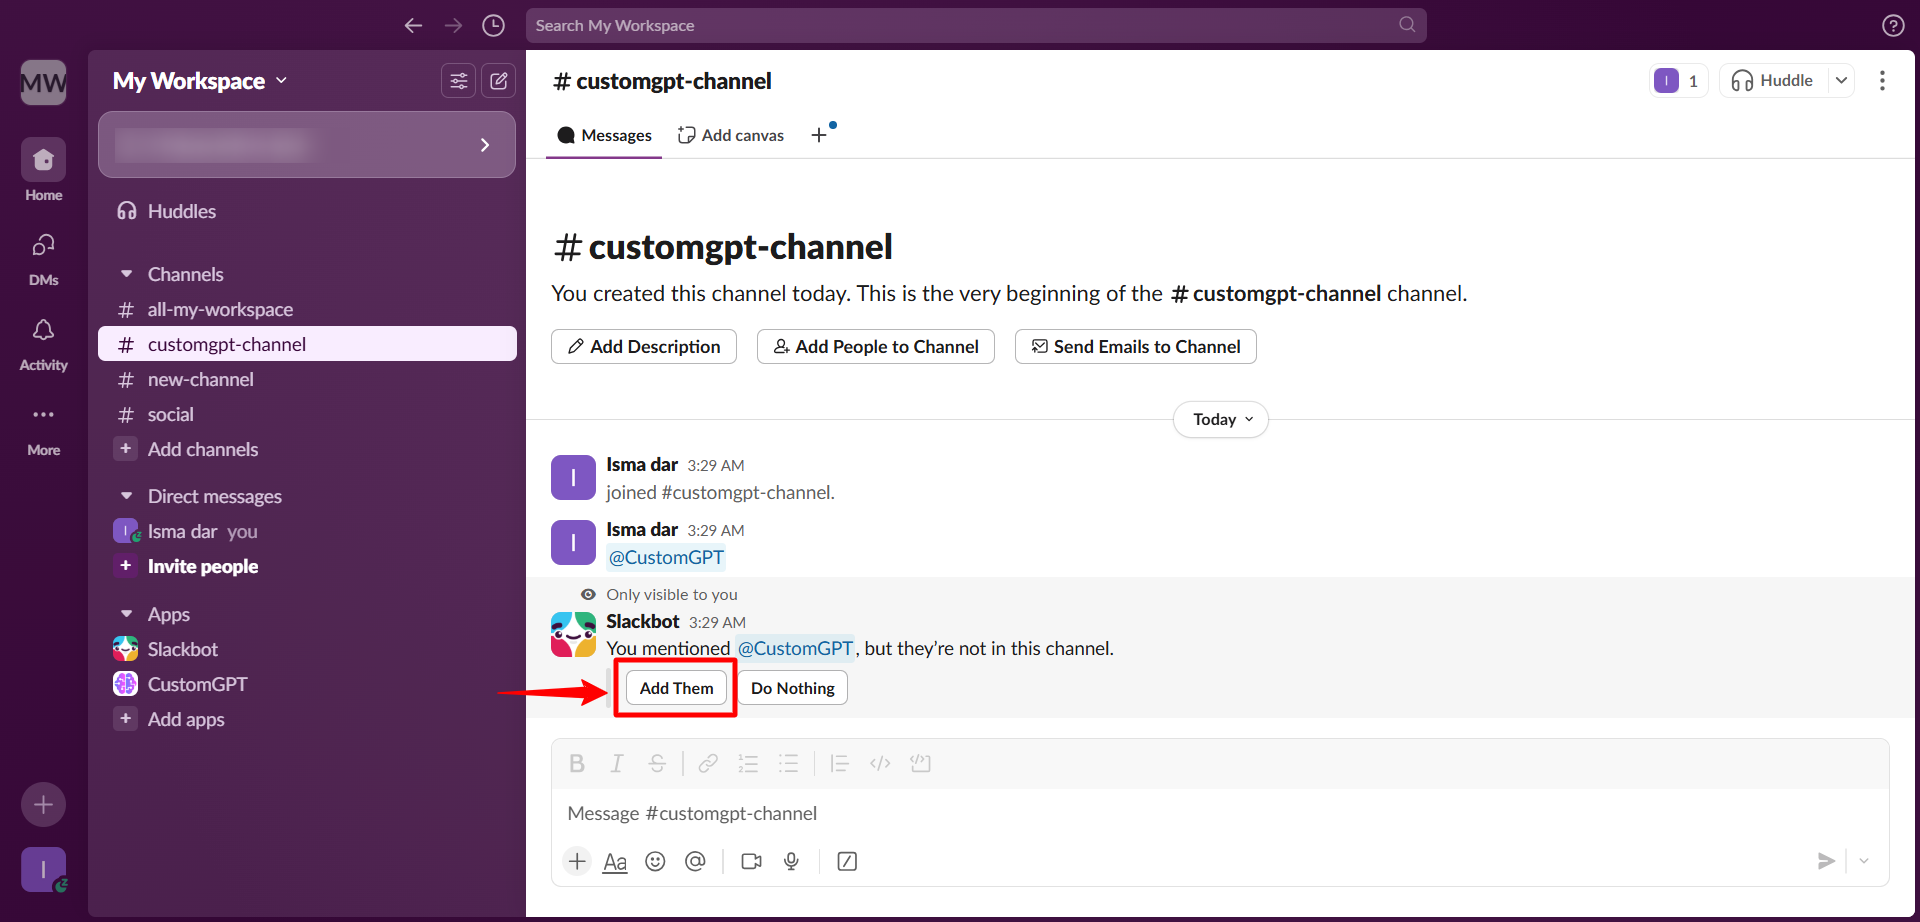
- When prompted, click Add them.
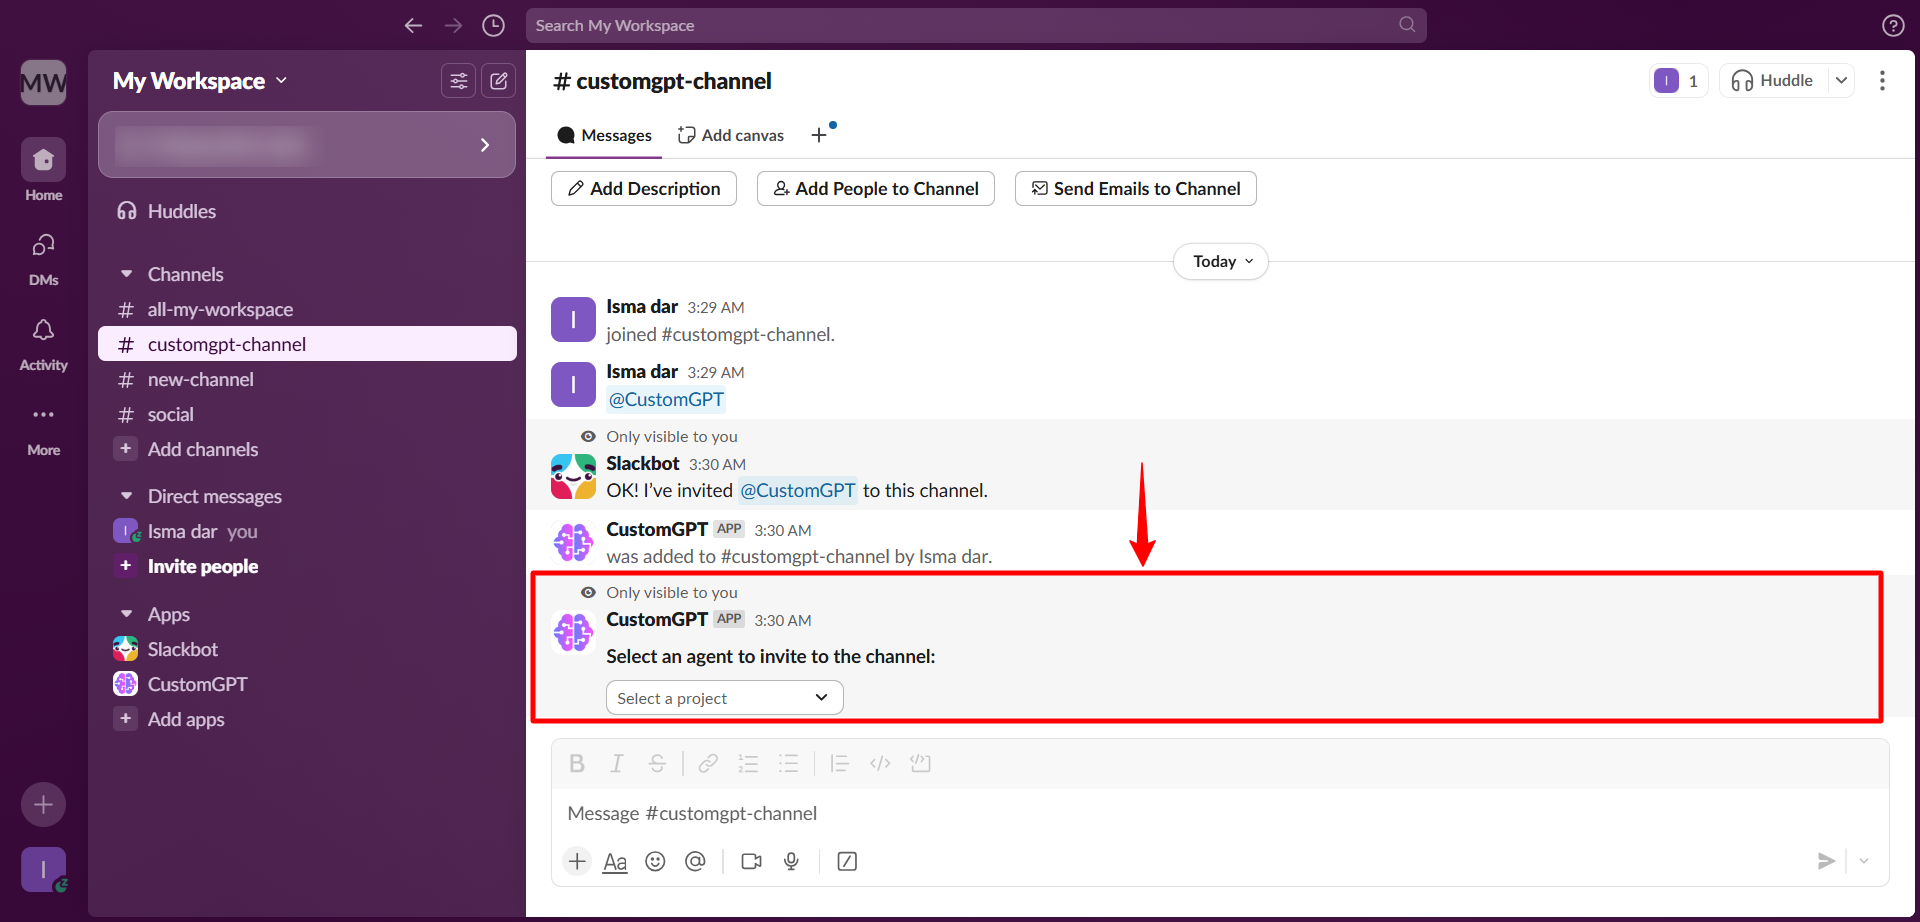
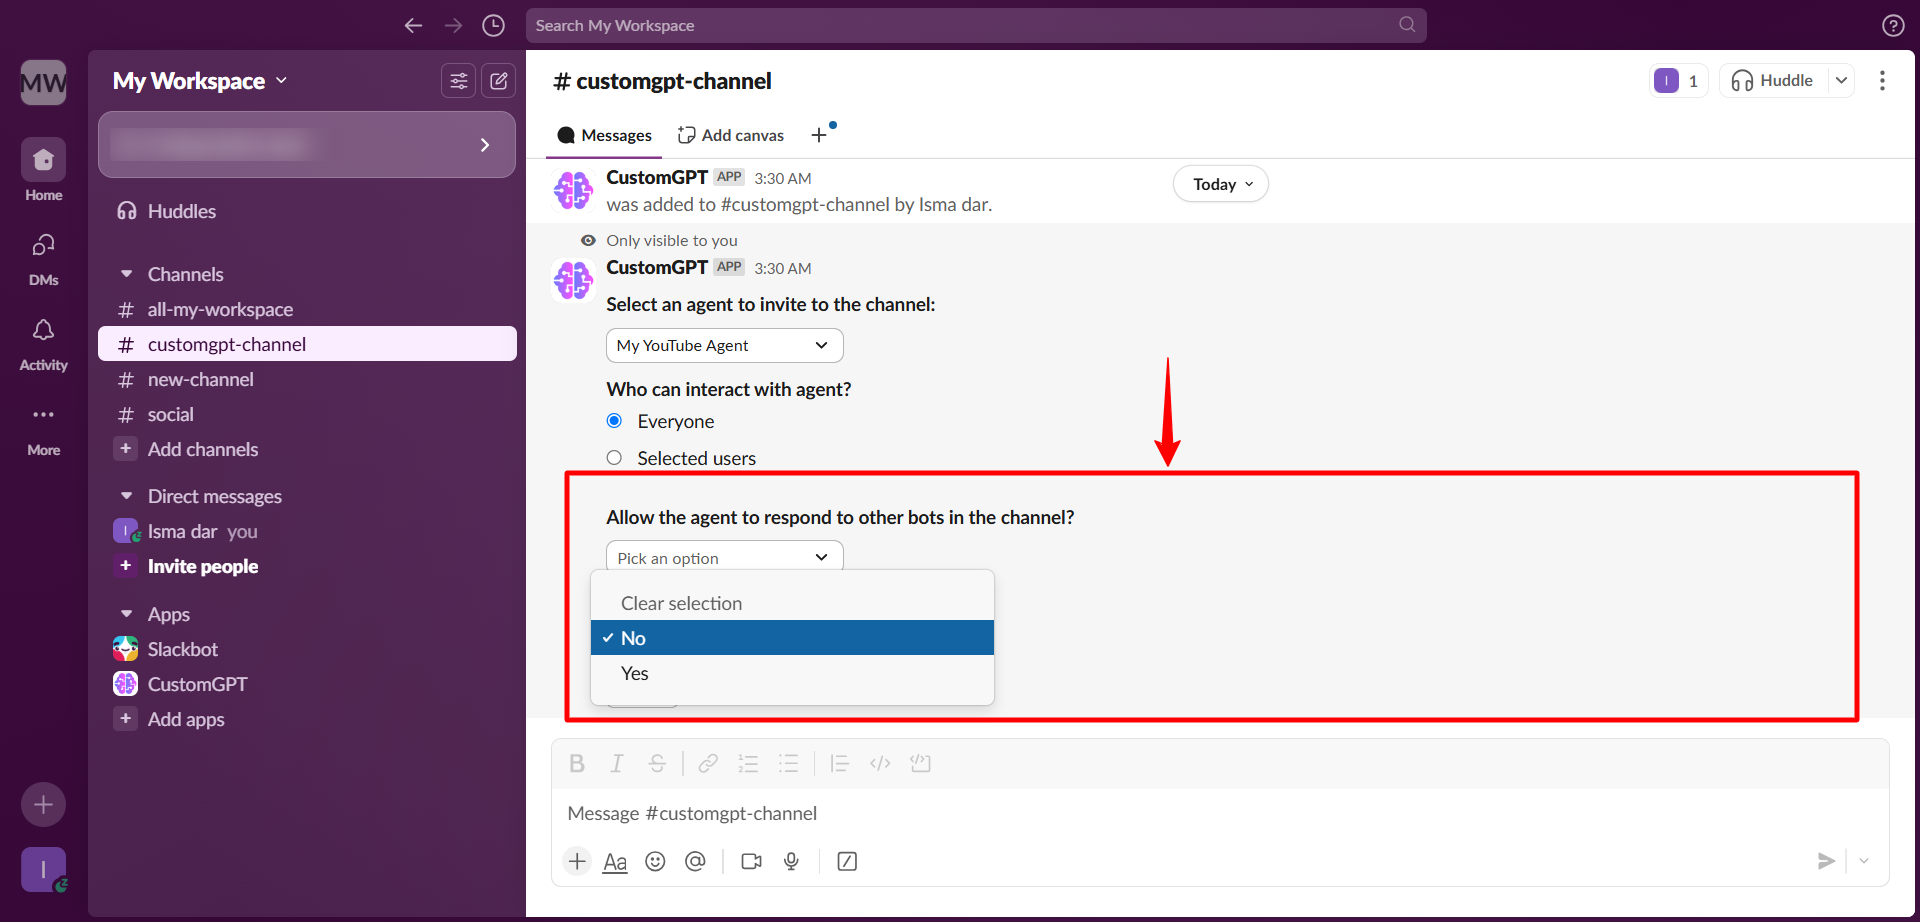
- Use the first dropdown to select the CustomGPT.ai agent you want to use. [how to create a agent using Slack integration].
Note:Admins can override these access settings from the Agent Access tab.
- In the users field, select who can communicate with the agent.
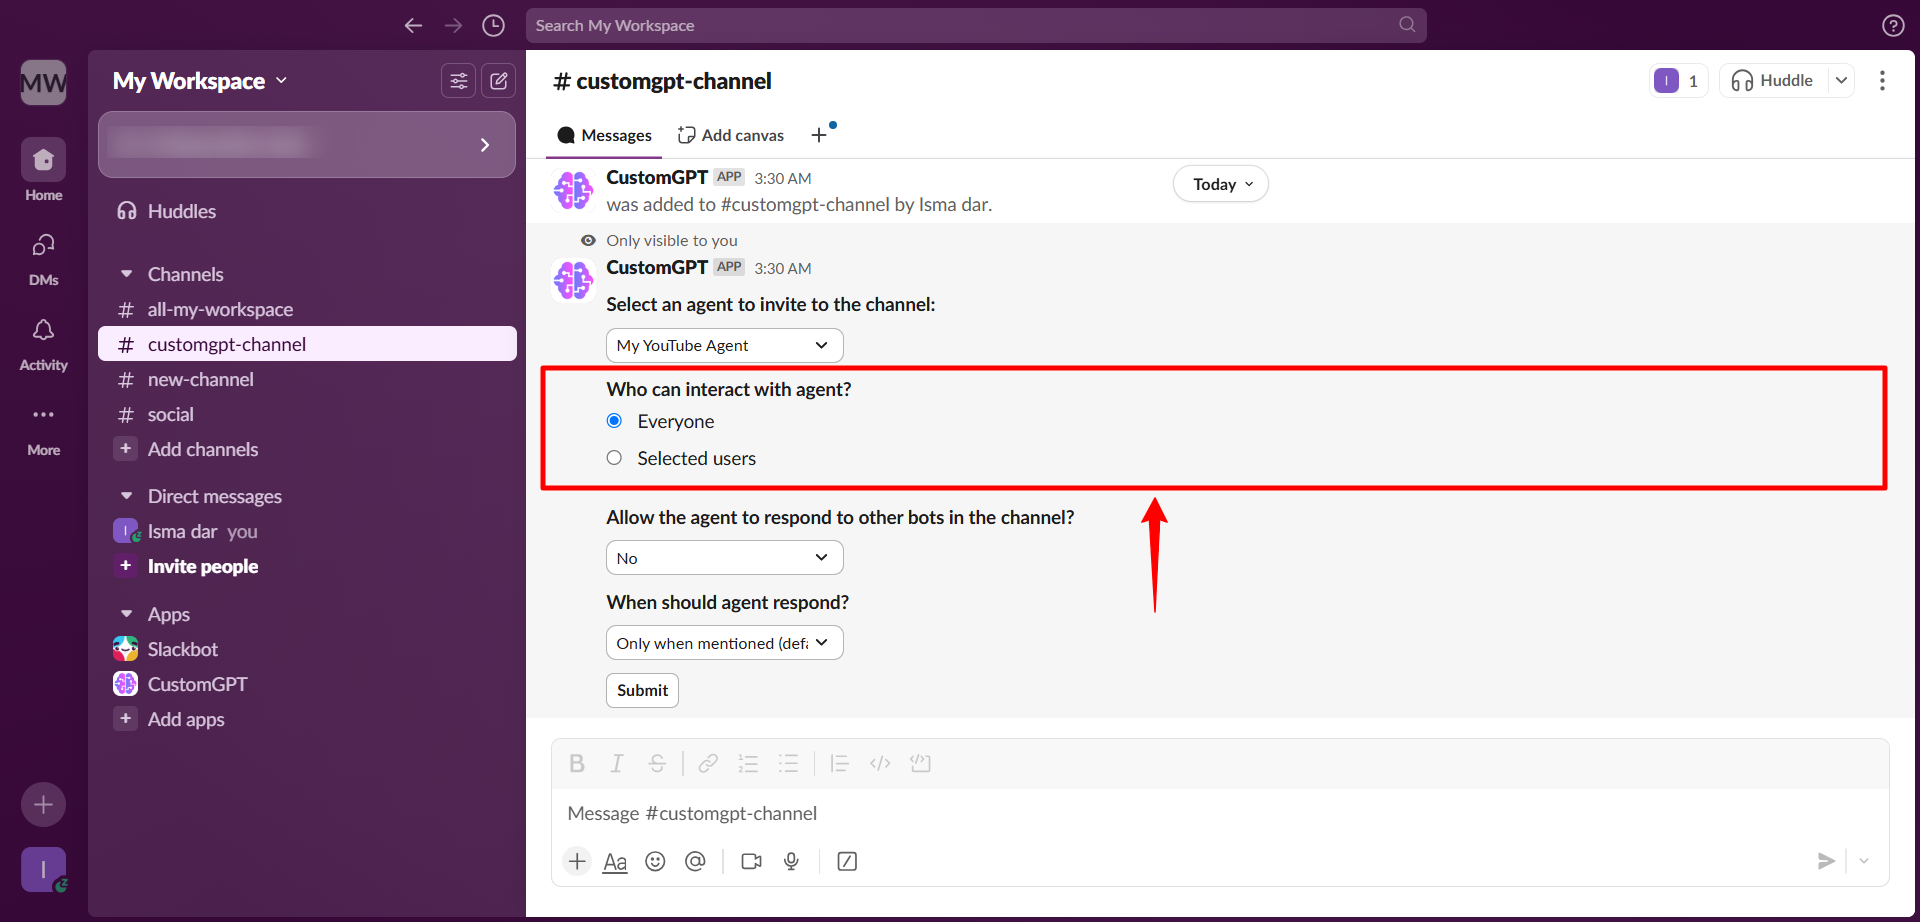
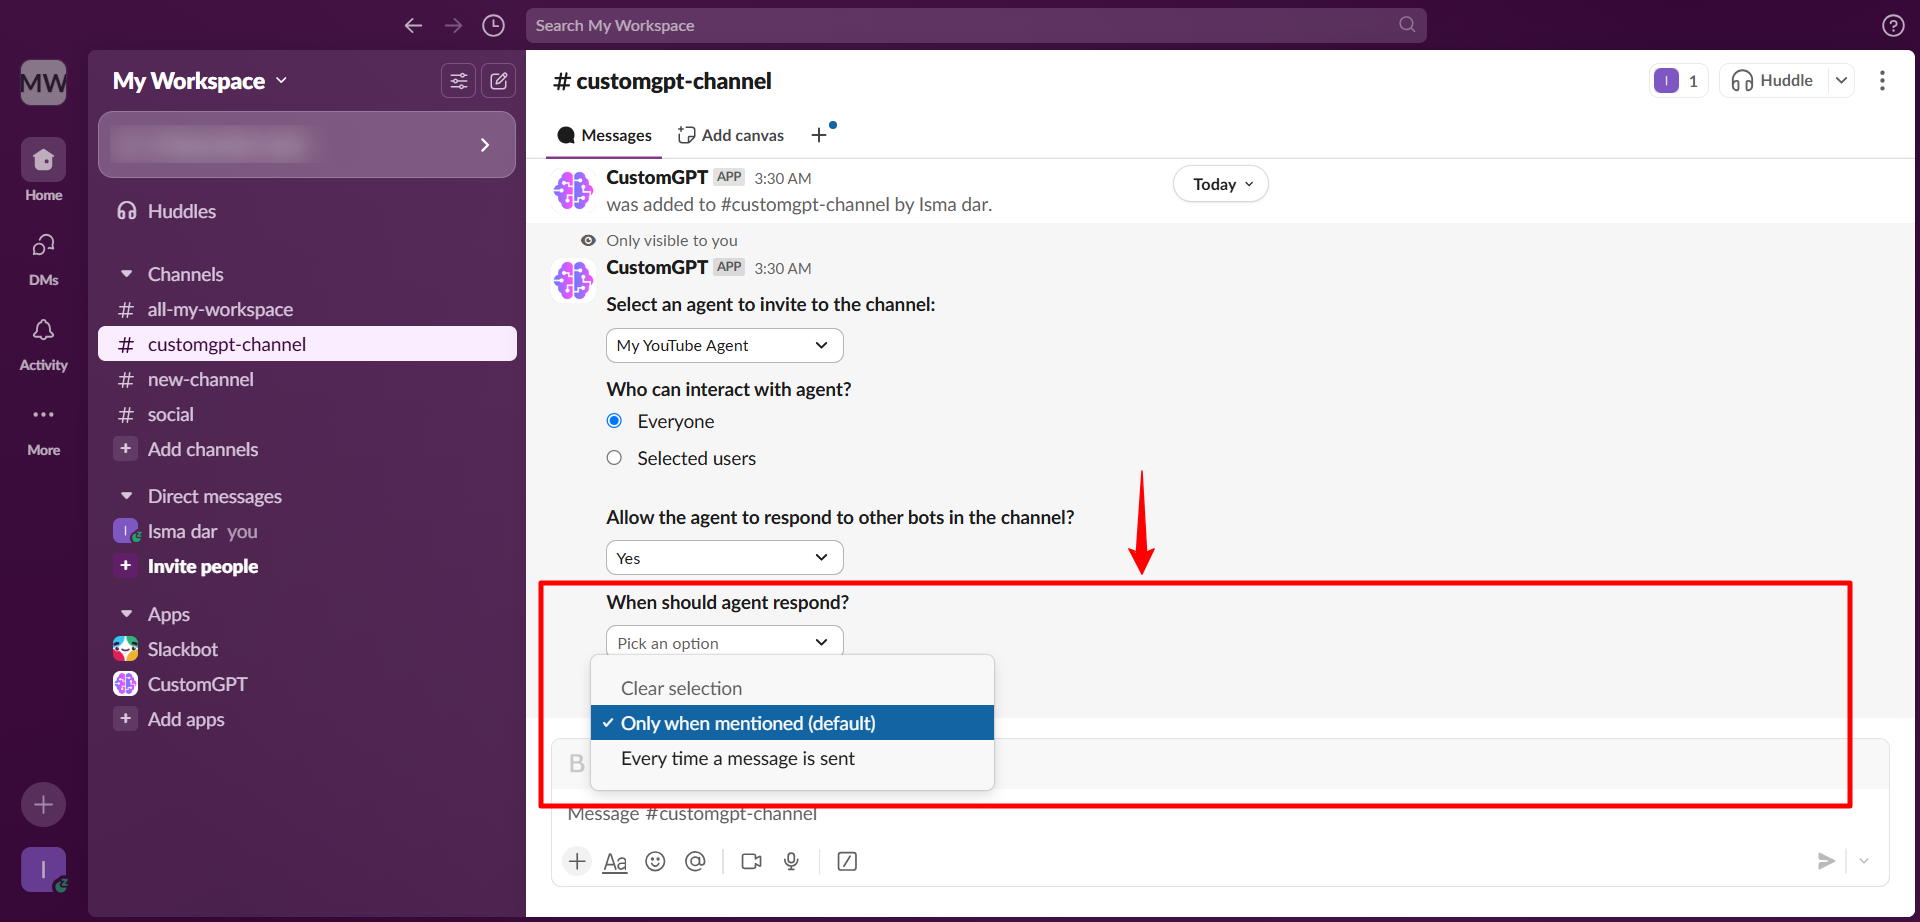
- Choose whether the agent can respond to other bots in the channel.
- Decide when the agent should respond:
- Only when mentioned
- Every time someone sends a message in the channel
- Click Submit to finish setup.

Check our user guide to learn How to set agent access in Slack workspace".
Updated about 1 year ago
Did this page help you?