Search Generative Experience (SGE)
Follow this how-to guide step-by-step to enhance your website's interactivity and user engagement.
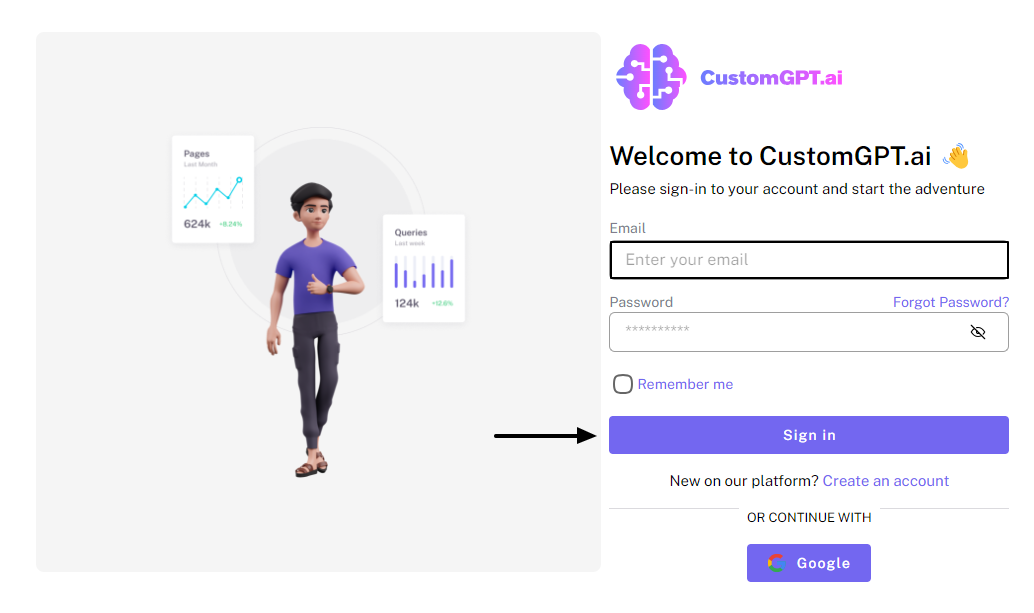
Step 1: Sign In
Sign in to your CustomGPT Dashboard.
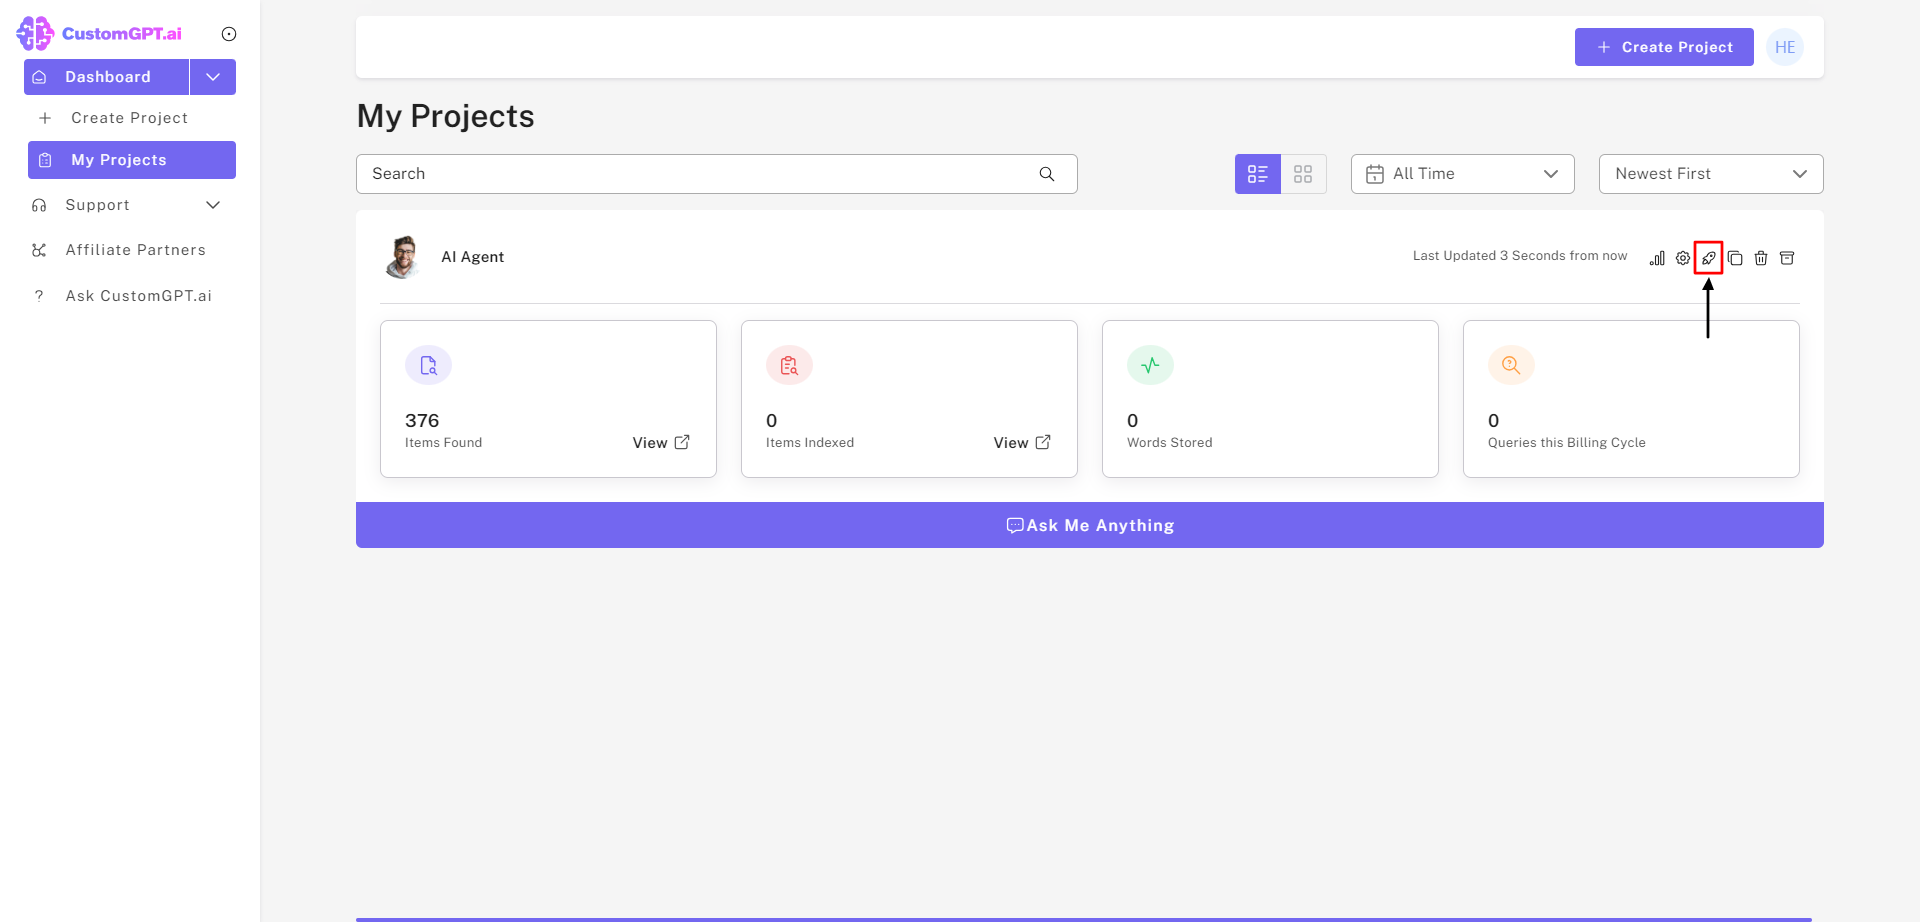
Step 2: Access Project Settings
Under "My Projects", click on the “Deploy Project” icon.
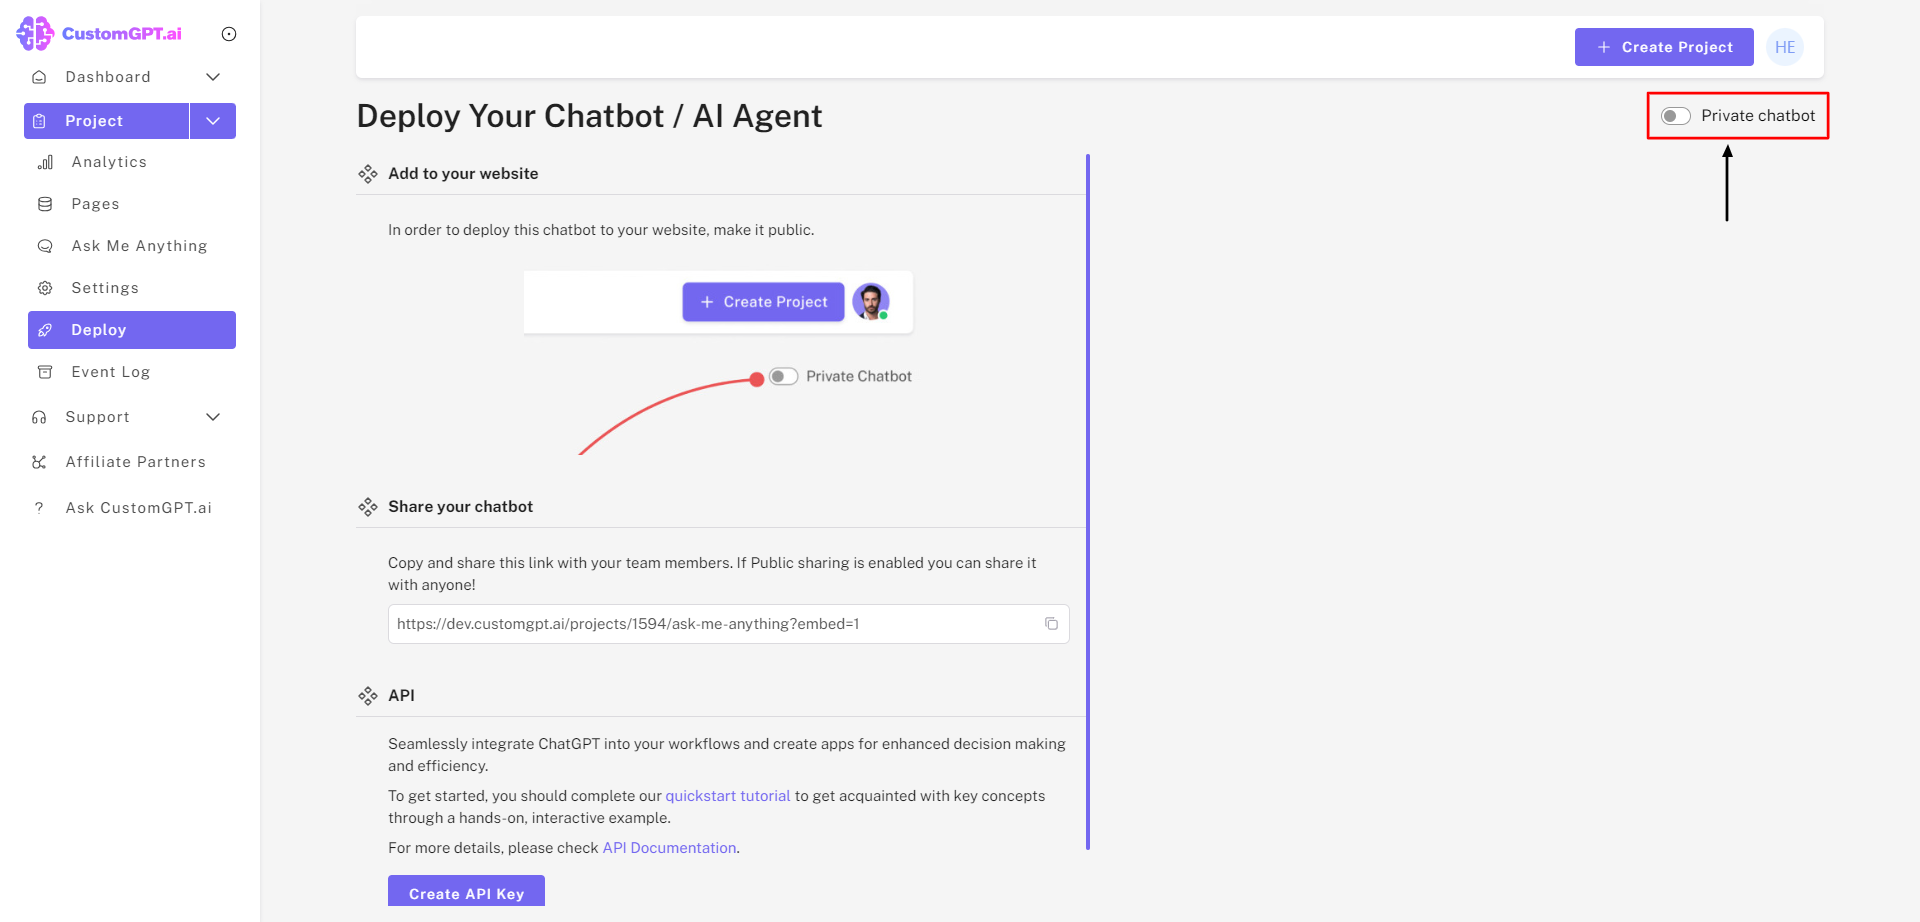
Step 3: Enable Public AI Agent
Enable "Public Sharing" for the AI Agent by sliding to the right.
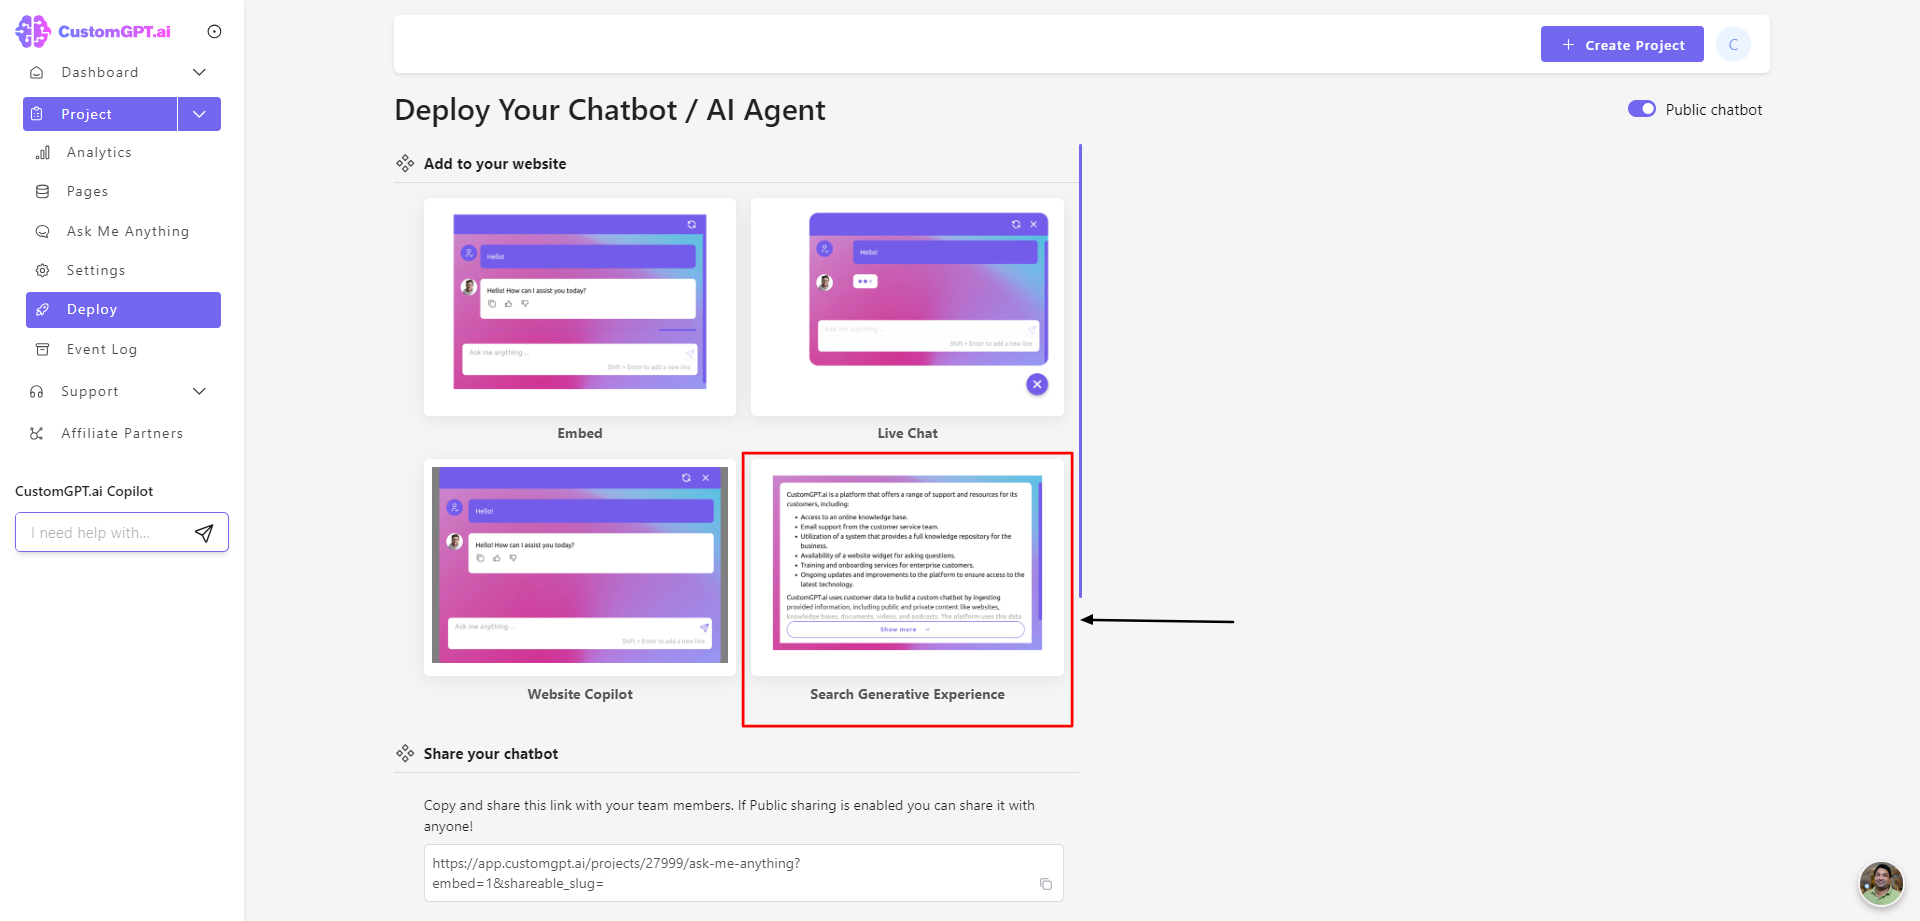
Step 4: Activate Search Generative Experience
a) Click on "Search Generative Experience" to embed the bot on your search results page.
b) This feature allows the bot to automatically detect search terms and provide relevant responses, improving the search experience with AI-driven interactions.
Step 5: Embed the Bot
Insert the following code in your website’s <body> section, ideally just before your search results, to render the chatbot and generated responses:
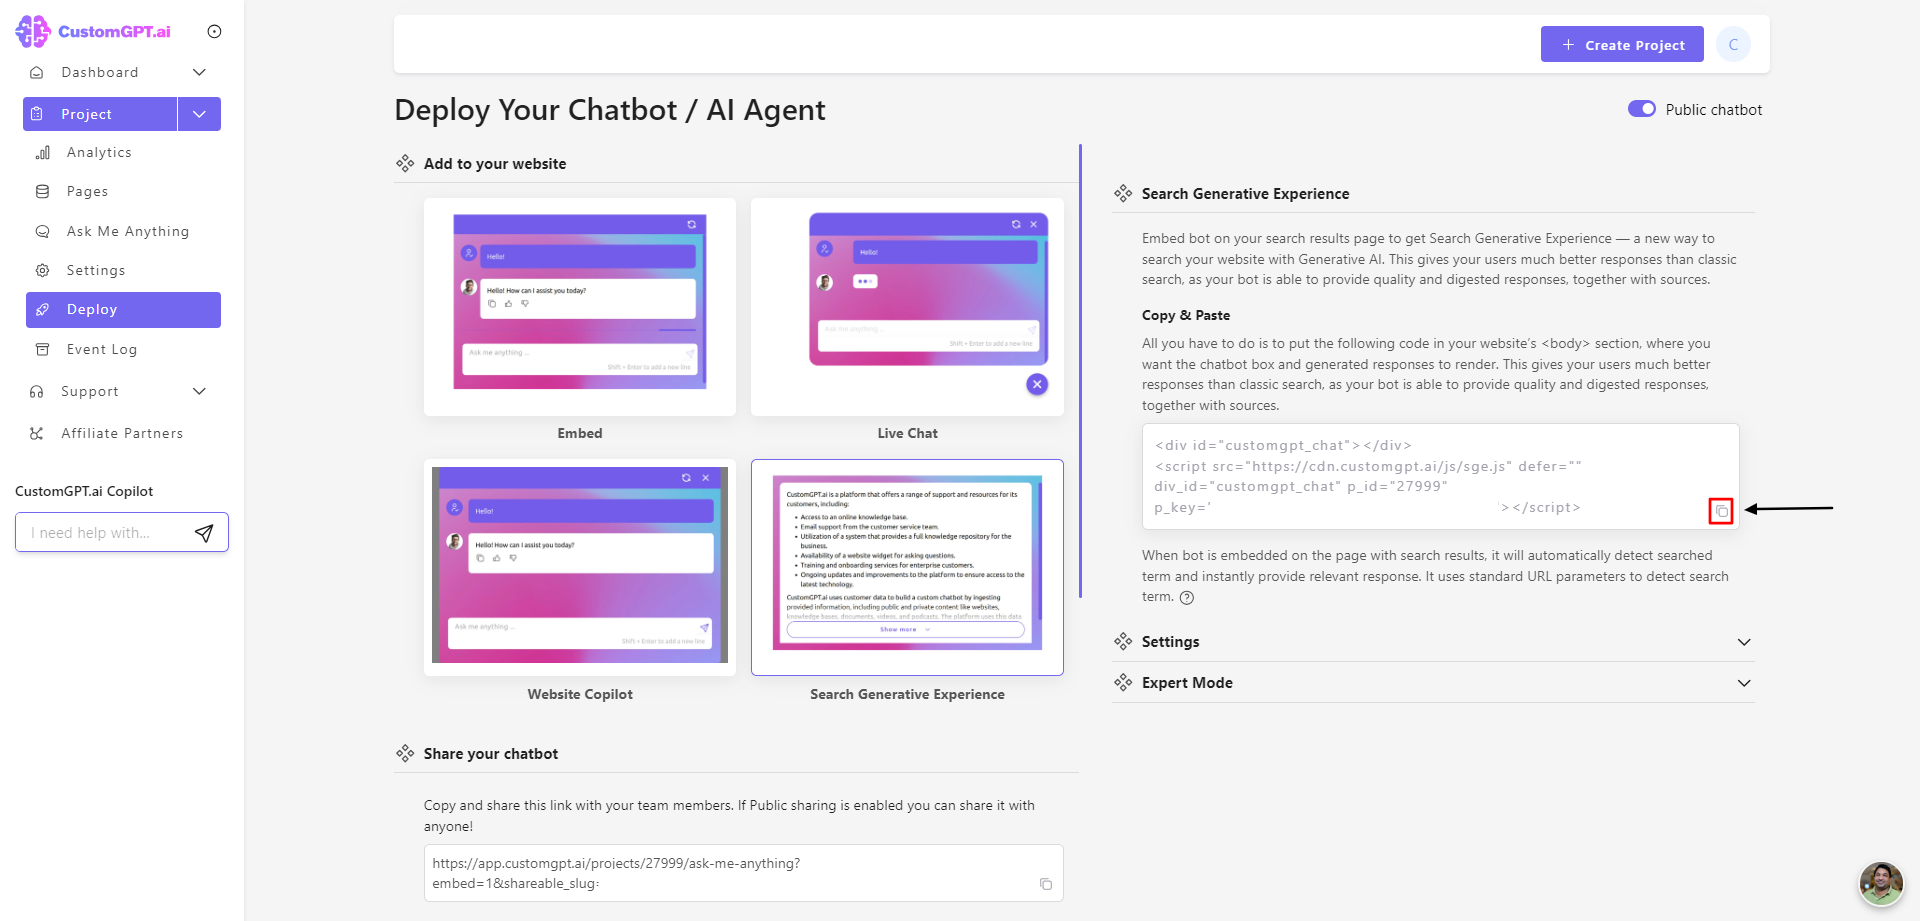
This feature works by detecting search parameter in the URL and sending it to the chatbot, like "example.com/?search=CustomGPT".Currently supported parameters are "q", "s", "id", "cat", "utm", "ref", "page", "user", "sort", "lang", "type", "term", "terms", "query", "search", "filter", "userid", "filters", "keyword", "keywords", "language", "category" and "categories".
Step 6: Customize Bot Appearance
a) Enable "Advanced Setting". Customize your bot’s height, prefilled prompt, and other visual elements.
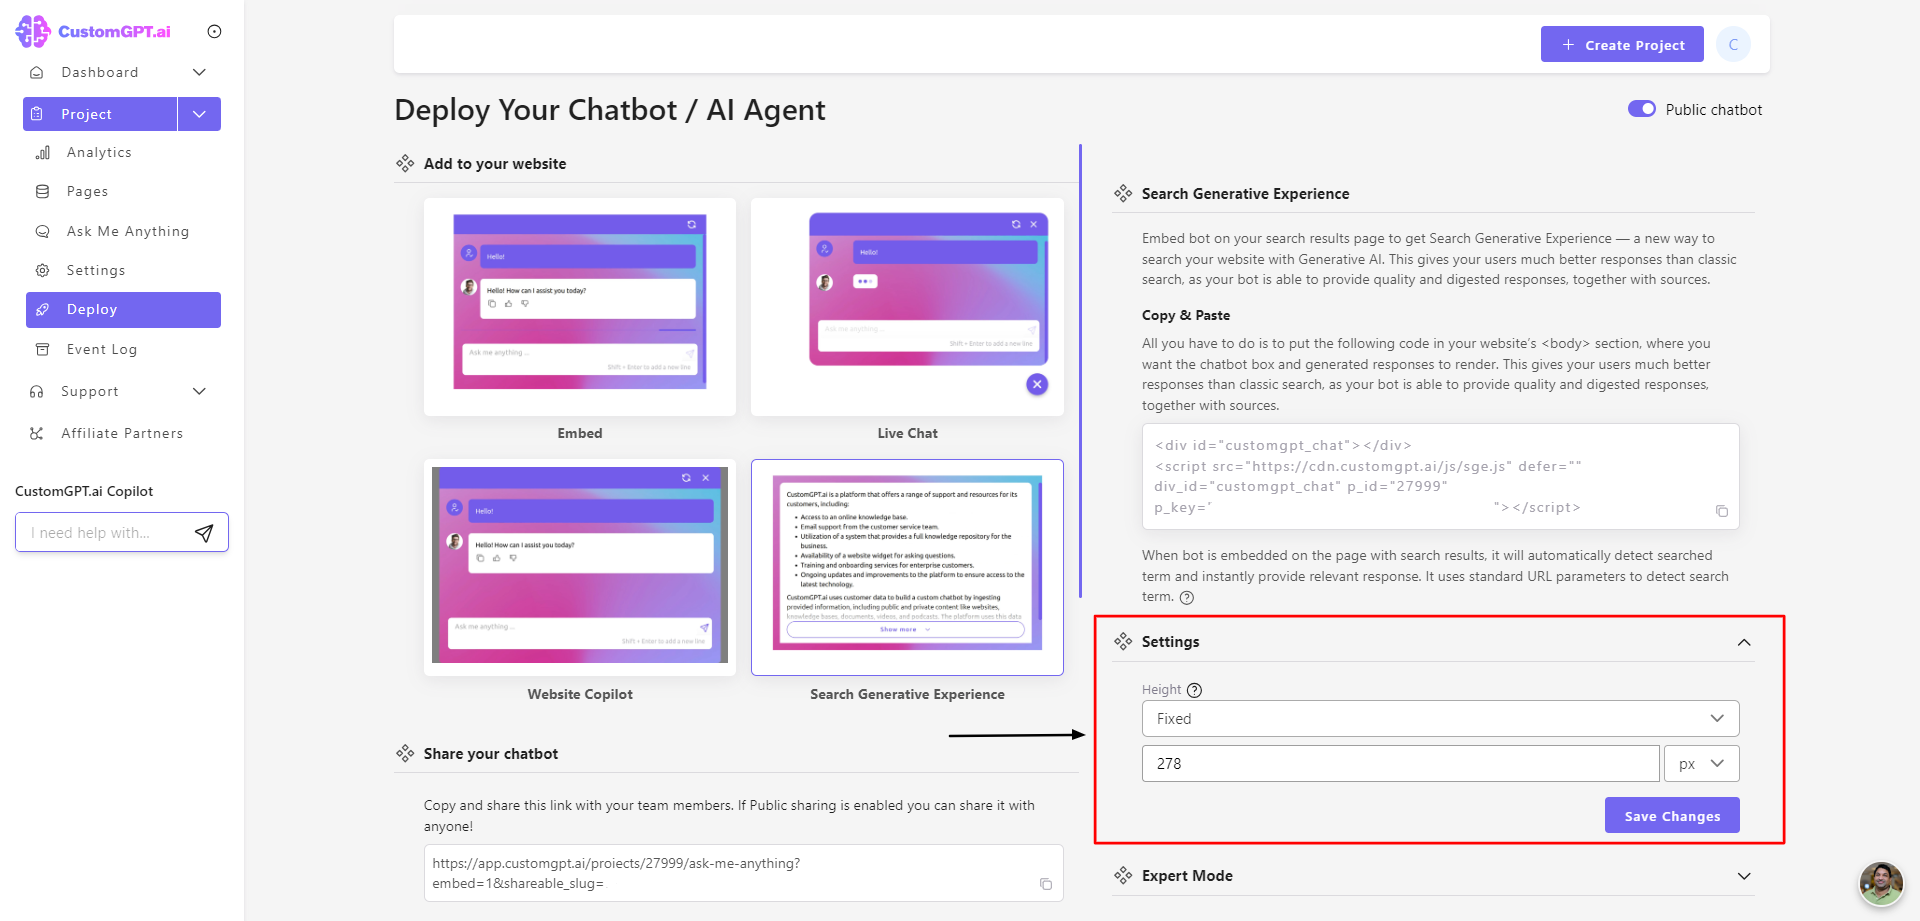
Congratulations! You have successfully embedded the CustomGPT bot on your website, enhancing your site's functionality with Search Generative Experience.
Updated about 1 year ago
