Create custom roles
This step-by-step guide explains how to create and manage custom roles in your CustomGPT.ai team to control access and responsibilities.
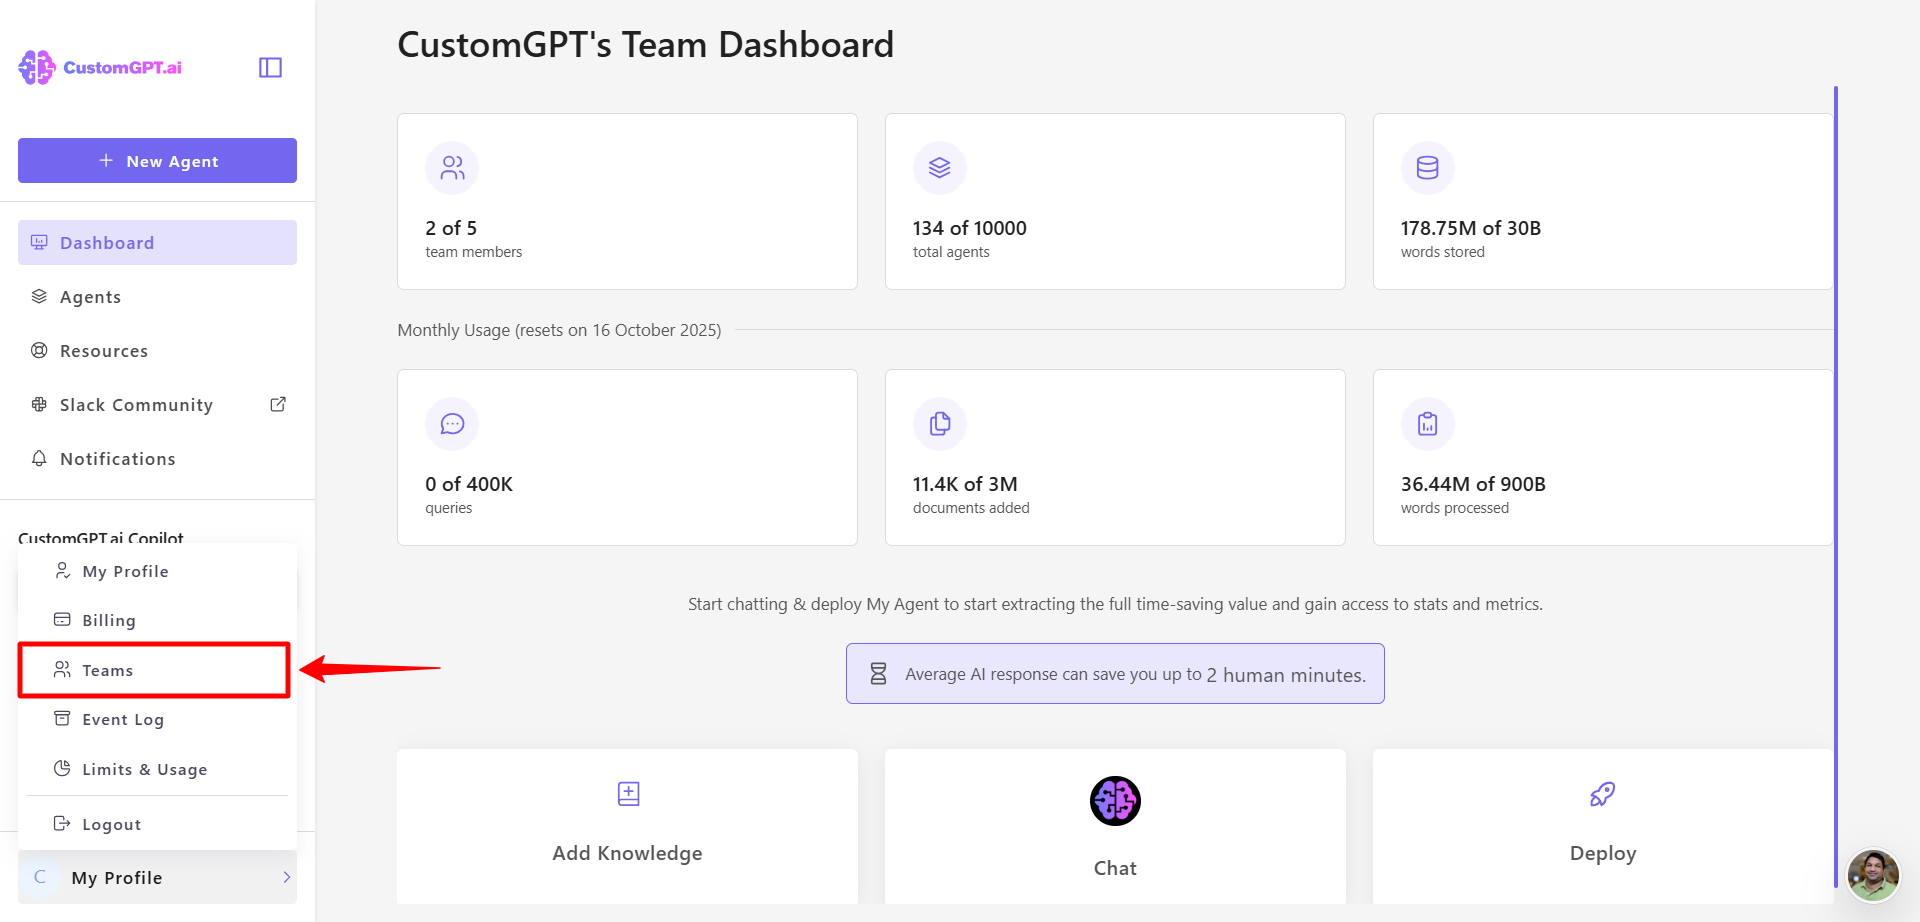
- Click your profile icon in the bottom-left corner of the dashboard, then select Teams from the dropdown menu..
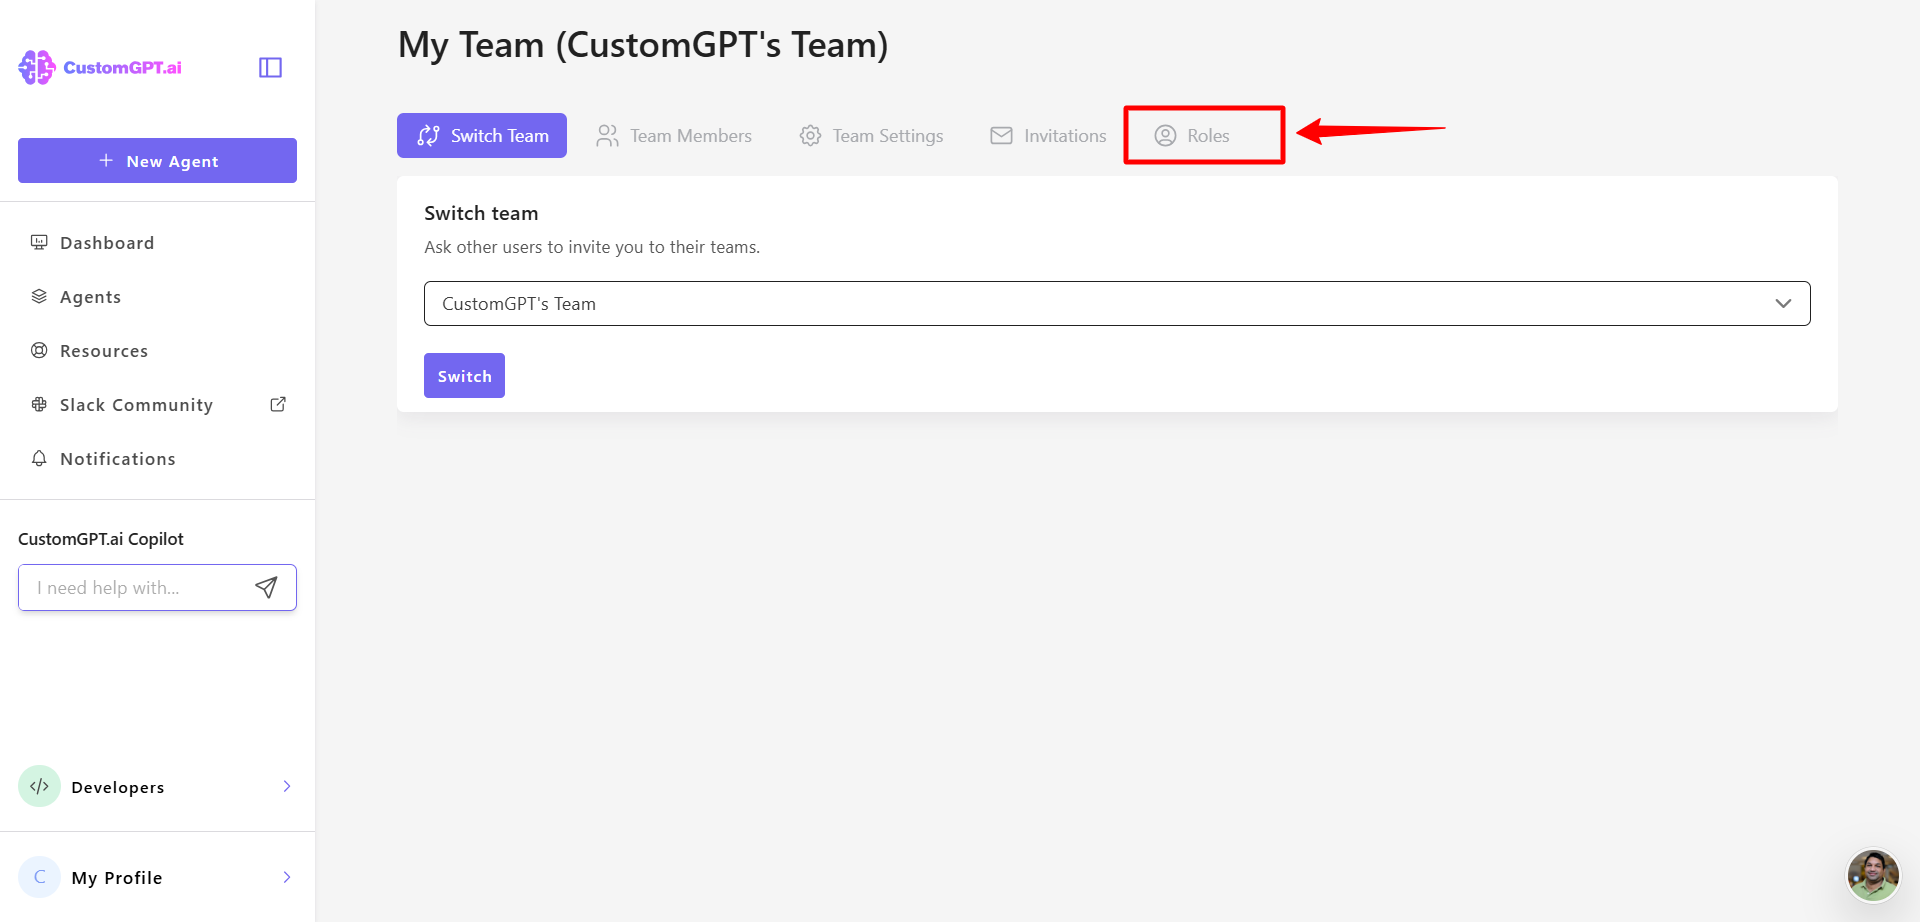
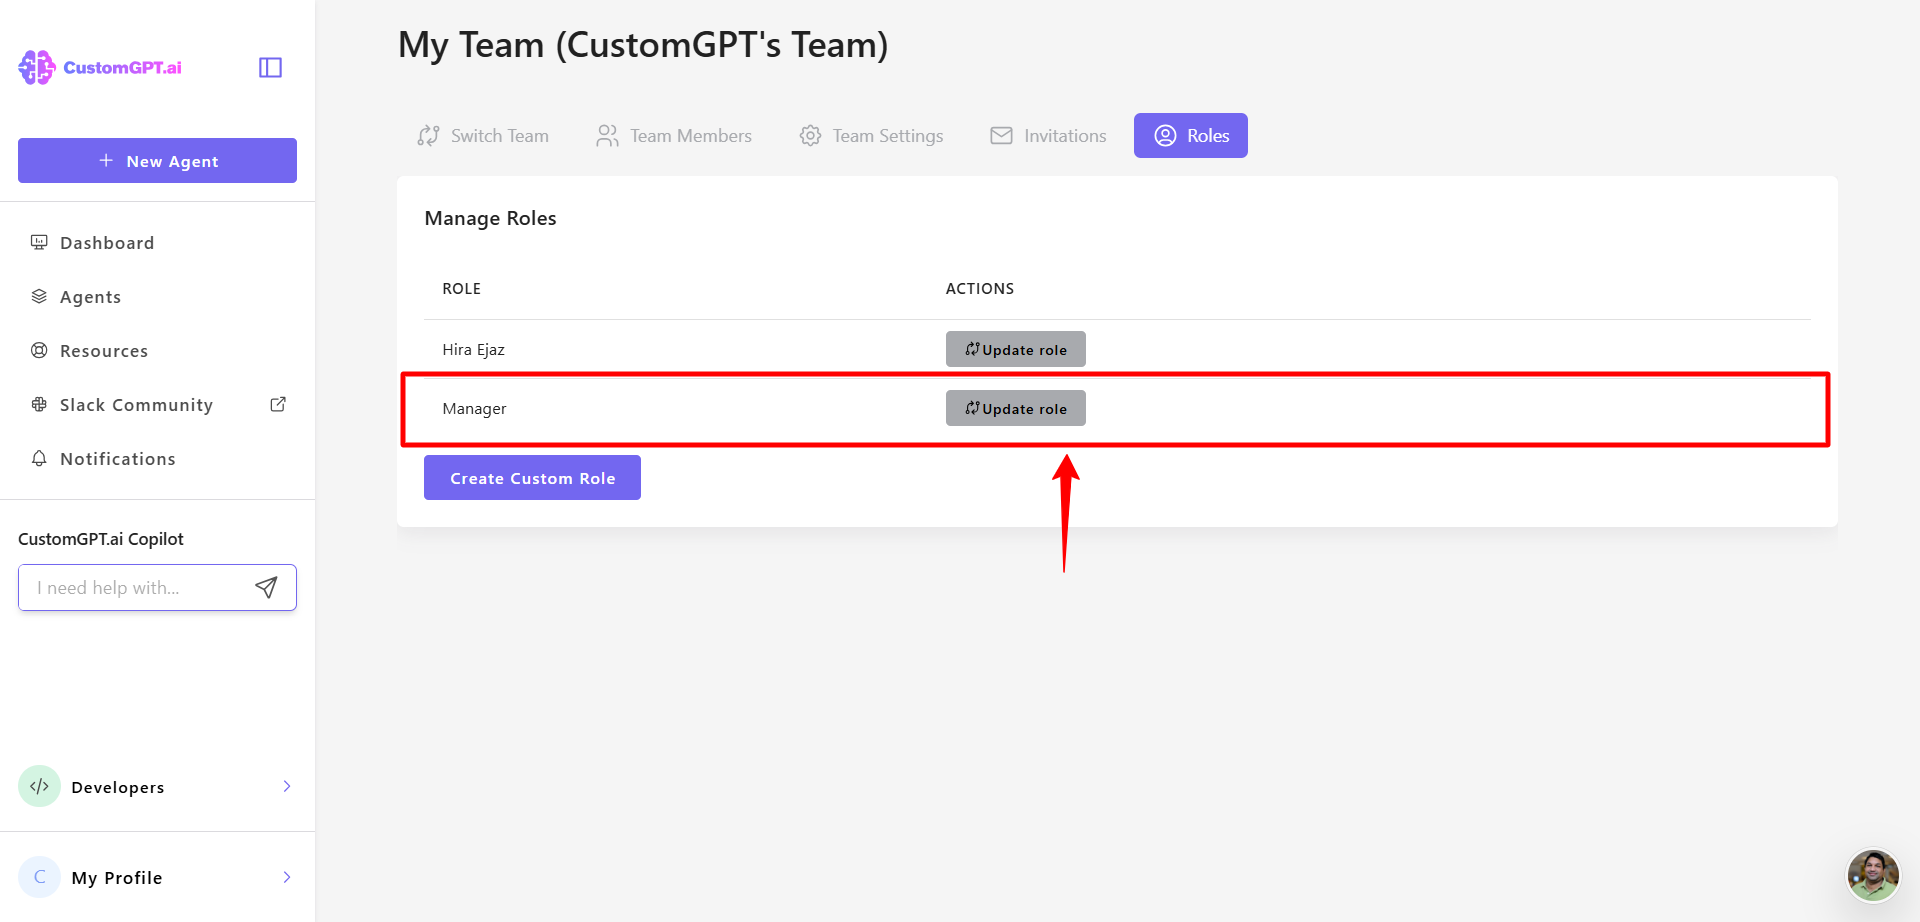
- In the team settings, click the Roles tab in the top menu bar.
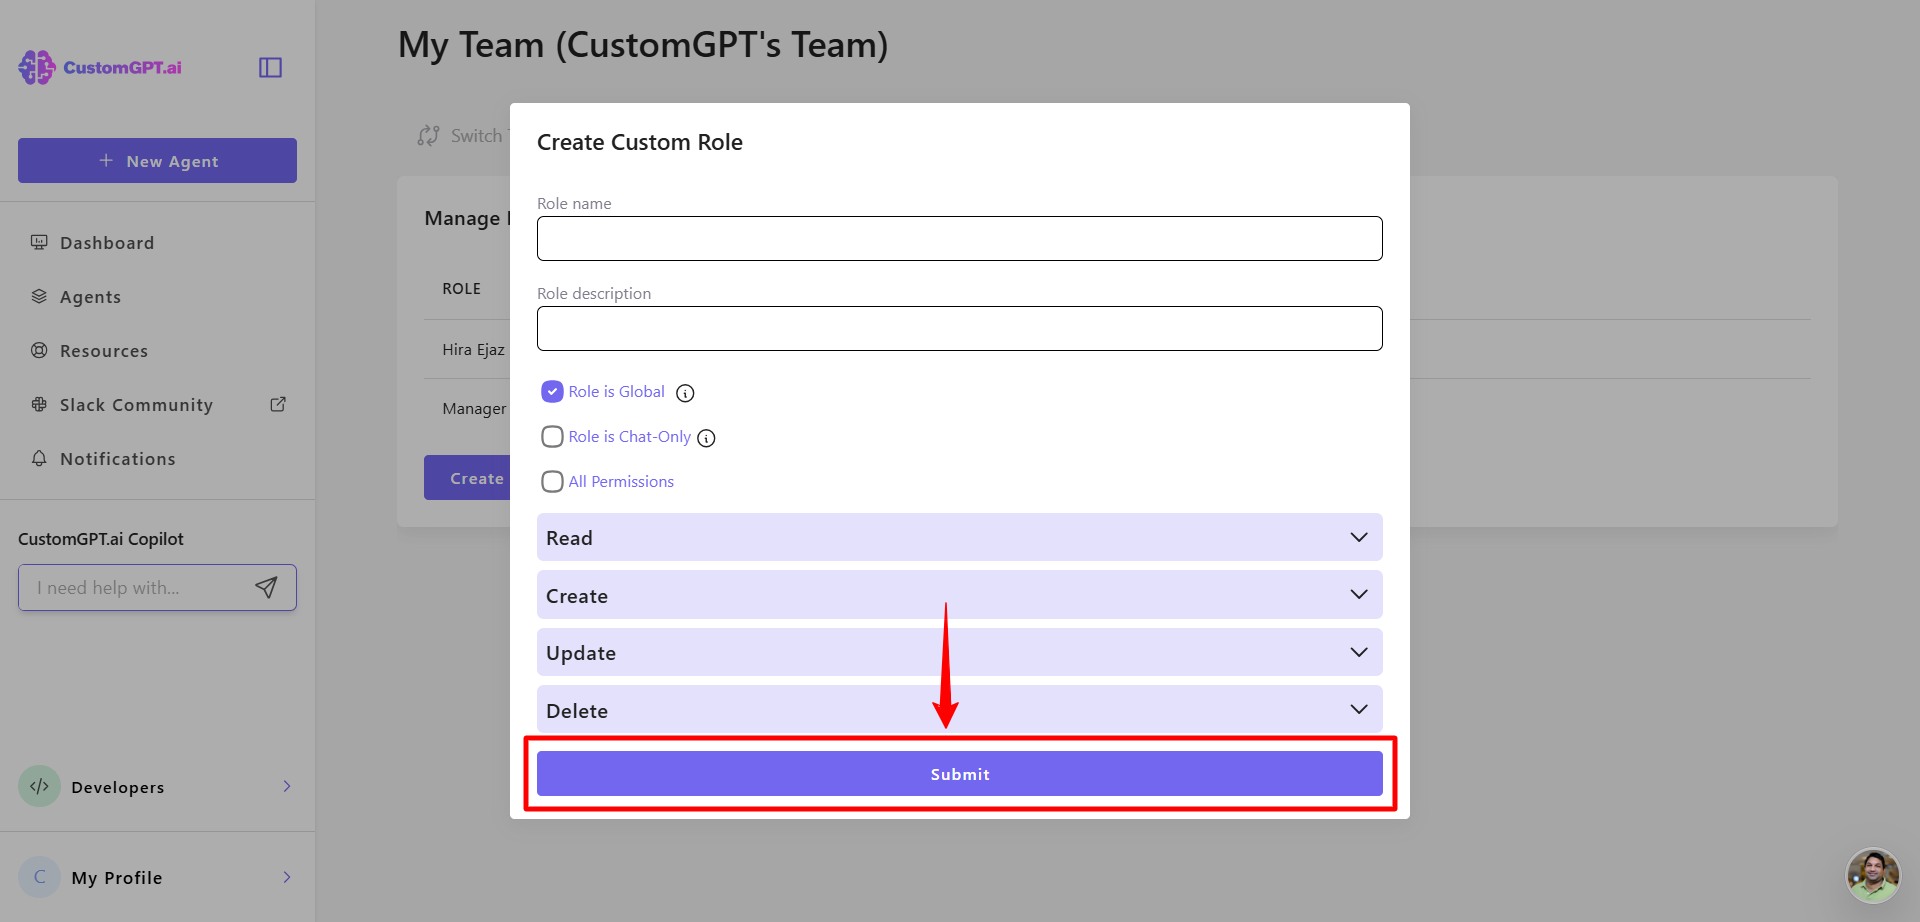
- Click Create Custom Role.

- Enter a role name and add a short description to explain the purpose of the role.
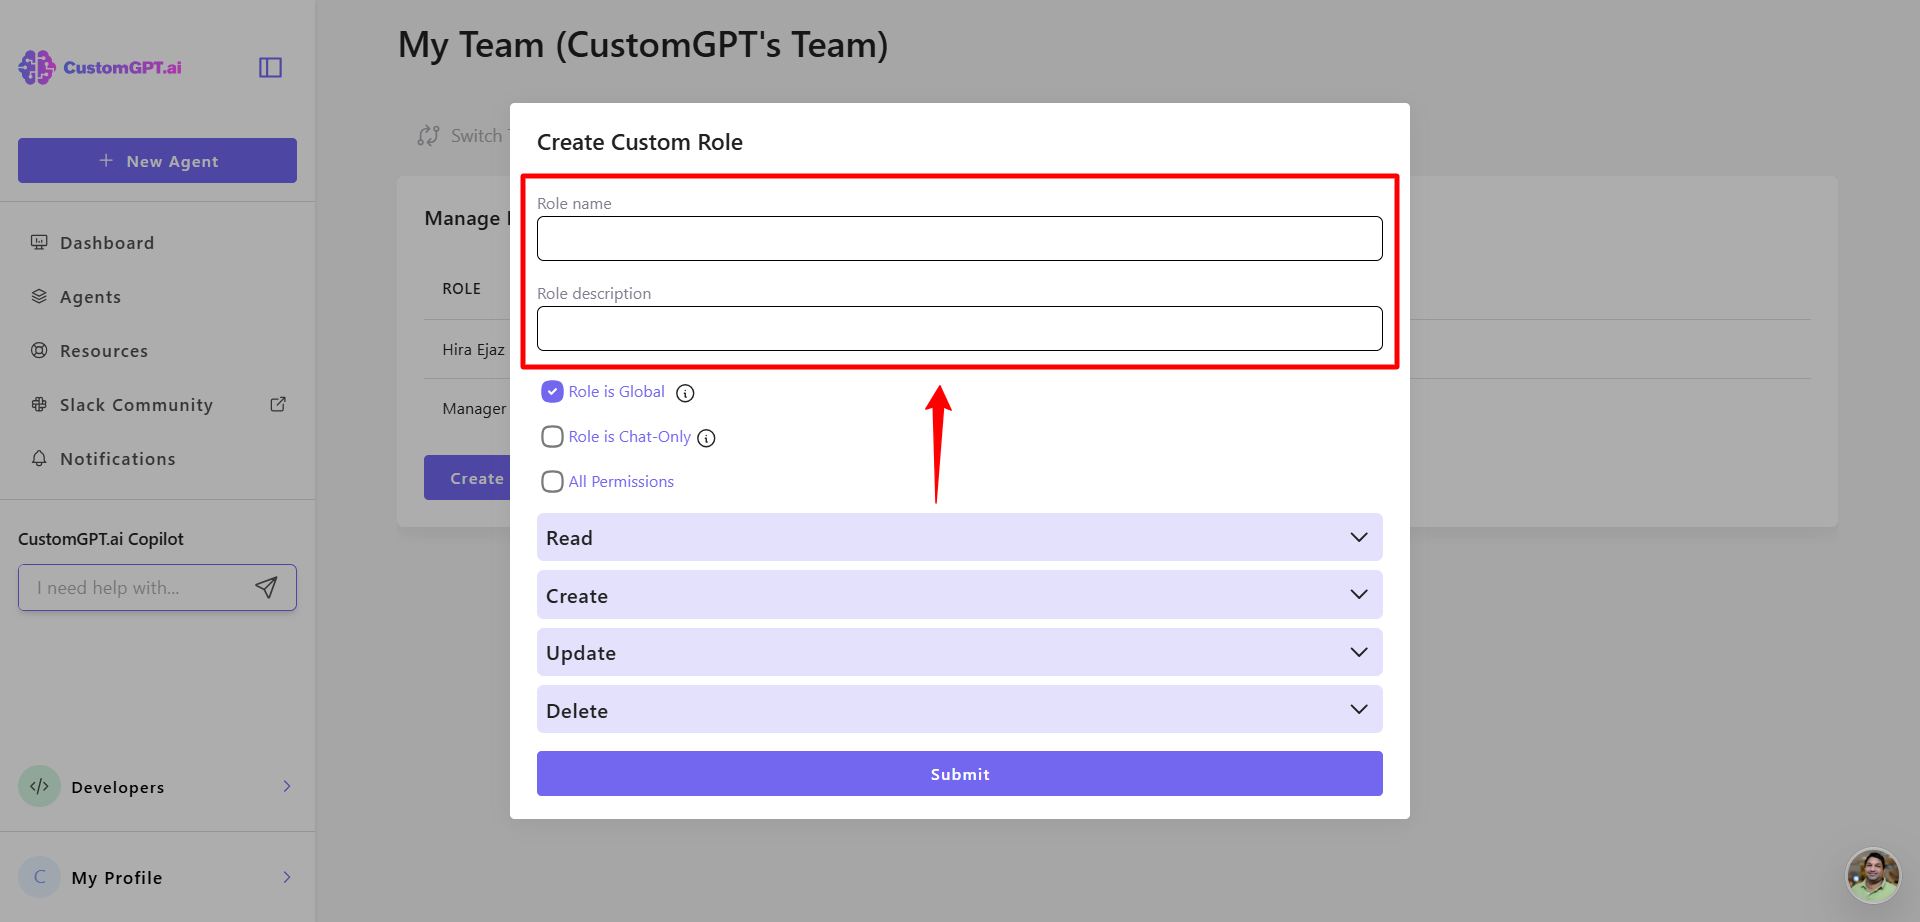
- Expand the permissions section to define what actions this role can perform. You can grant read, create, update, or delete access based on what responsibilities the role should have.
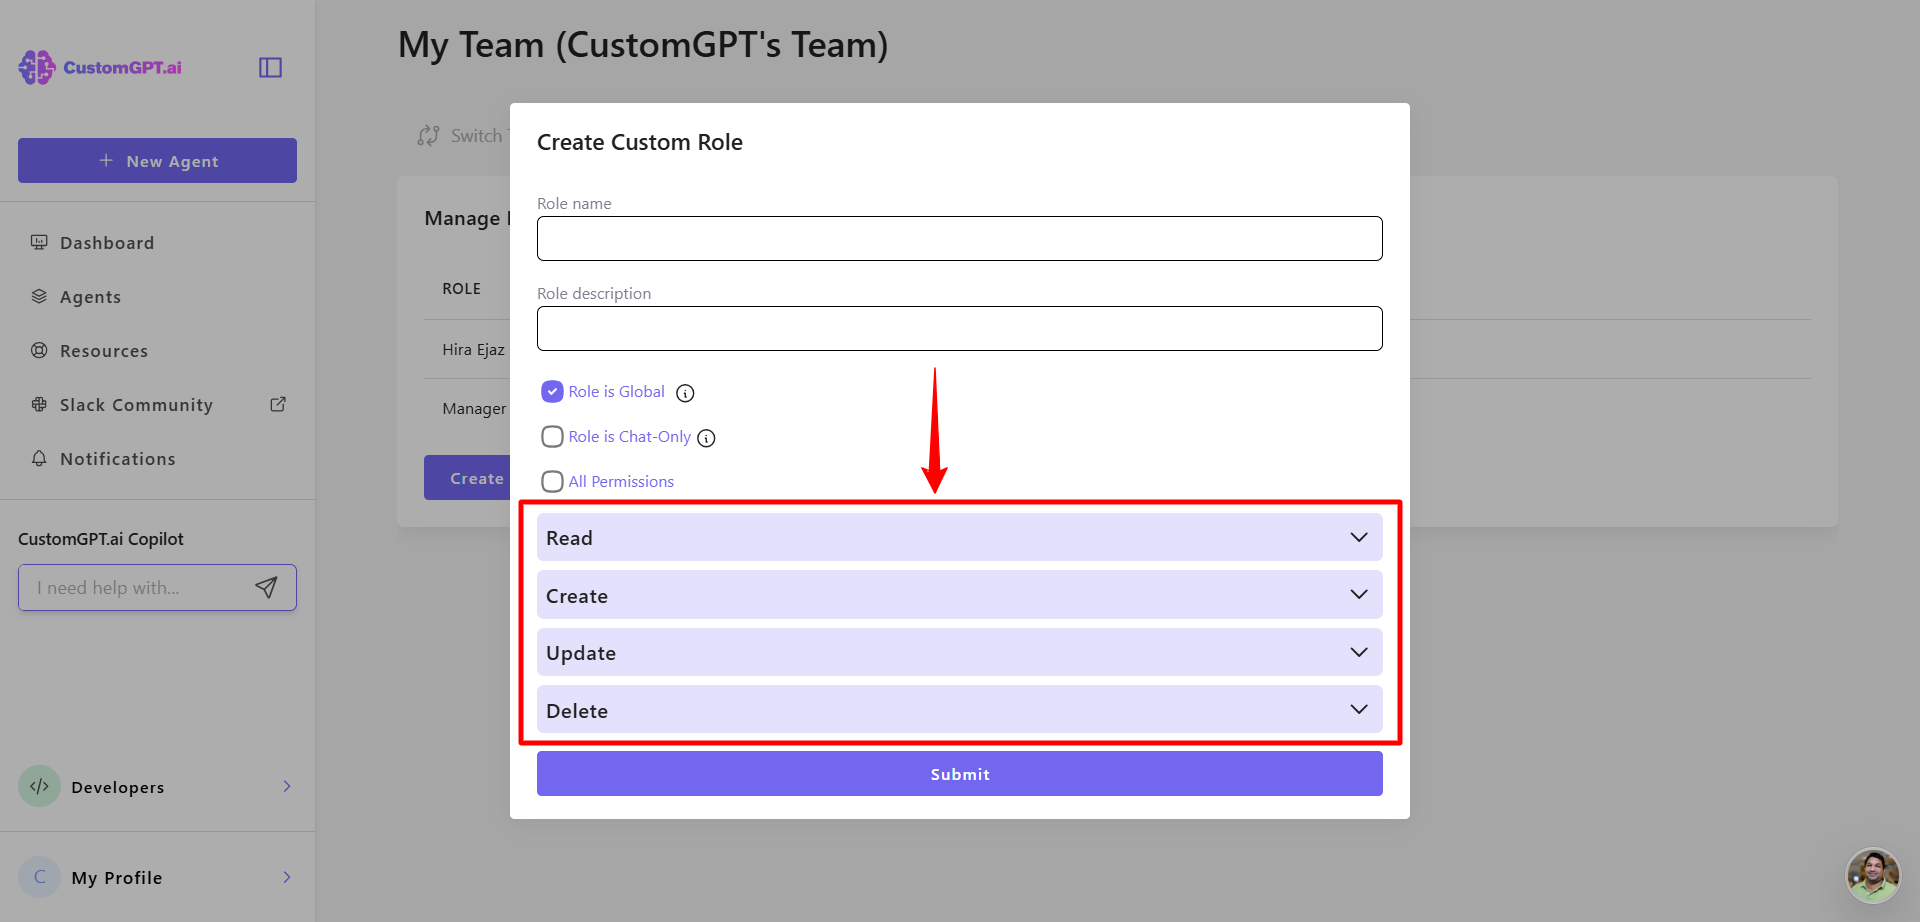
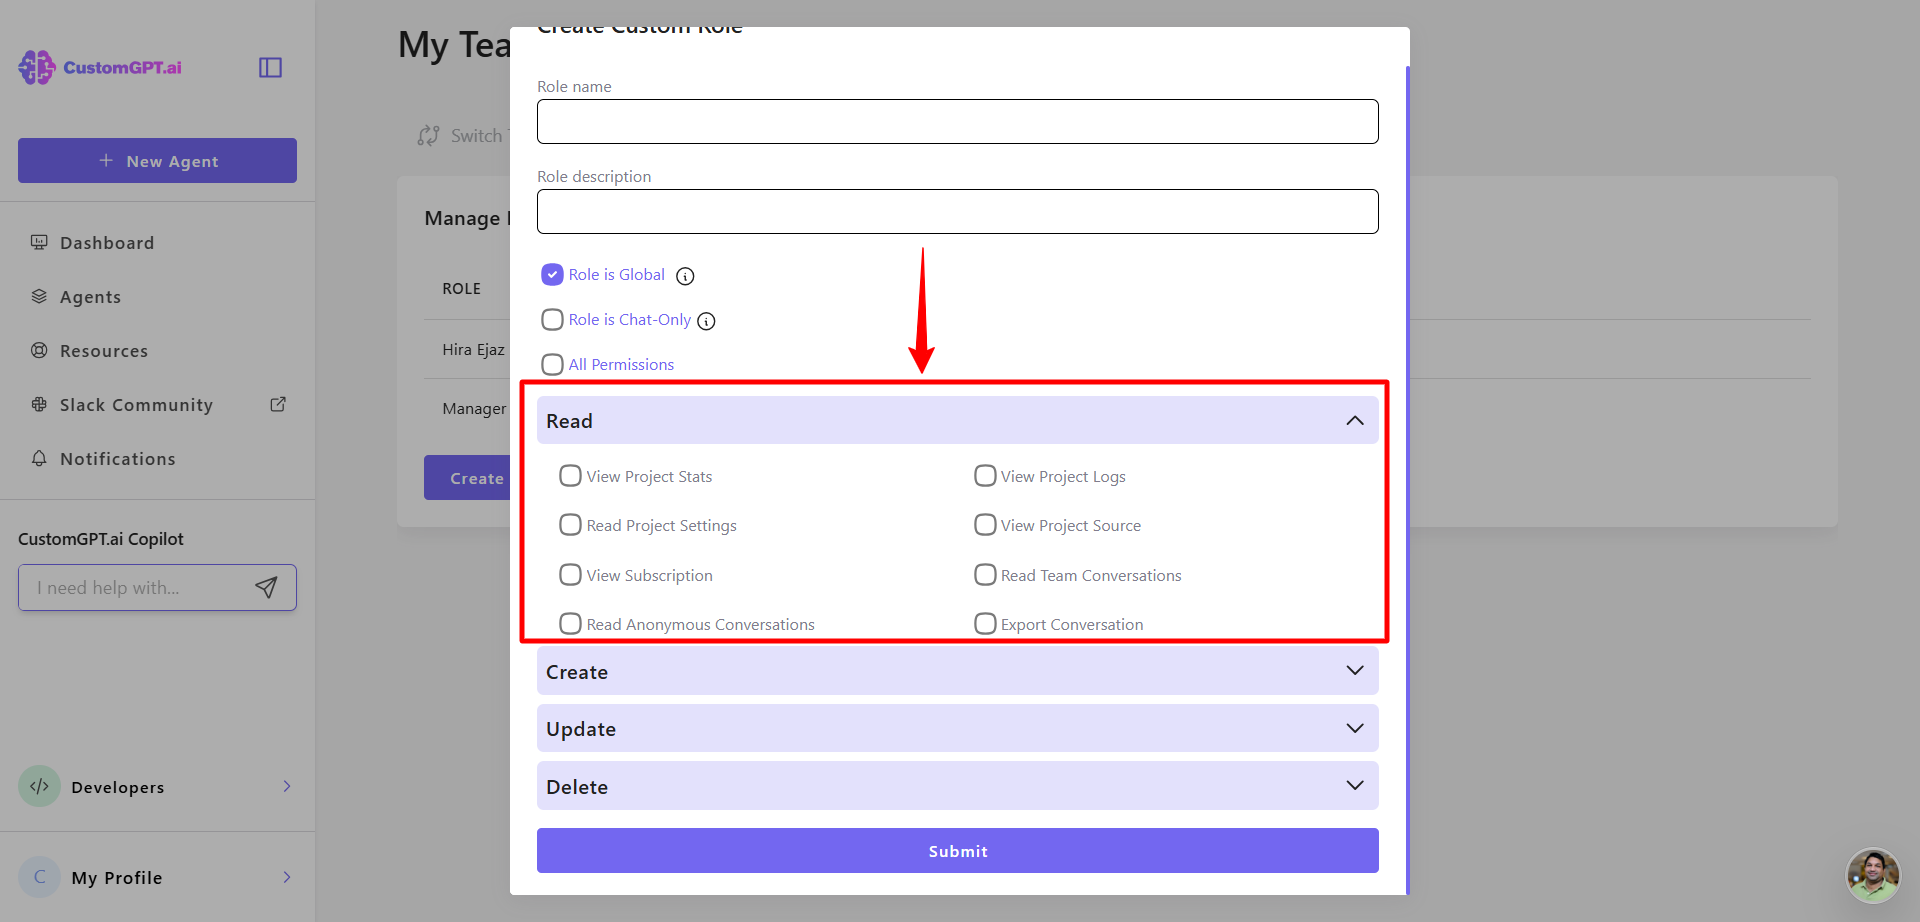
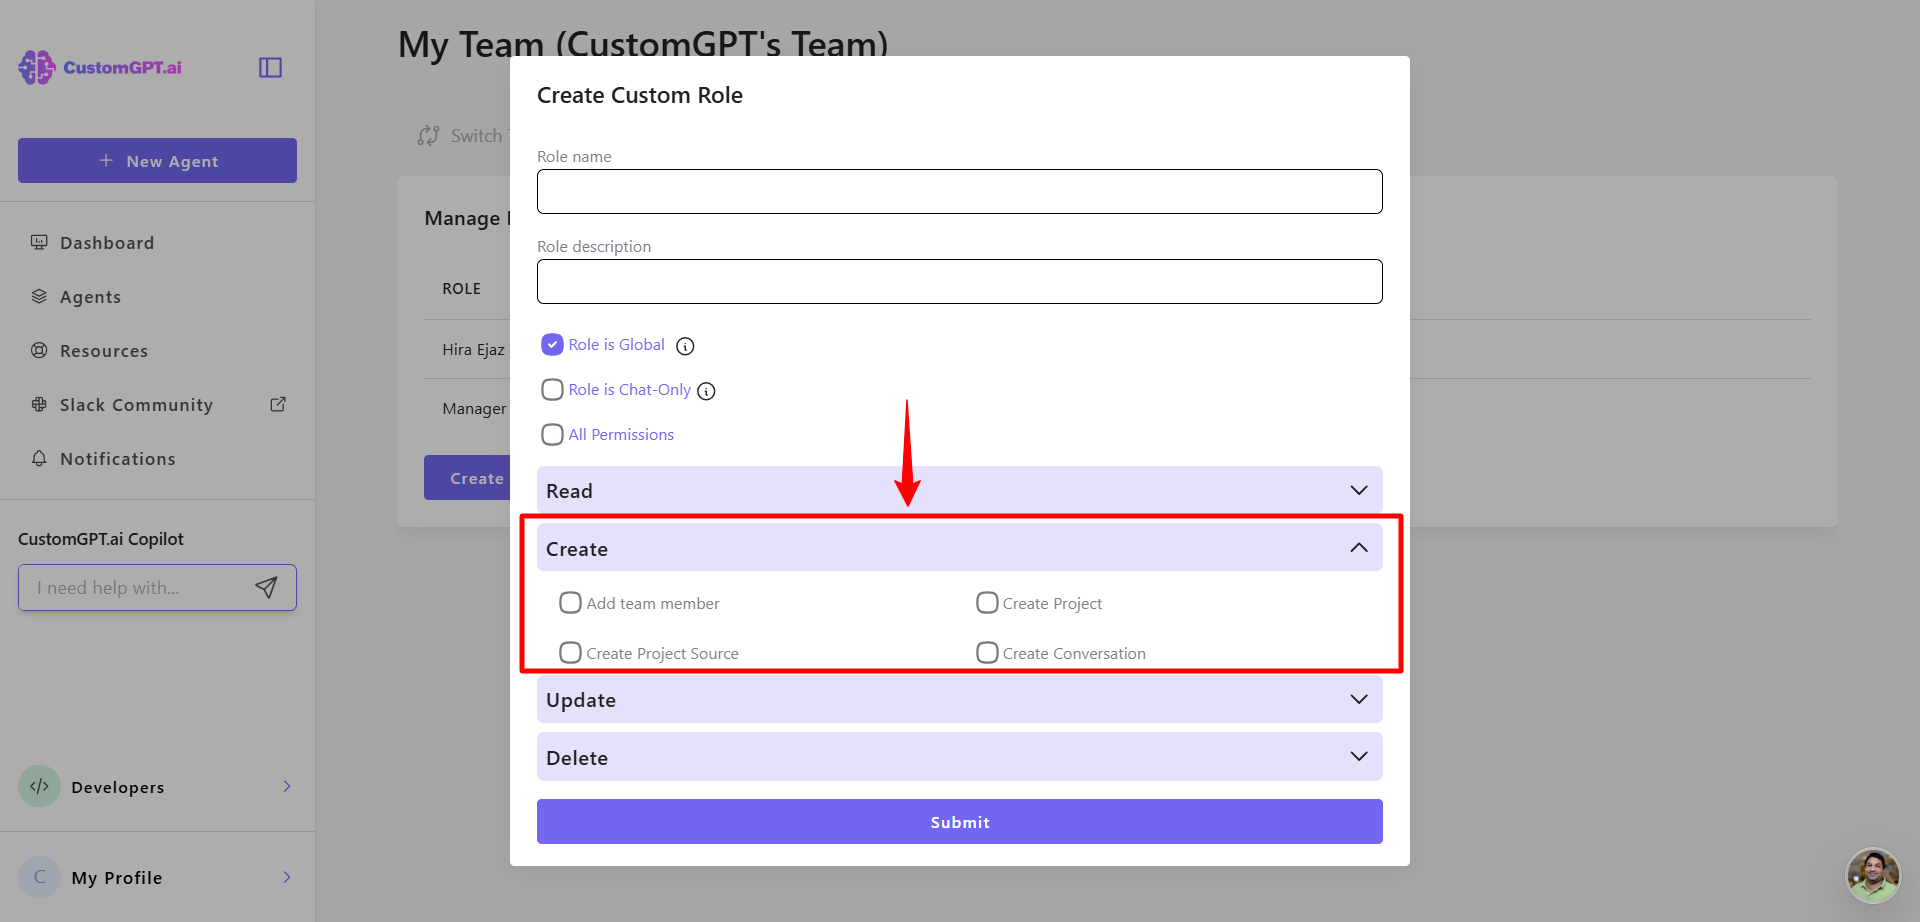
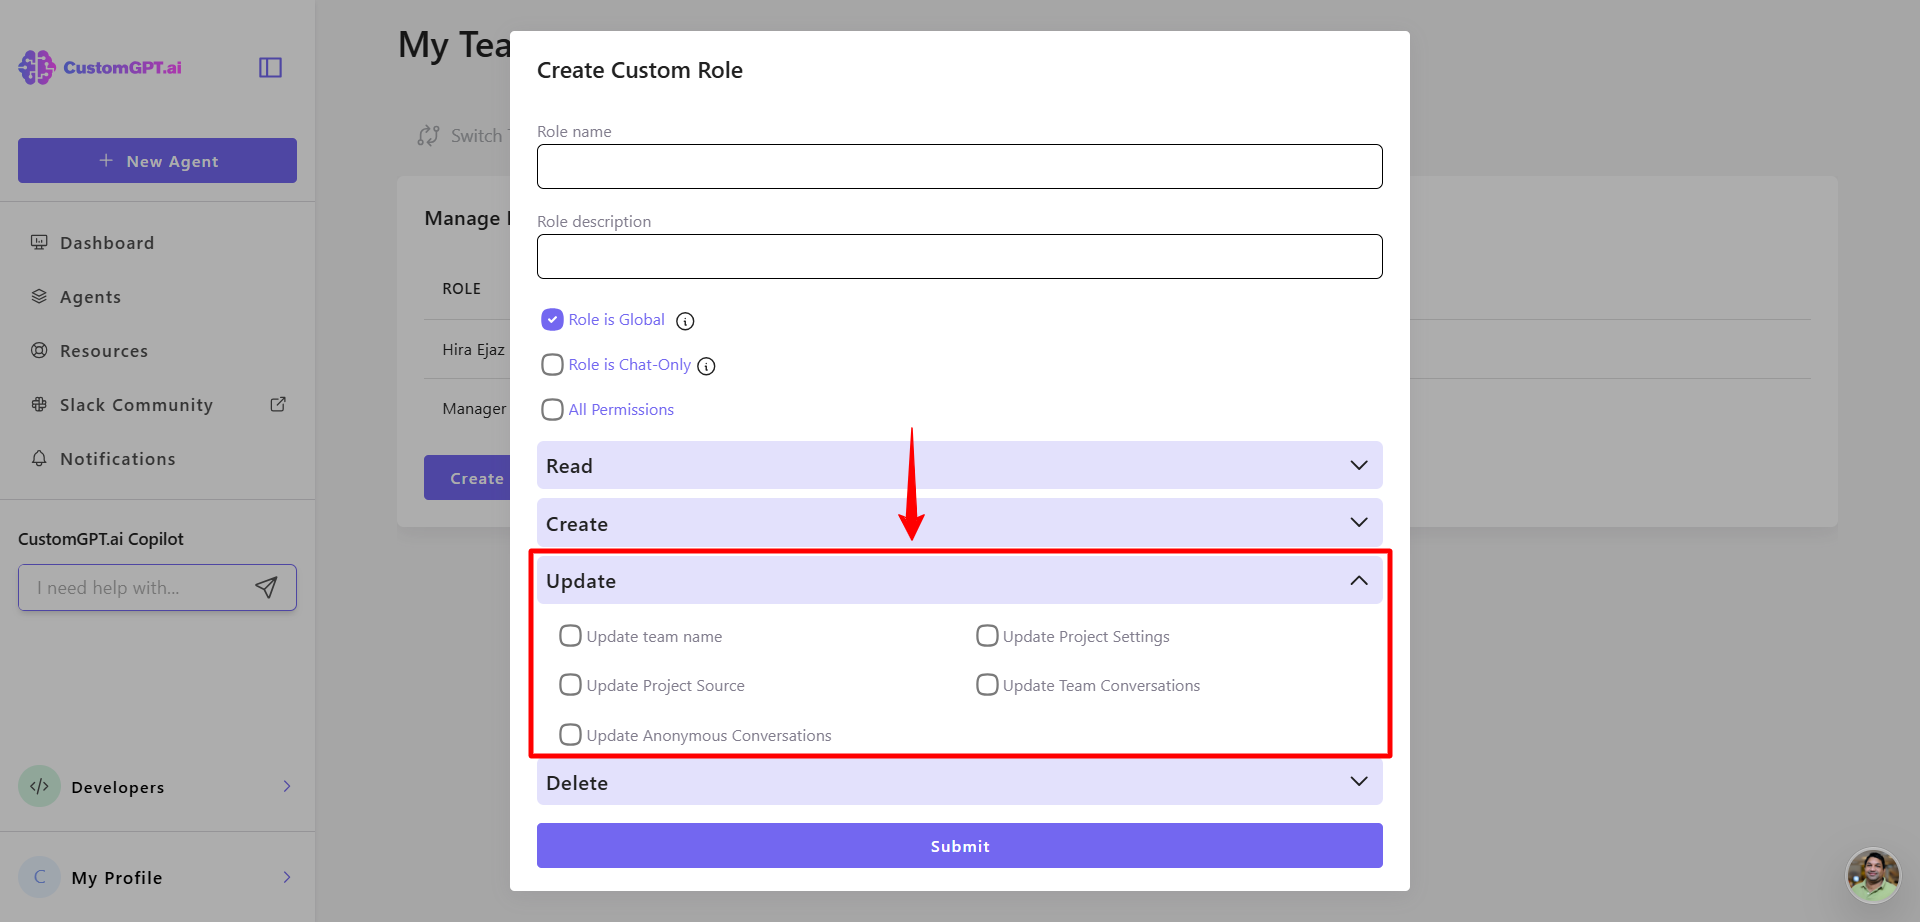
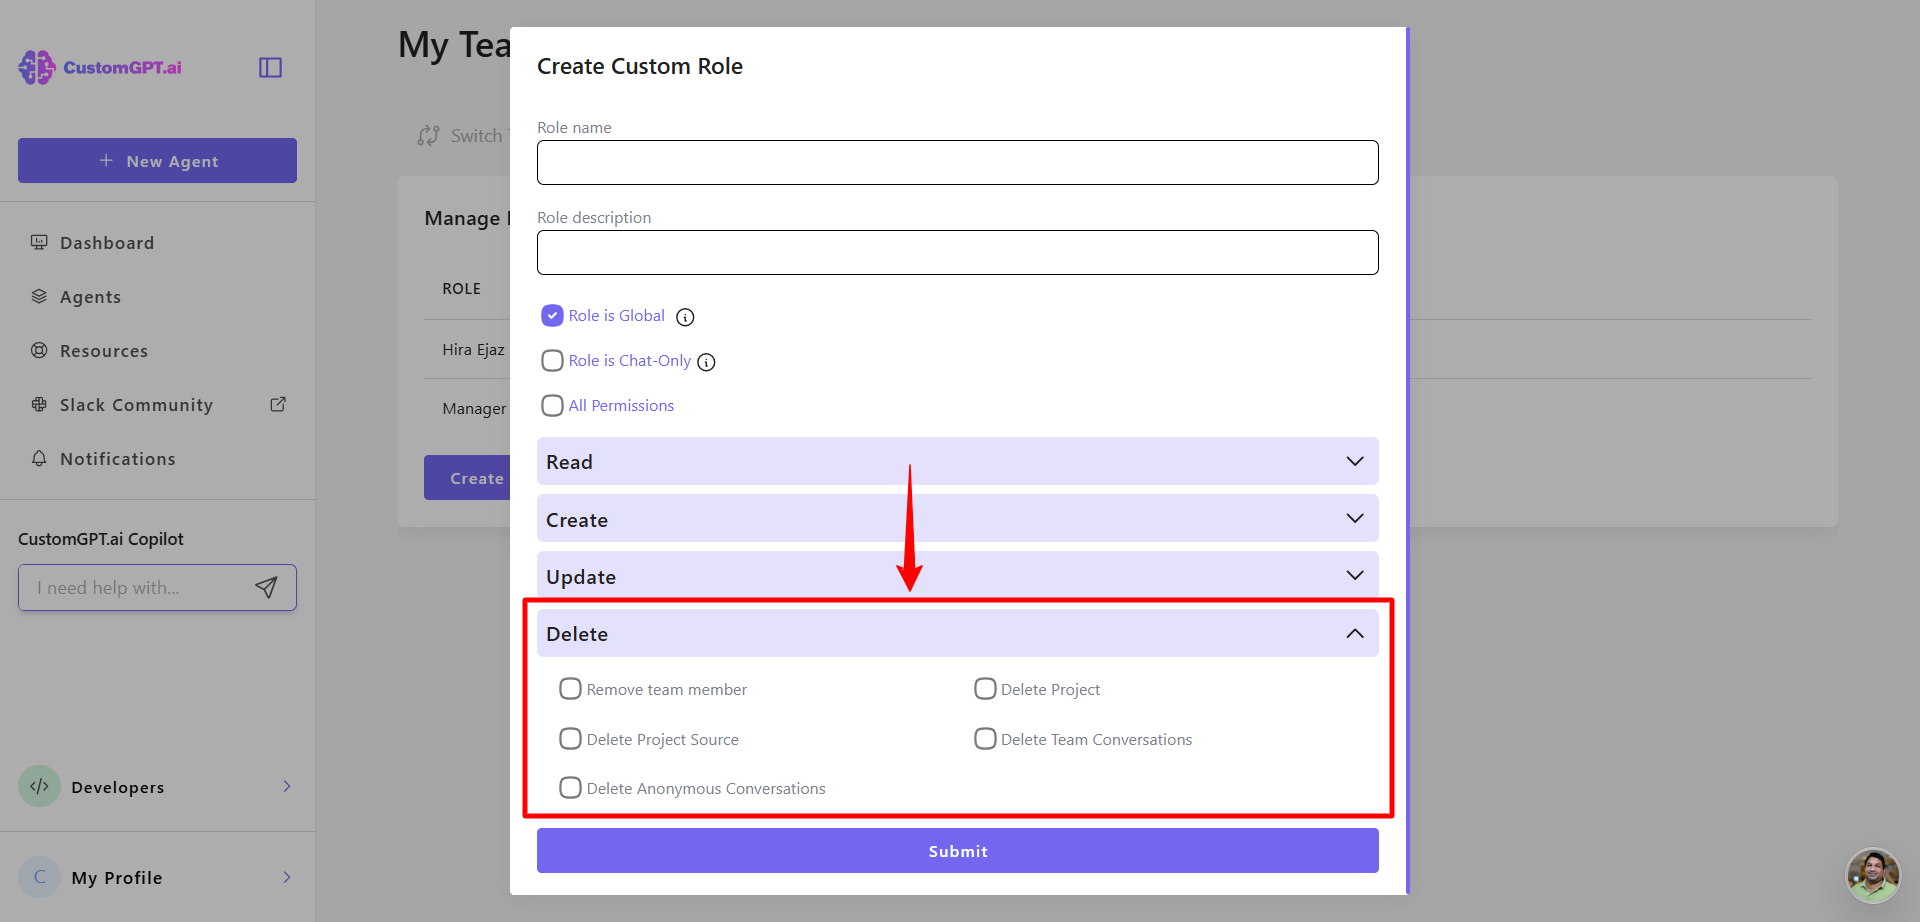
- Select the permissions this role should have:
Read permissions:
- View agent stats
- View agent logs
- Read agent settings
- View agent source
- View subscription
- Read team conversations
- Read anonymous conversations
- Export conversations
Create permissions:
- Add Team Members
- Create Agents
- Create Agent Source
- Create Conversations
Update permissions:
- Update Team Names
- Update Agent Settings
- Update Agent Source
- Update Team Conversations
- Update Anonymous Conversations
Delete permissions:
- Remove Team Members
- Delete Agents
- Delete Agent Source
- Delete Team Conversations
- Delete Anonymous Conversations
- Click Create Role to save your changes.
- You can view your newly created role in the Roles tab and update or delete it at any time. If you want to create a role that applies only to specific agents, see advanced role-based access control
For more details, see:
Updated 10 months ago
Did this page help you?