How to Integrate a CustomGPT.ai Agent with Your WIX Website

Enhance your WIX website by creating and integrating a CustomGPT.ai agent, designed to boost customer engagement and drive sales through personalized AI-driven interactions. Follow this step-by-step guide to get started.

Step 1: Sign in

a) Sign in to https://app.customgpt.ai/.


Step 2: Create a New Project

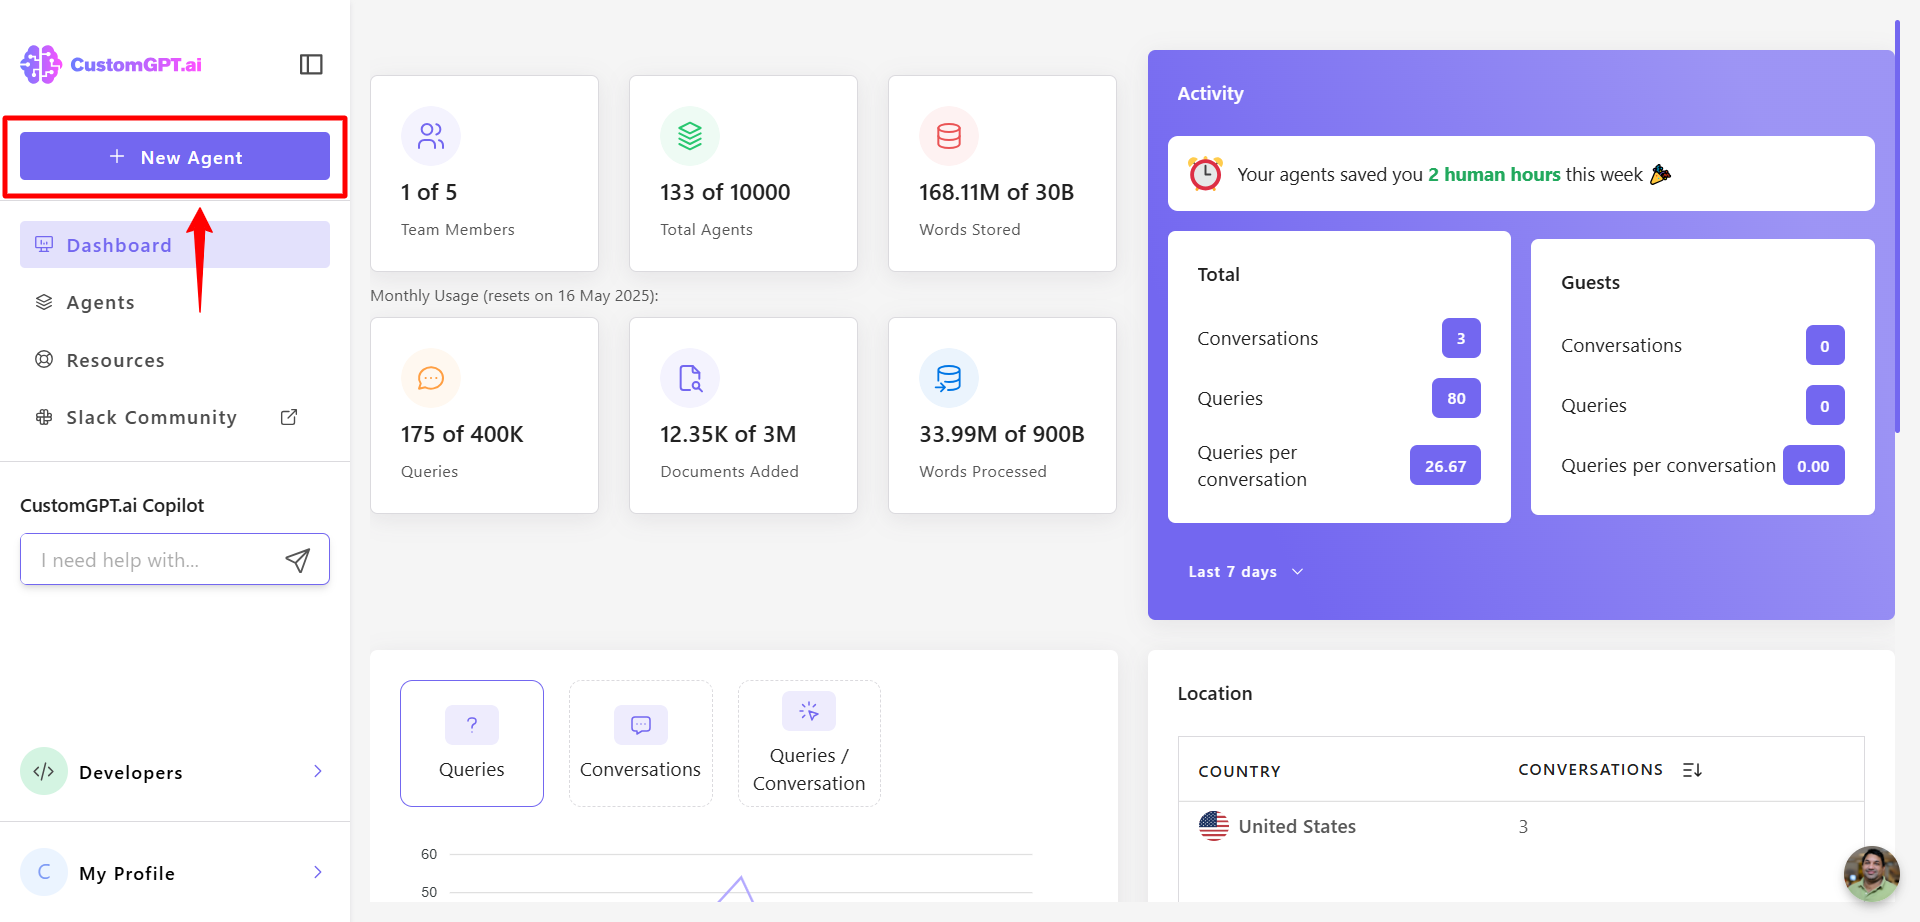
Once signed in, you will be directed to the main dashboard.. Click on the "Create a Project" button.

Create a Project

Step 3: WIX Integration

After creating a project, you'll need to connect it to your WIX website. Follow these steps to complete the integration:

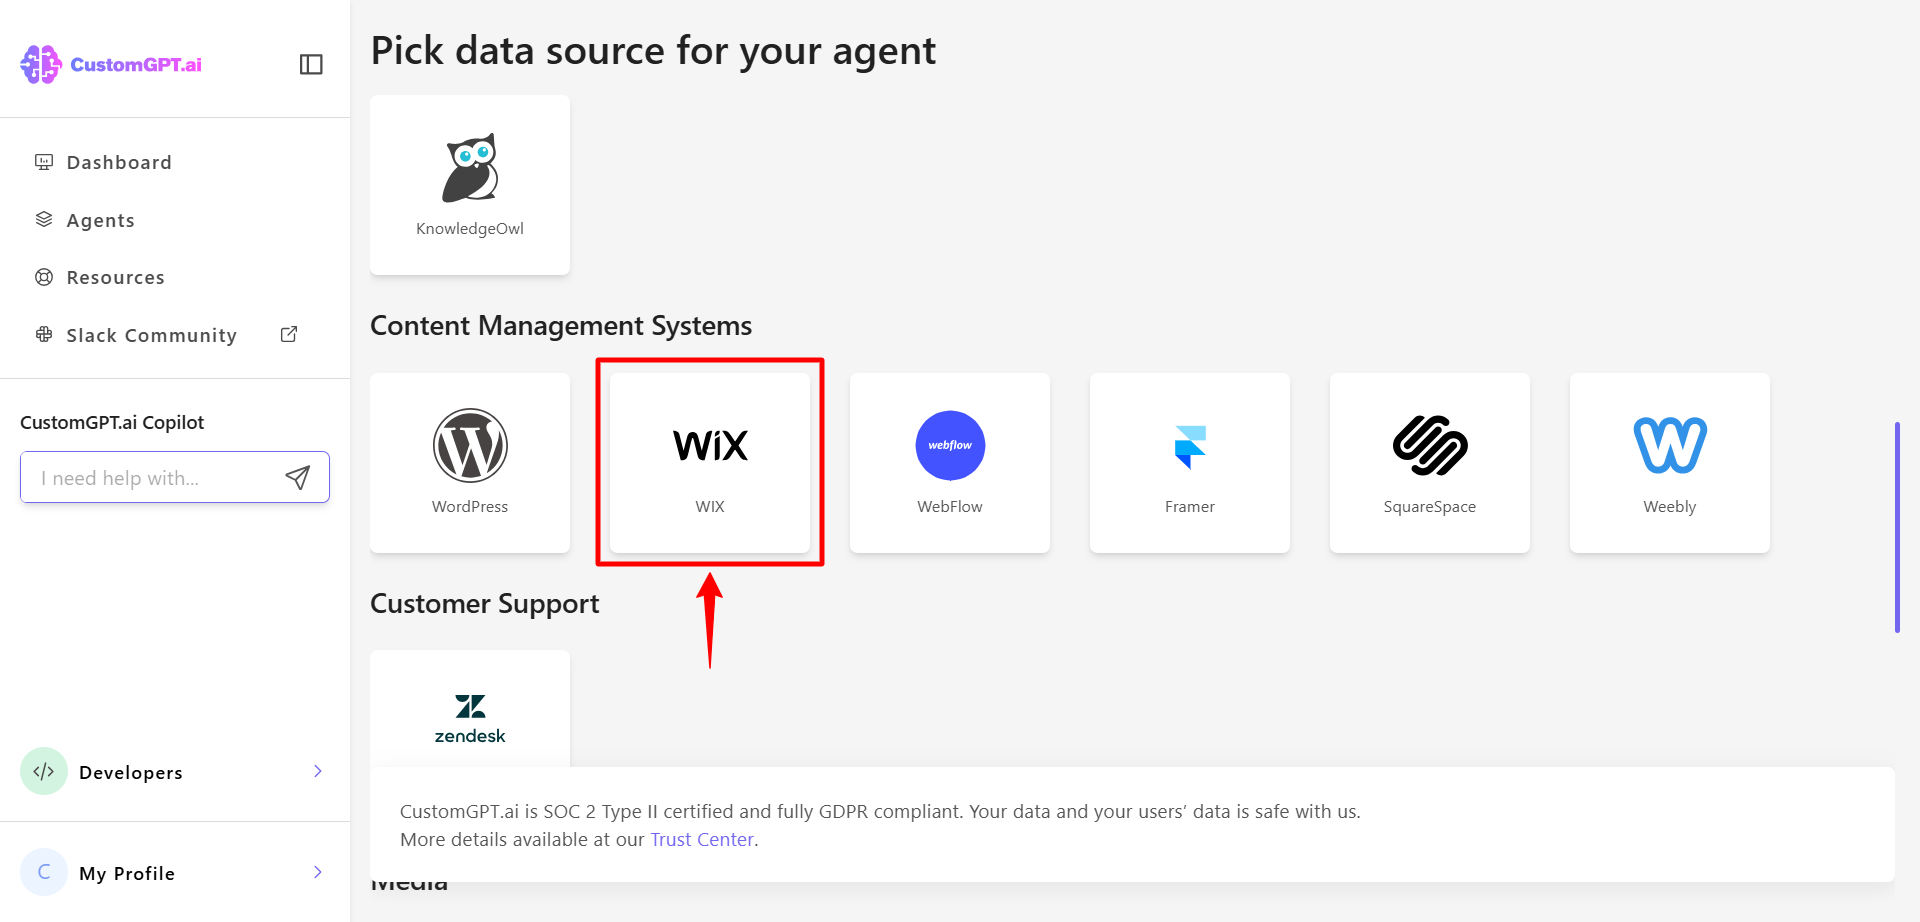
a) Click on "WIX" under the "Create Project" section.

WIX

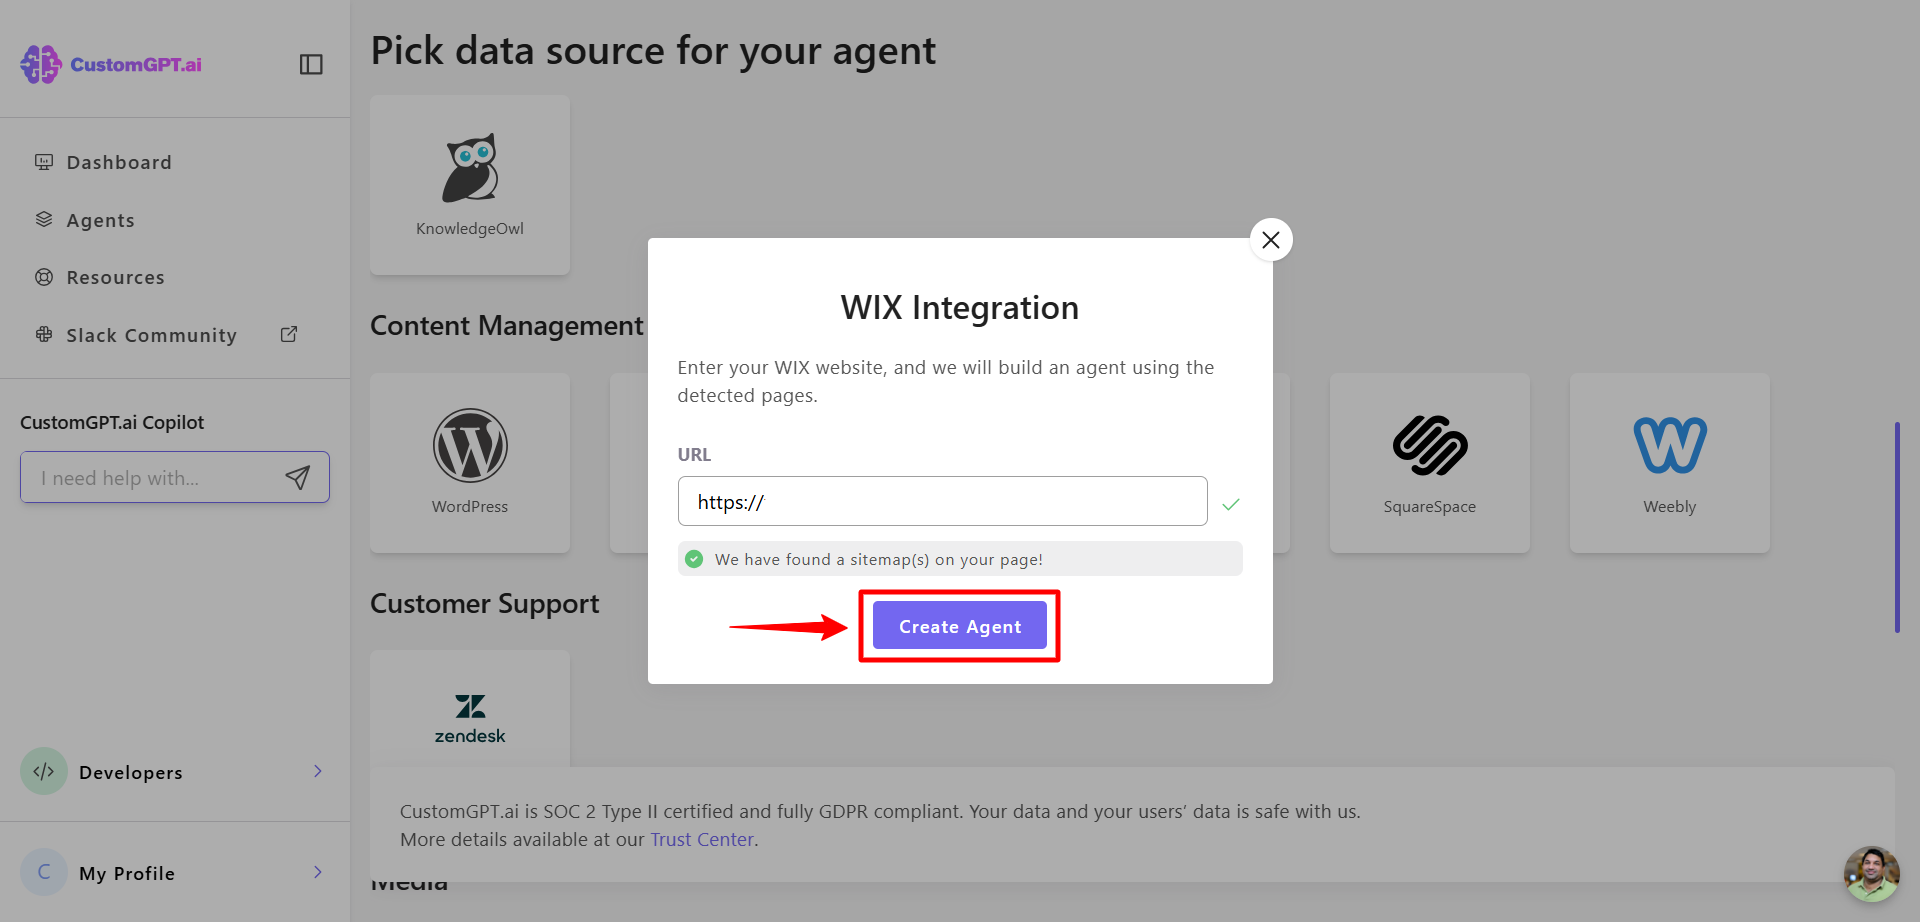
b) Enter your WIX website URL in the provided field. CustomGPT.ai will automatically detect the pages on your site.
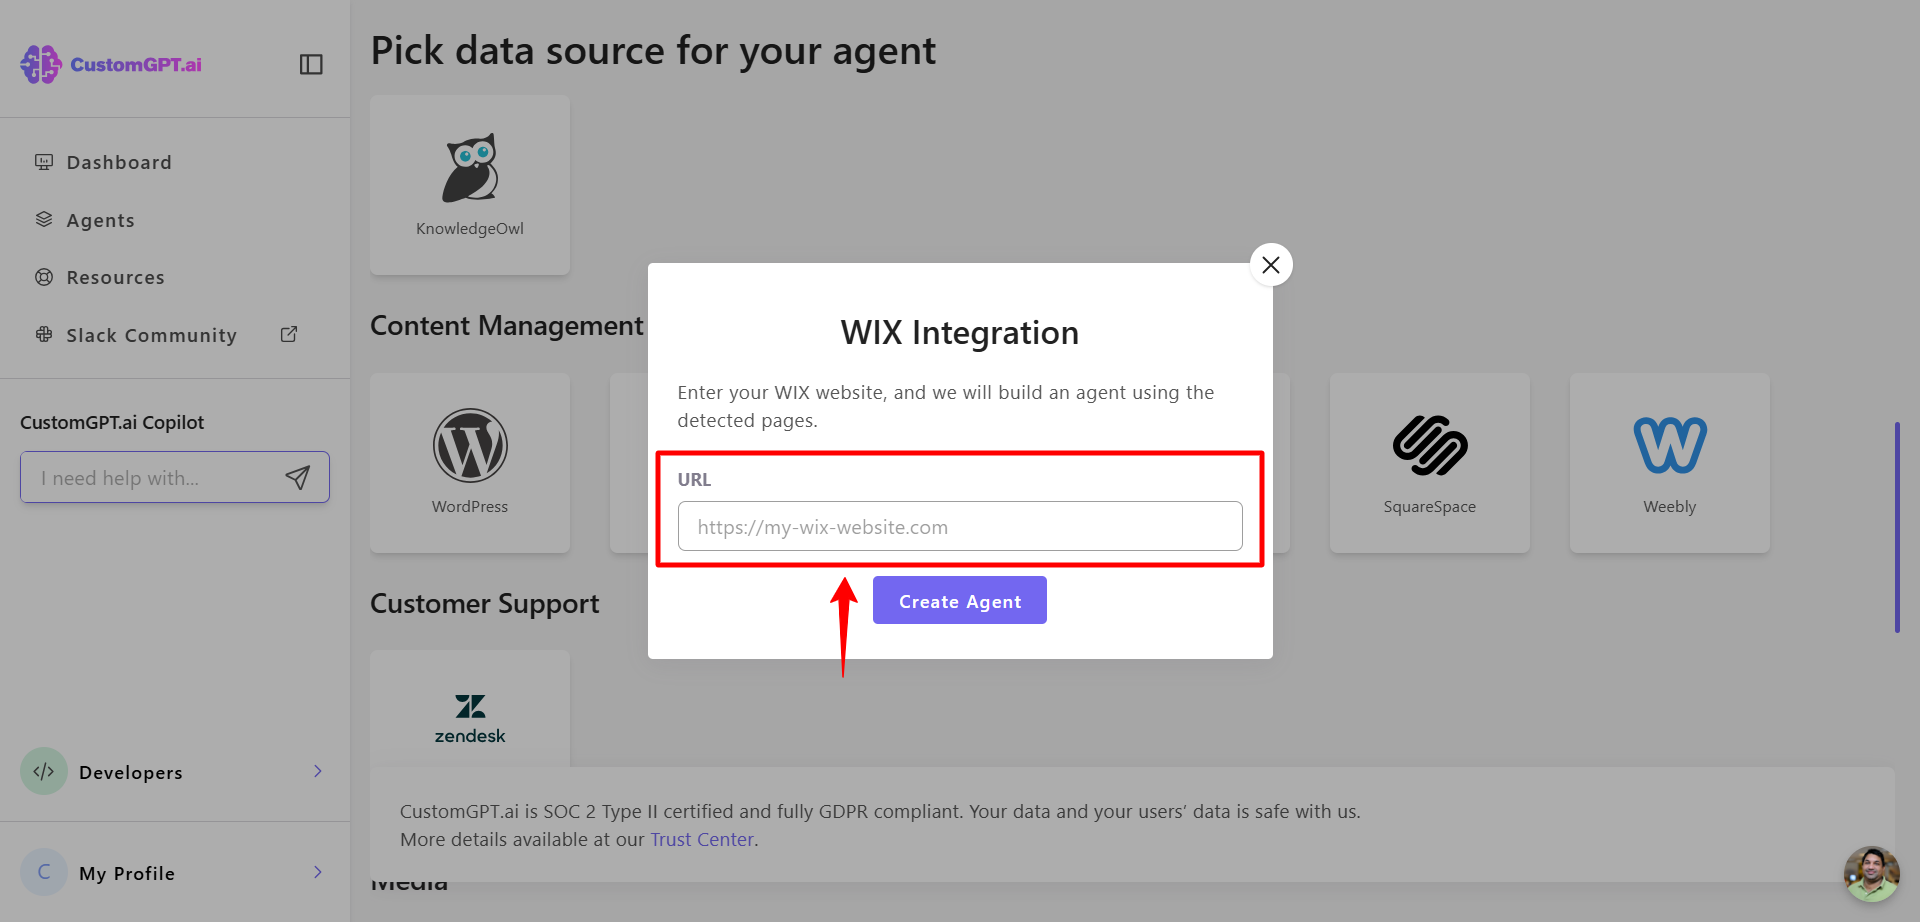
WIX Integration

c) Click on "Create" to start building your AI Agent using the detected pages from your WIX website.

Create Project

Step 4: Configure Your AI Agent's Appearance

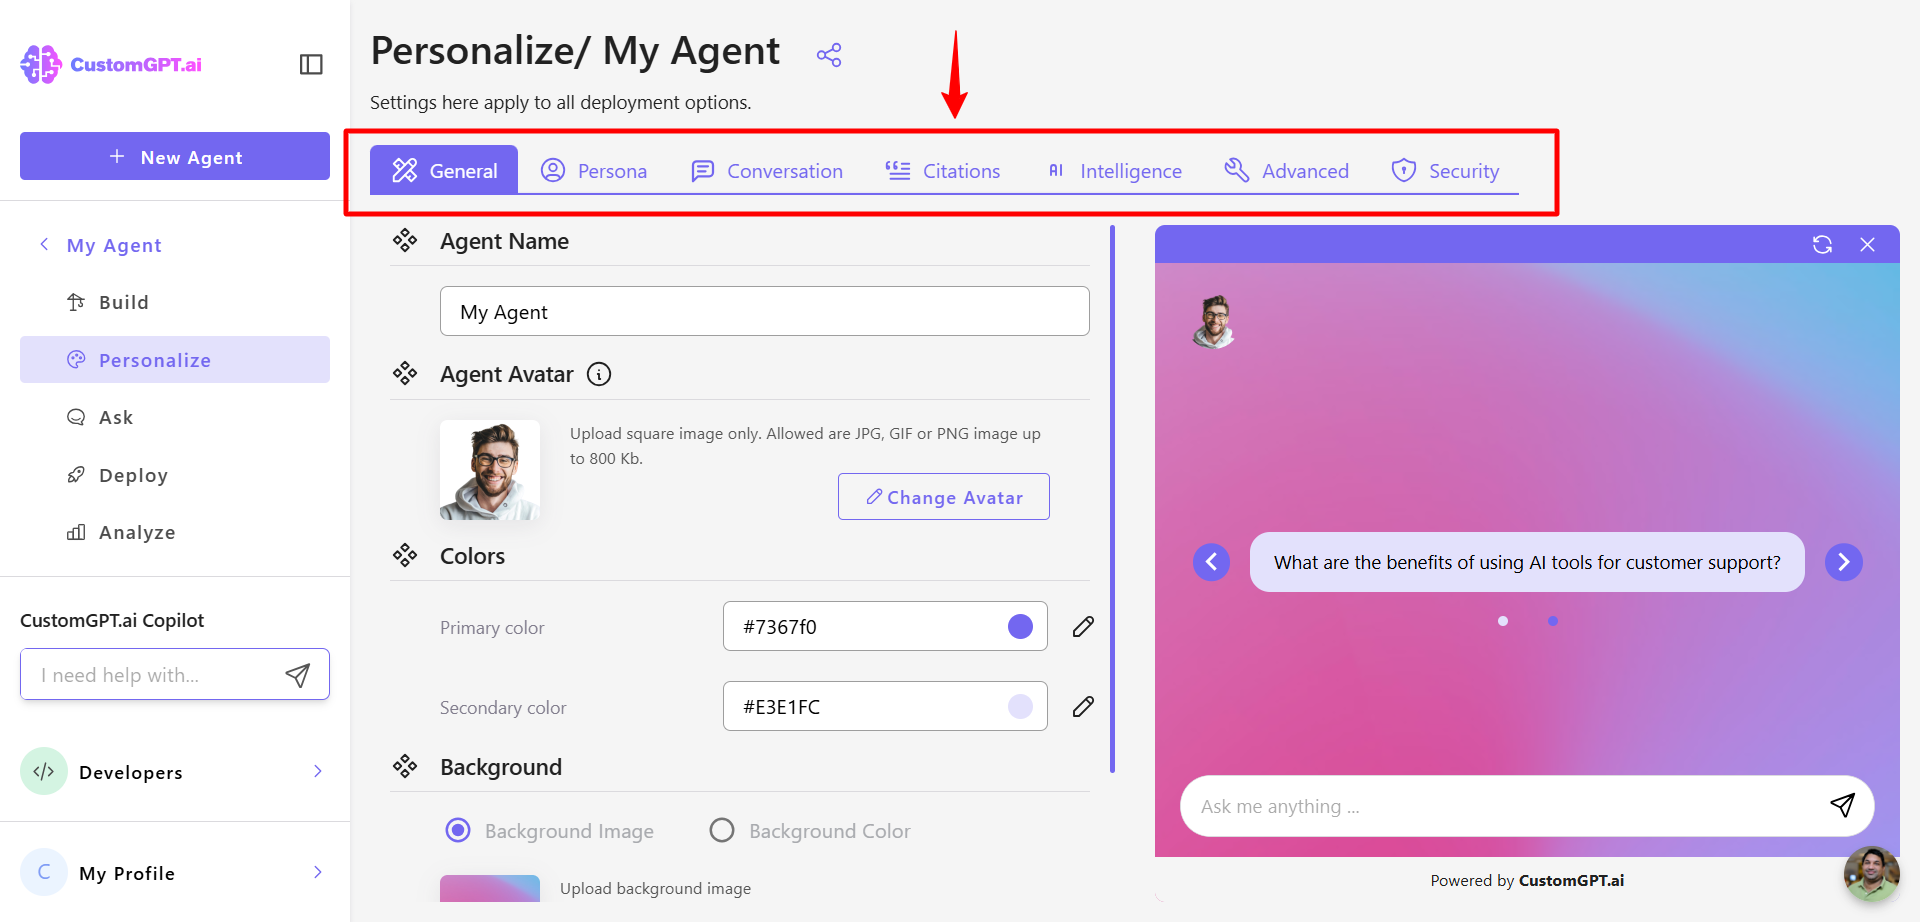
a) Configure Appearance: Tailor your AI agent’s appearance to match your brand’s look and feel.

b) Name Your AI Agent: Give your agent a unique name that represents your brand identity.

Configure Your AI Agent's Appearance

c) Once you've completed these steps, your project will appear in your project settings, where you can further manage and fine-tune your AI Agent.

Projects - CustomGPT.ai

👍

Congratulations! Your CustomGPT.ai agent has been successfully created and integrated with your WIX website. Now, you can engage visitors with personalized AI-driven interactions, enhancing their experience and encouraging more sales.