Enable auto-sync for websites and sitemaps
This step-by-step guide shows you how to enable the Auto-Sync feature in CustomGPT to keep your agent's data updated automatically.
Note:This feature is available on the Premium plan or higher. If you're interested in enabling it, please contact our sales team.`
- Click the three dots next to your agent’s name, then select Build.

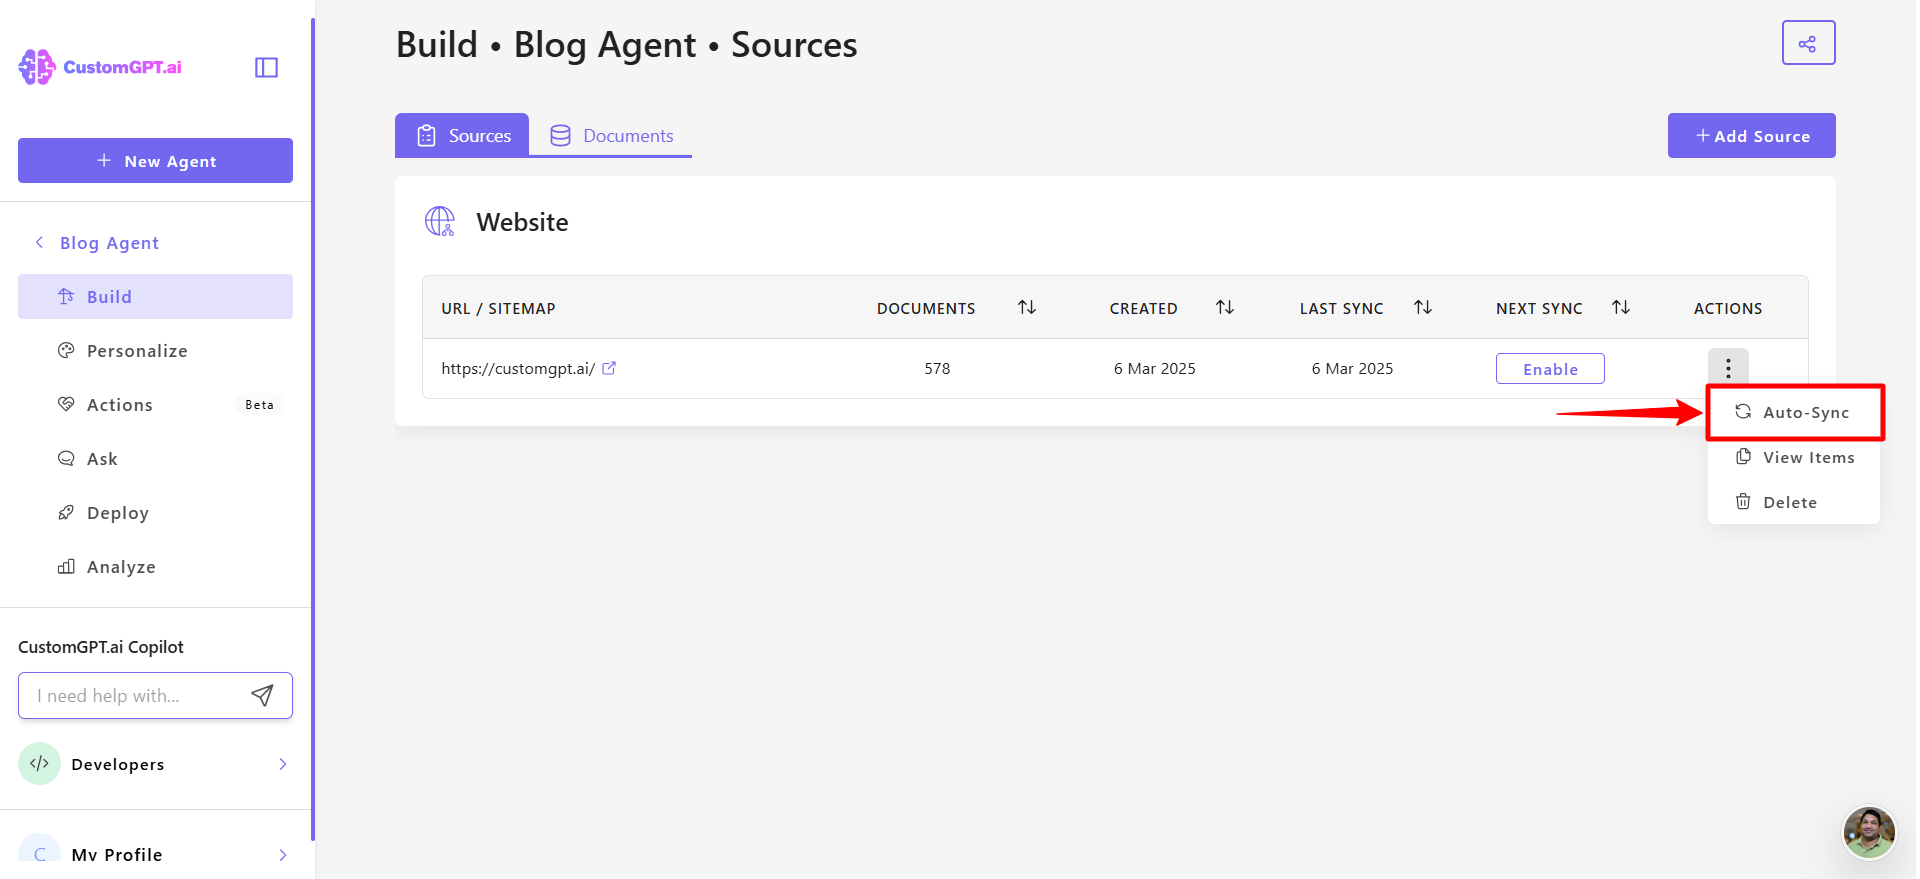
- In Website section, find your connected website, click the three-dot menu next to it, and select Auto Sync.
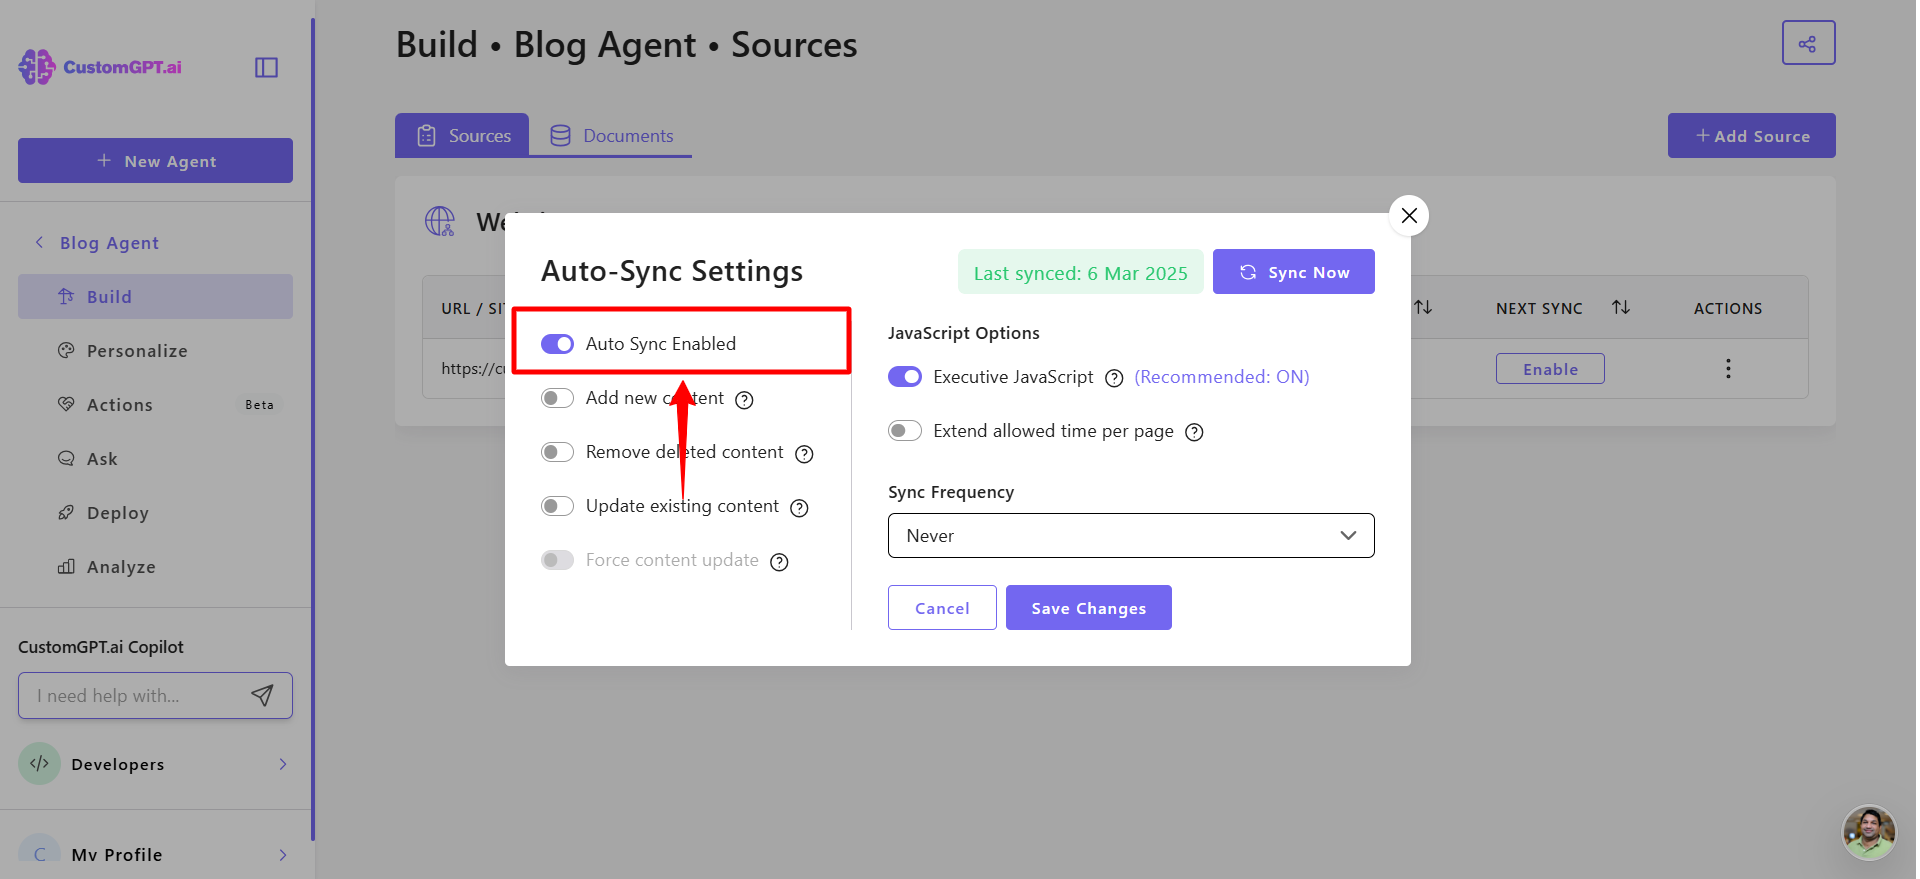
- Toggle Auto Sync to Enabled.
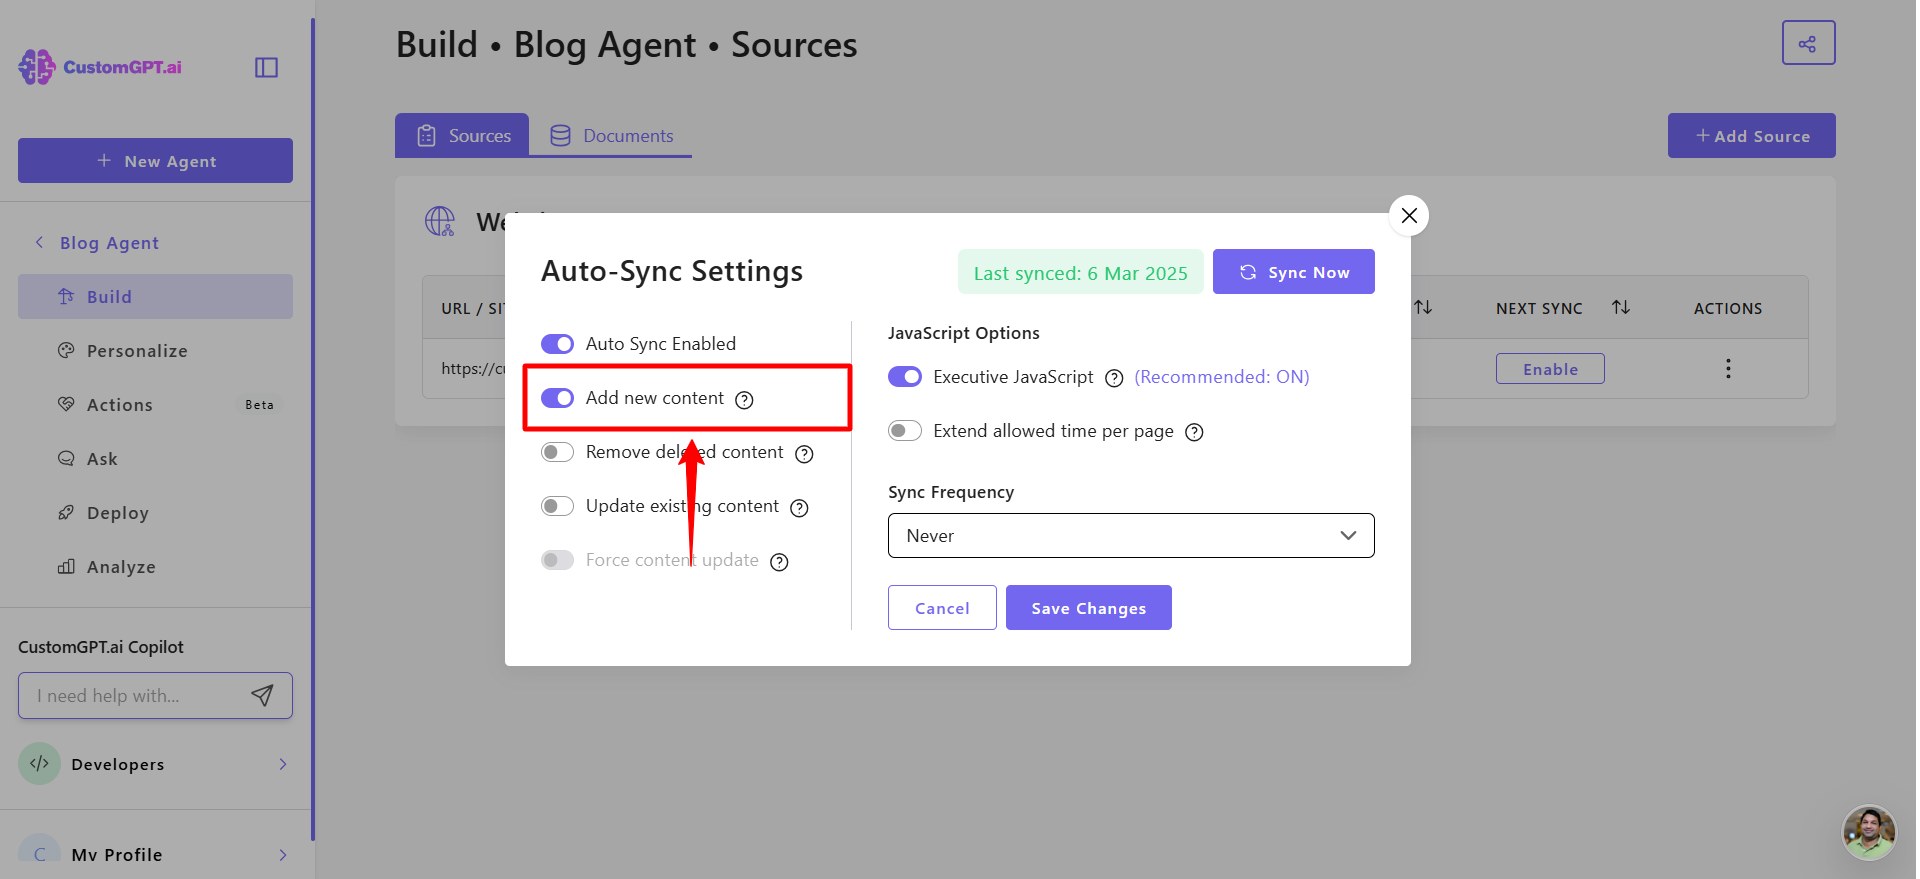
- Toggle Add new content to automatically add any new pages or documents found on your website to your agent’s knowledge base.
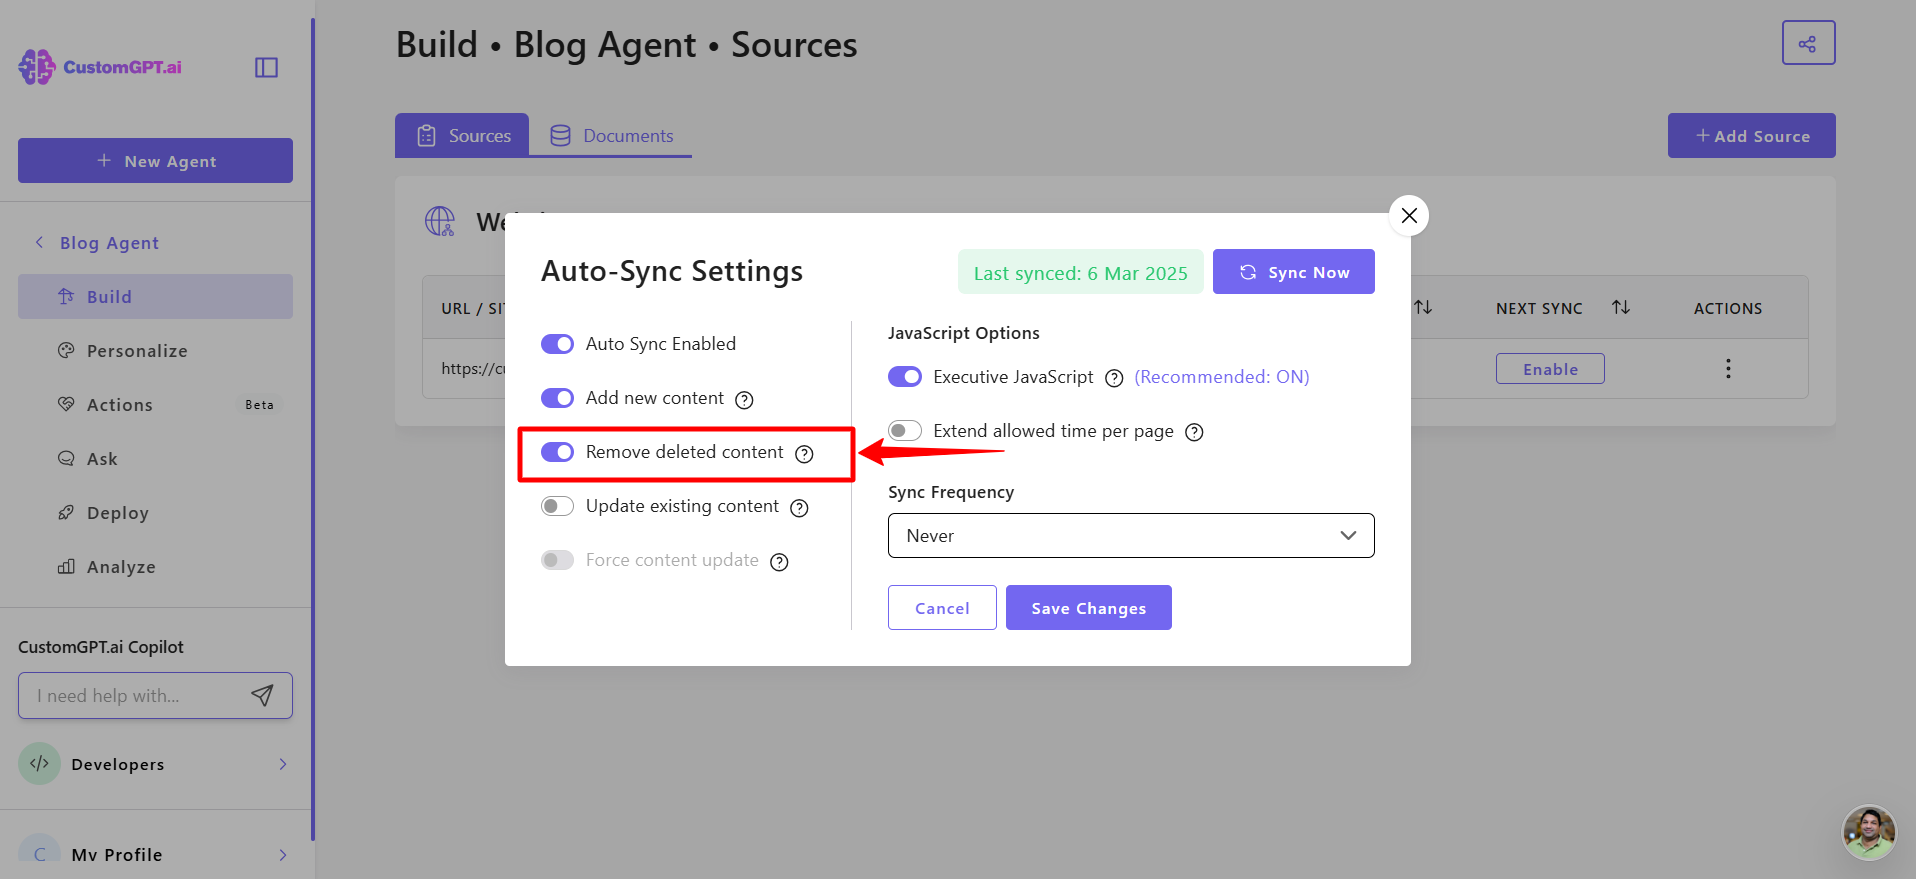
- Toggle Remove deleted content to automatically remove deleted or missing pages that are no longer found on your website.
- Toggle Update existing content to define how CustomGPT should handle pages that already exist in your agent’s knowledge base.
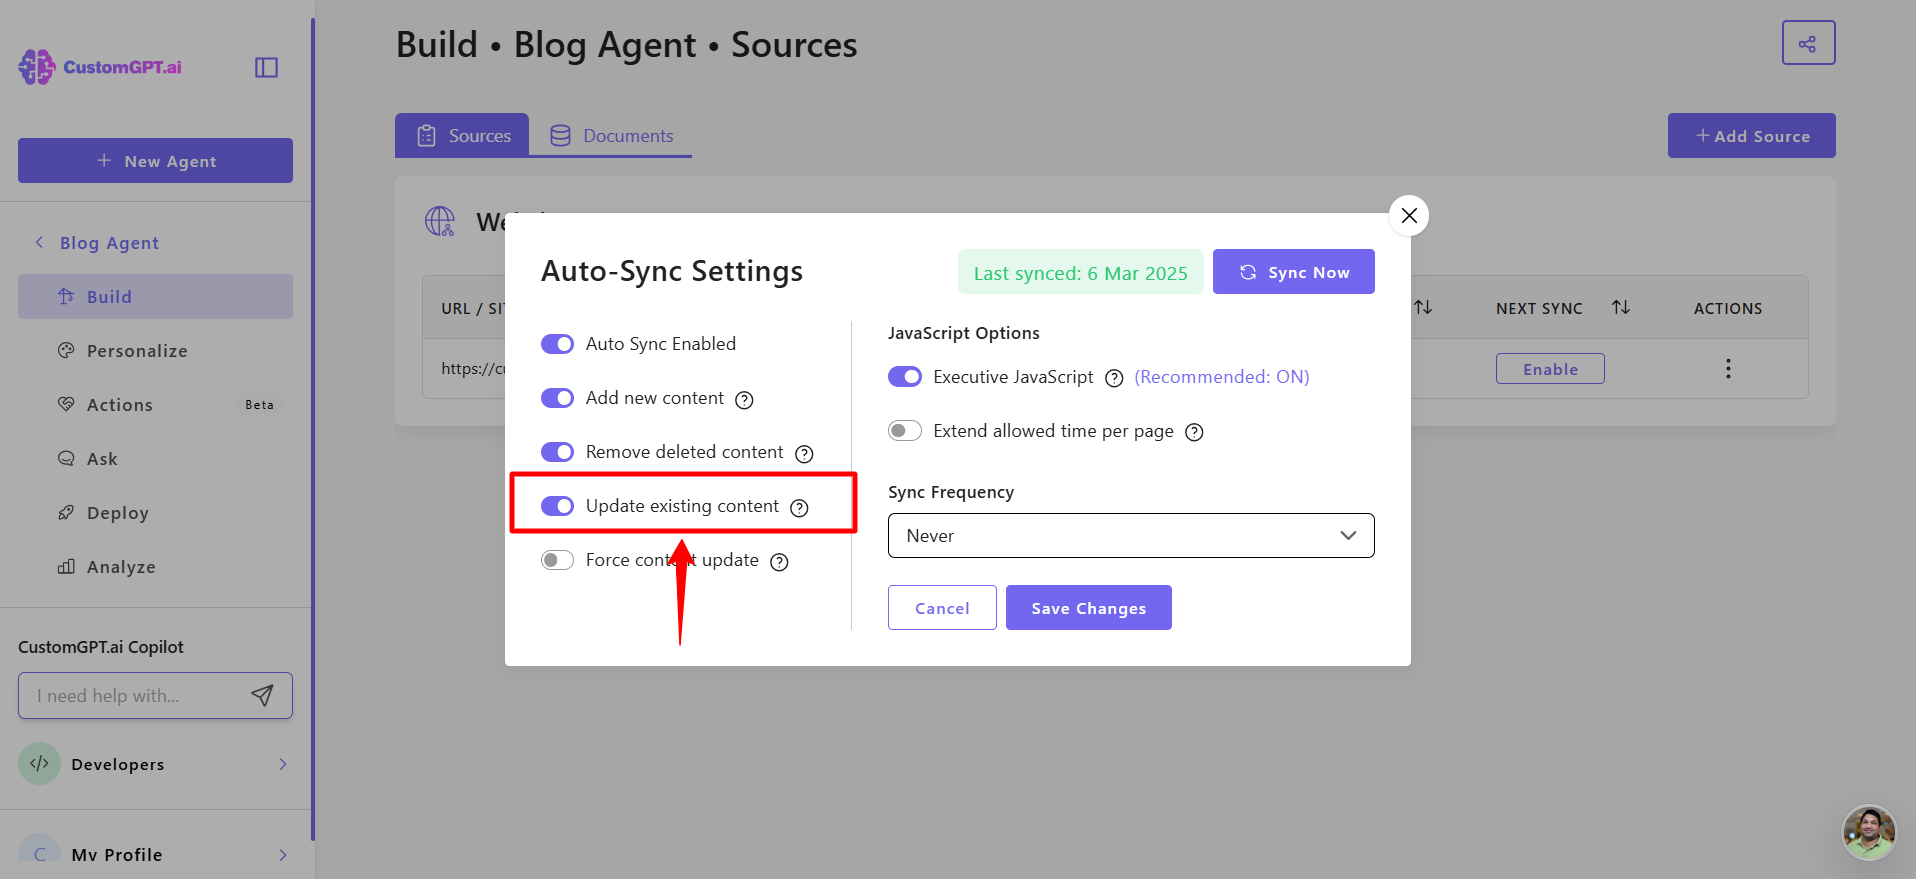
- Toggle Force content update if you want all content to refresh even when it hasn’t changed since the last sync.
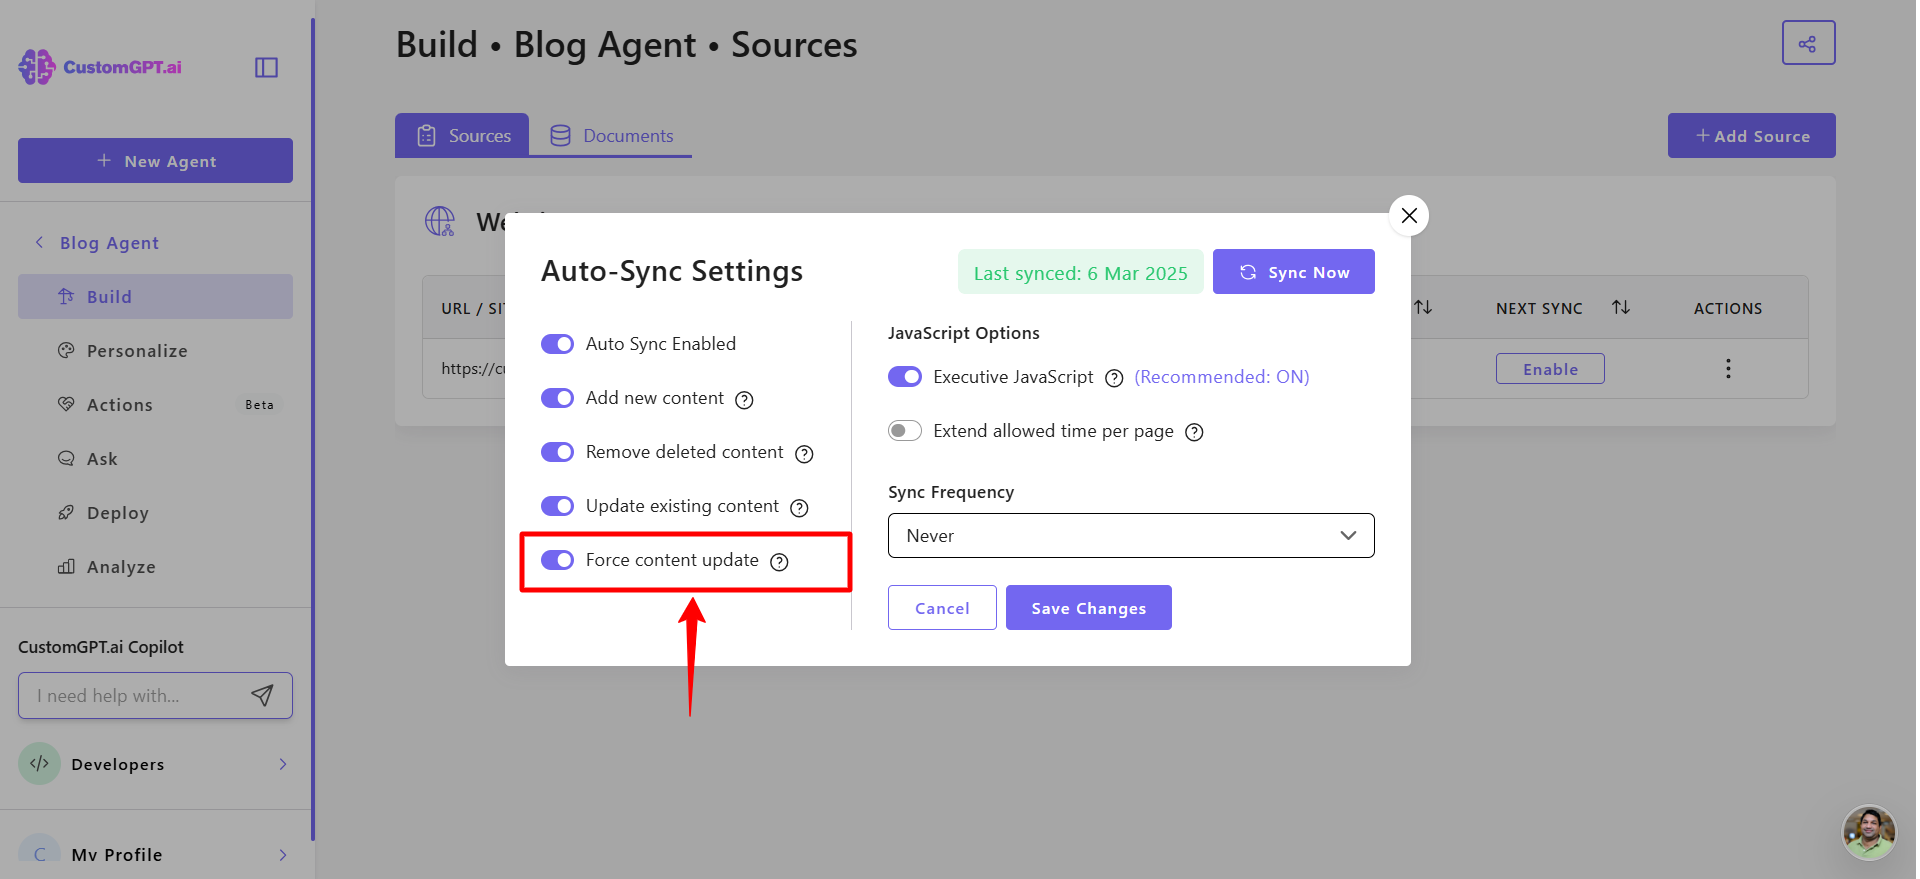
NoteForce content update is available on the Enterprise plan. If you're interested in enabling it, please contact our sales team.`
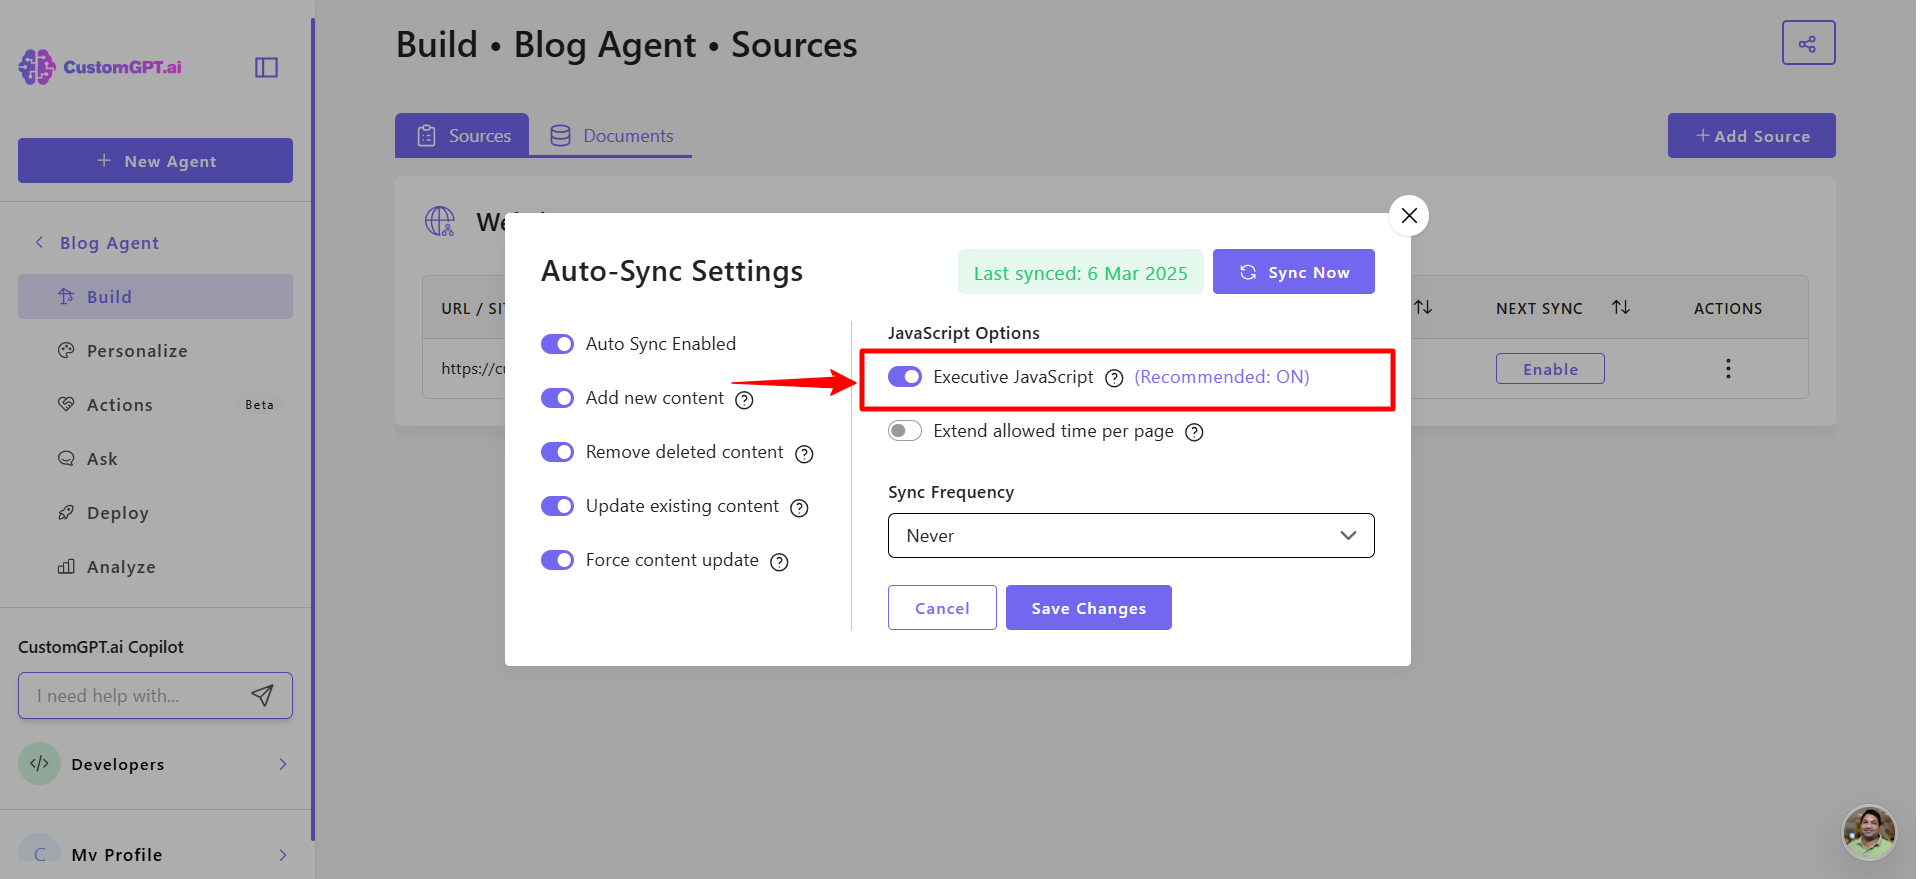
- Under JavaScript options, keep this enabled to use a headless HKJavaScript browser (recommended) for dynamic websites. But if you prefer not to use JavaScript rendering, toggle this Off, but note that some dynamic content may not load completely.
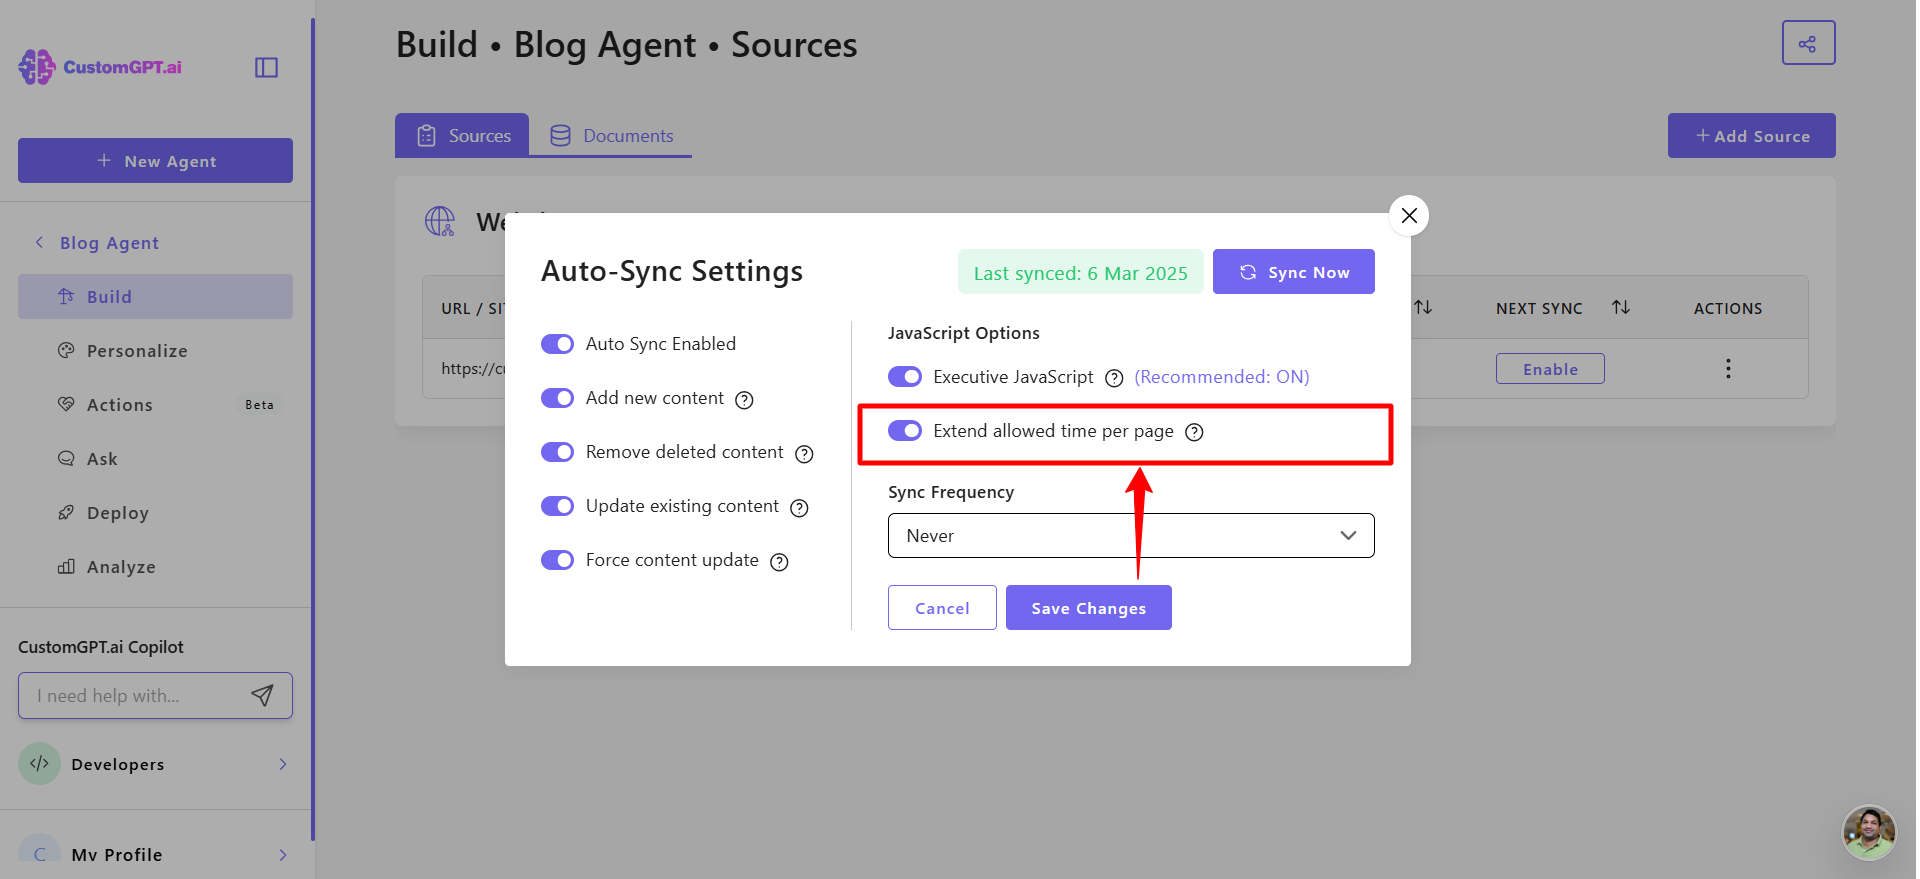
- Adjust Extend allowed time per page if your website requires more time to crawl each page. Increase this setting if not all pages are being captured.
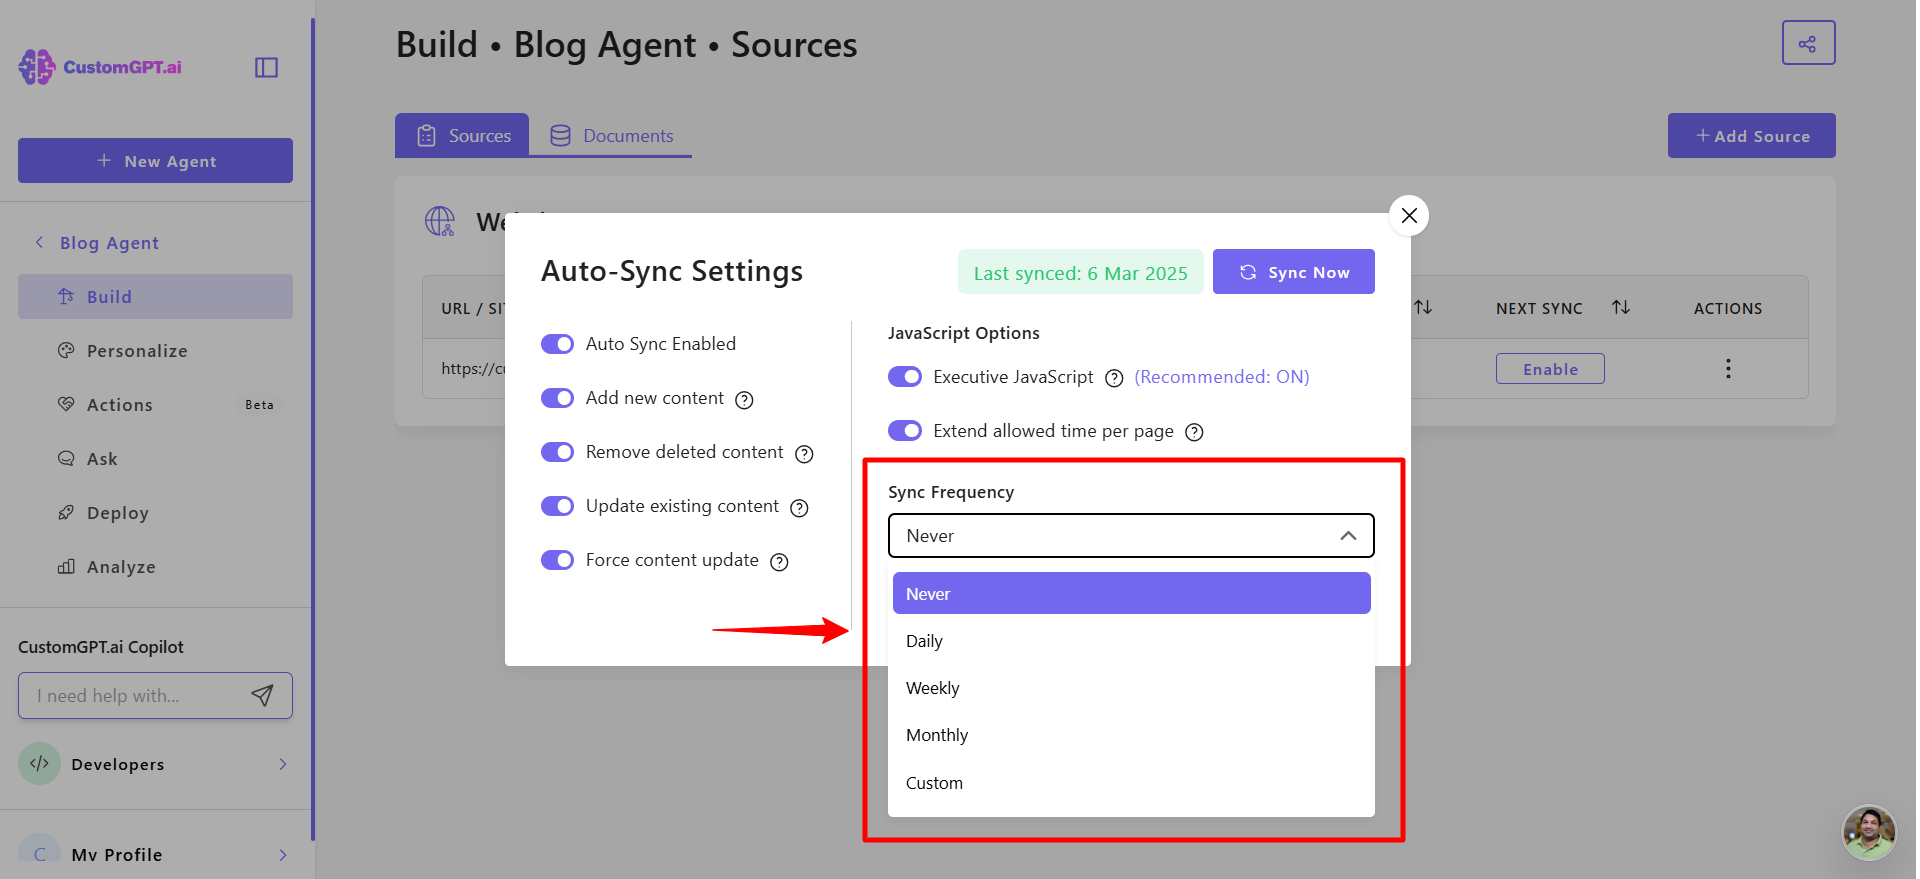
- In Set sync frequency, choose how often your website content should sync:
- Never
- Daily
- Weekly
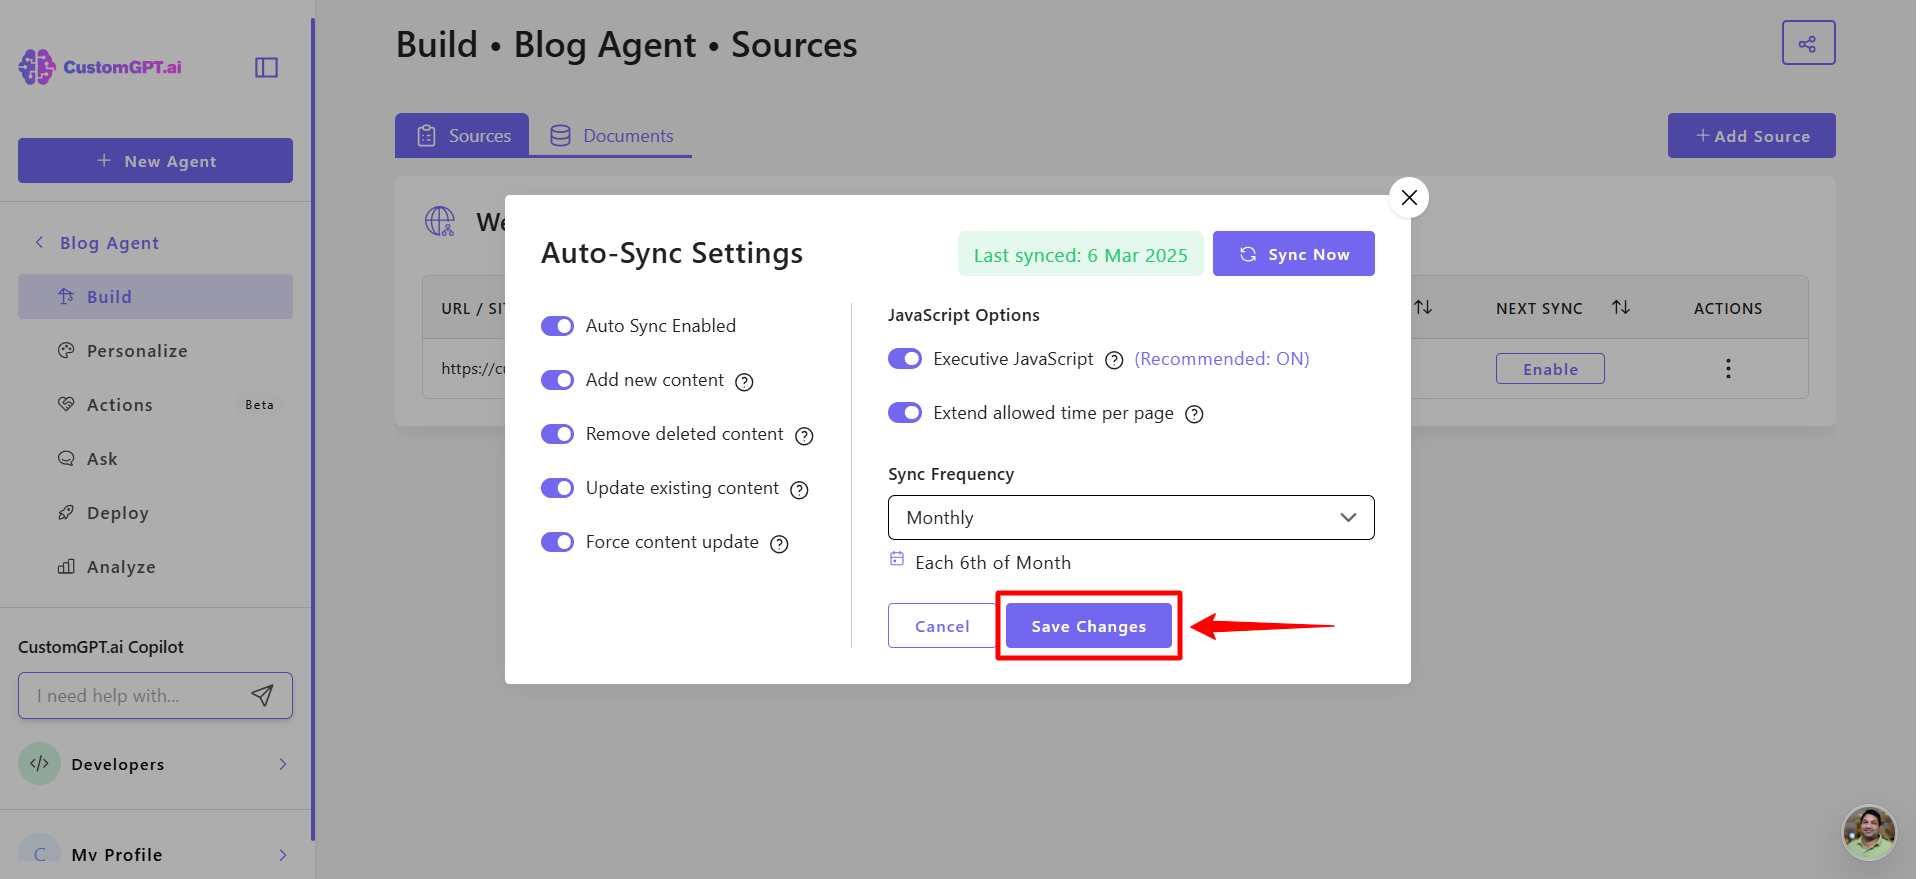
- Monthly
- Custom
- Click Save changes to apply your settings.
Updated 9 months ago
Did this page help you?