Website Copilot
Follow this how-to guide step-by-step to enhance your website's interactivity and user engagement.
Website Copilot Deployment
To put your a window with a AI copilot on your website, follow the steps below:
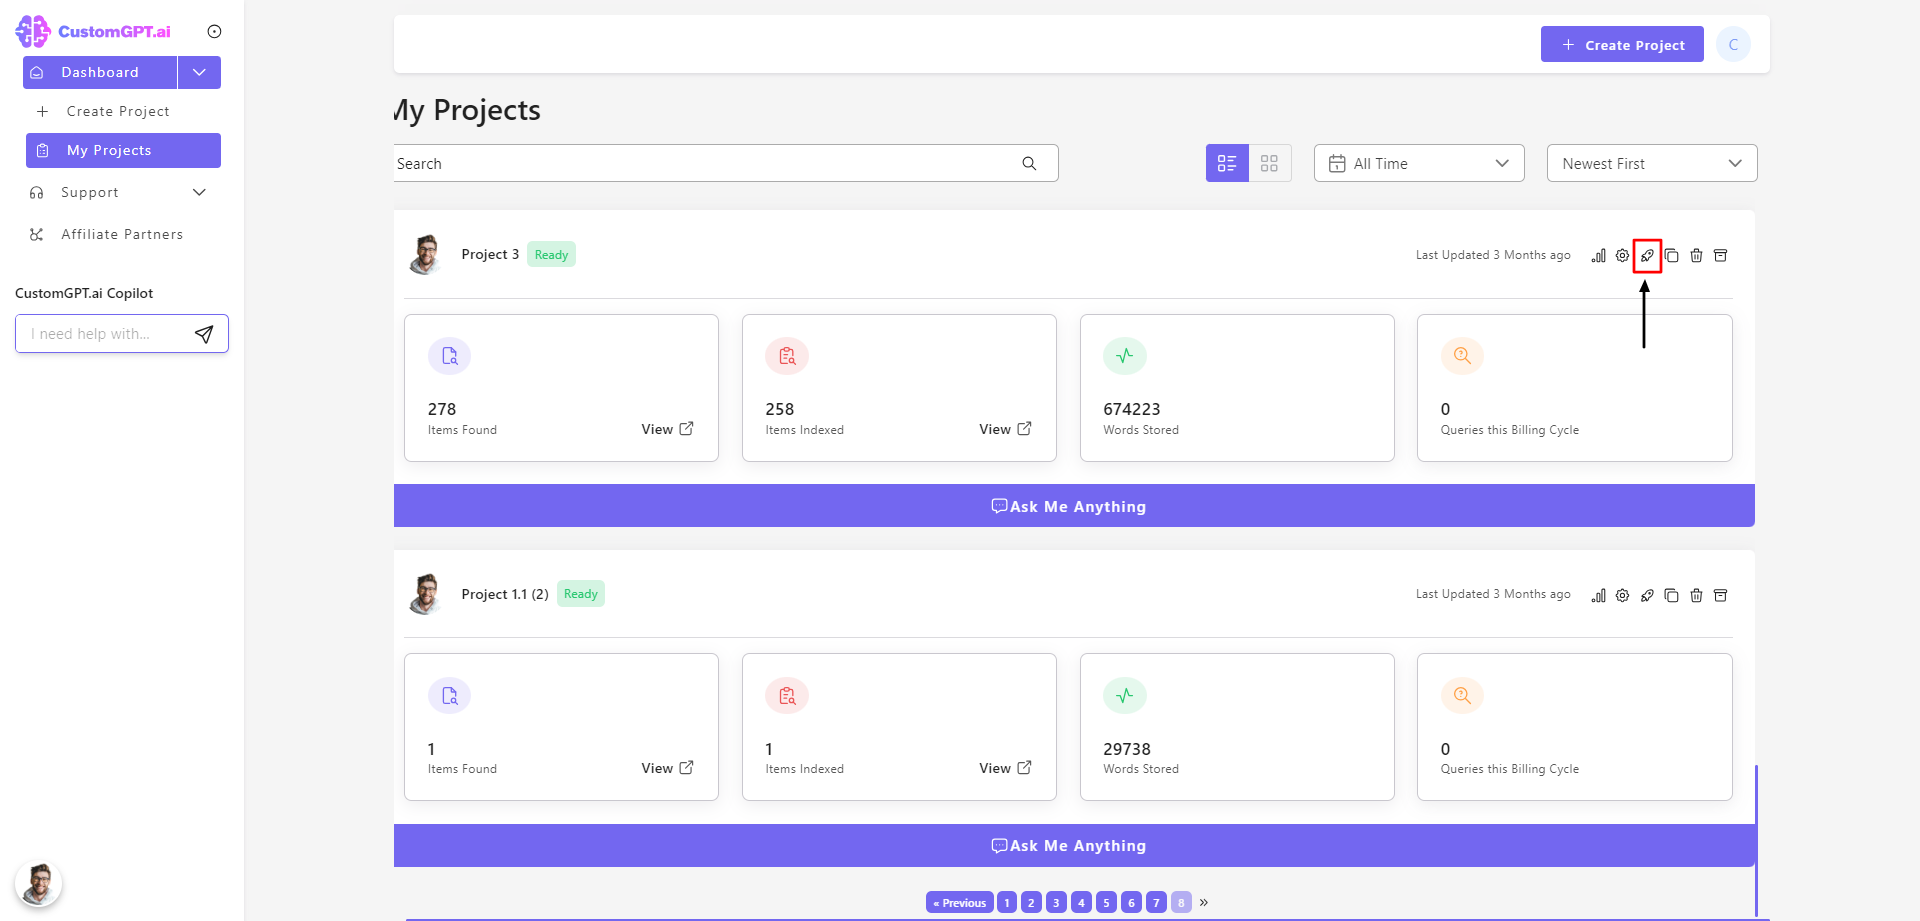
- Navigate to your CustomGPT Dashboard.
- Under "My Projects", click on the “Deploy Project” icon.
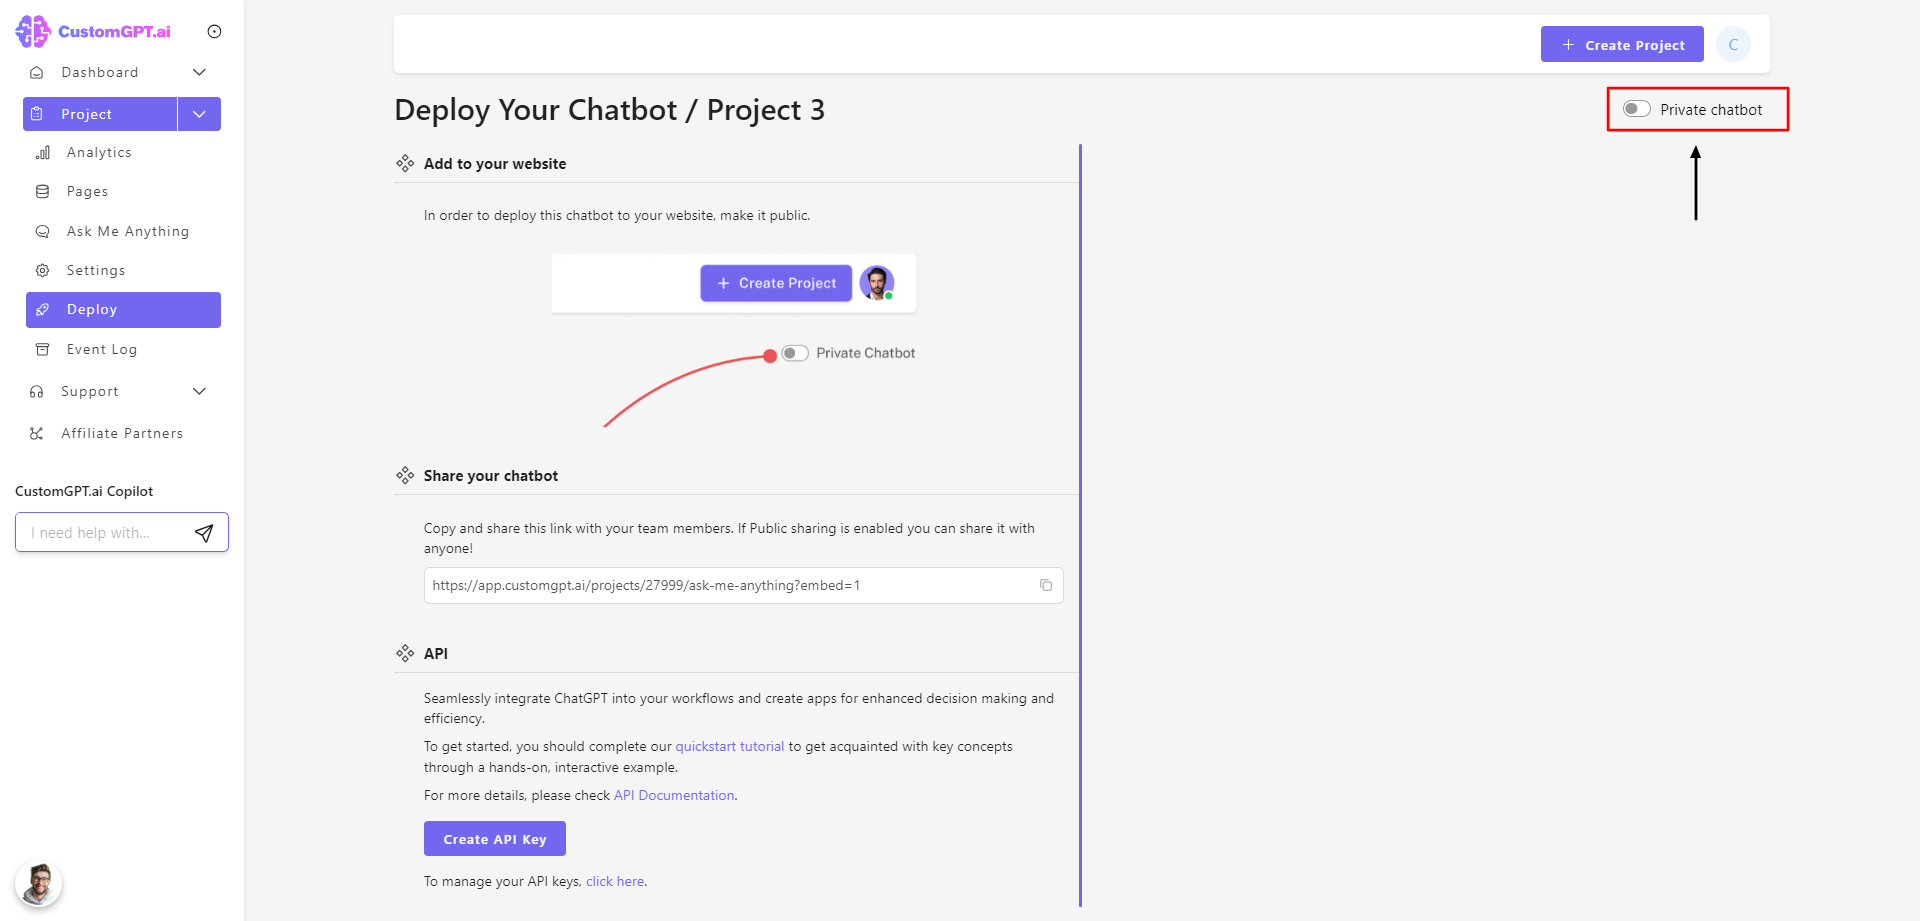
- Enable public sharing for the AI Agent by sliding to the right.
- Click the “Website Copilot” button.
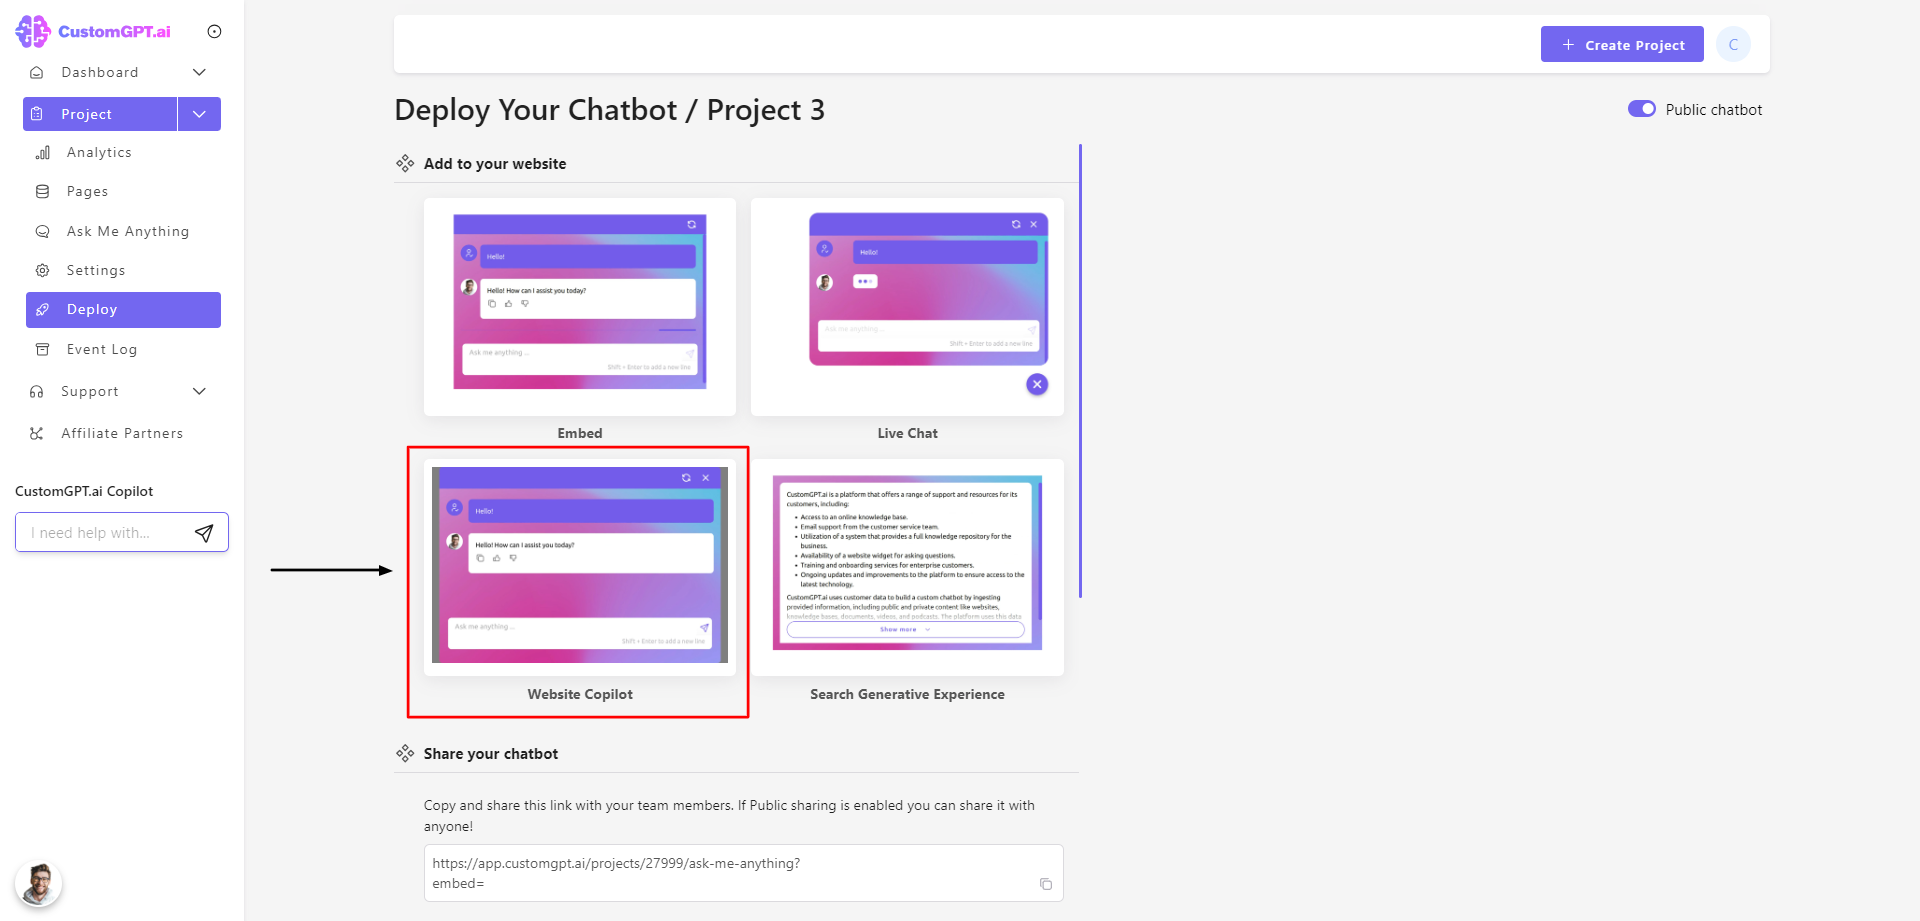
- Click on "Website Copilot" to the right to enable the embed feature. Then, copy the HTML script and paste it anywhere in your website's body section.
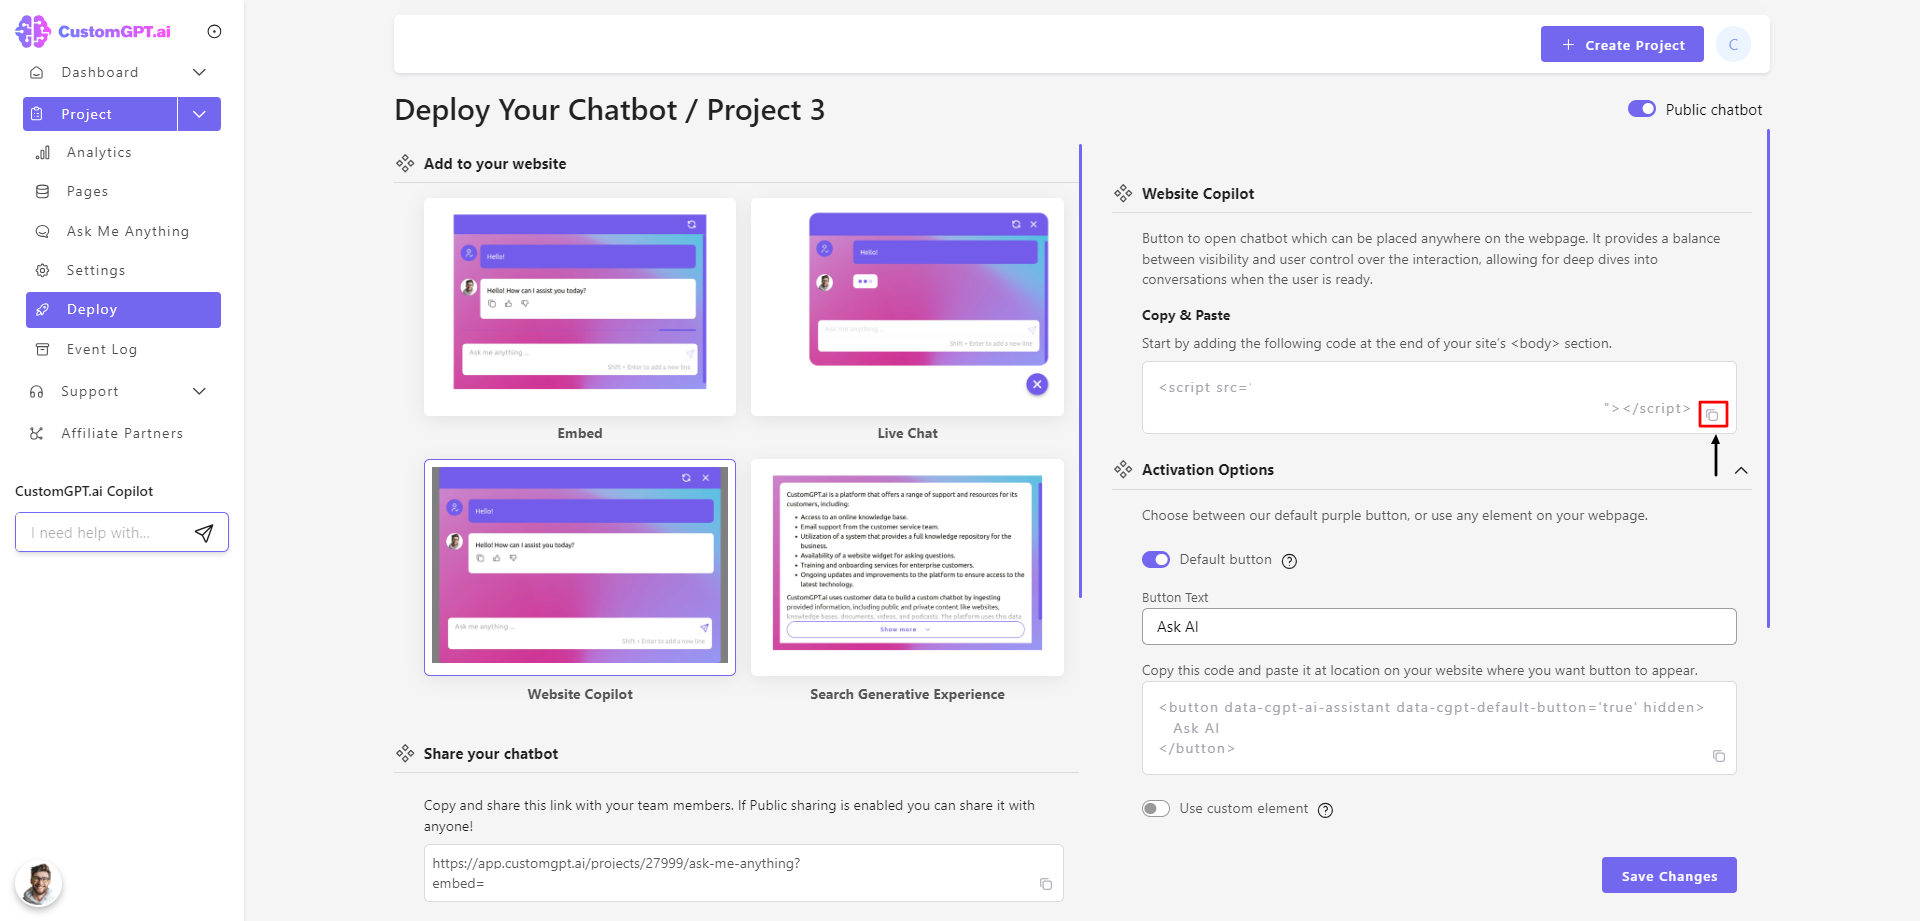
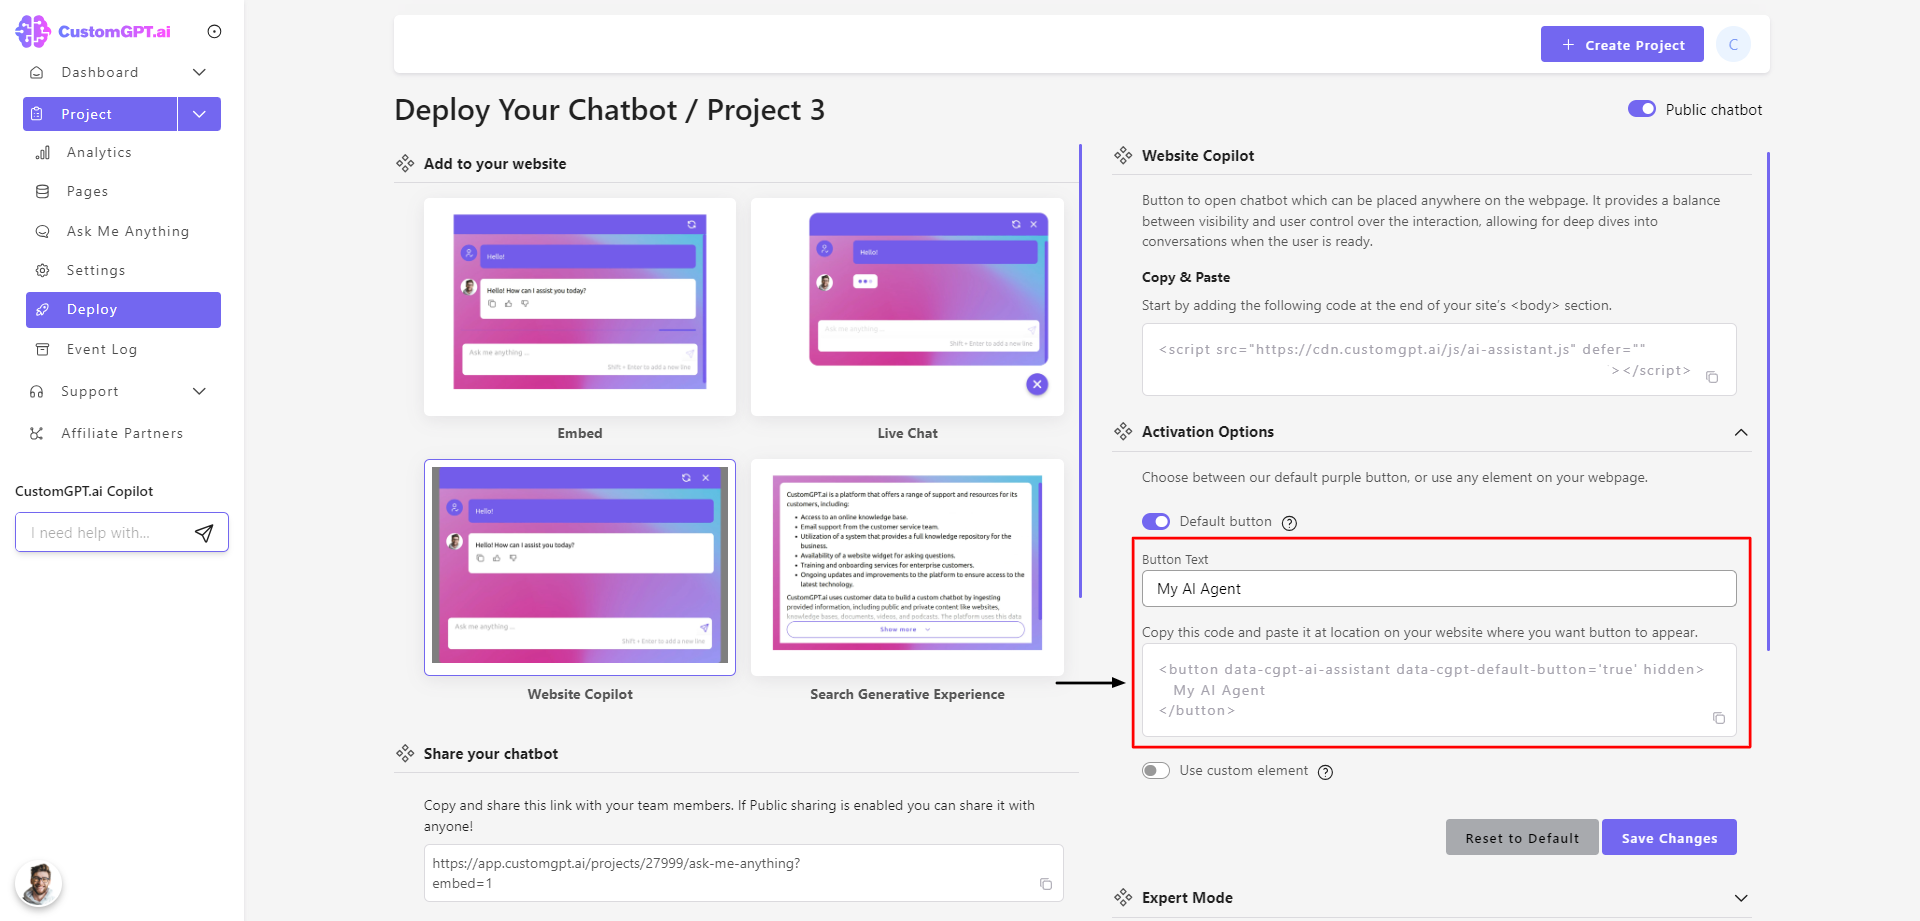
- Next step is to add a button that will open your Website Copilot
You can use our default button. Simply type text you want to have on a button, and copy HTML script to exact location on your page where you want button to be:
Or you can put the following attribute to any element you want to use to trigger the Website Copilot. It can be any HTML element, such as a button, link, or image.
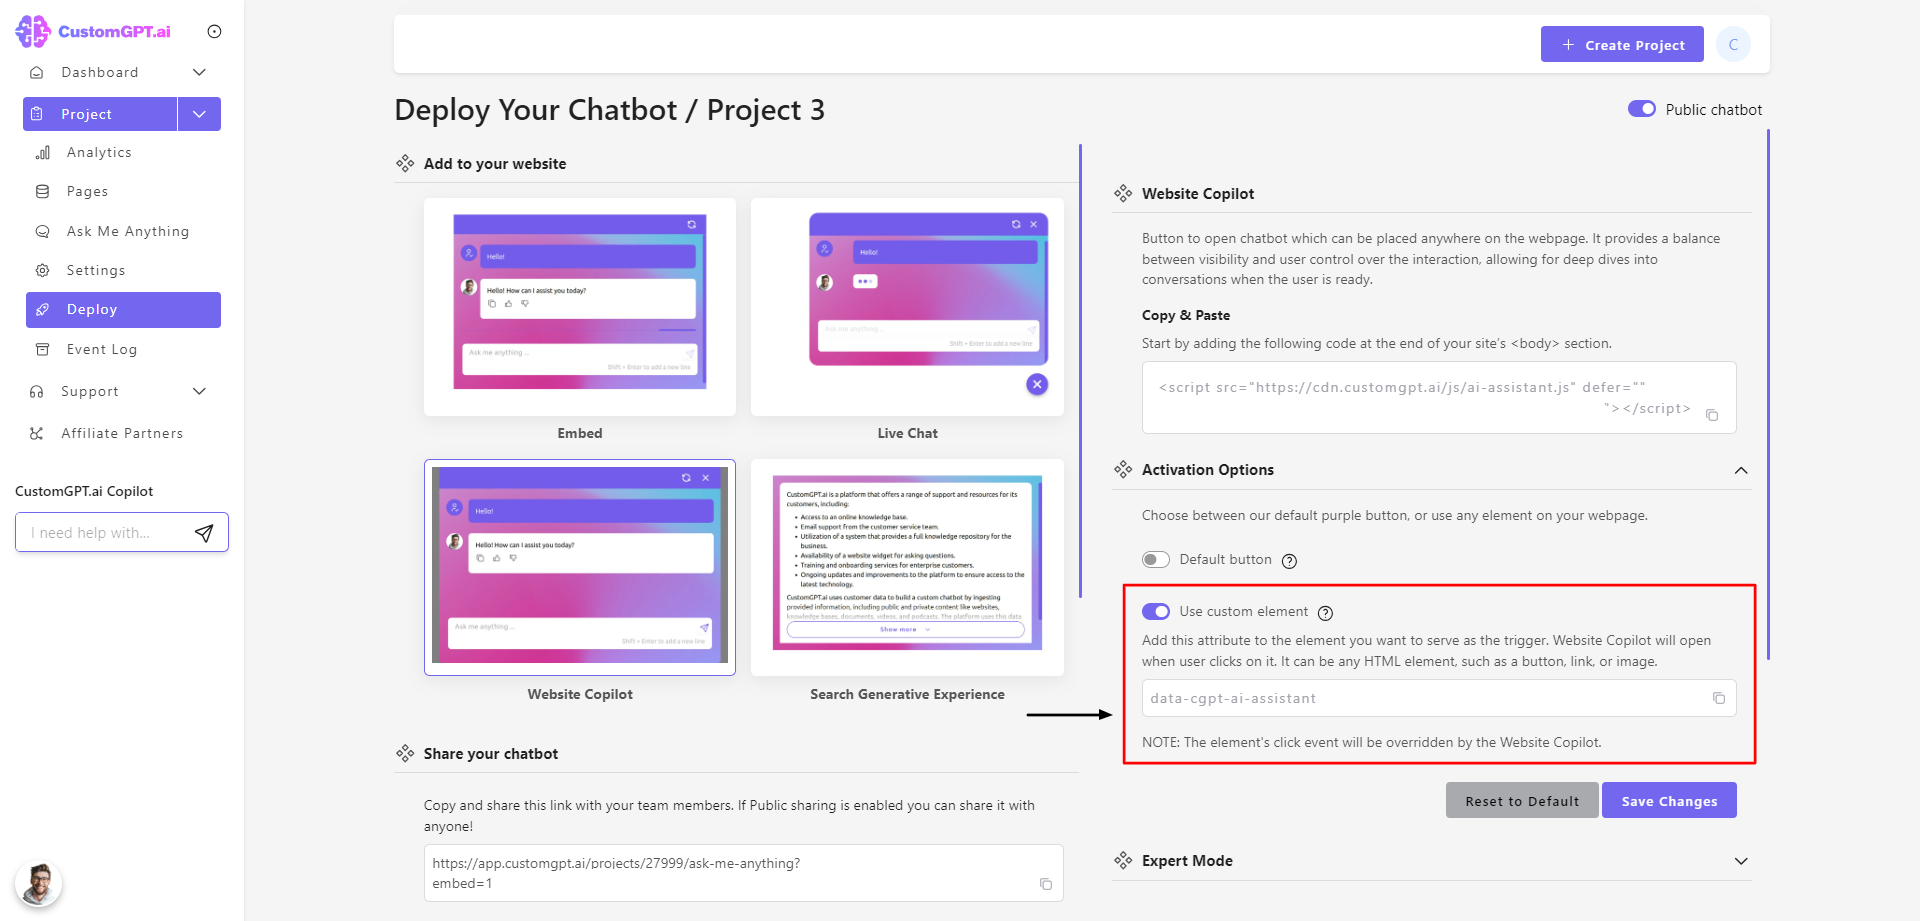
Please note that the element's click event will be overridden by the Website Copilot.
You have successfully managed to embed the CustomGPT in your website!