Set user message color
This guide explains how to change the color of your AI agent.
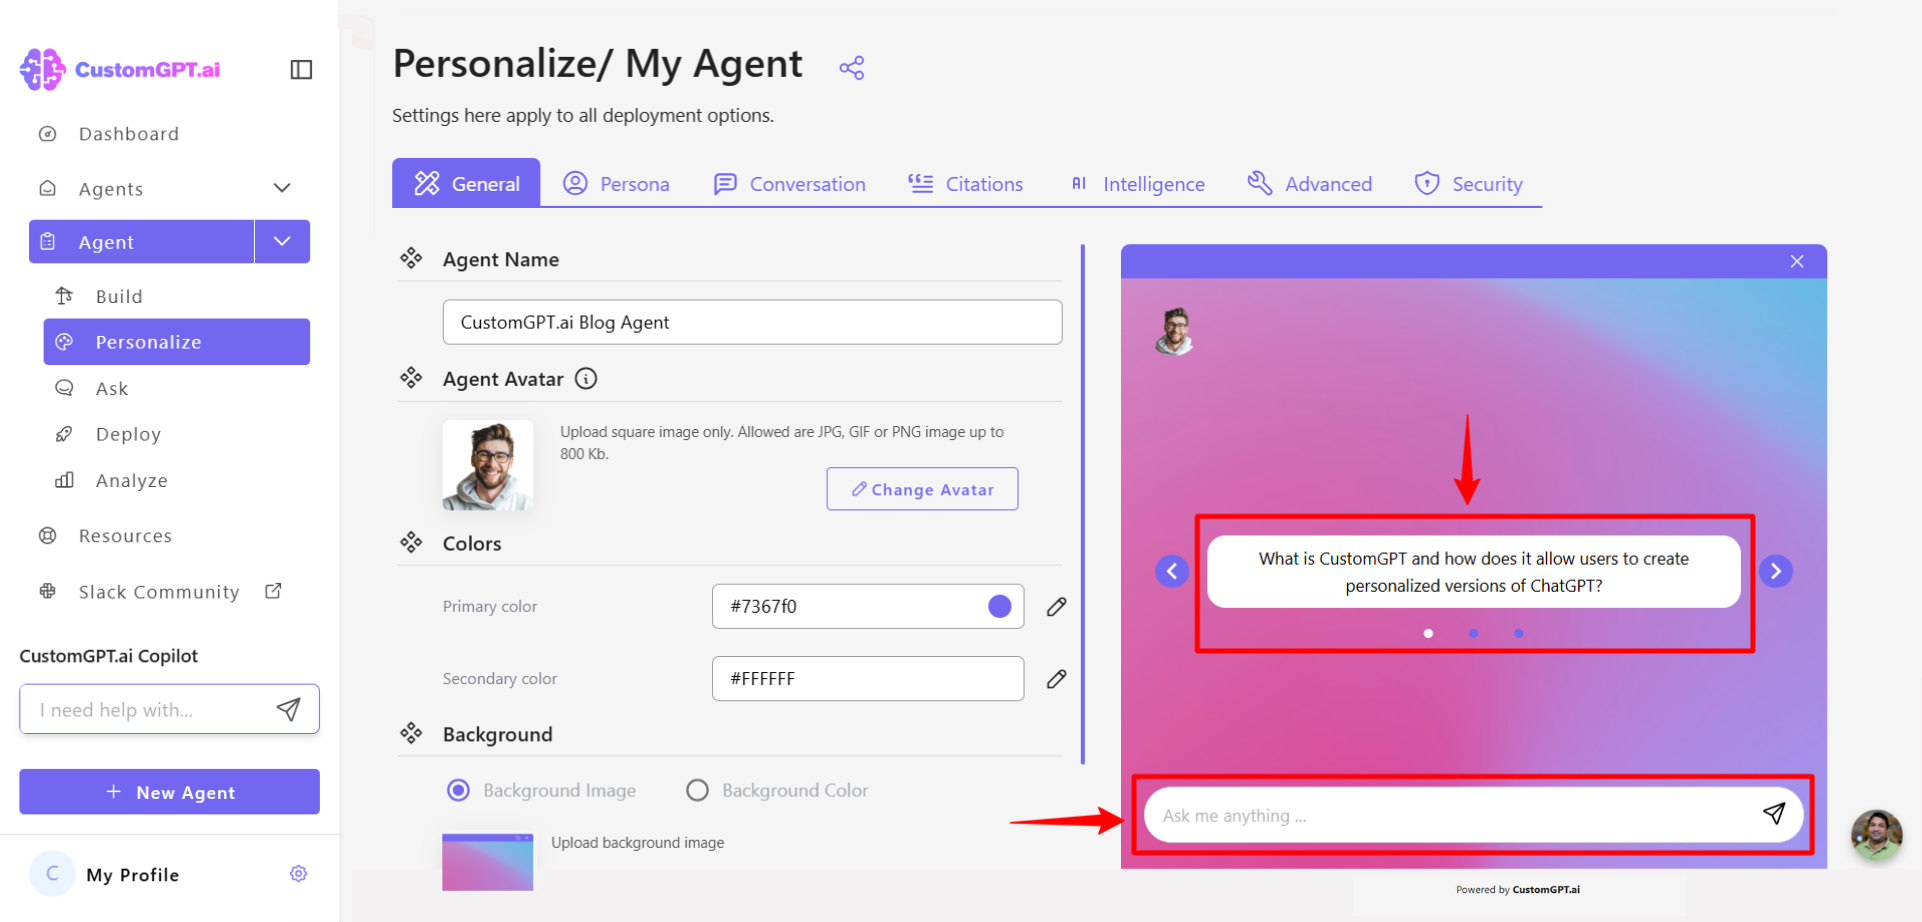
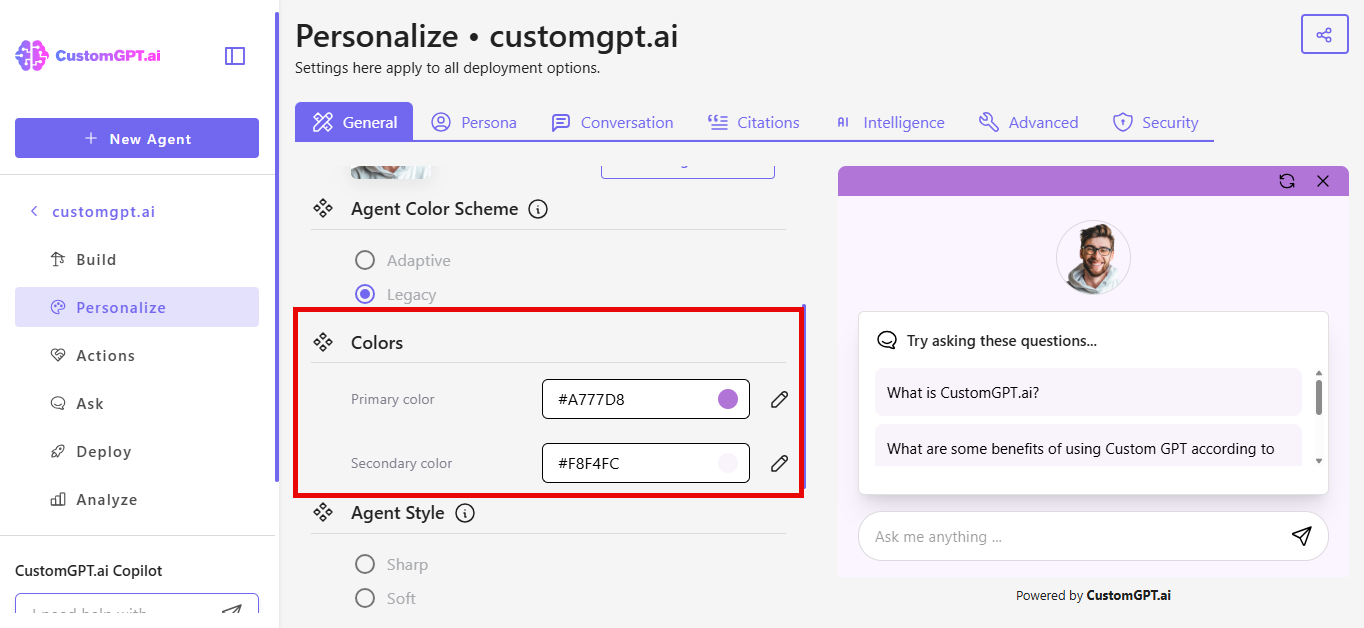
Secondary color
The secondary color affects several user-facing elements and helps you tailor the visual experience to match your brand. Changing the secondary color updates the following:
- User message bubble
- User avatar
- Starter question bubbles
- Send arrow (if the selected color is too light, the arrow will automatically appear in black for visibility)
How to update the user message color
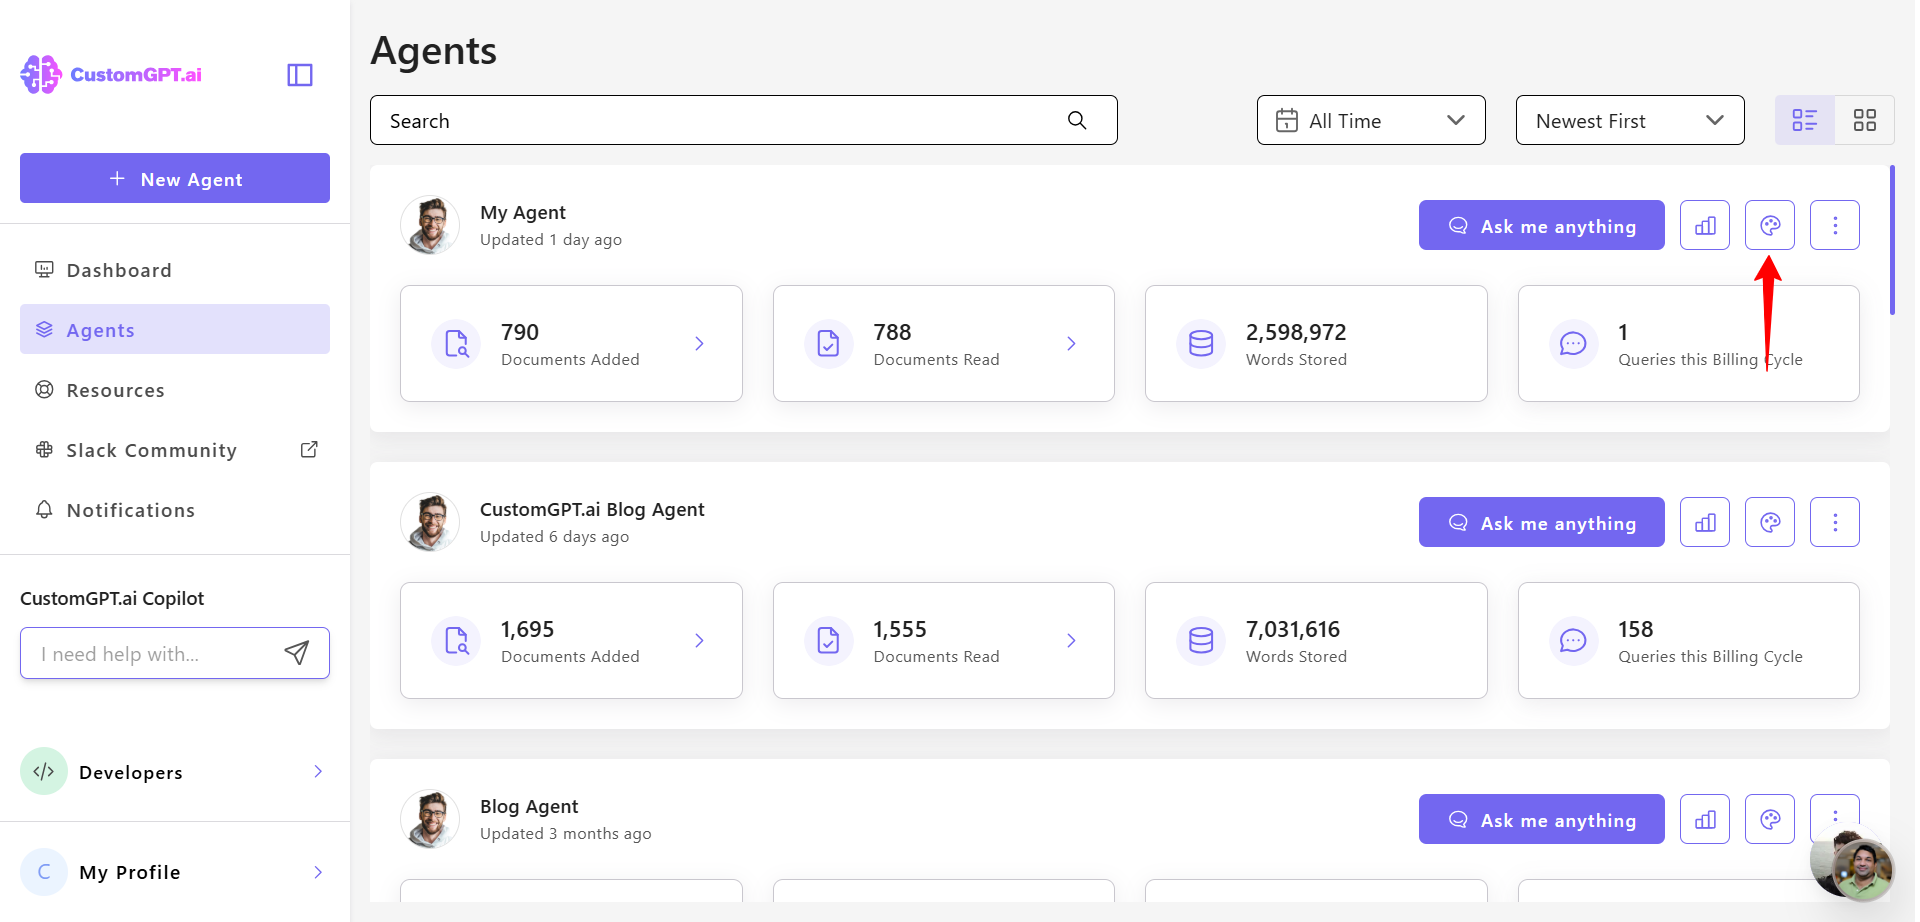
- Click the Personalize icon next to the agent you want to customize.
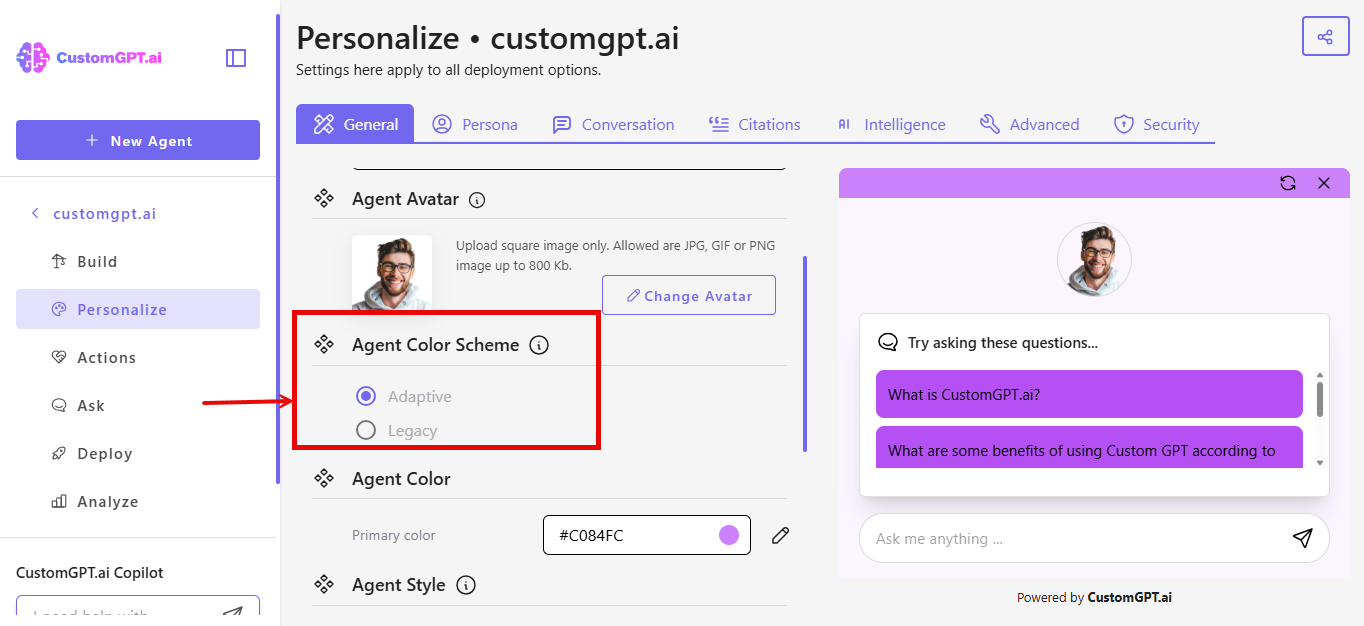
- Locate the Agent Color Scheme section.
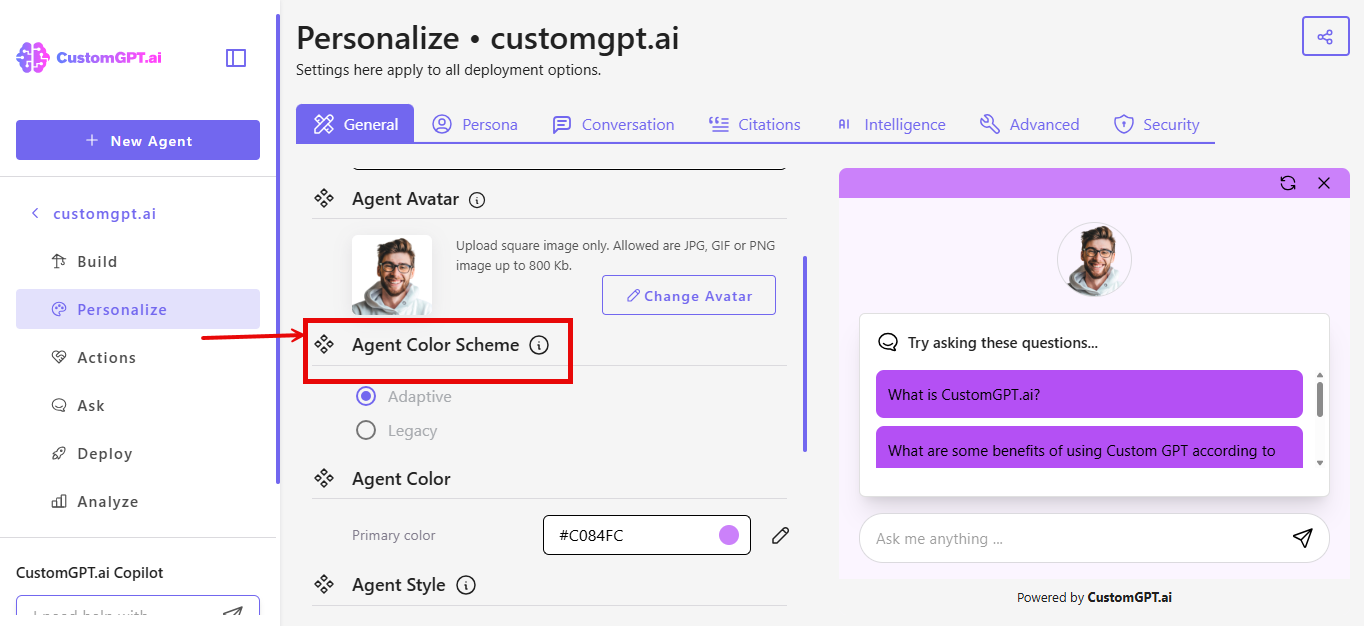
- Select your preferred scheme:
- Adaptive - Set one primary color, agent colors adjust automatically
- Legacy - Set toolbar and agent colors individually
If You Selected Adaptive
- Scroll to the Primary Color field
- Click the color icon to open the color picker.

- Choose your toolbar color:
- Enter a HEX code for the desired color, or
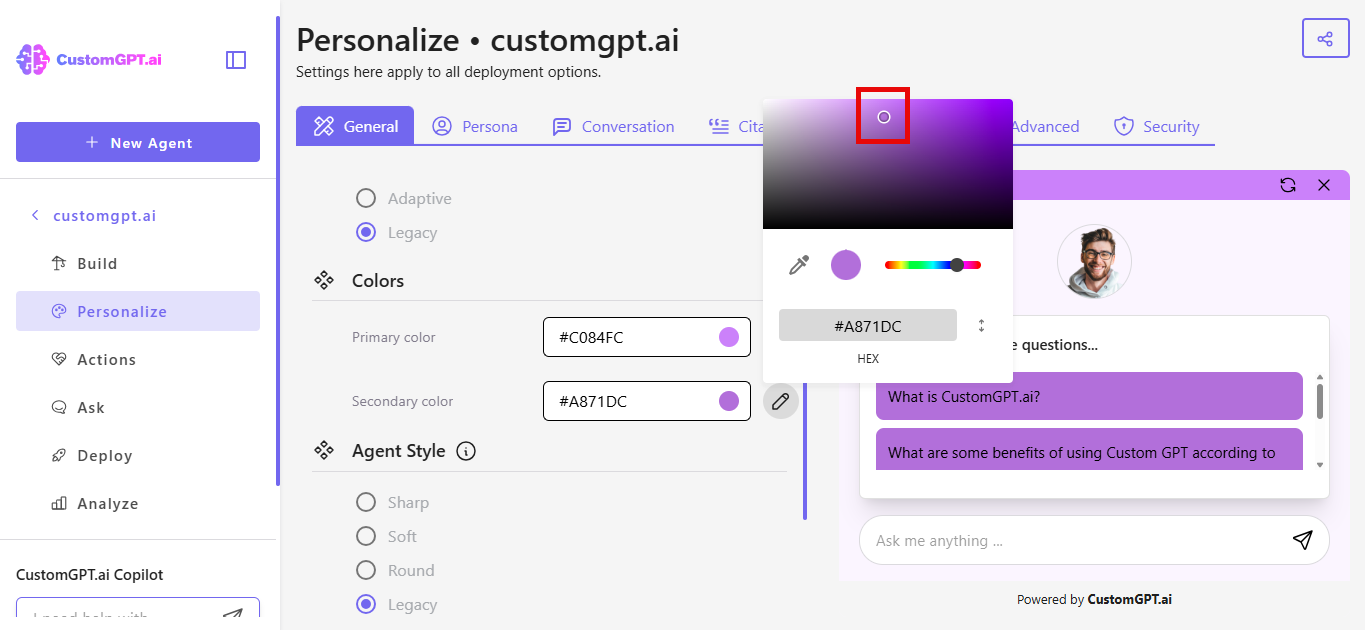
- Move the color selector dot to choose a color manually
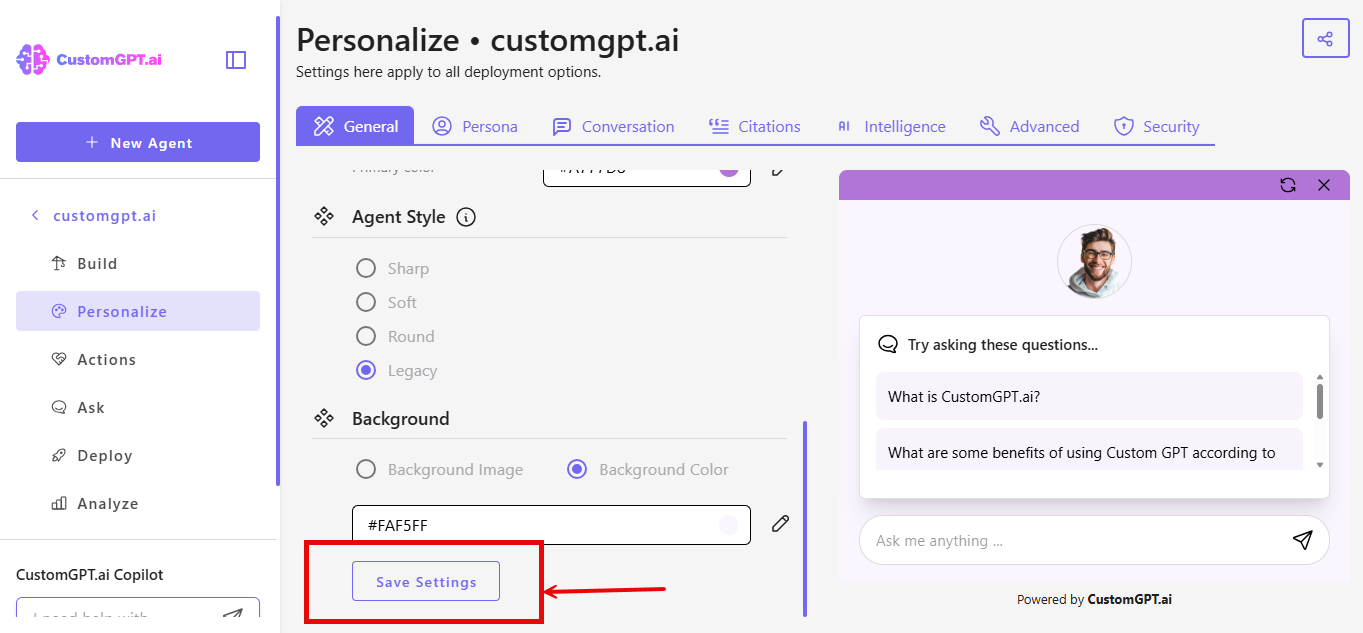
- Click Save Settings to apply the update.

Note: The user message color will automatically adjust to complement your primary color choice.
If You Selected Legacy
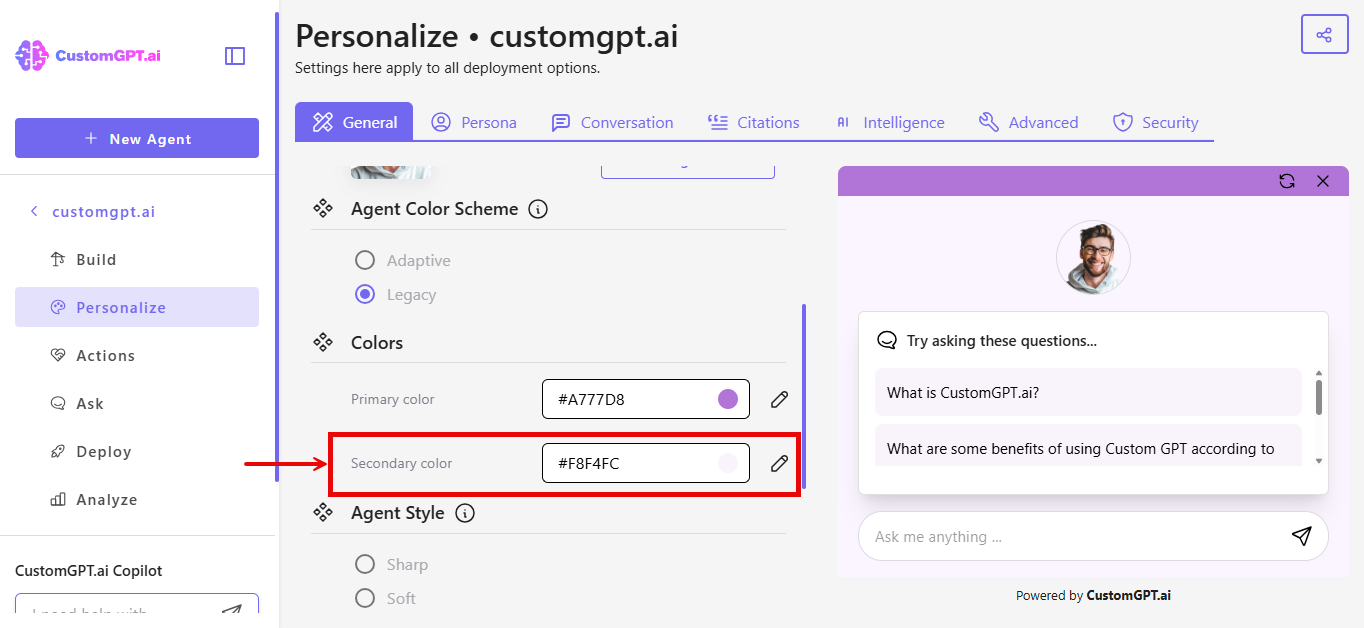
- Scroll to the Color section.

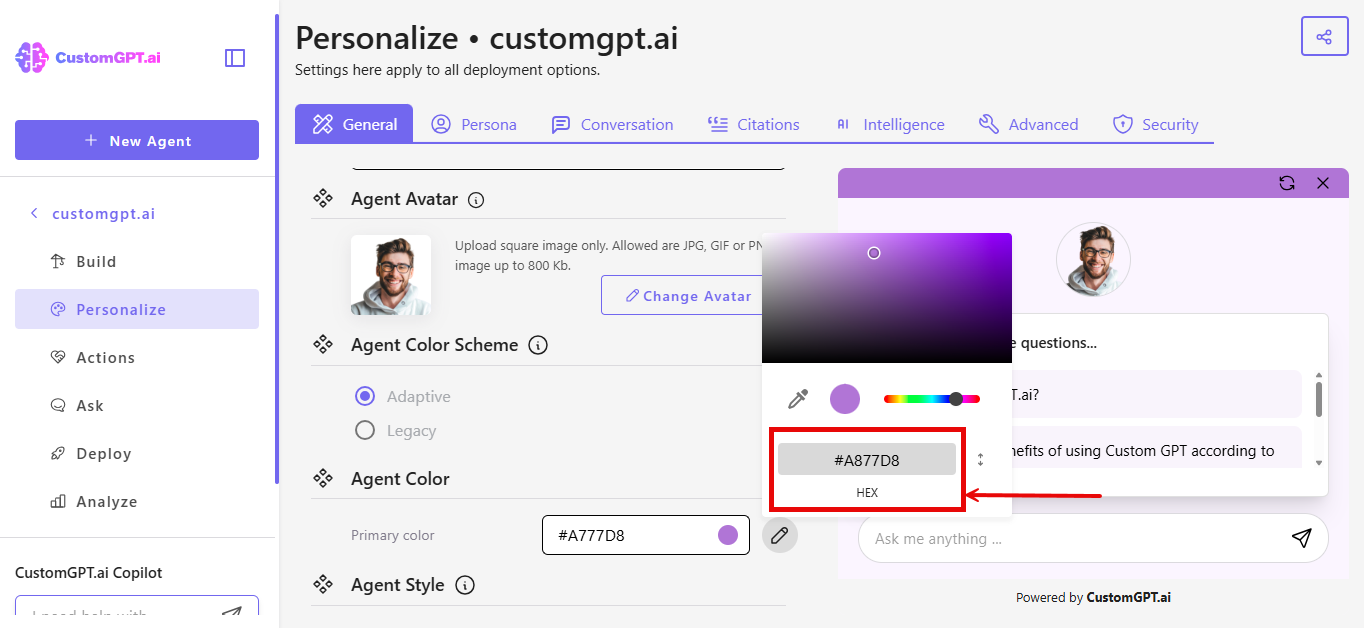
- Locate Secondary color field.
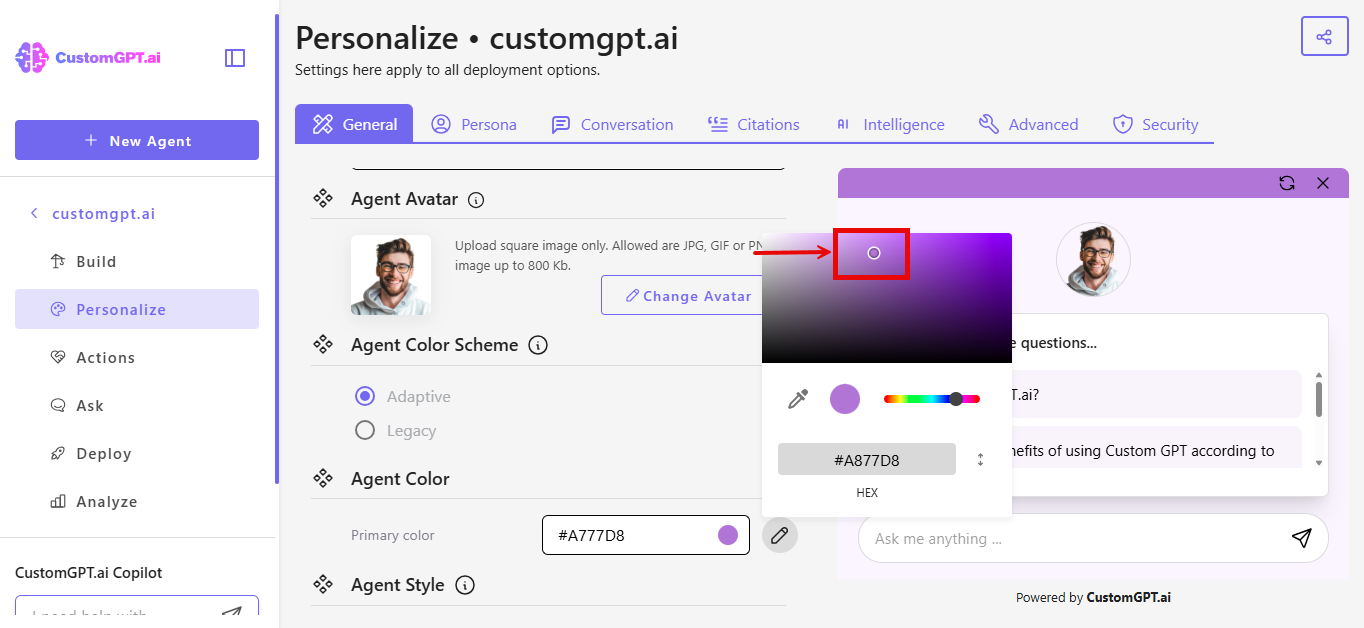
- Click the color icon to open the color picker.
- Choose a color:
- Enter a HEX code for the desired color, or
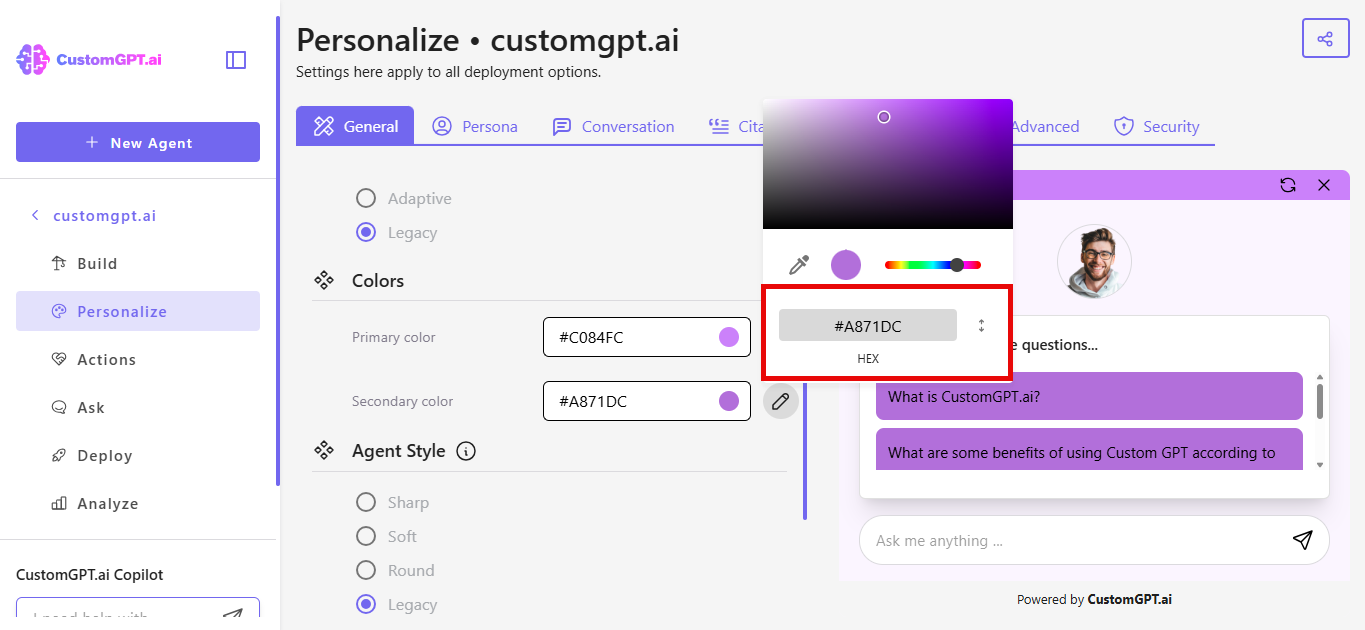
- Move the color selector dot to choose a color manually
- Click Save Settings to apply the update.
Looking to adjust change the toolbar color? See how to set the toolbar color.
Updated 7 months ago
Did this page help you?