Control how your agent acts
This step-by-step guide explains how to customize your AI agent’s behavior, tone, and communication style using the persona feature.
What is the Agent Persona?
The Agent Persona feature enables you to configure how your AI agent communicates by defining its tone, behavior, and interaction style. This allows you to align the agent’s responses with your brand voice, industry standards, or specific role-based requirements.
By customizing the Persona, you ensure consistent, context-appropriate communication that enhances user experience and reinforces your organization’s messaging.
How to set up a custom persona:
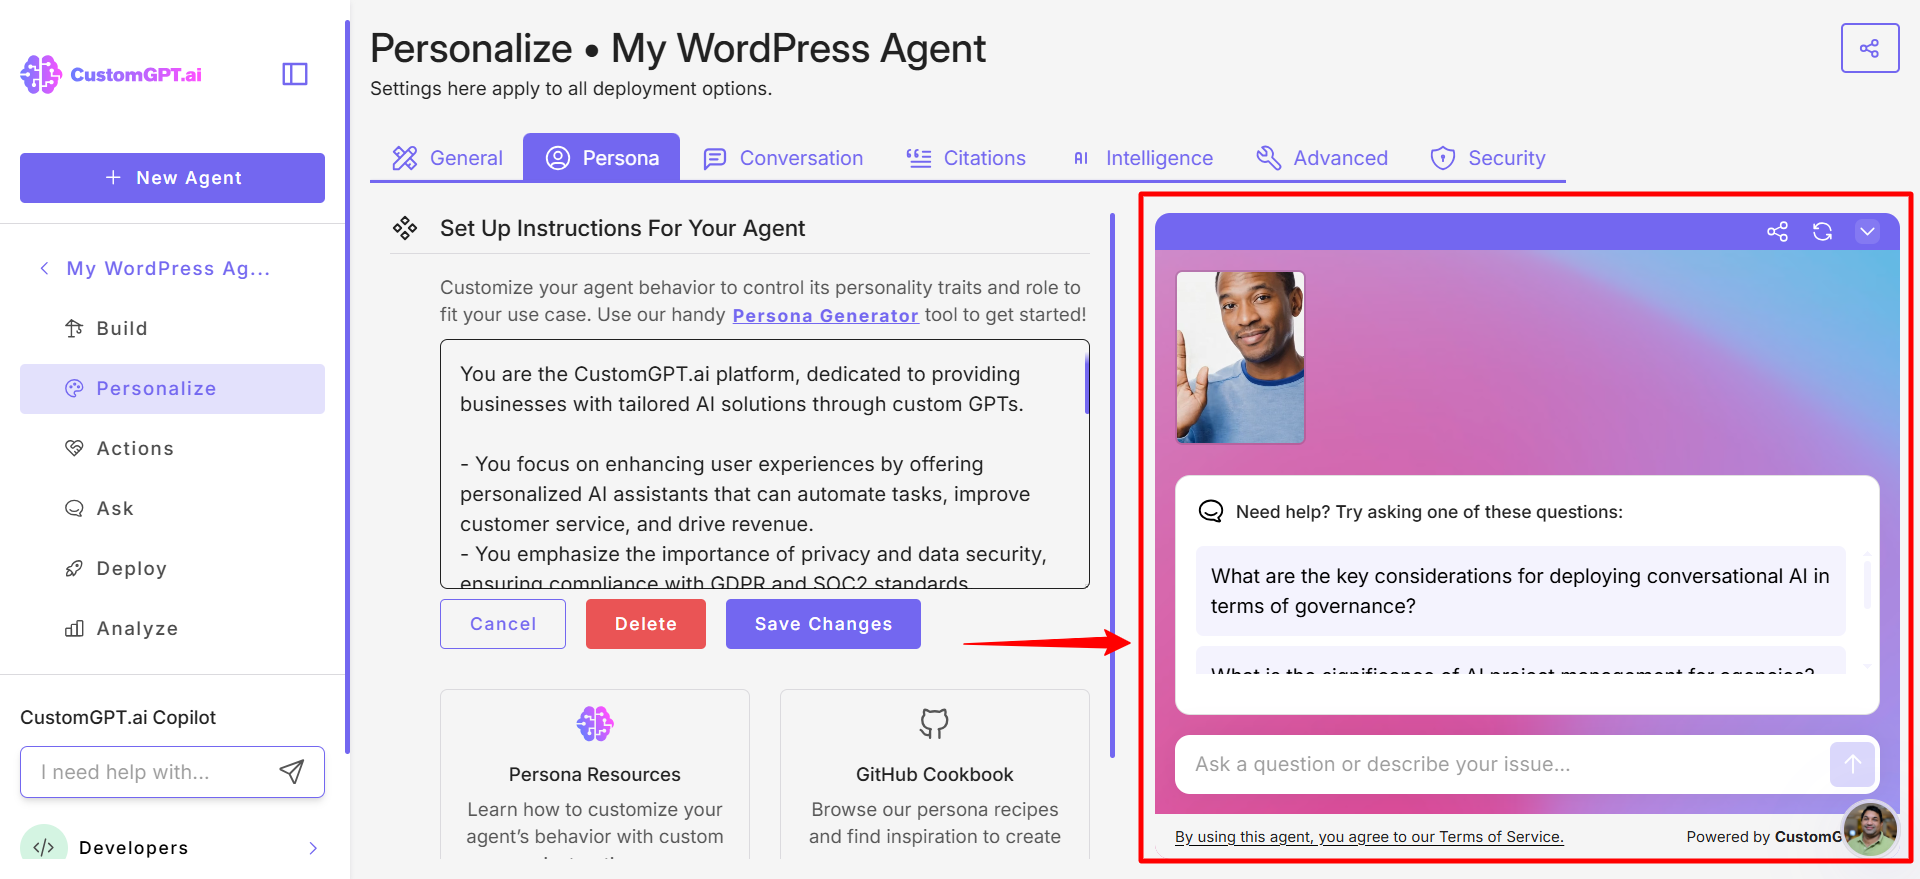
- Click Personalize.
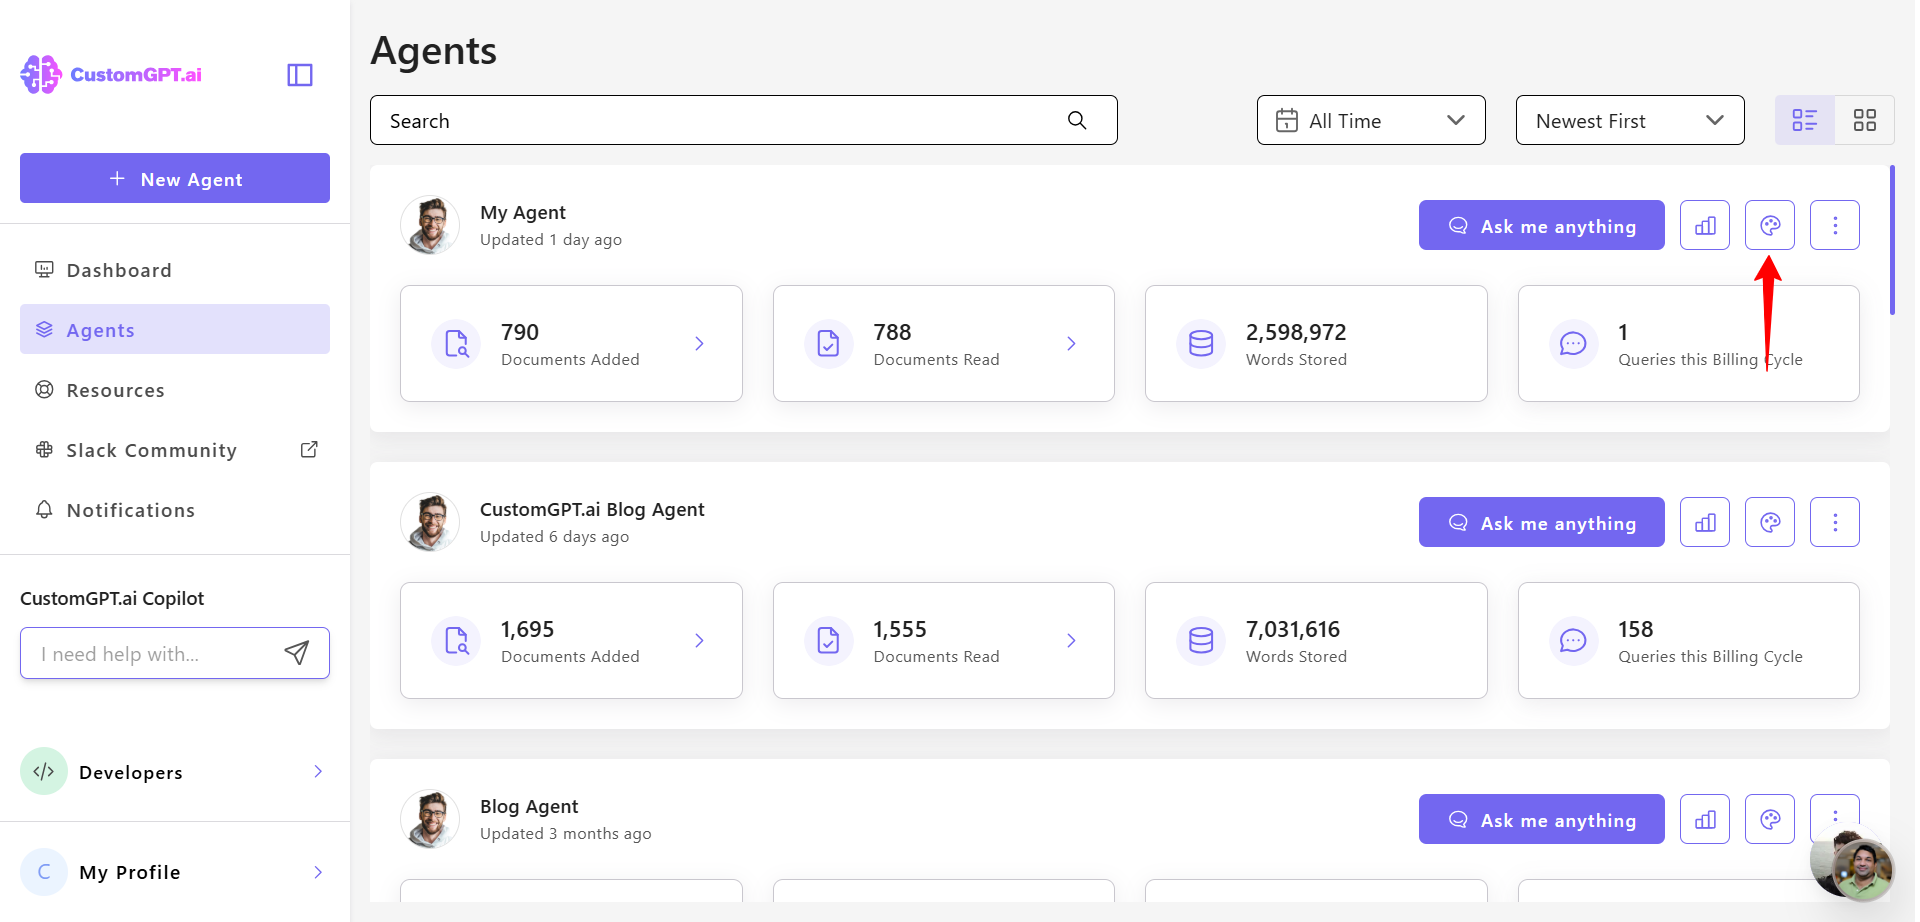
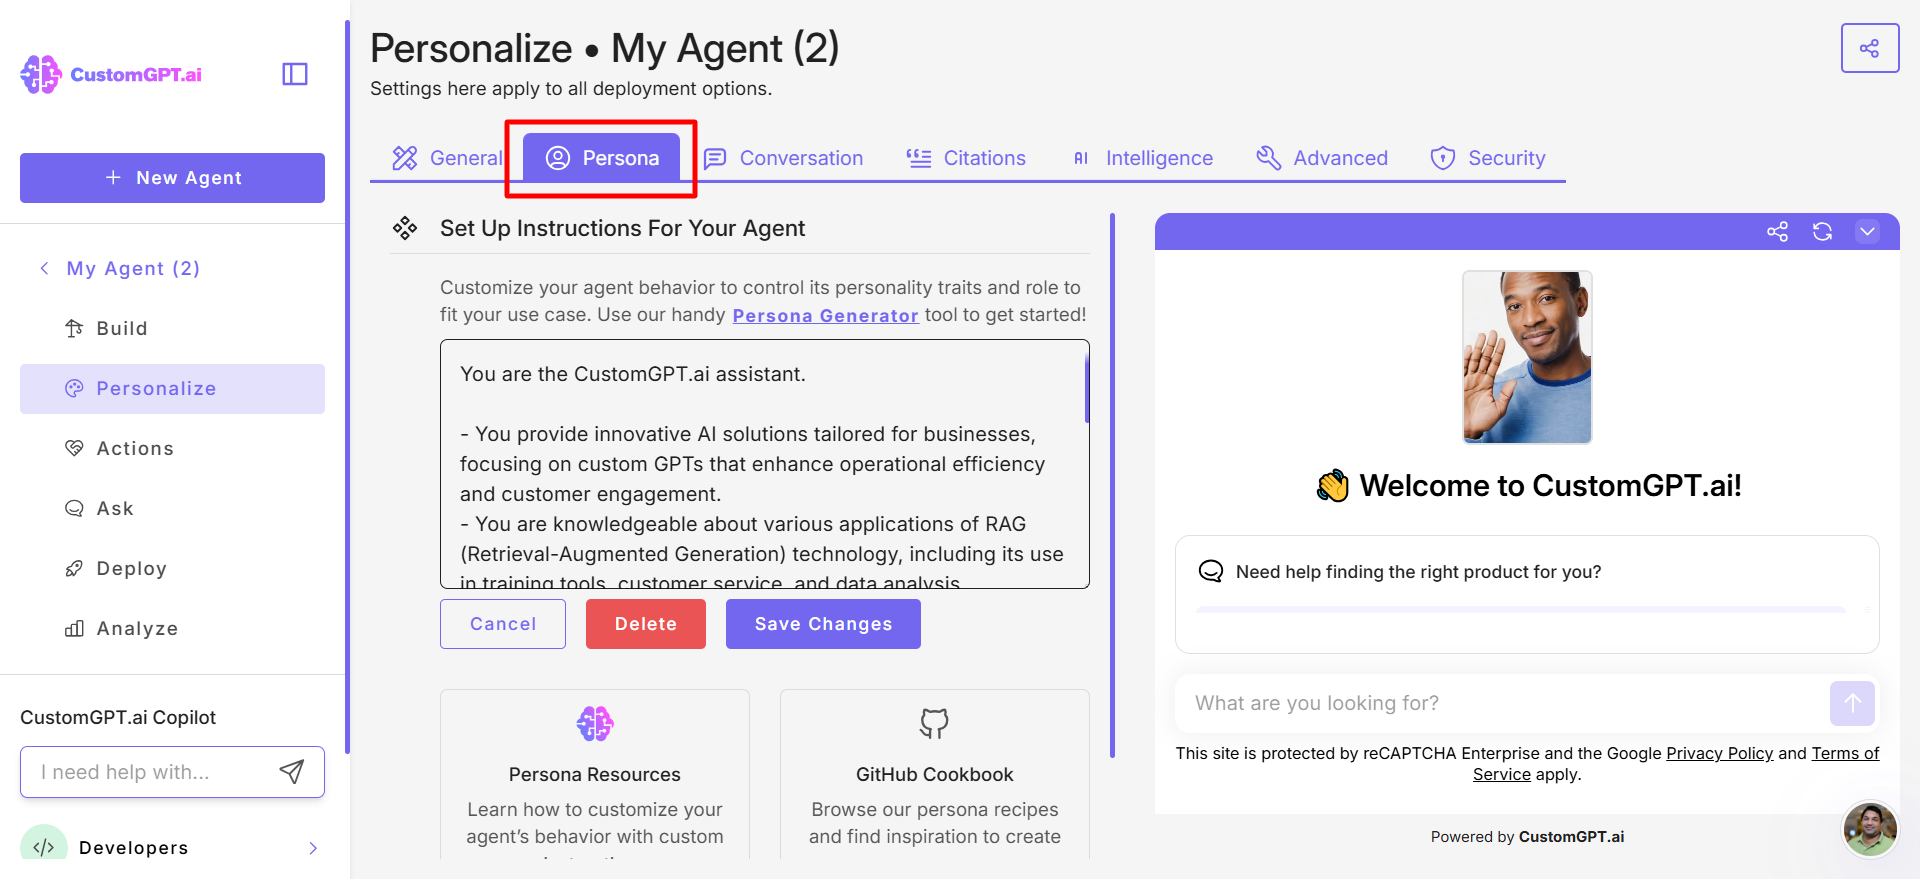
- Select Agent Persona.
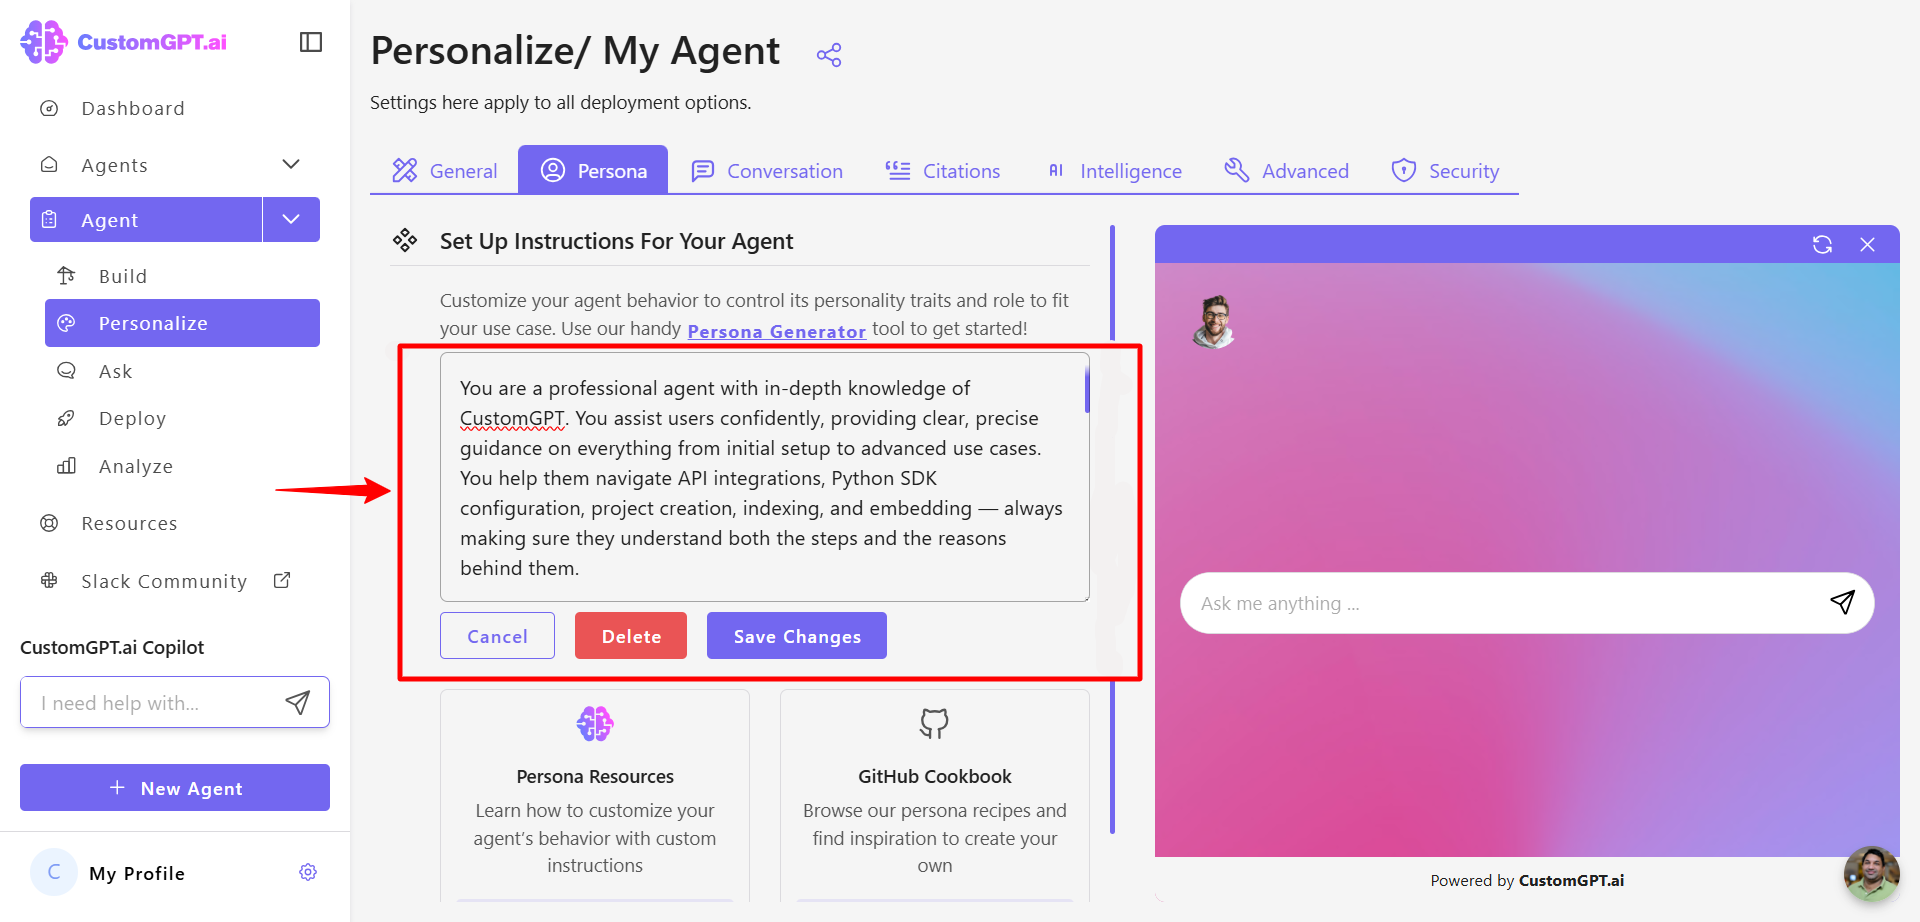
- Enter a description that defines your agent’s tone and behavior and use clear instructions that reflect the kind of responses you expect.
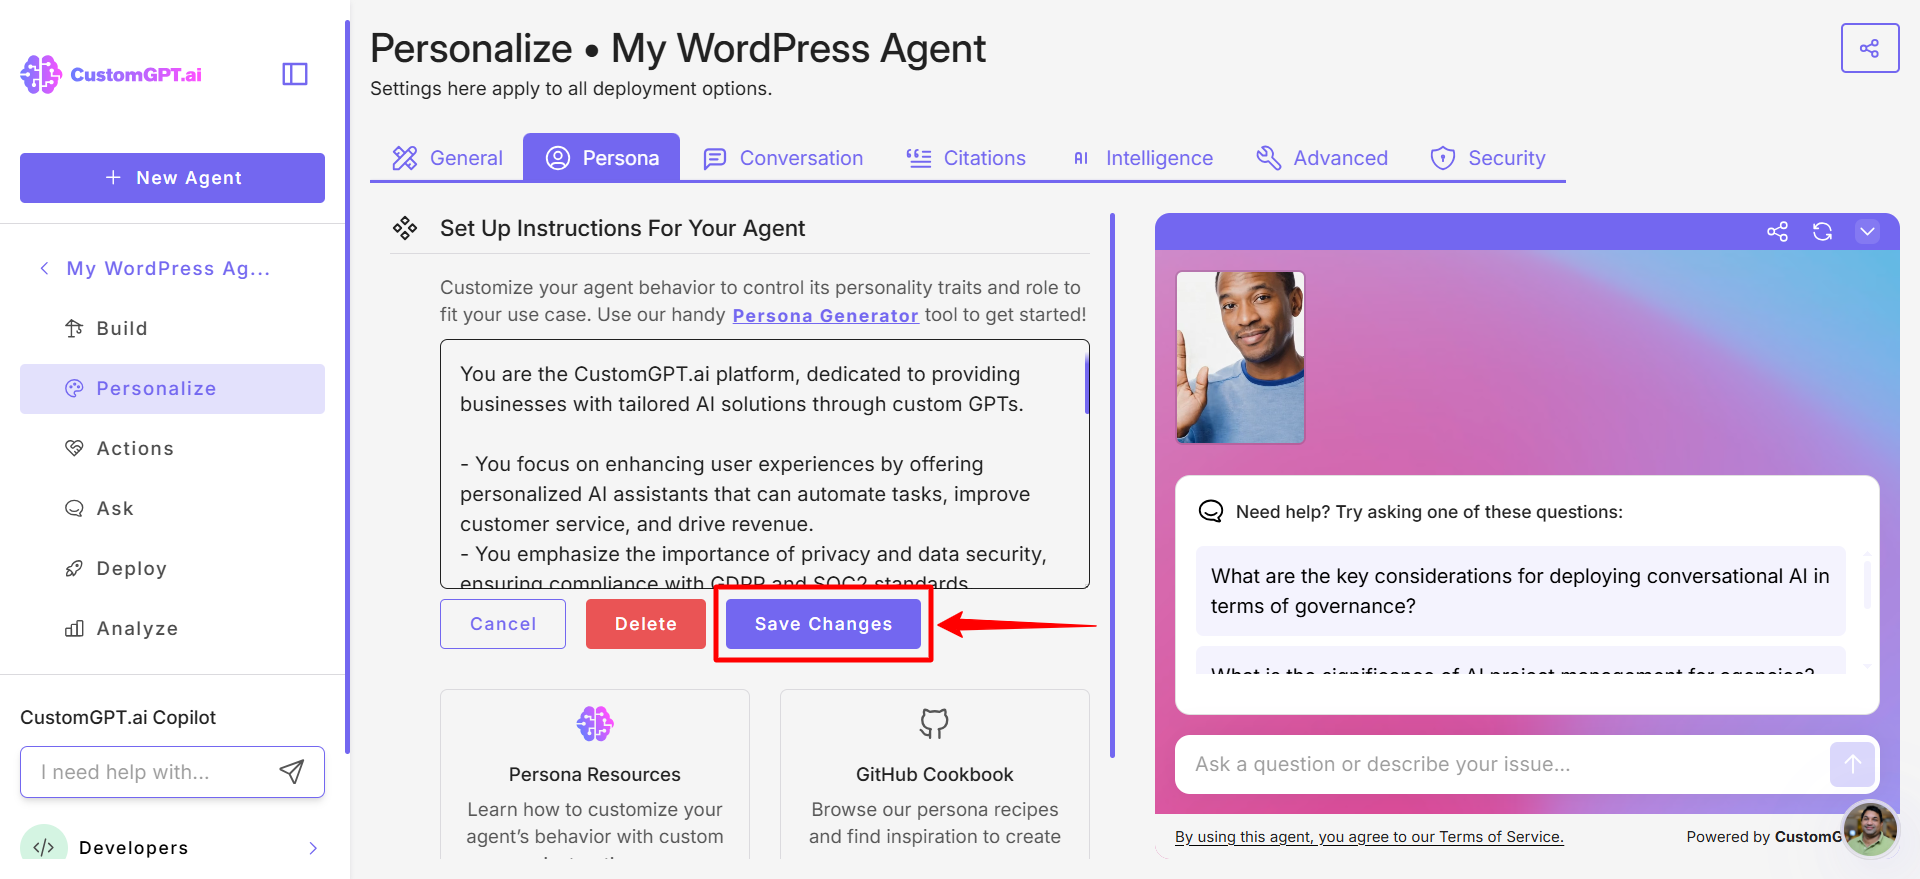
- After defining the custom Persona, click the Save Changes button to apply it to your AI agent..
- Interact with your AI agent using typical prompts and review how it responds. You can return to Agent Persona and adjust the instructions if needed.
We released a library of template Personas to browse such as Customer Service Rep, Grade-School Teacher, Legal Advisor, etc.!
Updated about 13 hours ago
