Change the background
This guide explains how to customize your AI agent’s background using either an image or a solid color.
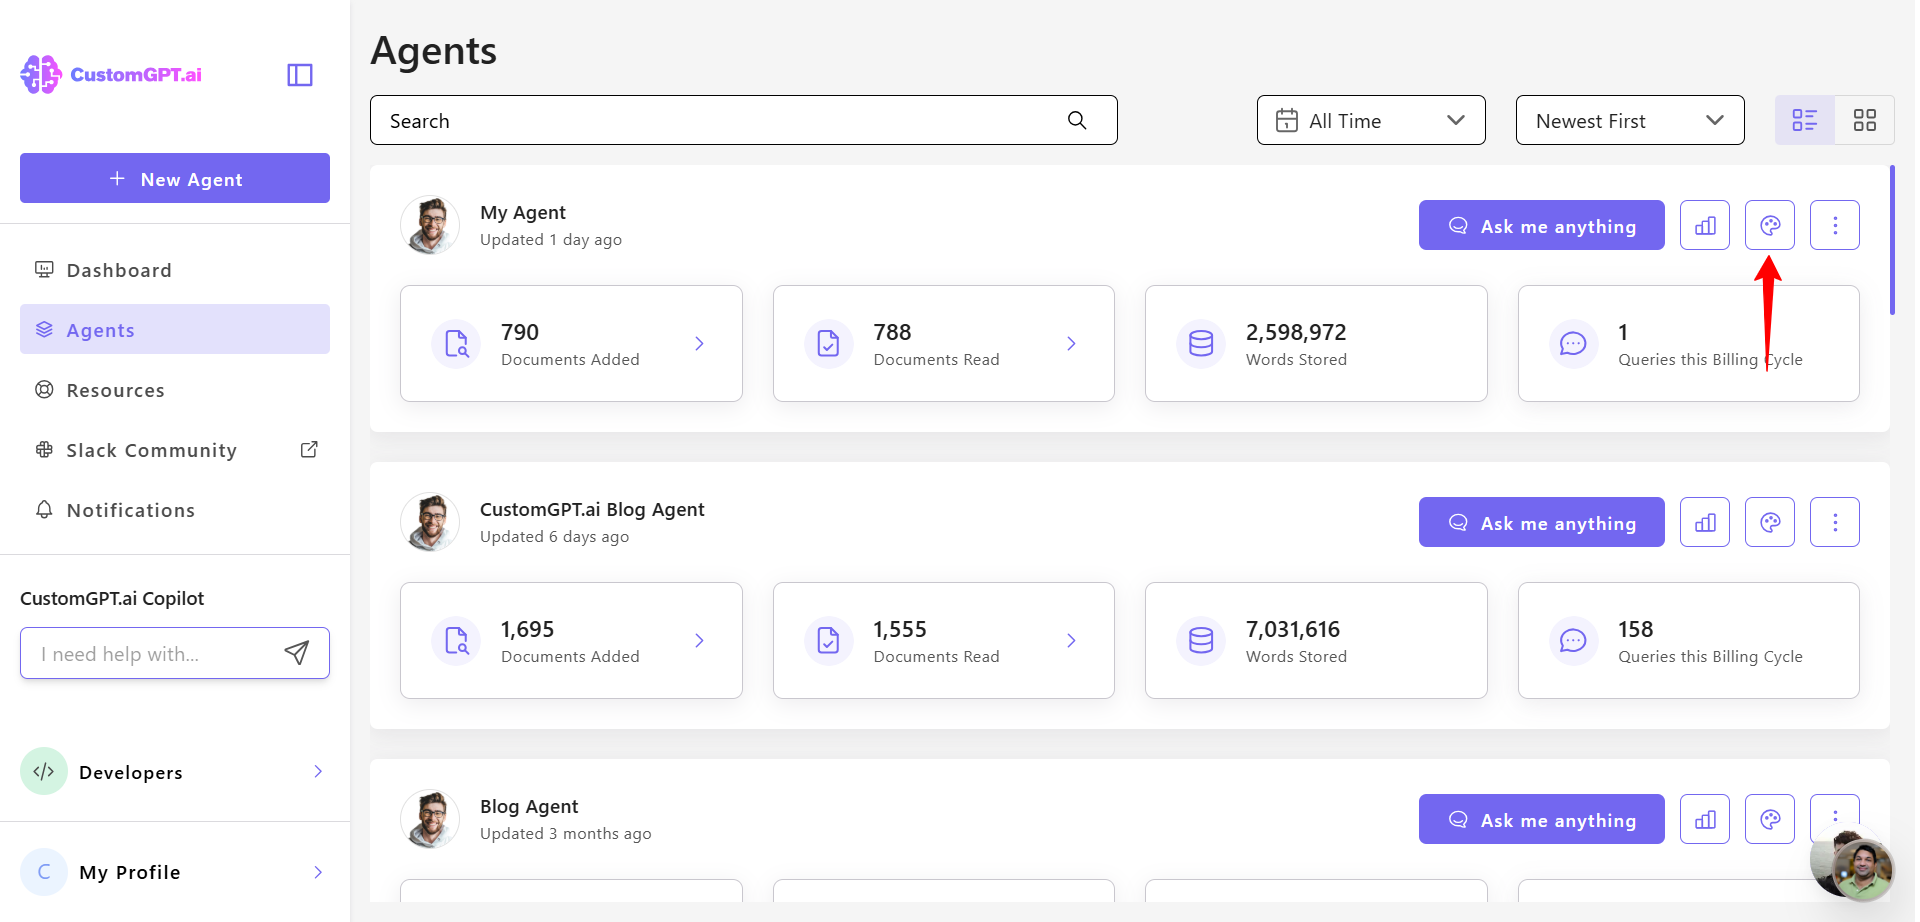
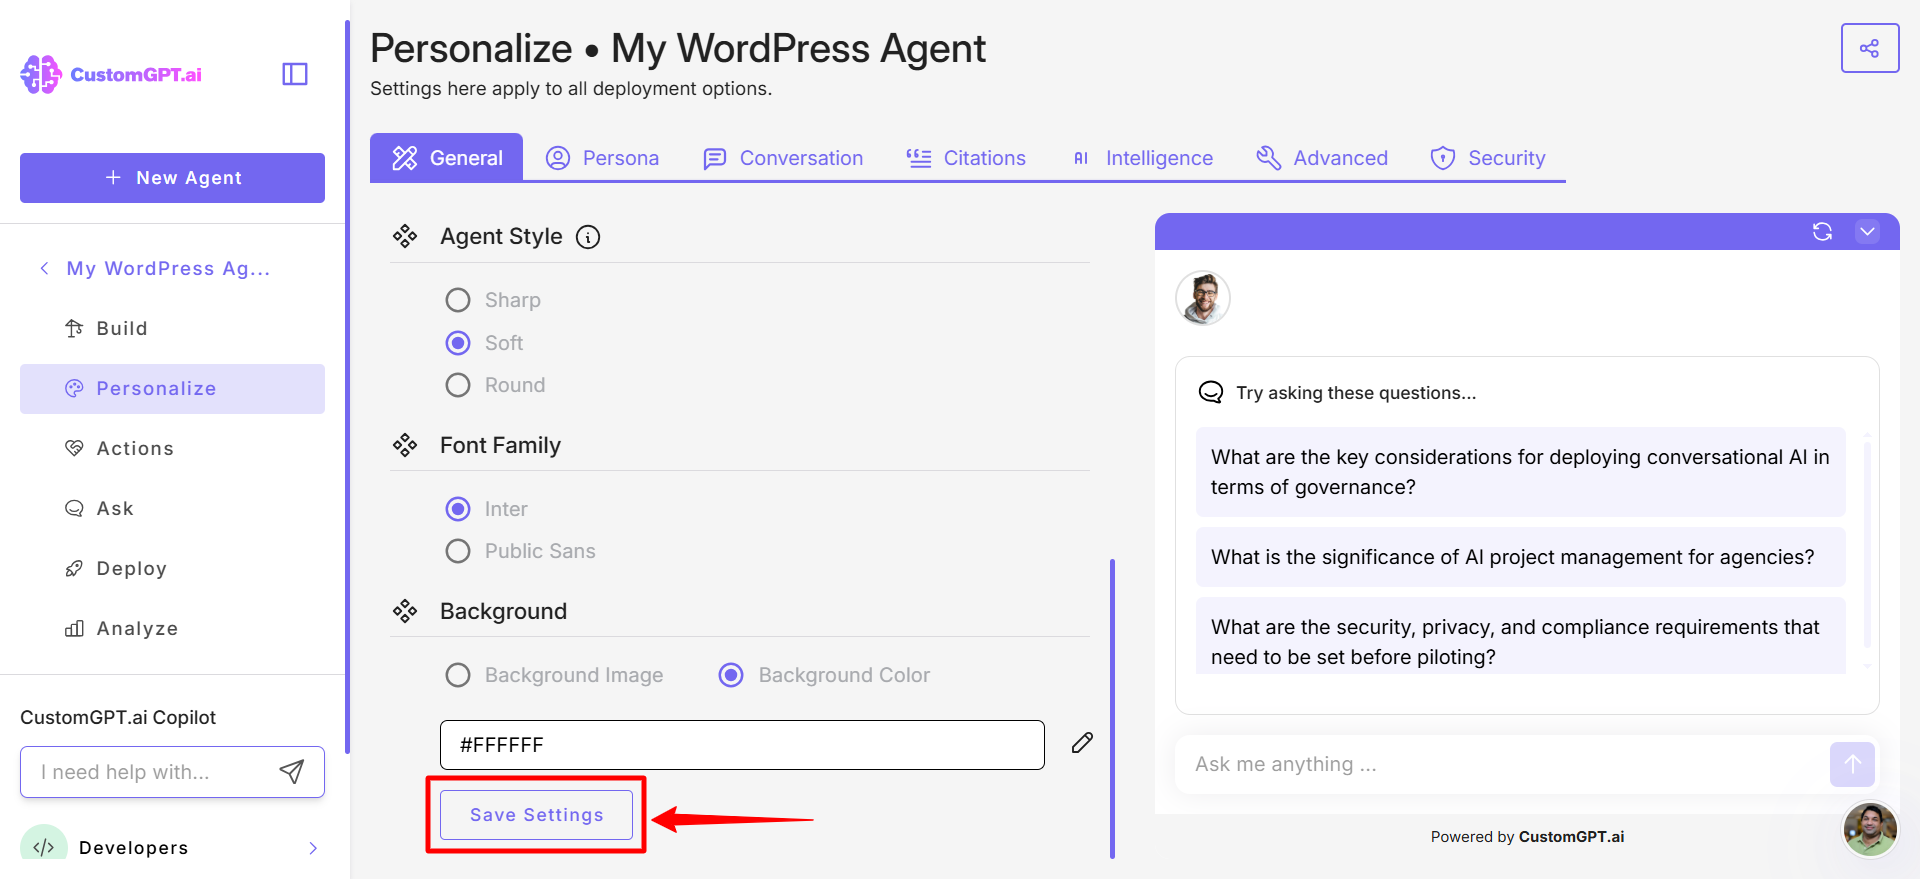
- Click the Personalize icon next to the agent you want to customize.
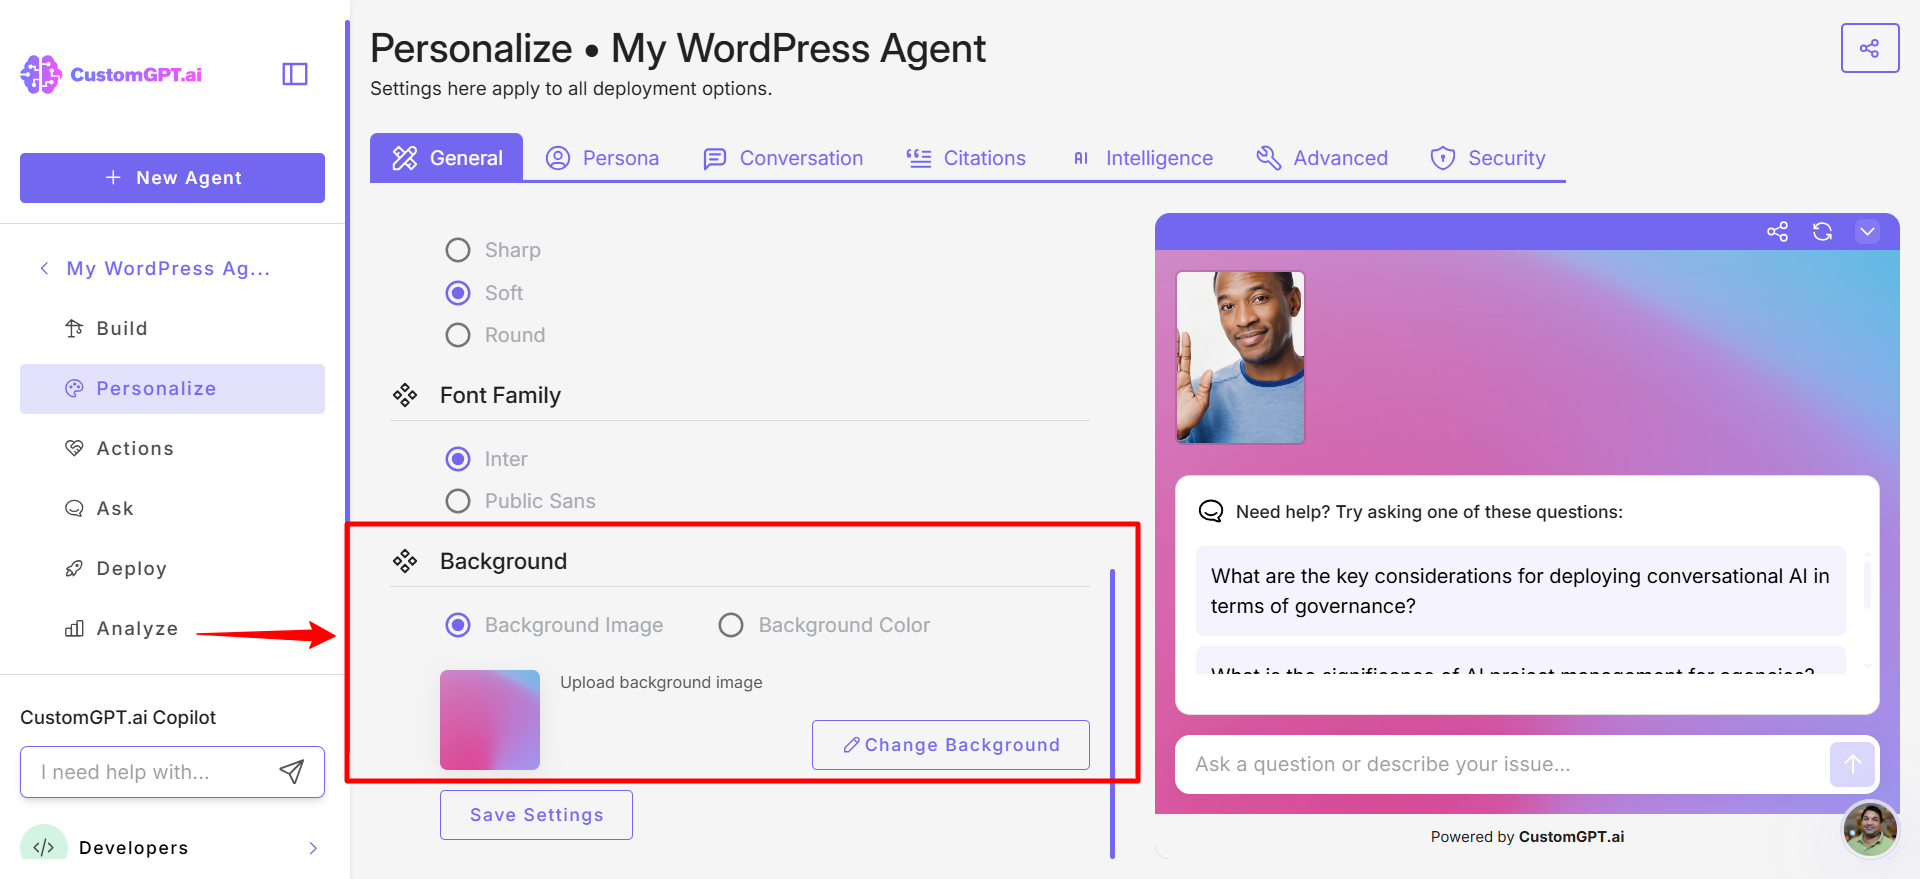
- Scroll down to the upload Background section.
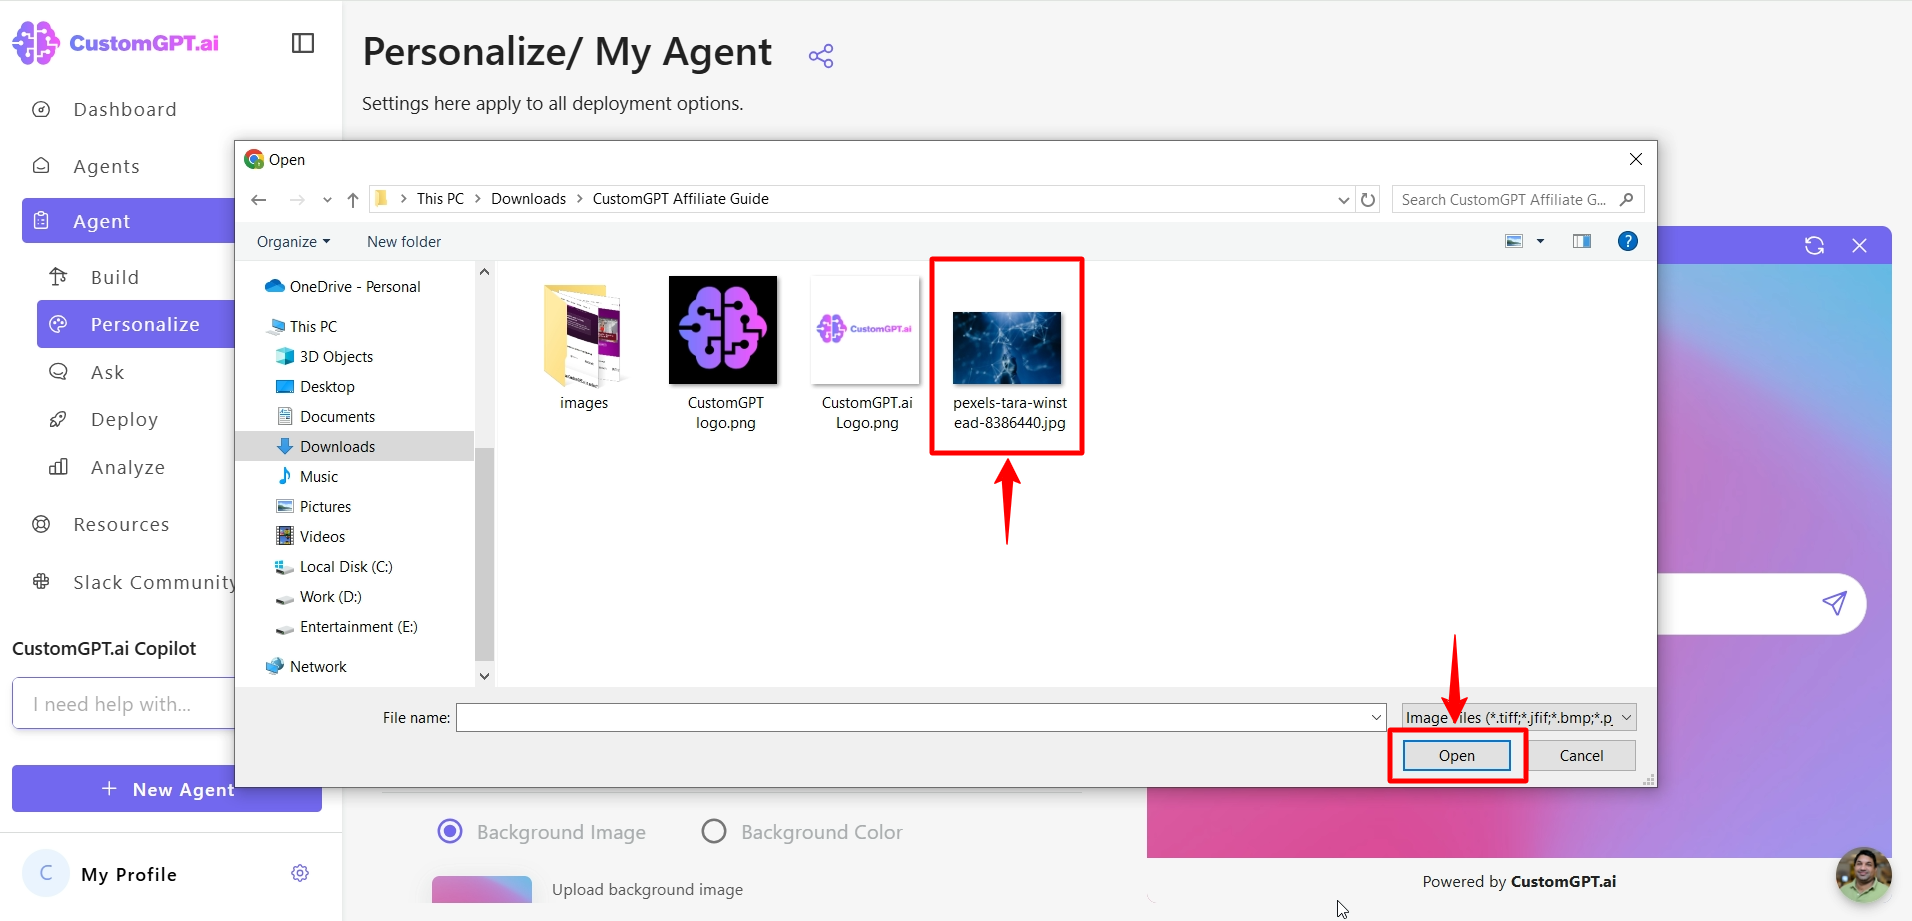
- To use an image, click Change Background, select your image file, and click Open to upload it.
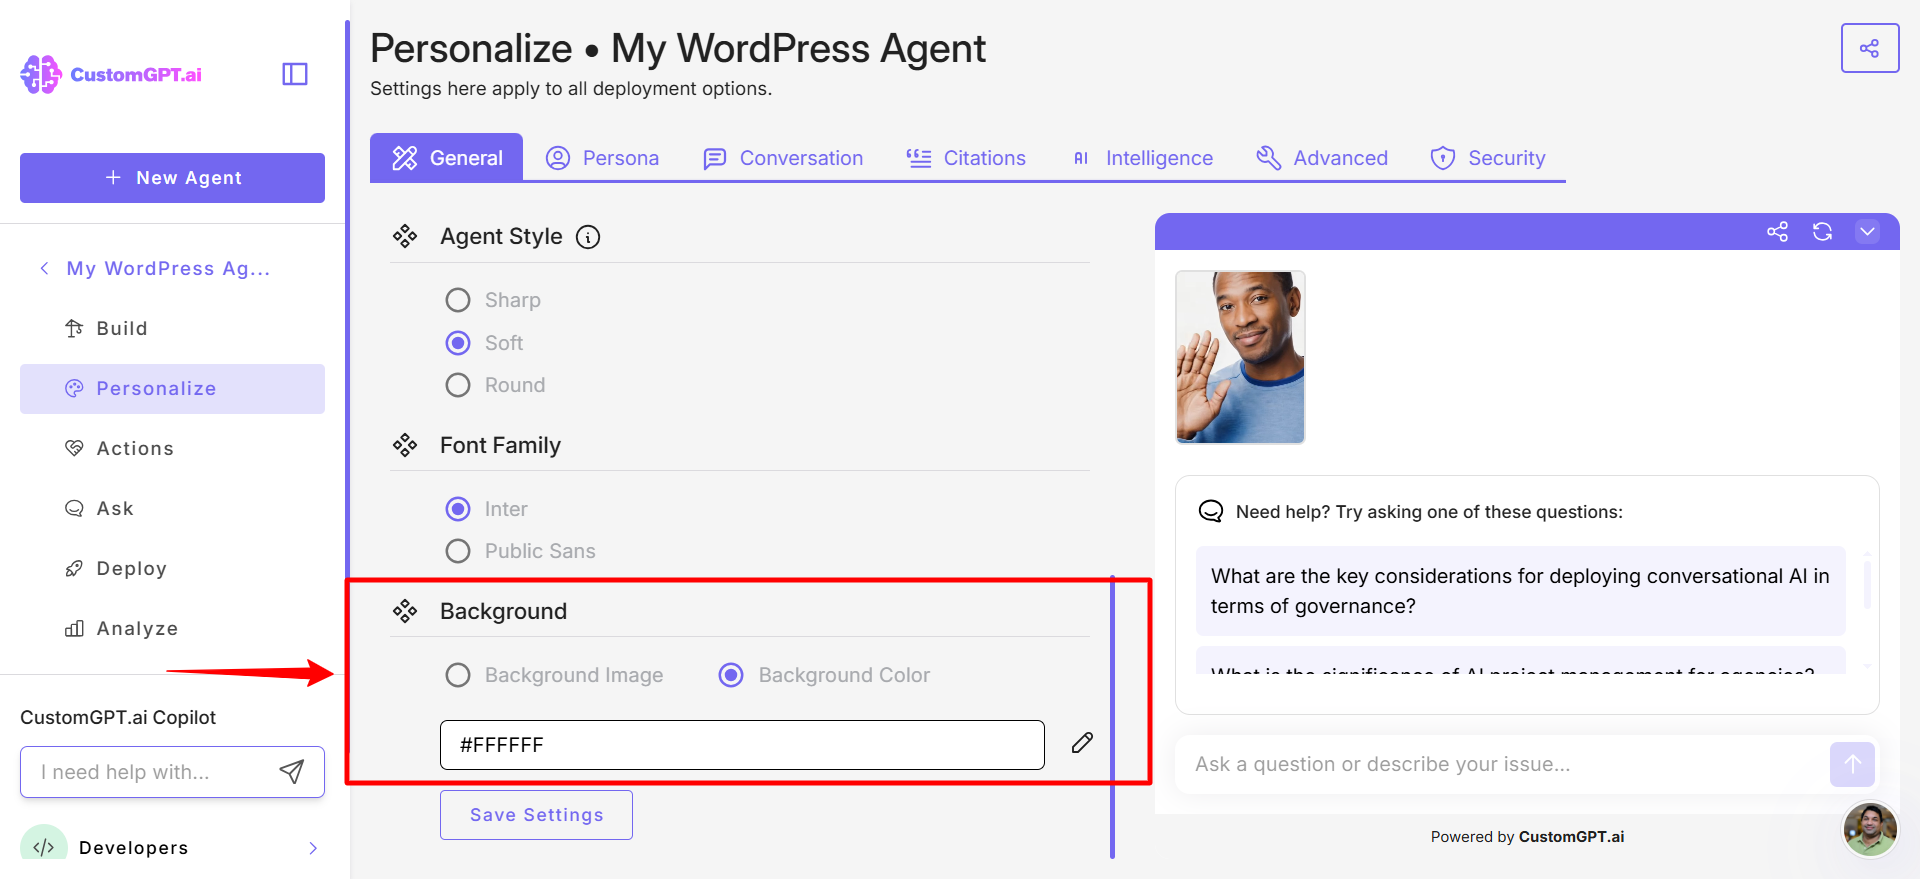
- To use a solid color, click the Background Color option, then enter a HEX color code or use the color picker.
- Click Save Settings to apply your updates.
Updated 5 months ago
Did this page help you?