Set up domain whitelist for your AI agent
This step-by-step guide explains how to set up domain whitelisting to control where your AI agent can be used. This helps prevent unauthorized use and improves your agent’s security.
Note:When you enable domain whitelisting, your AI agent will only work on the domains you specify. The "Share link" deployment will not work for this agent!
Use this feature to make sure no one can copy your agent’s embed code and run it on other sites.
Set up domain whitelisting
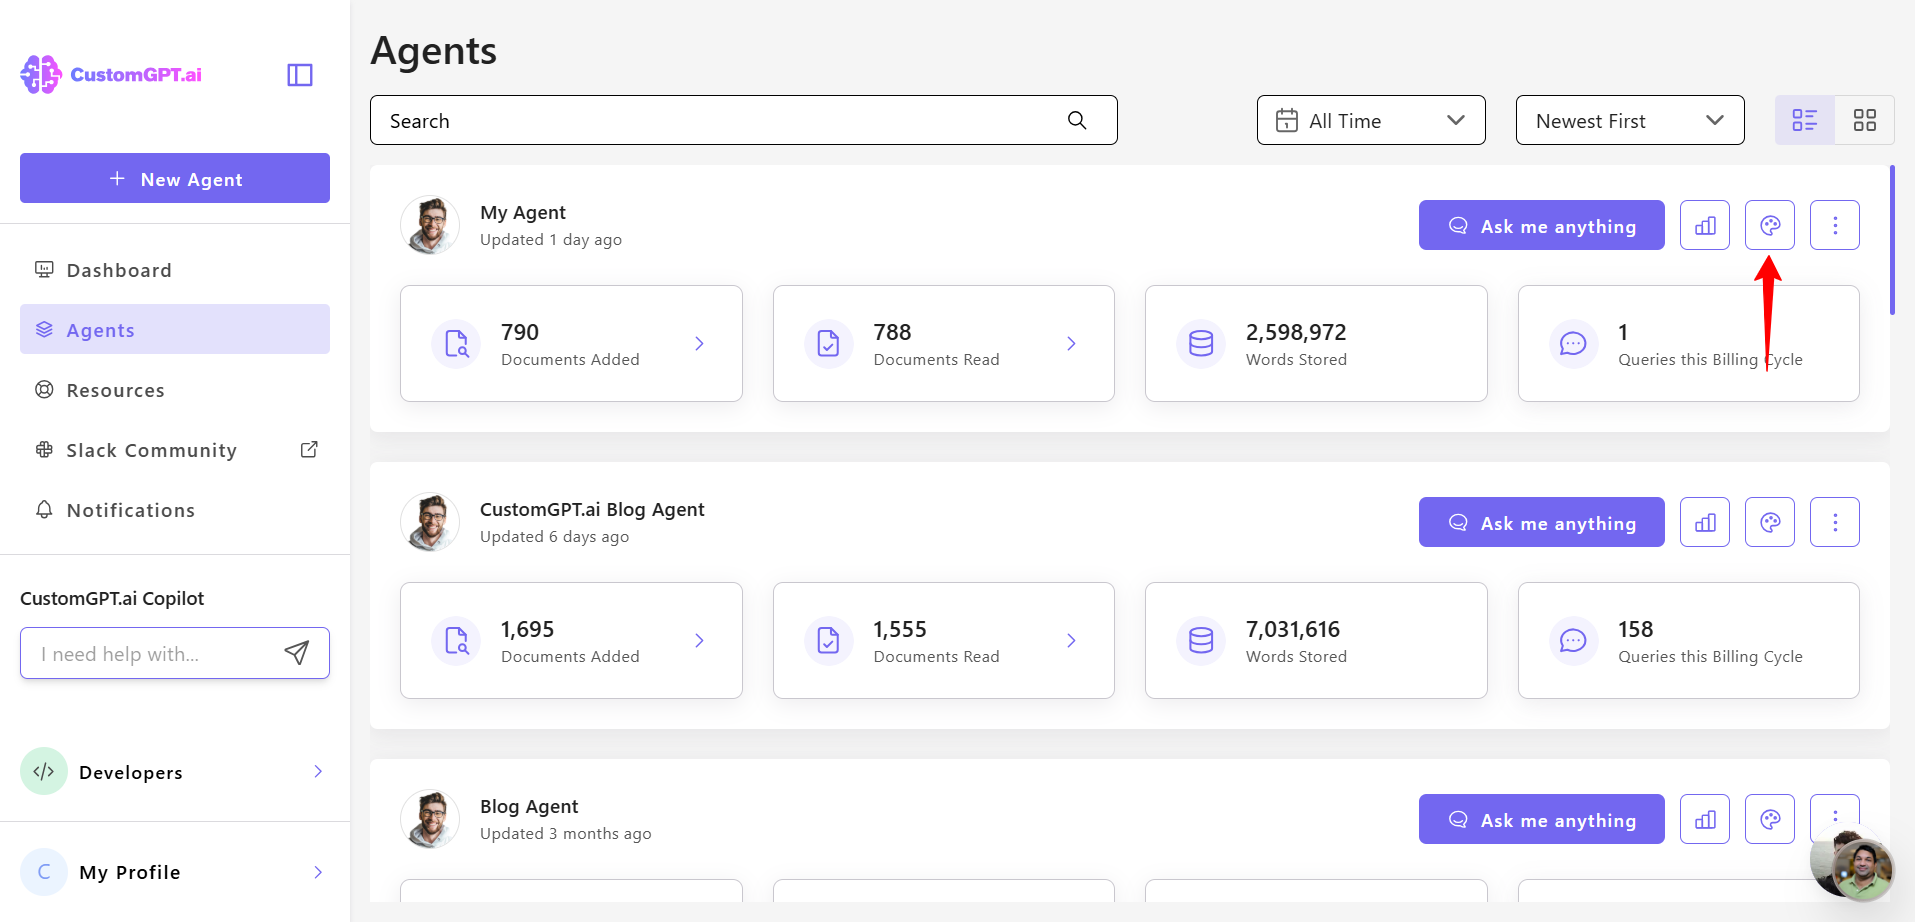
- In the right-hand menu, click Personalize.

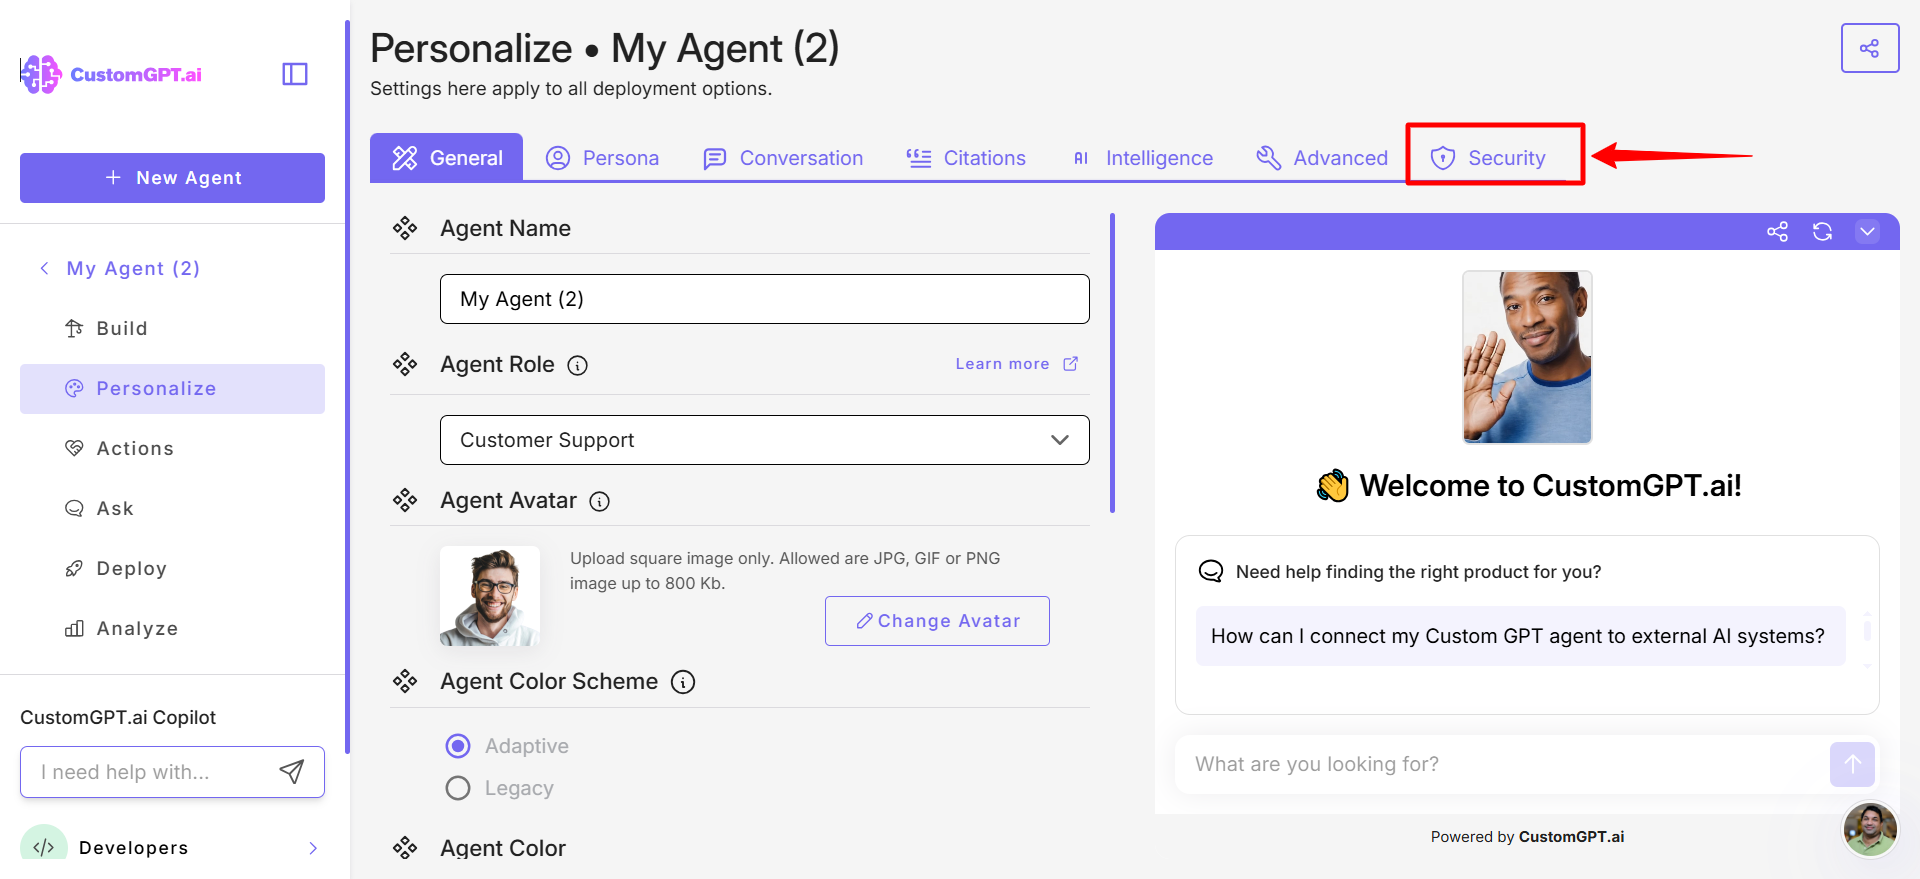
- Click Security tab.

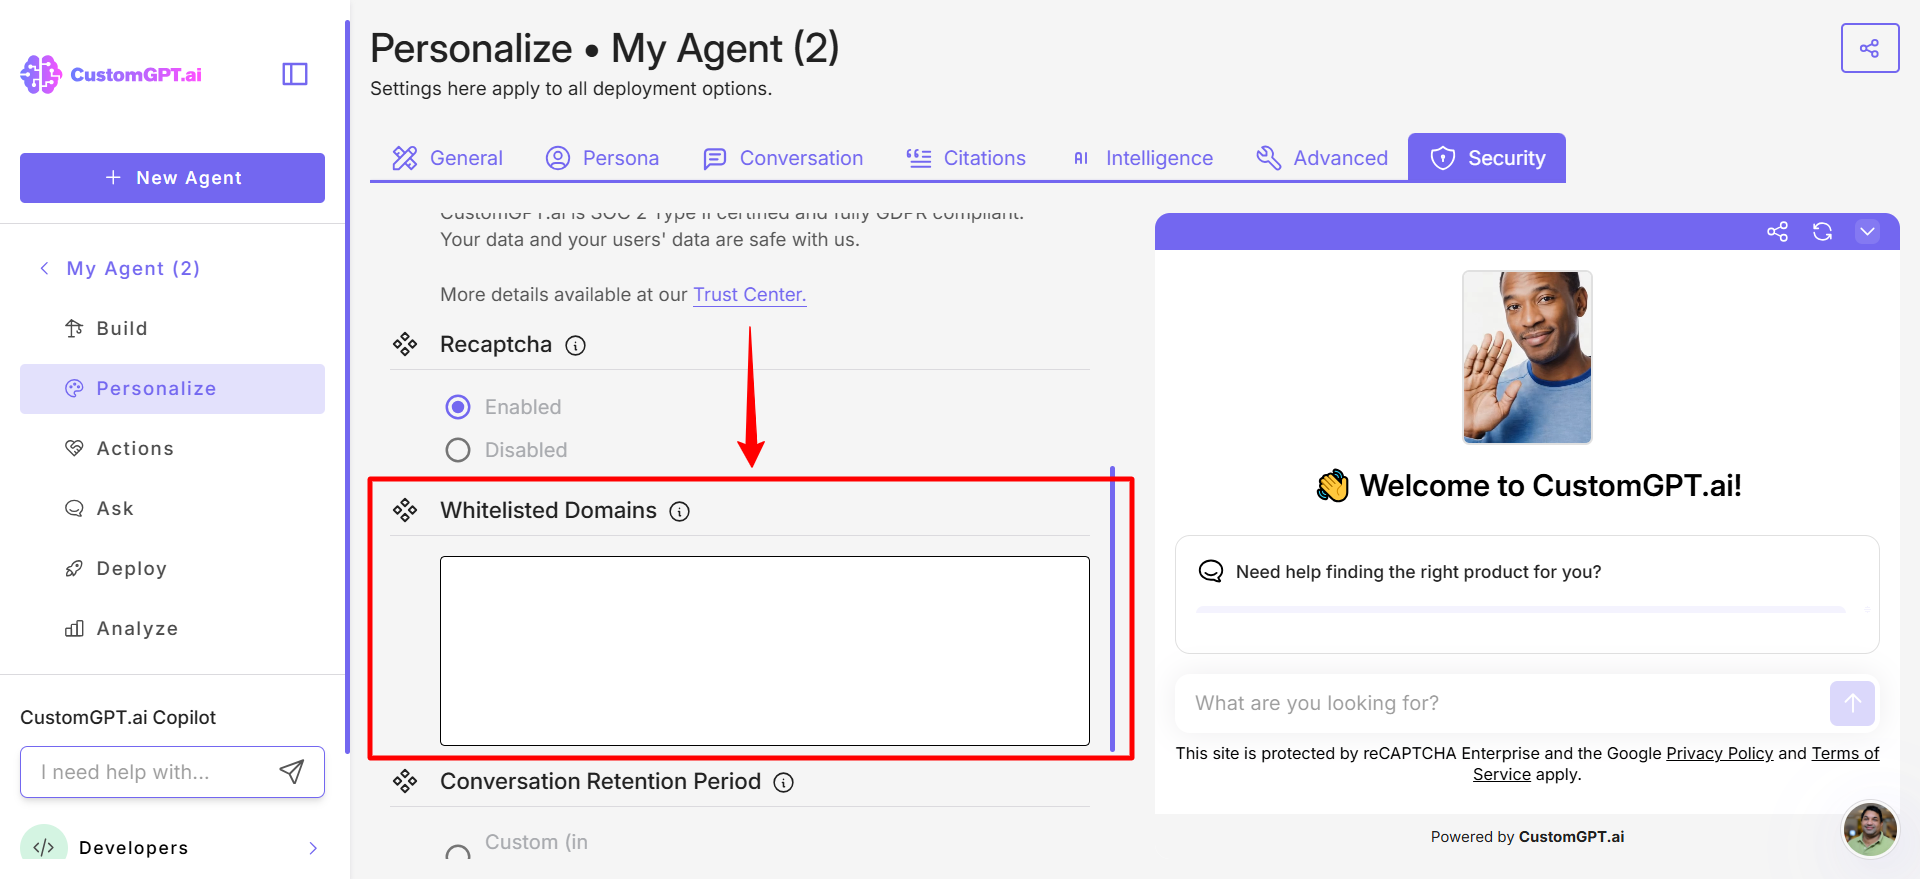
- Scroll to the Whitelisted Domains section. Enter the domains you want to allow, separating them by spaces, tabs, new lines, or commas.

You can use '*' as a placeholder, which represents any sequence of characters. For example *****.domain.com will allow all subdomains of domain.com).
Use only the domain name (e.g., example.com) and do not include http:// or https://.
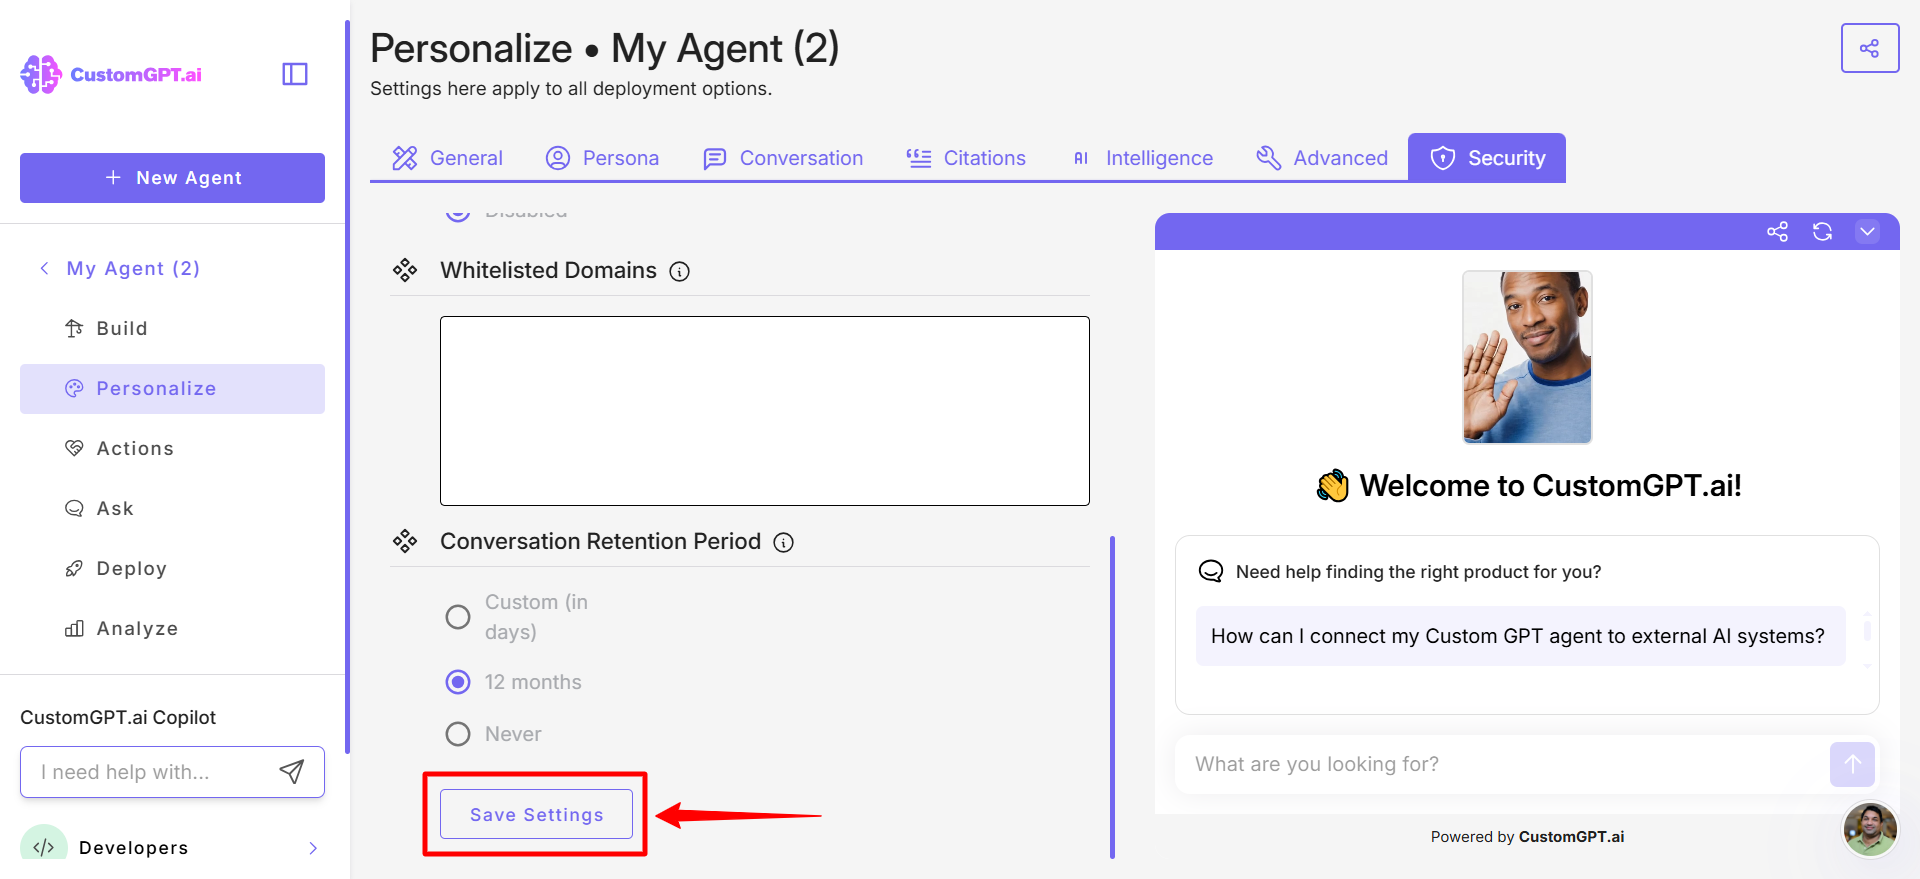
- Click Save Settings to apply your updates.

Updated 12 days ago
