Enable auto-sync for SharePoint sites
Follow this guide to easily enable the SharePoint Sites Auto-Sync feature, ensuring your data is always automatically updated and synchronized.
Note:This is our Enterprise feature. If you are interested in enabling it, please contact our sales team.
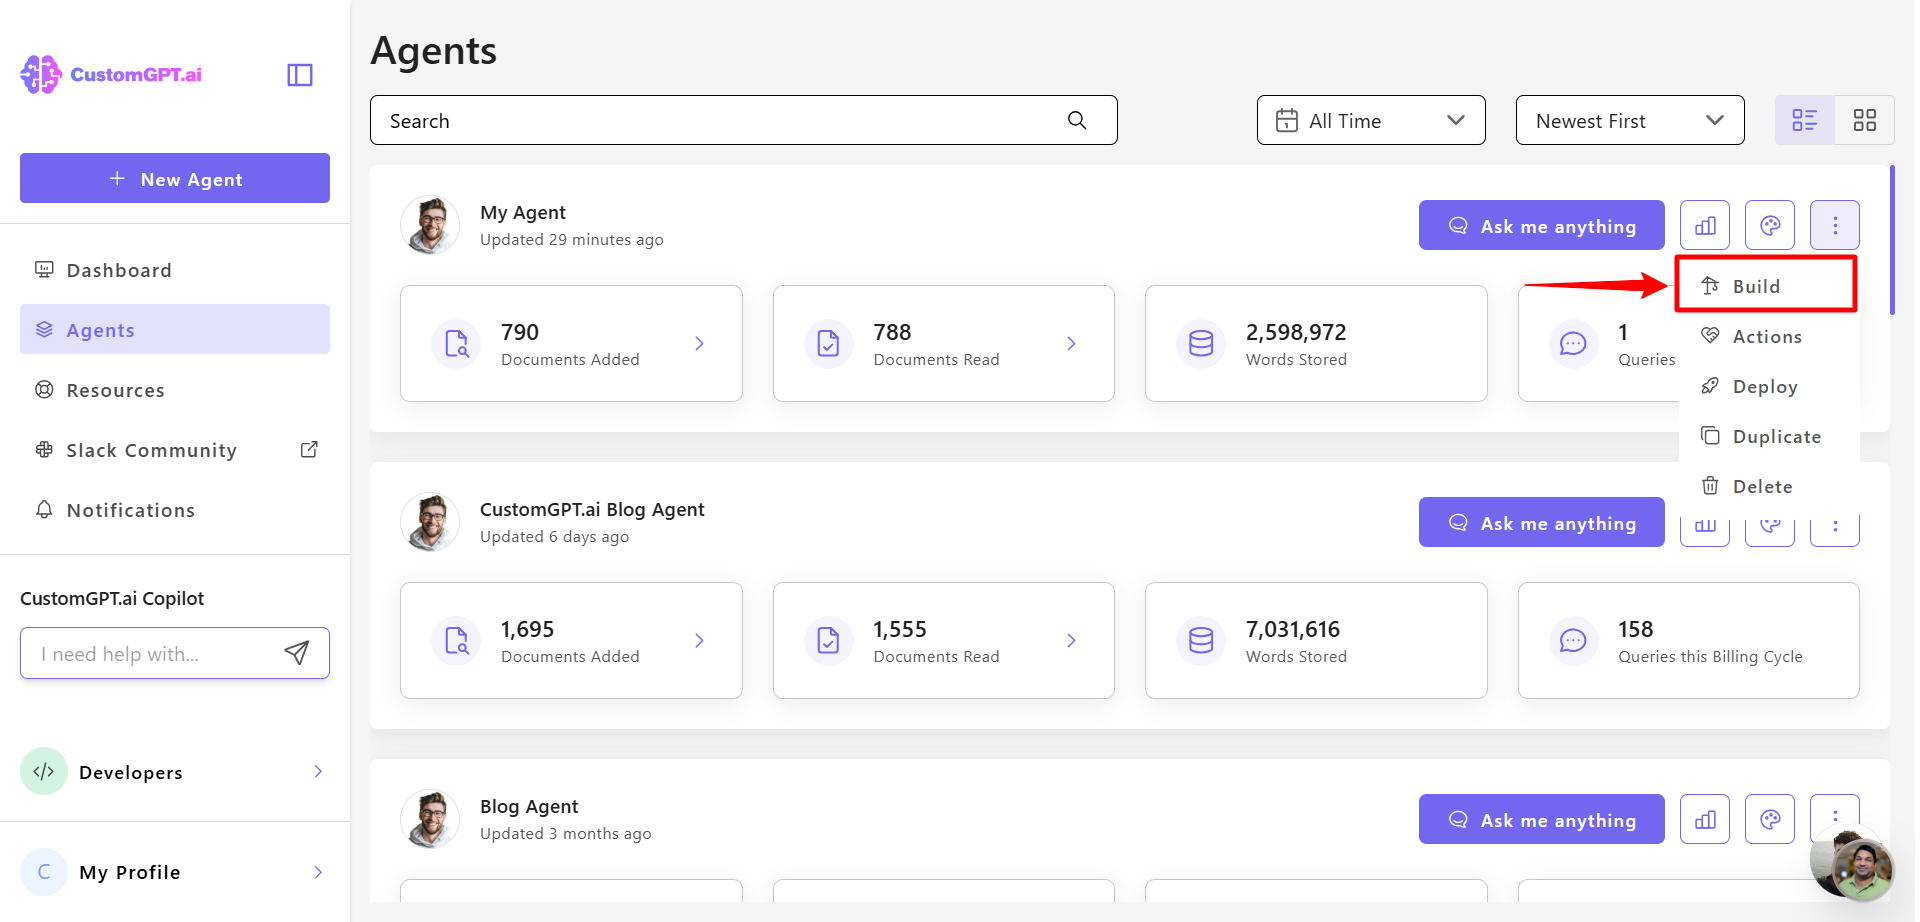
- Click the three dots next to your agent’s name, then select Build.
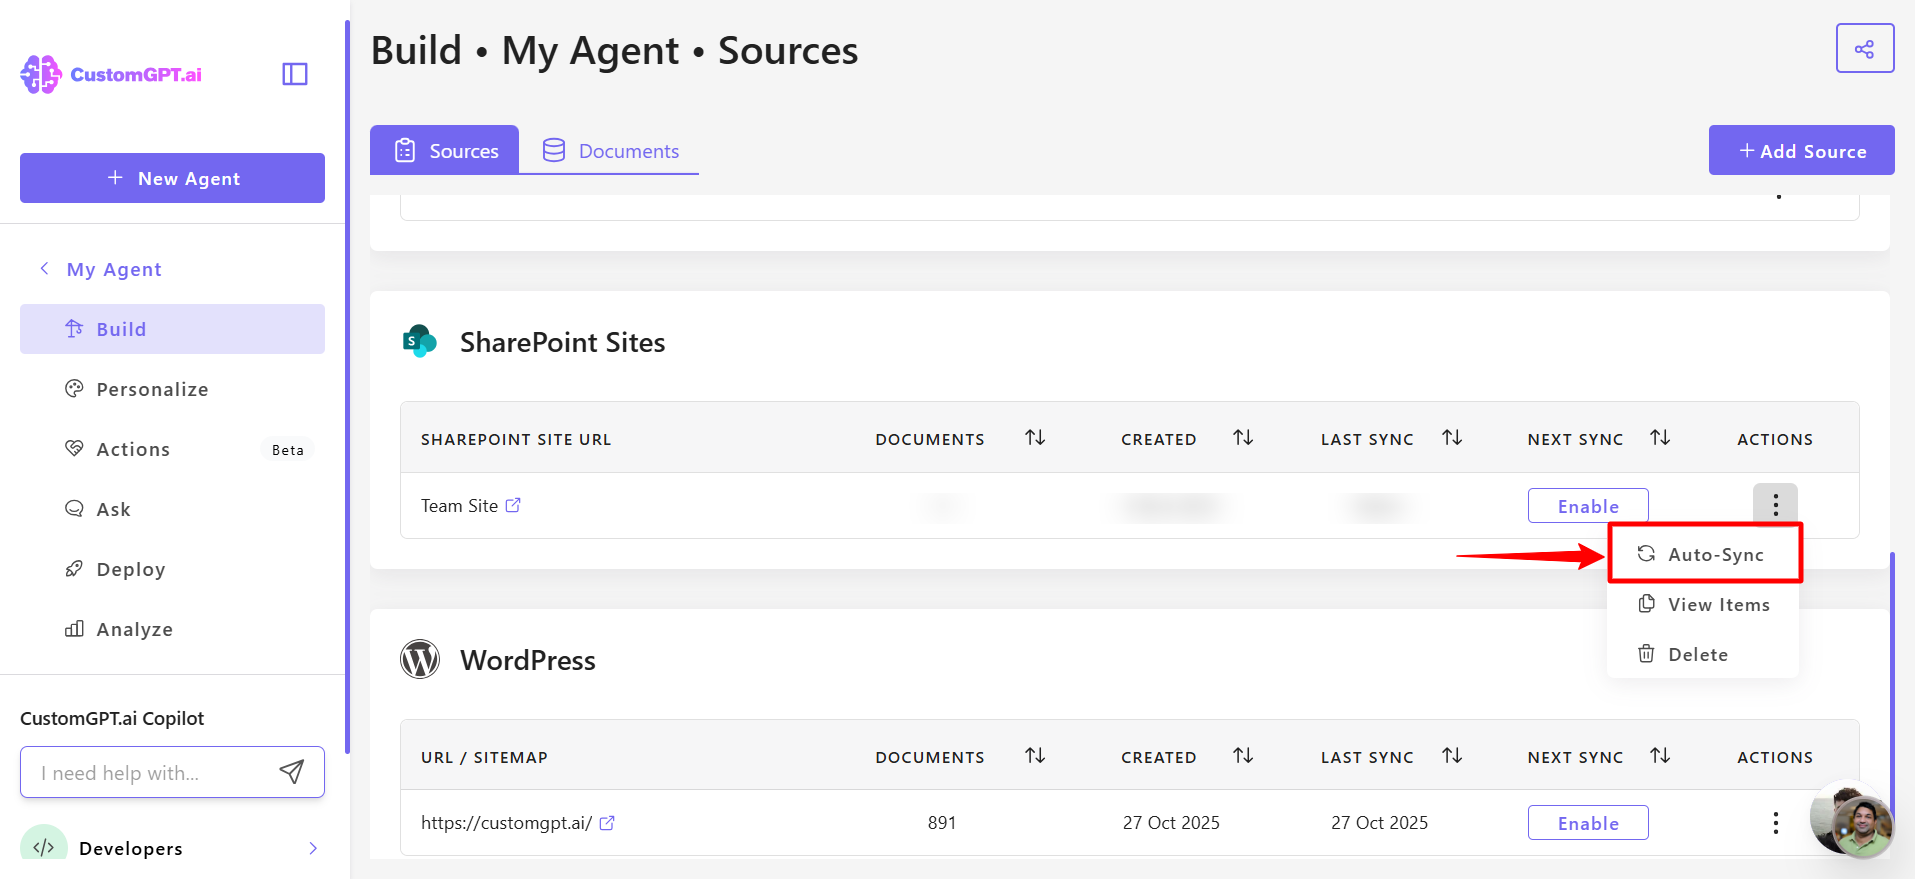
- In SharePoint sites section, find your connected sites, click the three-dot menu next to it, and select Auto Sync.
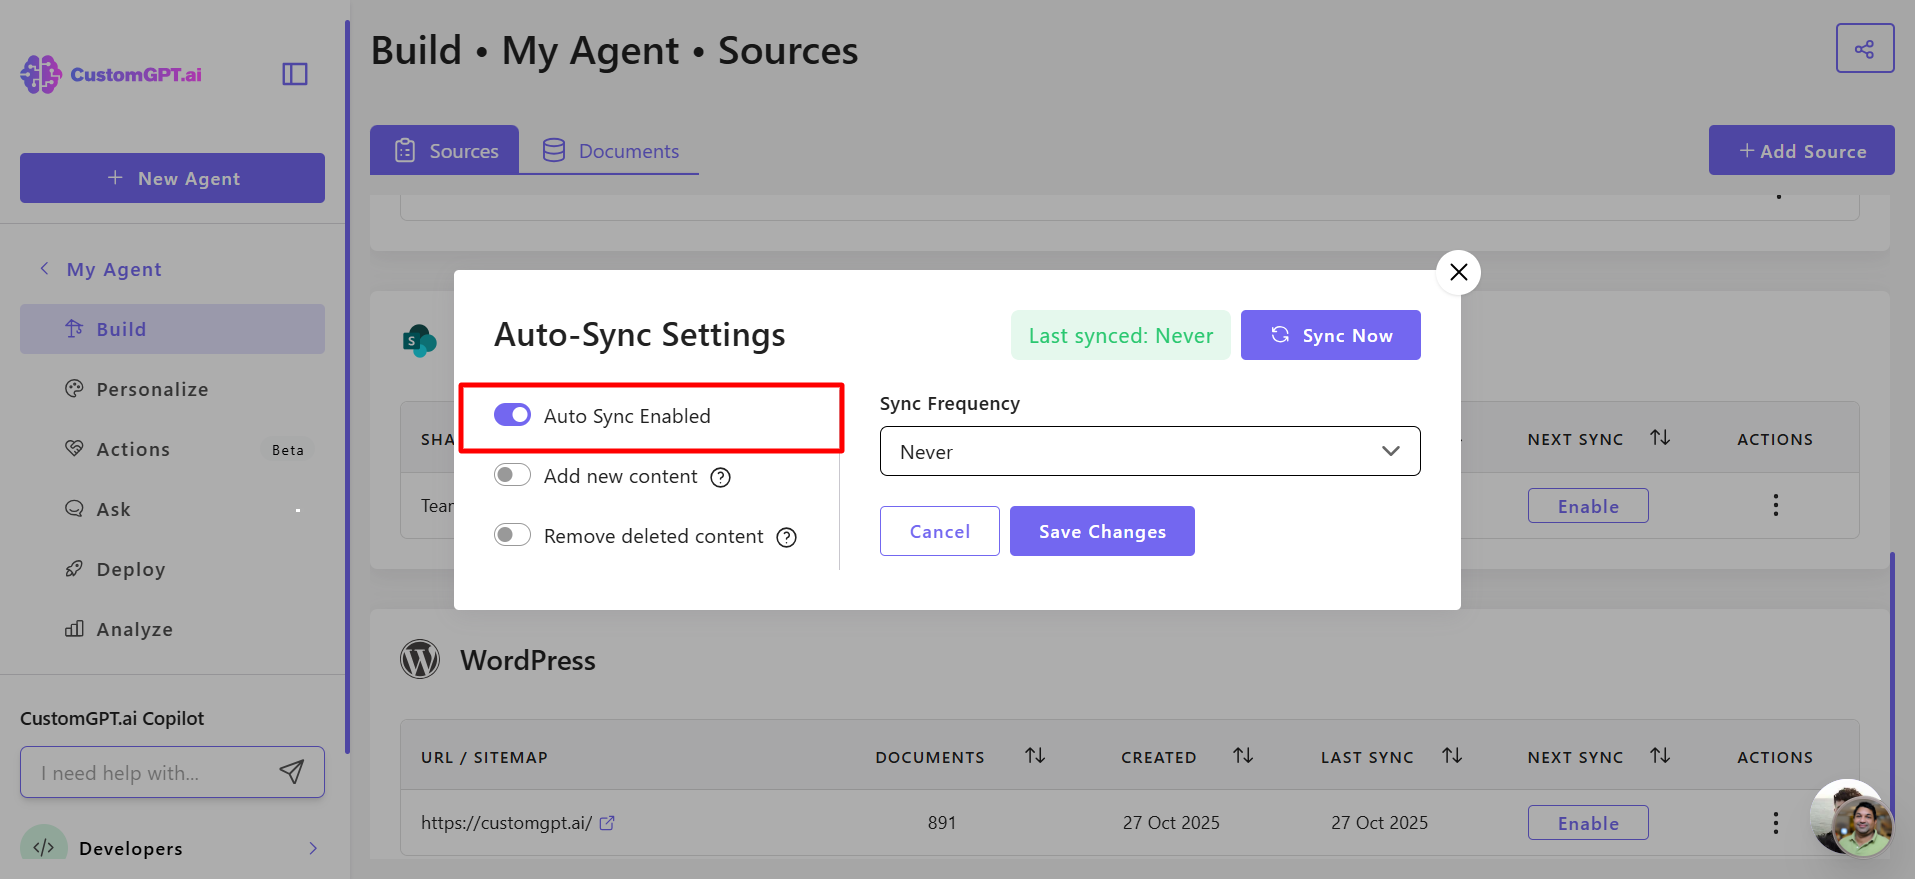
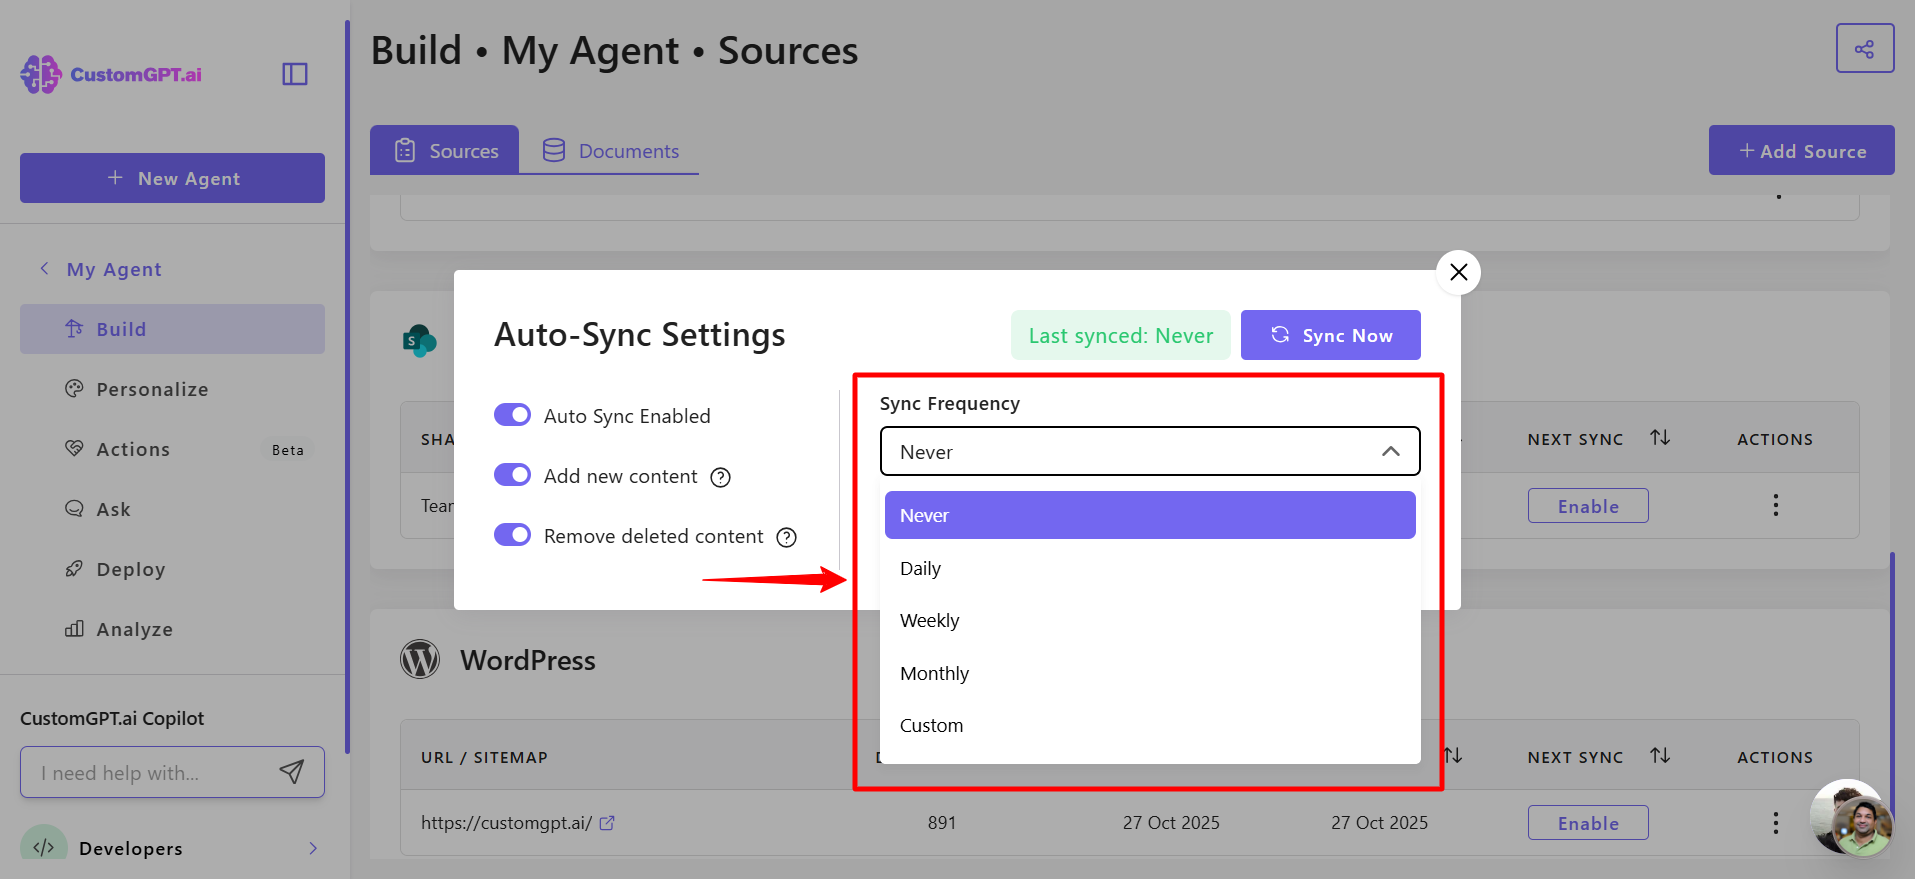
- Toggle Auto Sync to Enabled.
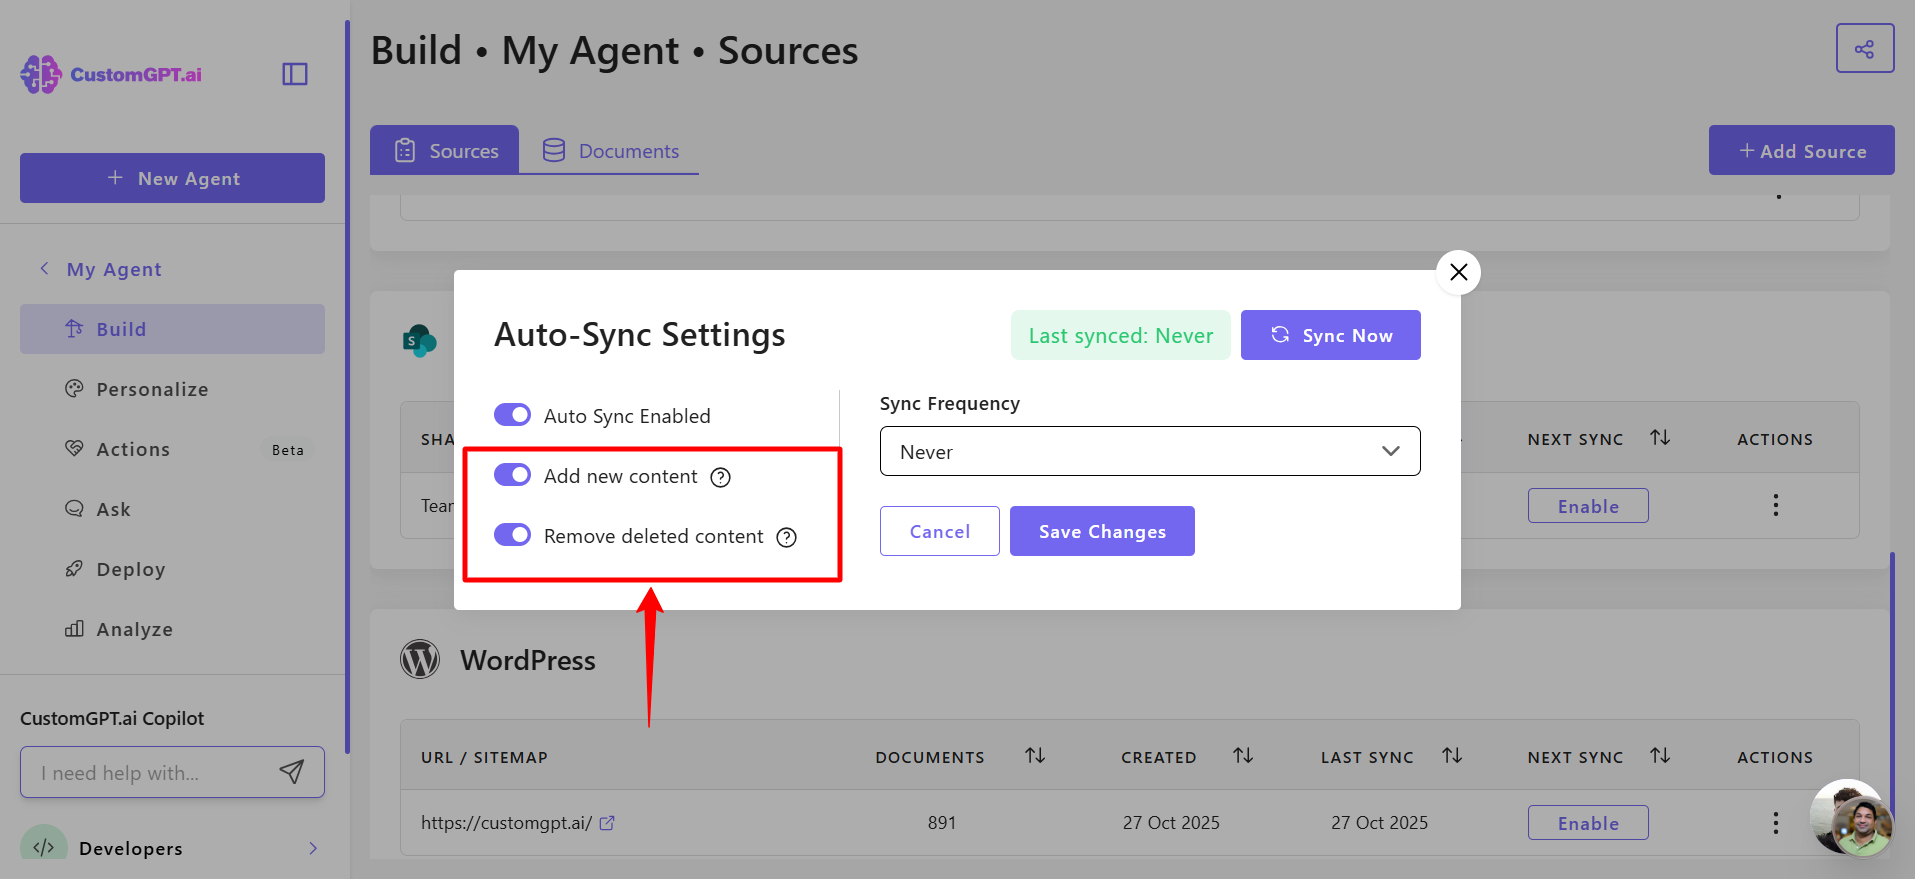
- Choose your sync options:
- Add new pages to the agent
- Remove deleted pages from the agent
- Set your sync frequency to control how often SharePoint content updates:
- Never
- Daily
- Weekly
- Monthly
- Custom
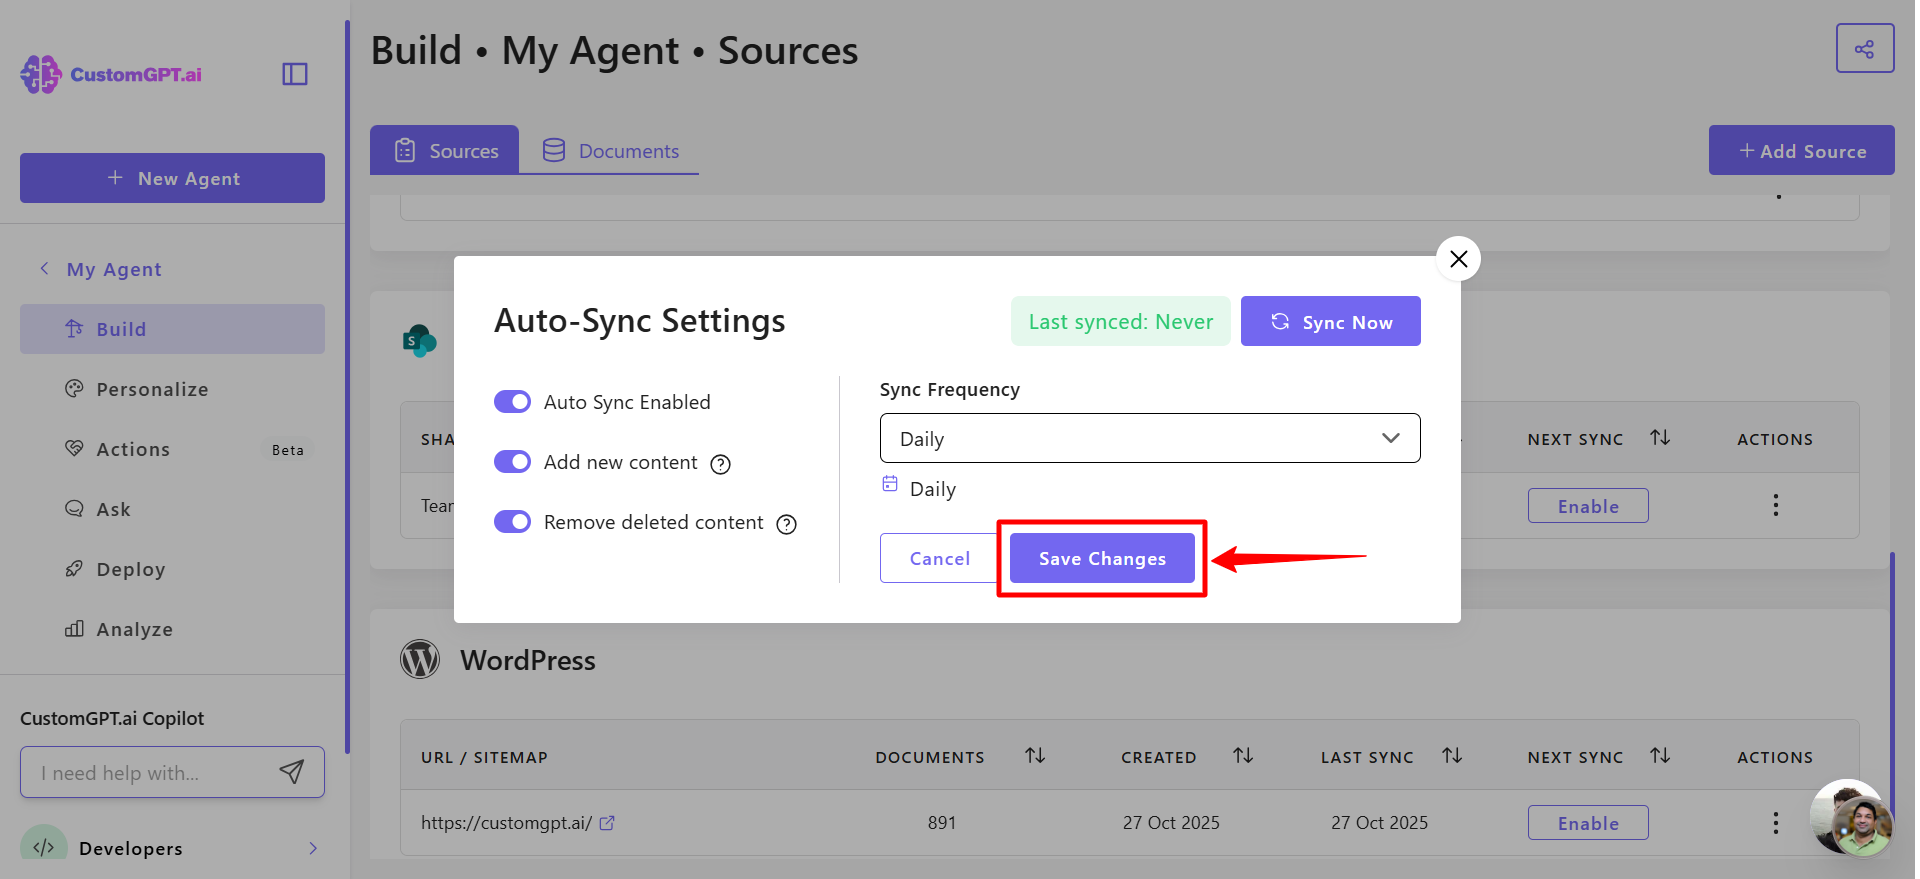
- Click Save Changes to apply your settings.
To enable Auto-Sync for SharePoint documents, refer to the guide on How to Enable Auto-Sync for SharePoint documents.
Updated 4 months ago
