How to Make Your Agent Public

Making your agent public allows others to access and interact with your work seamlessly. In this guide, we will explore two methods to achieve this. Follow the steps carefully to ensure your project is visible to your intended audience.

Method 1: Using the Deploy Page

This method is quick and effective if you want to make your agent public in just a few clicks.

Step 1: Sign in

a) Sign in to https://app.customgpt.ai/.


Step 2: Navigate to the Deploy Page

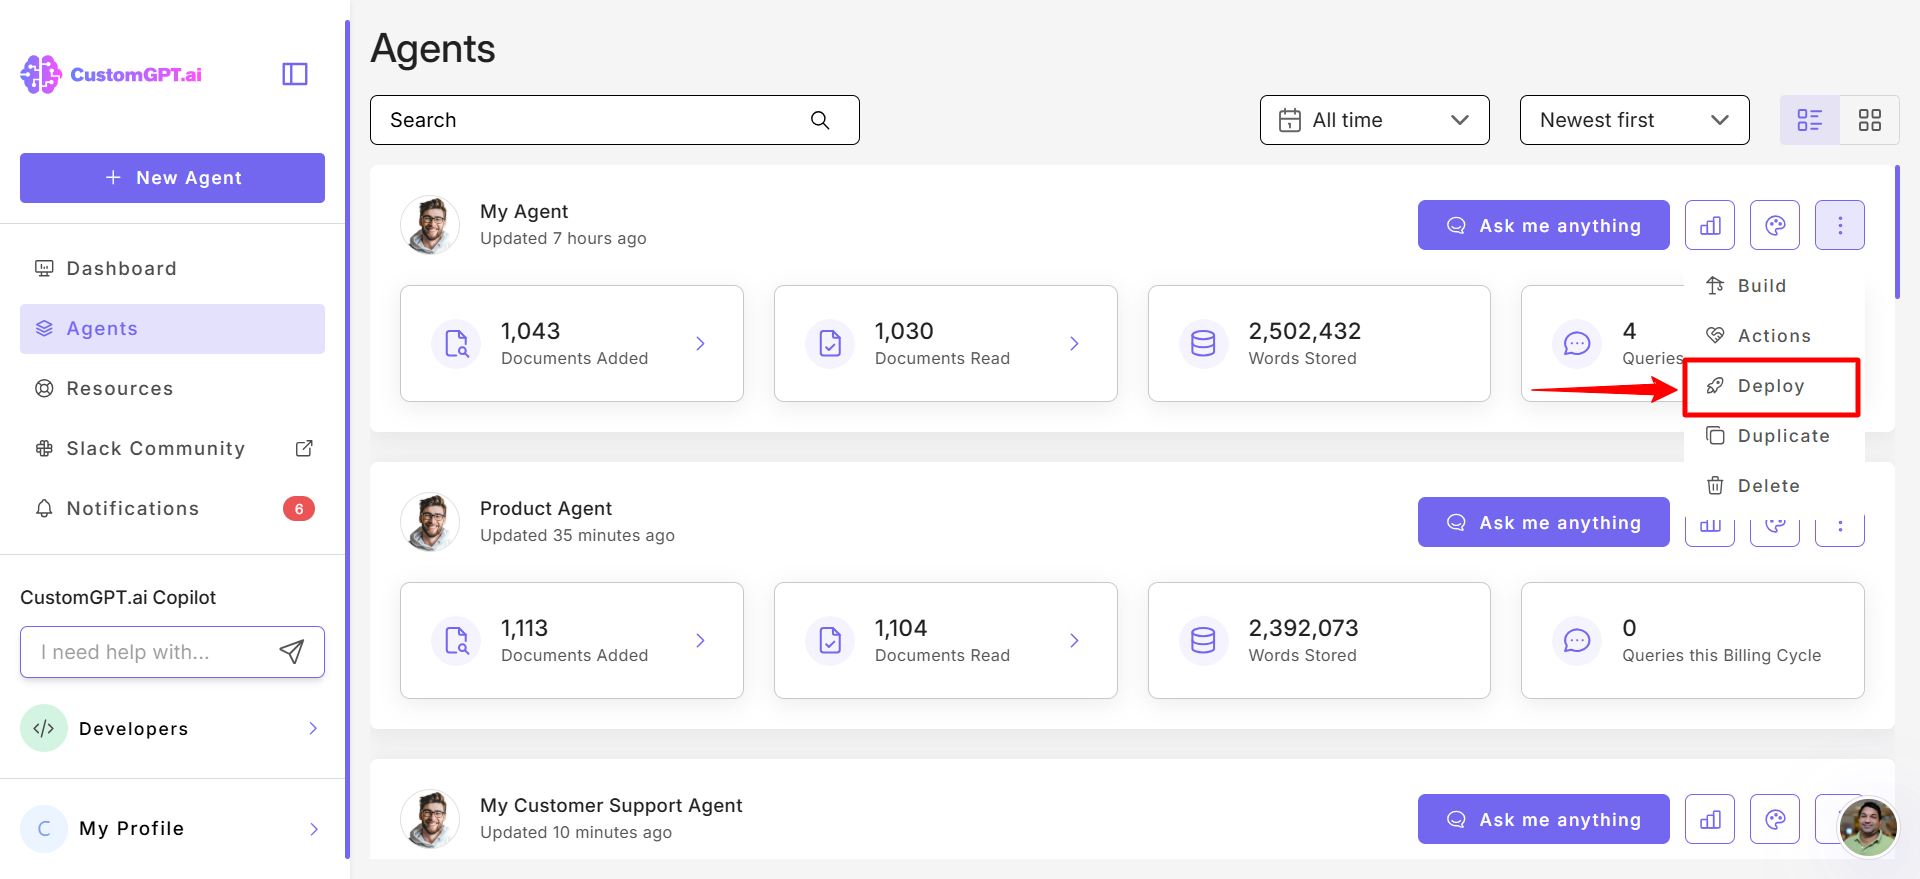
a) Access the "Deploy" page from your agent dashboard.

Deploy Project

Step 3: Make Your Agent Public

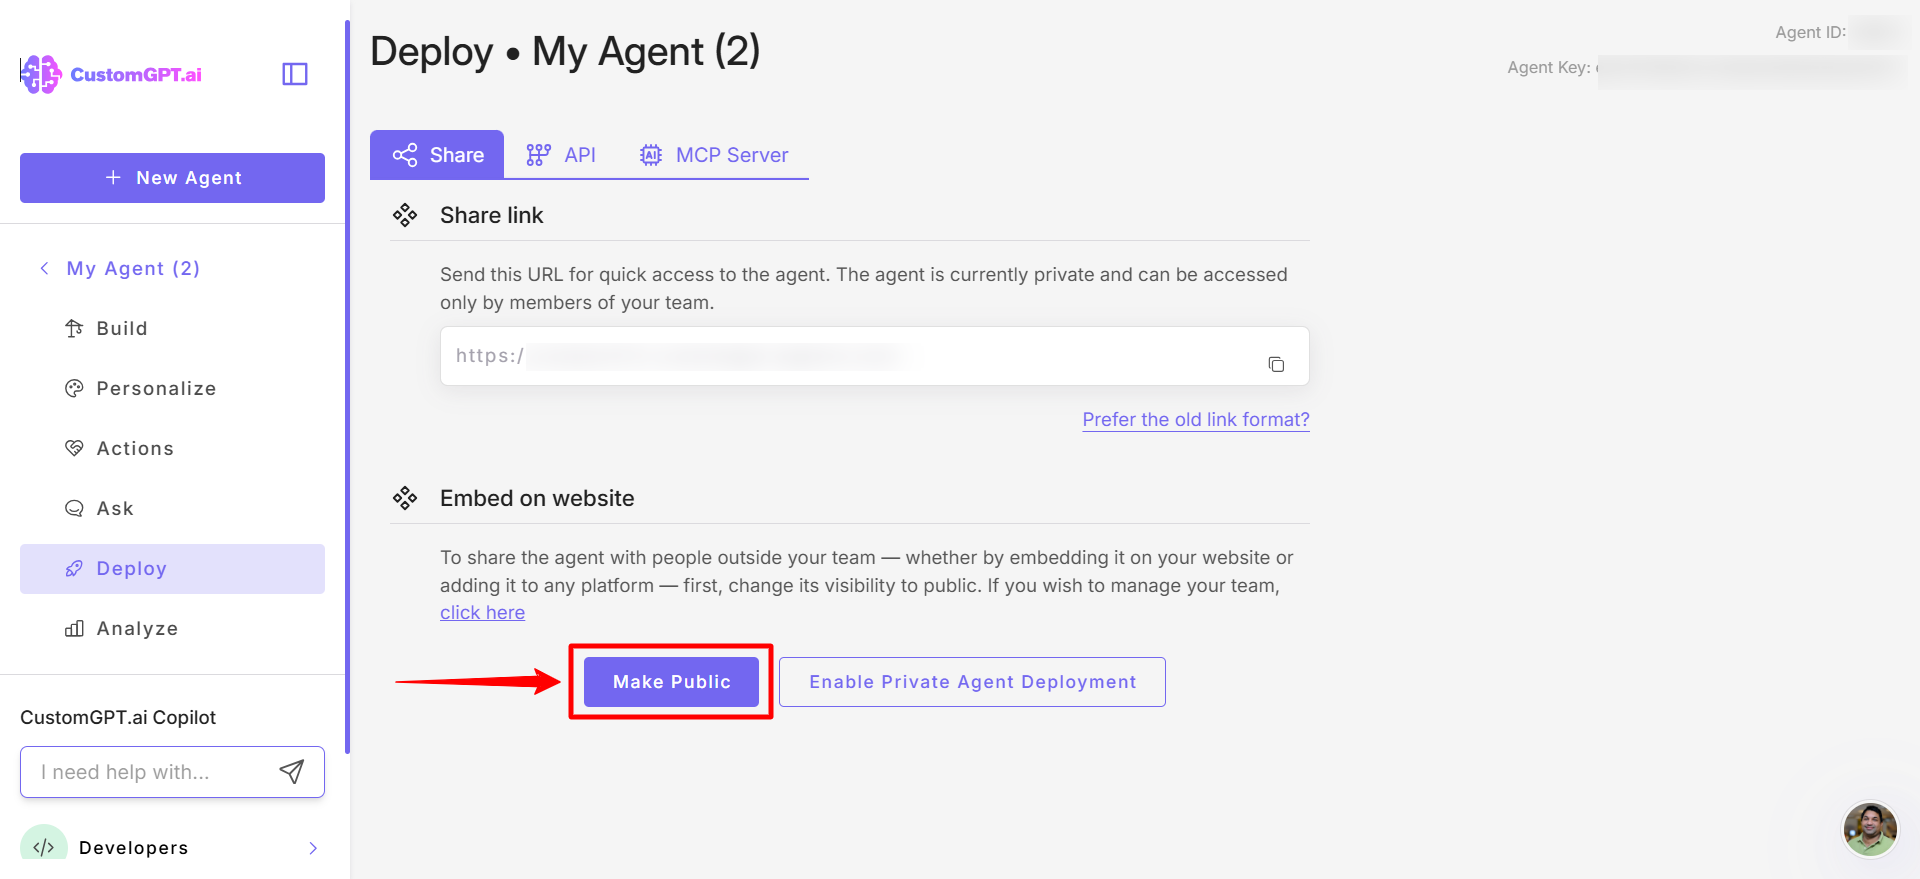
a) Locate the "Make Public" button and click it.

Deployment (Make Public)

Step 4: Copy the HTML Code

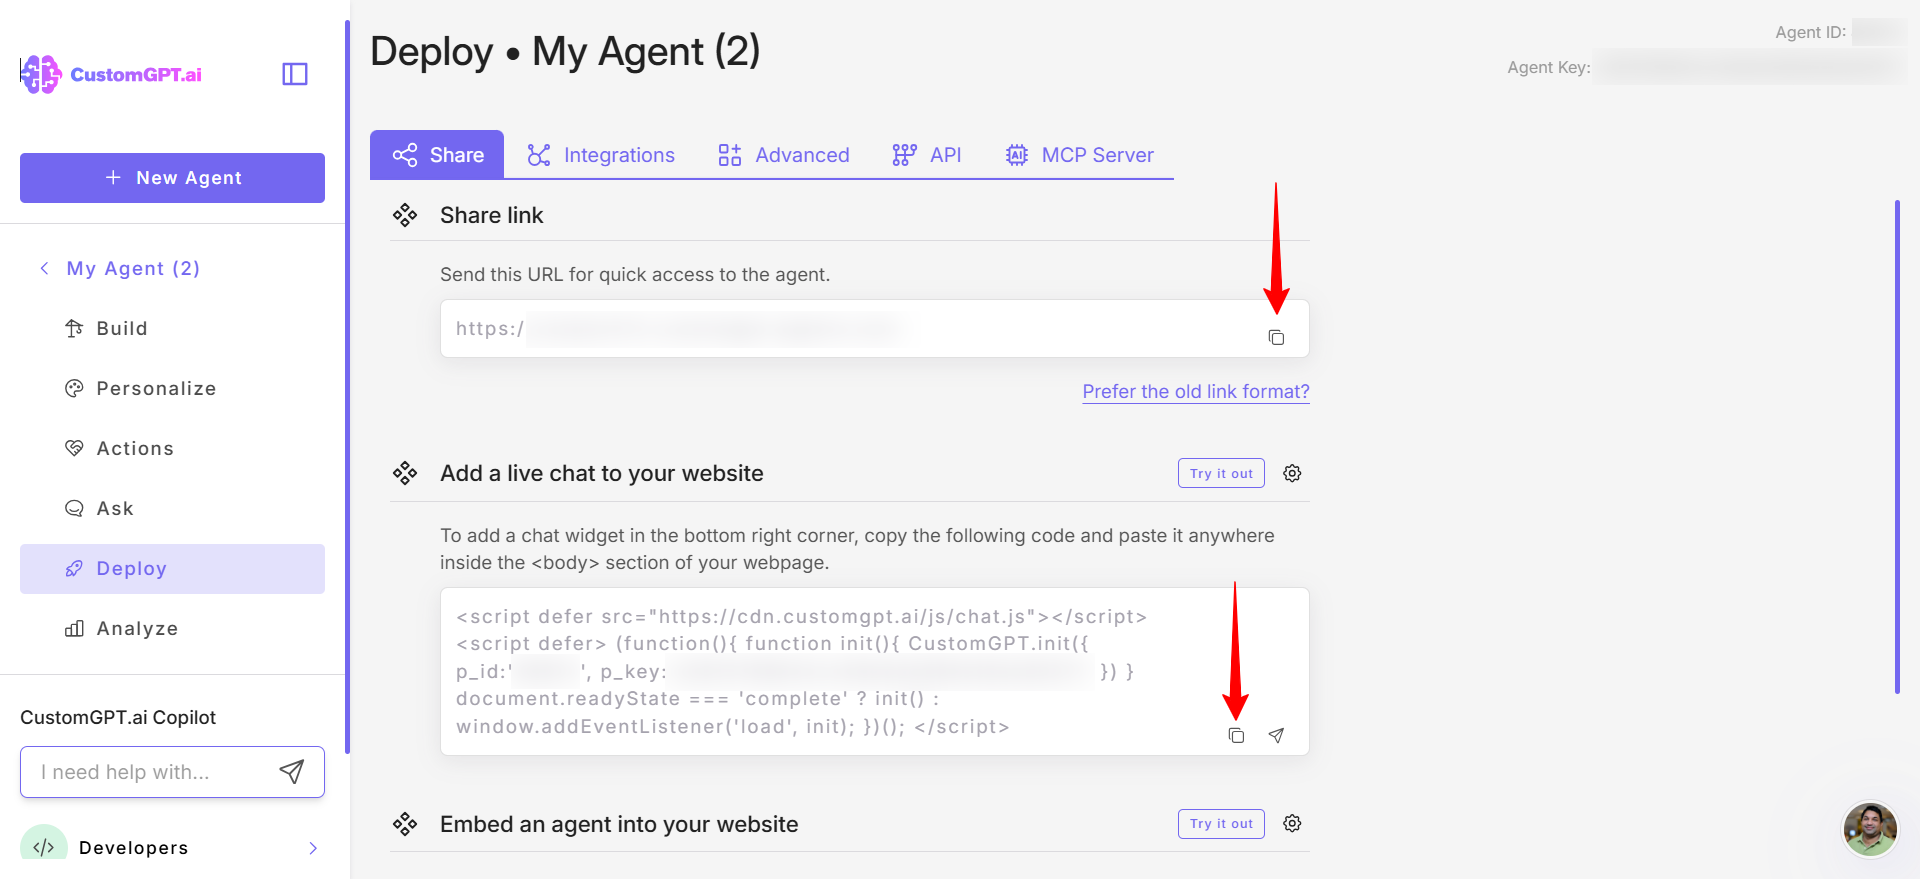
a) Once your agent is public, a code snippet will be generated. Copy this code for embedding or sharing your agent.

HTML Code

Your agent is now public and ready to be accessed by others.


Method 2: Configuring Agent Visibility in Settings

This method provides more control over the visibility settings of your agent.

Step 1: Sign in

a) Sign in to https://app.customgpt.ai/.


Step 2: Access AI Agent Settings

a) From your dashboard, navigate to "AI Agent Settings."

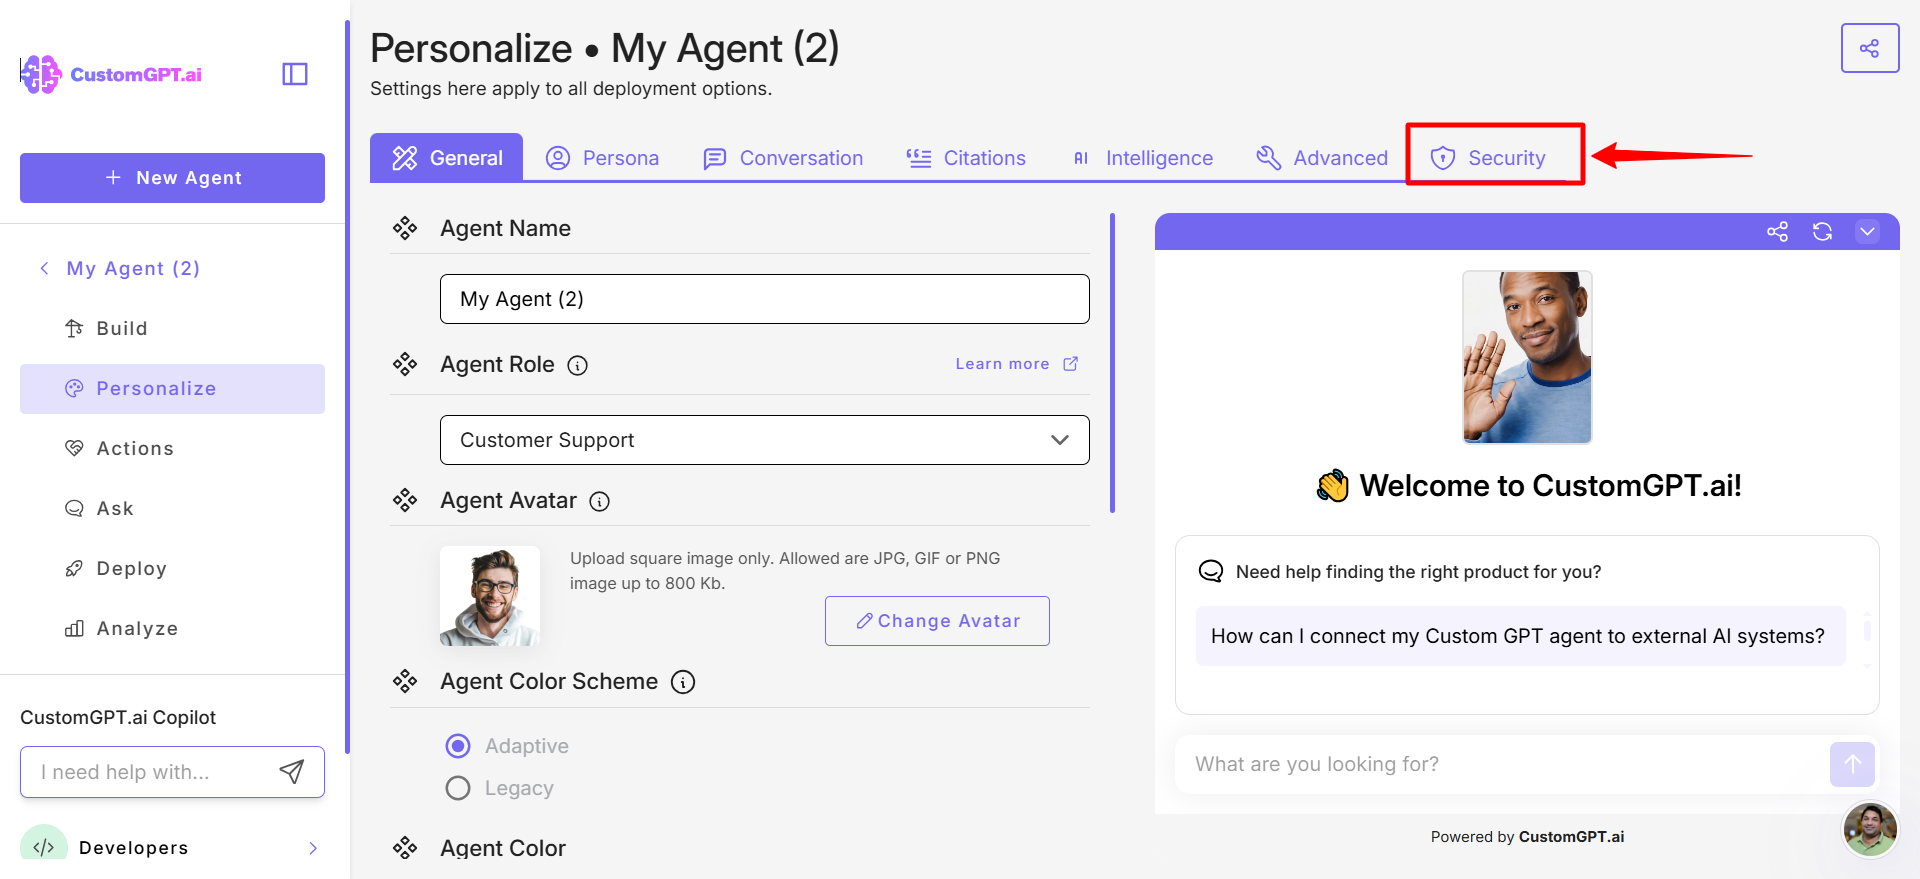
AI Agent Settings

Step 3: Go to Security Settings

a) Click on the "Security" tab to open the relevant options.

Security Setting

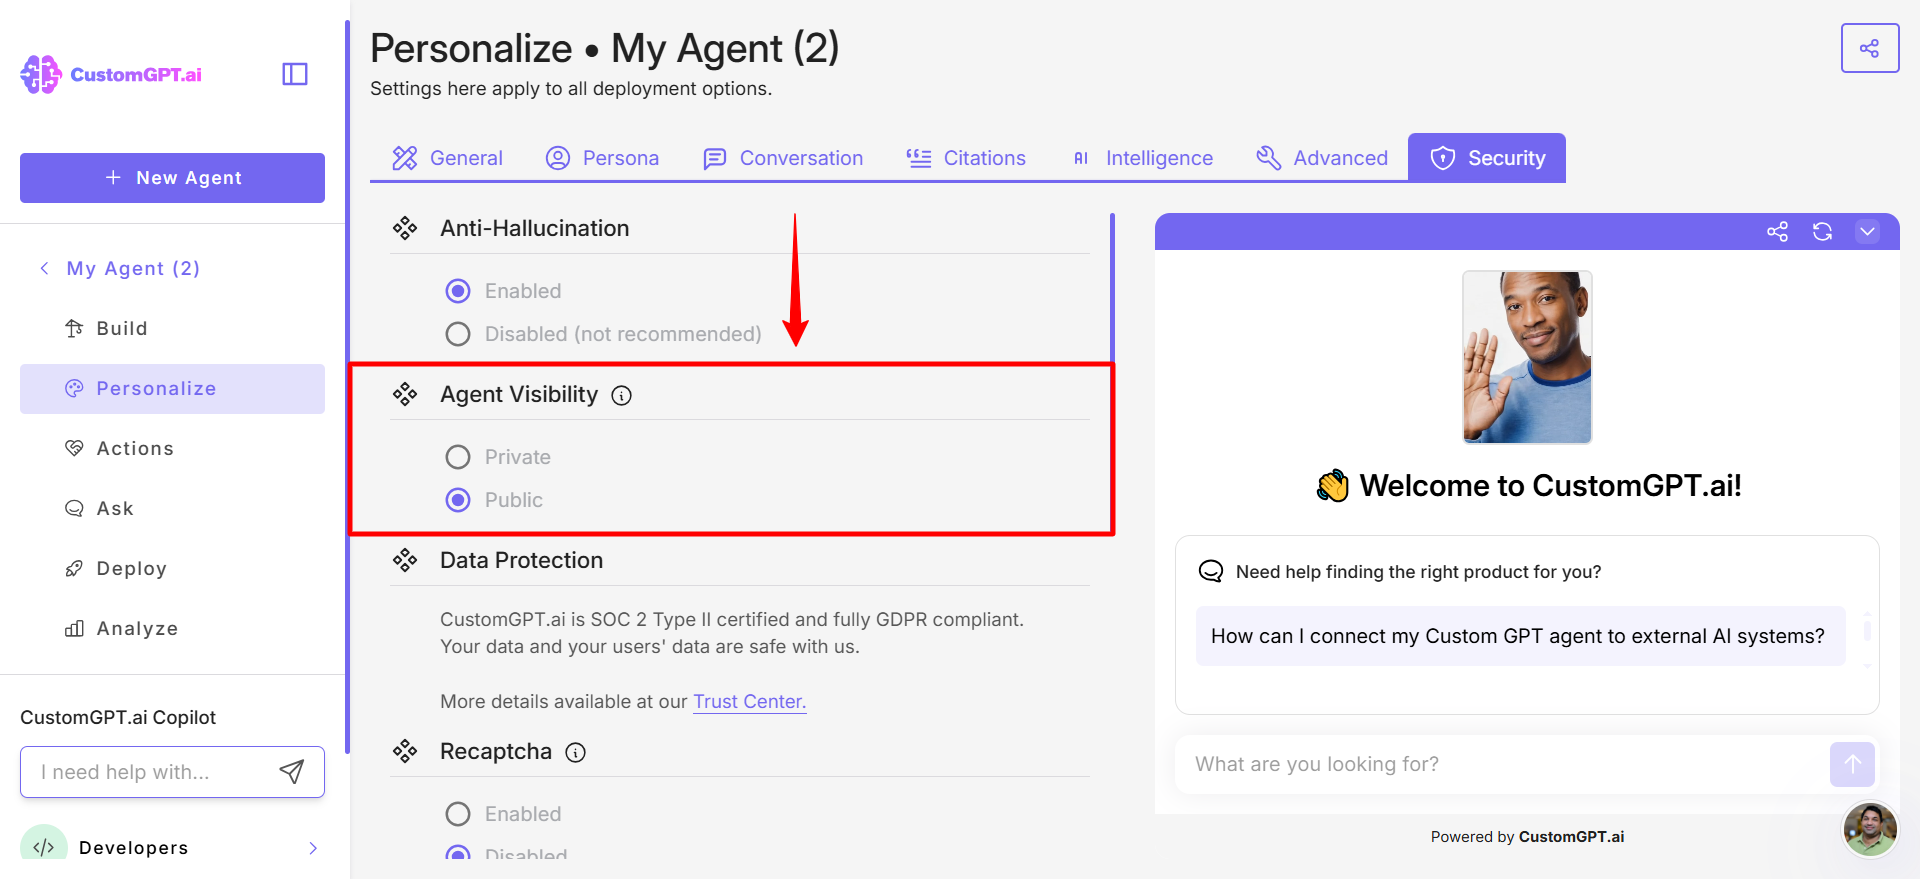
Step 4: Adjust Agent Visibility

a) Scroll down to find the "Agent Visibility" section.

Agent Visibility

b) Click to make the agent "Public".

Agent Visibility (Public)

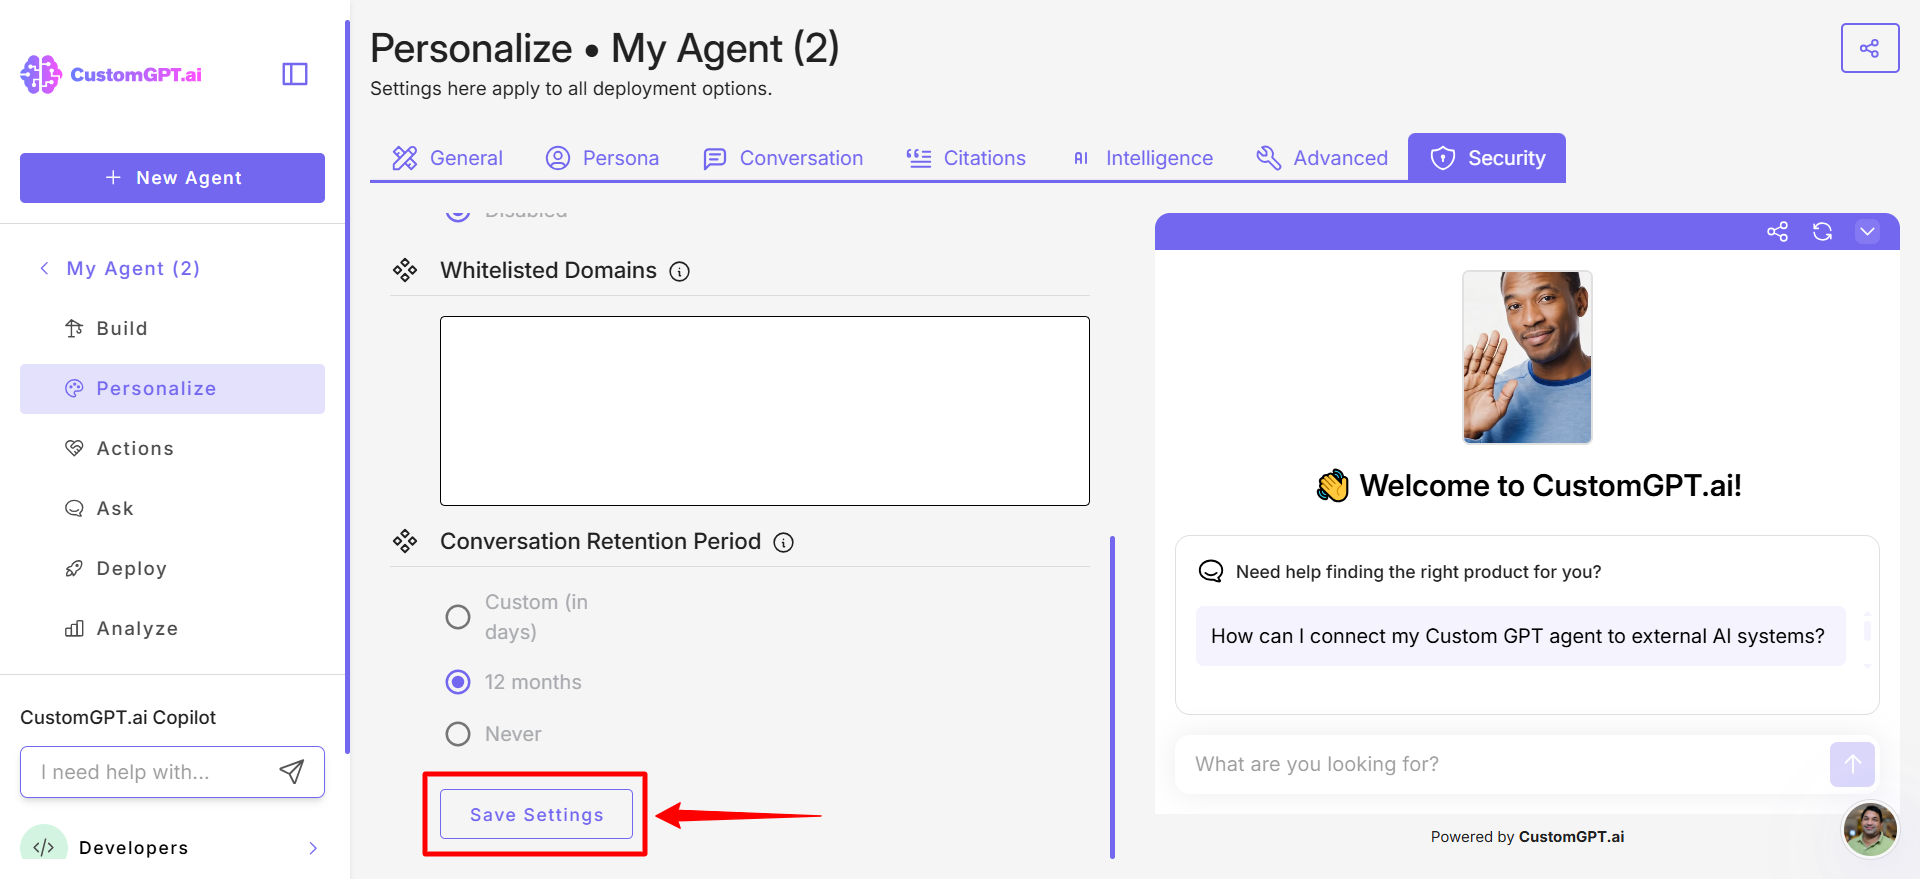
Step 5: Save Your Settings

a) Click the "Save" button to confirm your changes.

Save Settings

👍

Congratulation! Your agent is now configured to be public, granting access to others based on the updated visibility settings.