Enable auto-sync for SharePoint documents
Follow this guide to easily enable the SharePoint Auto-Sync feature, ensuring your data is always automatically updated and synchronized.
Note:This is our Enterprise feature. If you are interested in enabling it, please contact our sales team.
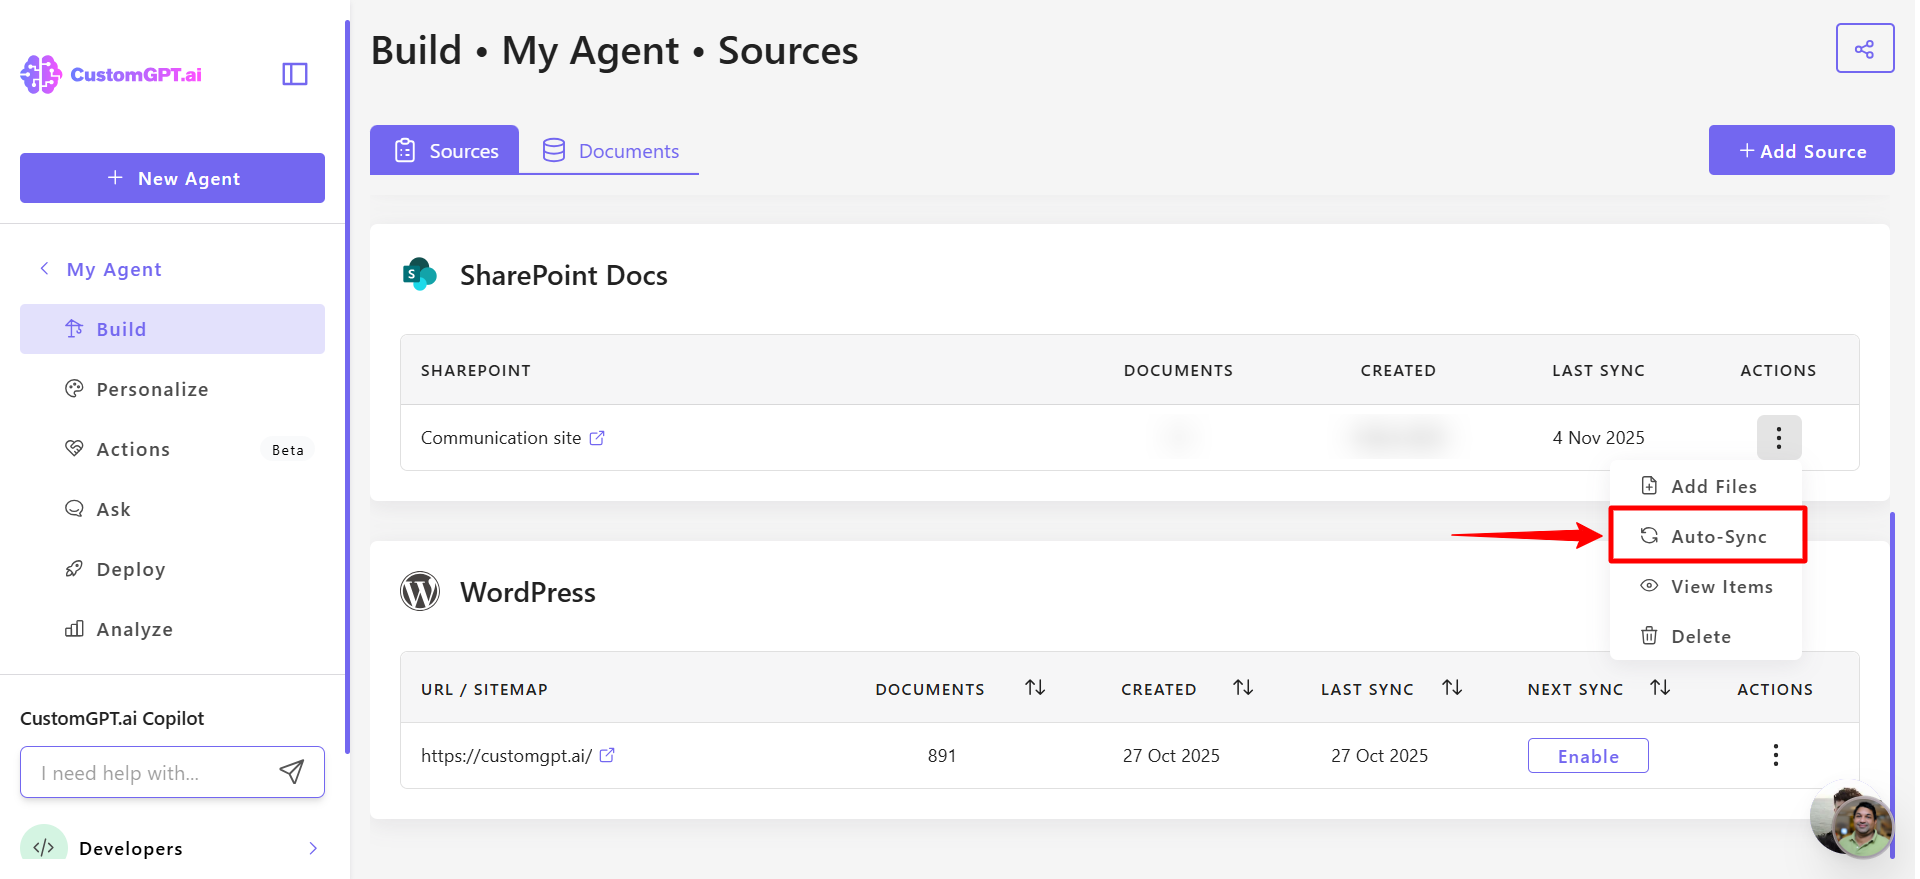
- Click the three dots next to your agent’s name, then select Build.

- In SharePoint documents section, find your connected documents, click the three-dot menu next to it, and select Auto Sync.
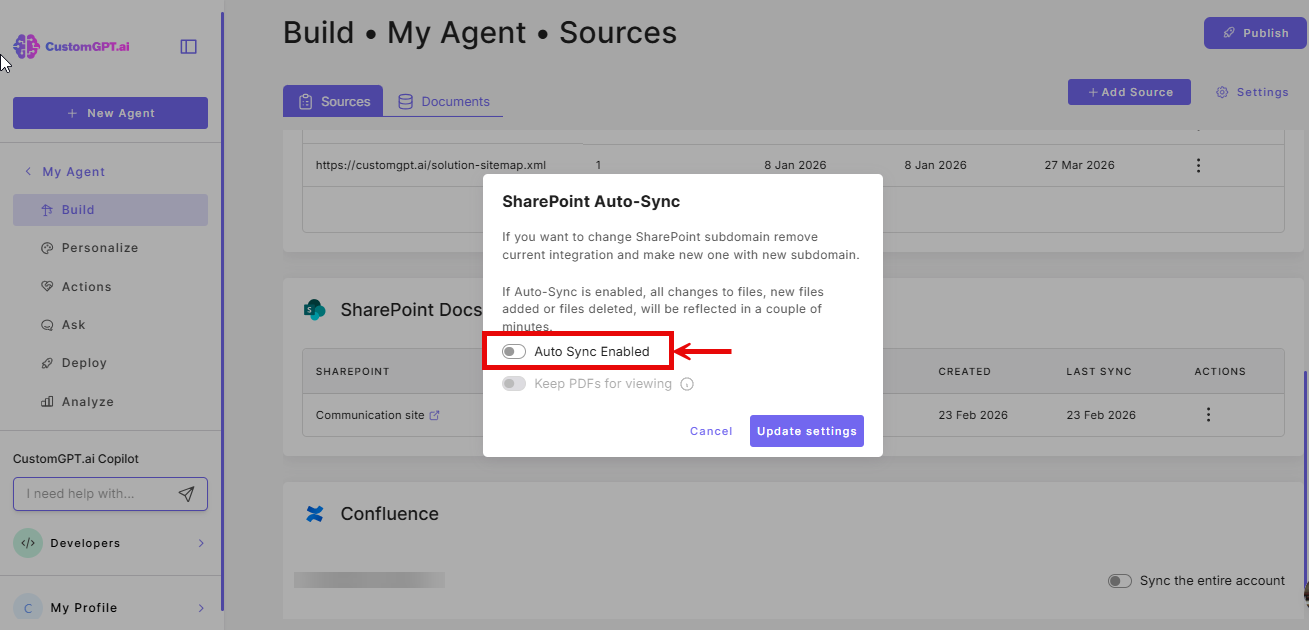
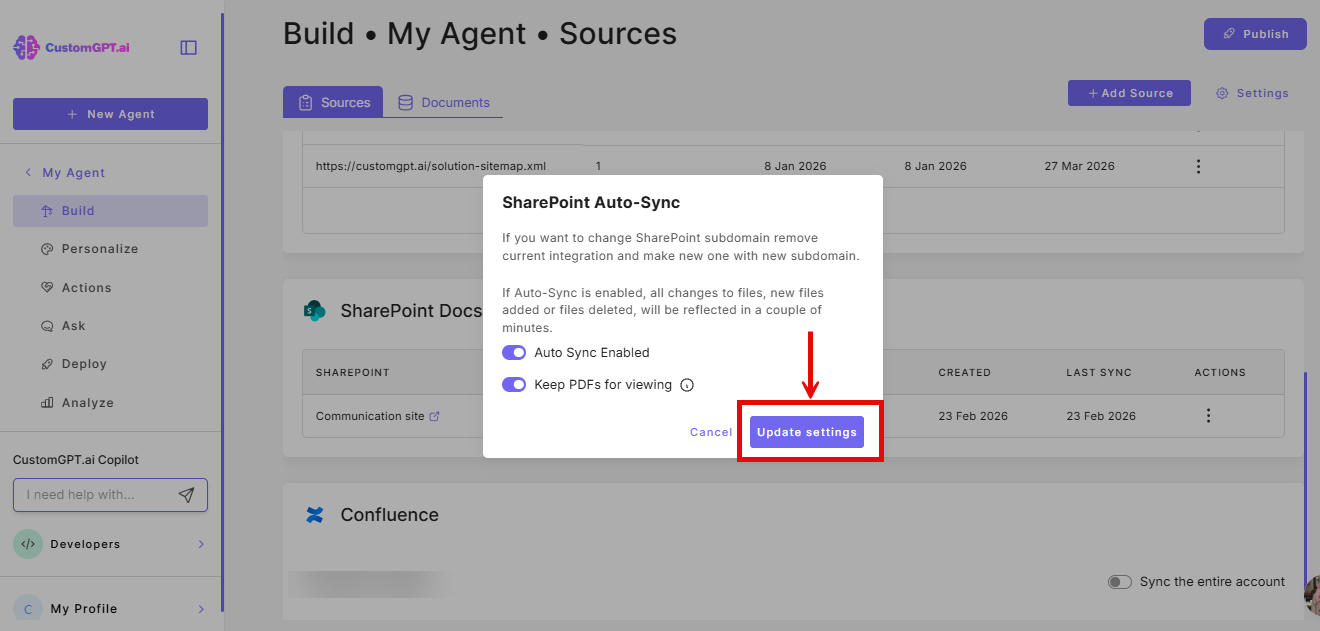
- Toggle Auto Sync Enabled to the right to activate auto-sync.
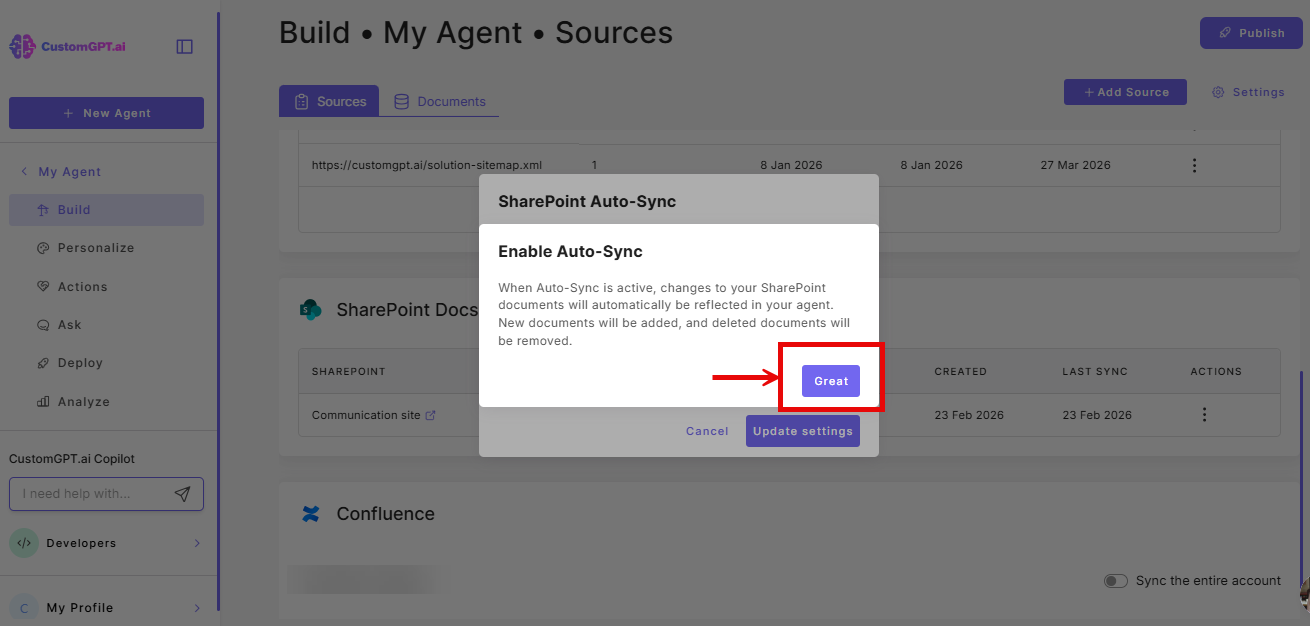
- Click Great to confirm
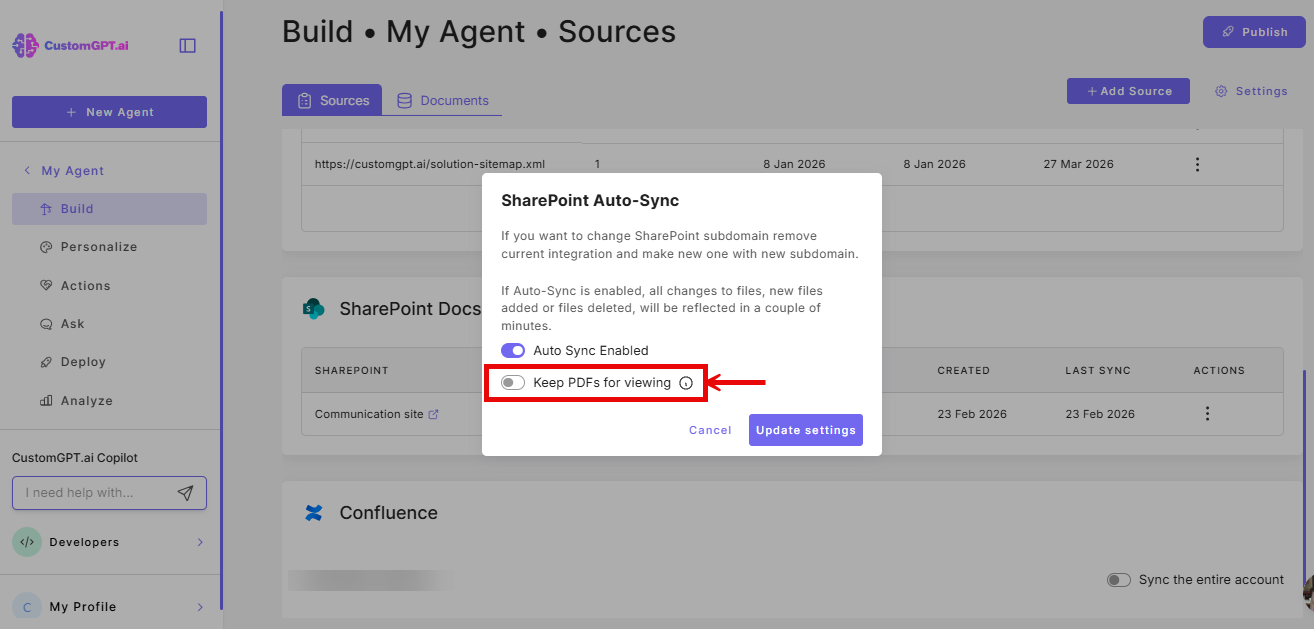
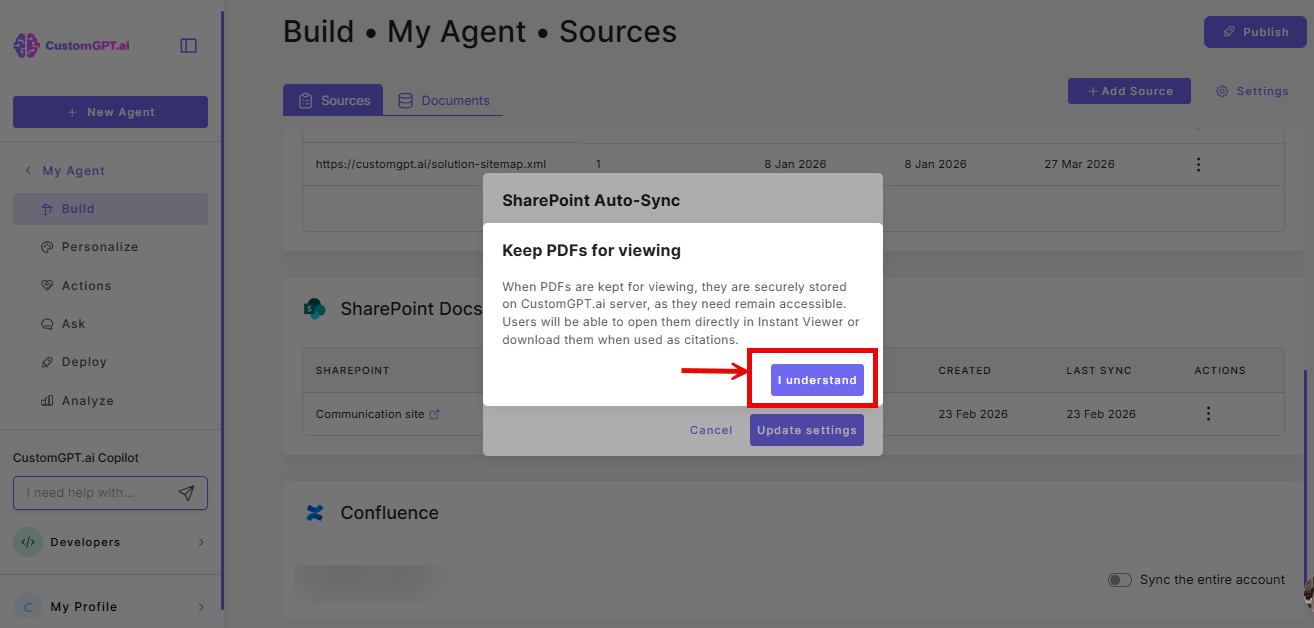
- (Optional) Toggle Keep PDFs for viewing to save a copy of each PDF added to your agent. Users can then open PDFs directly in the citation viewer or download them when cited in agent responses.
- Click I understand to confirm
- Click Update settings. Once Auto-Sync is enabled, any changes, additions, or deletions in your SharePoint documents will be reflected within a few minutes.
To enable Auto-Sync for SharePoint sites, refer to the guide on How to Enable Auto-Sync for SharePoint Sites.
To learn more about the Keep PDFs for viewing feature, see Save PDFs from SharePoint or OneDrive for Viewing.
Updated 4 months ago
Did this page help you?