Connect to SharePoint sites
This step-by-step guide explains how to integrate your SharePoint sites with CustomGPT.ai.
Note:SharePoint integration is available on Premium and Enterprise plans only.
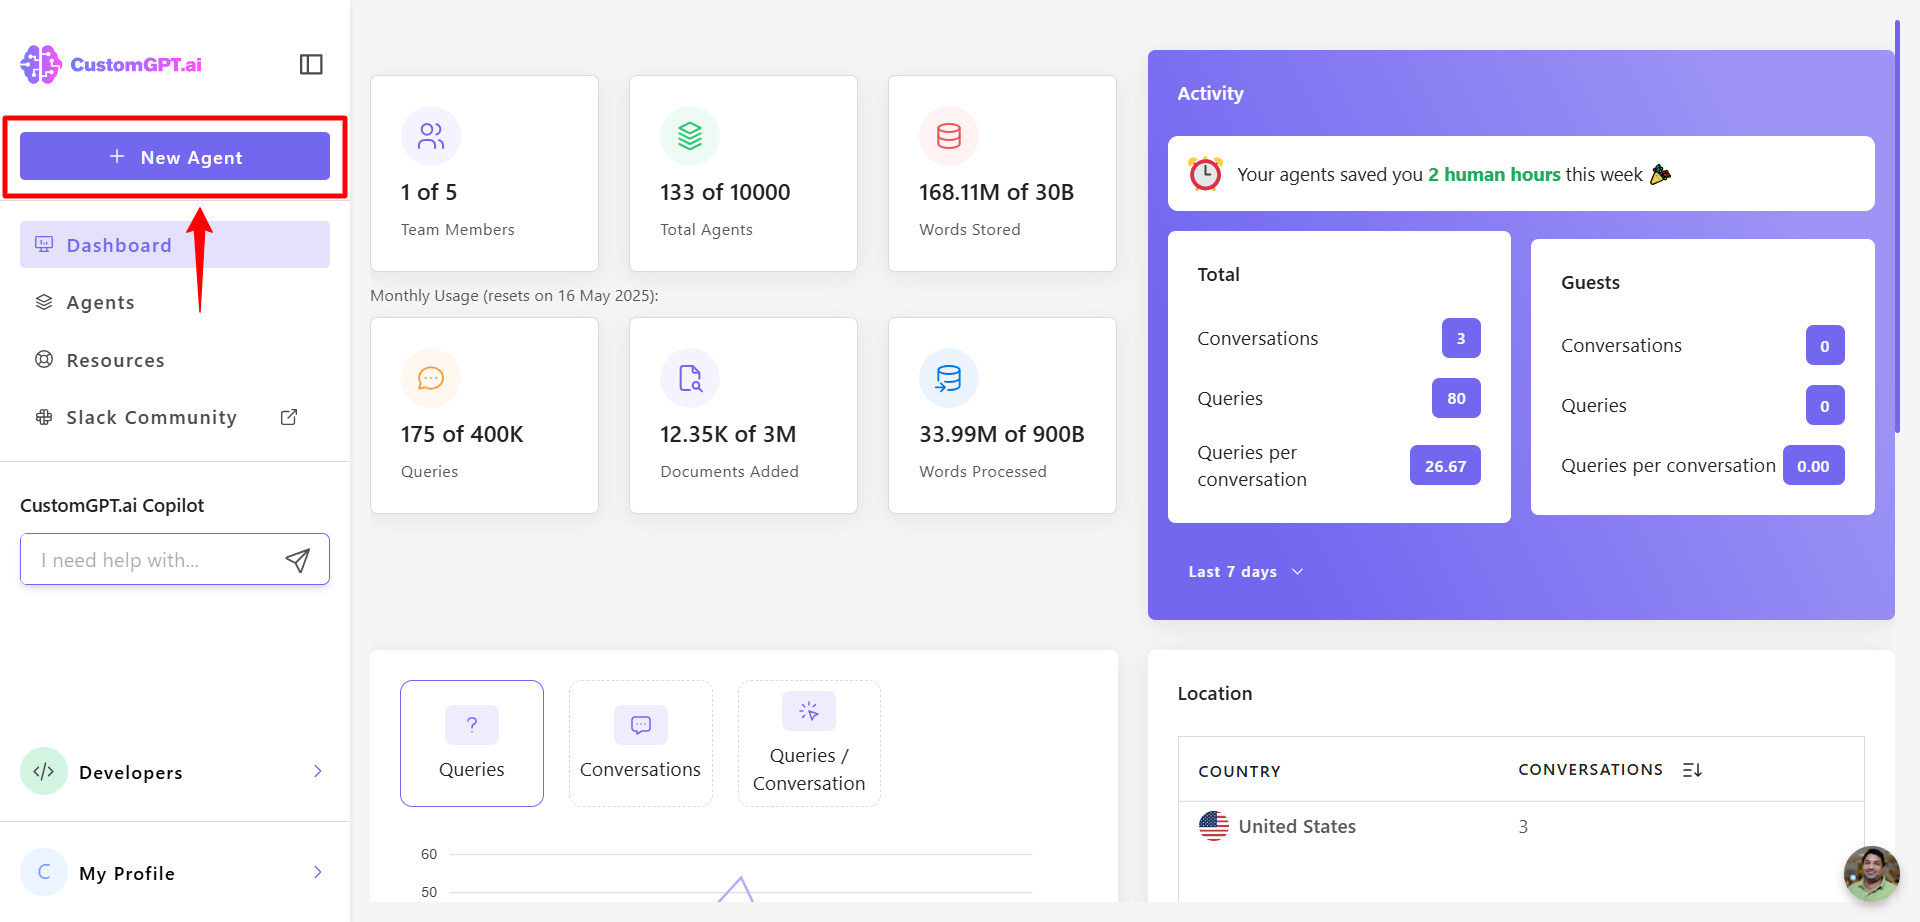
- Click on "New Agent" to begin setting up your agent.
- Under the Drives section, select SharePoint.
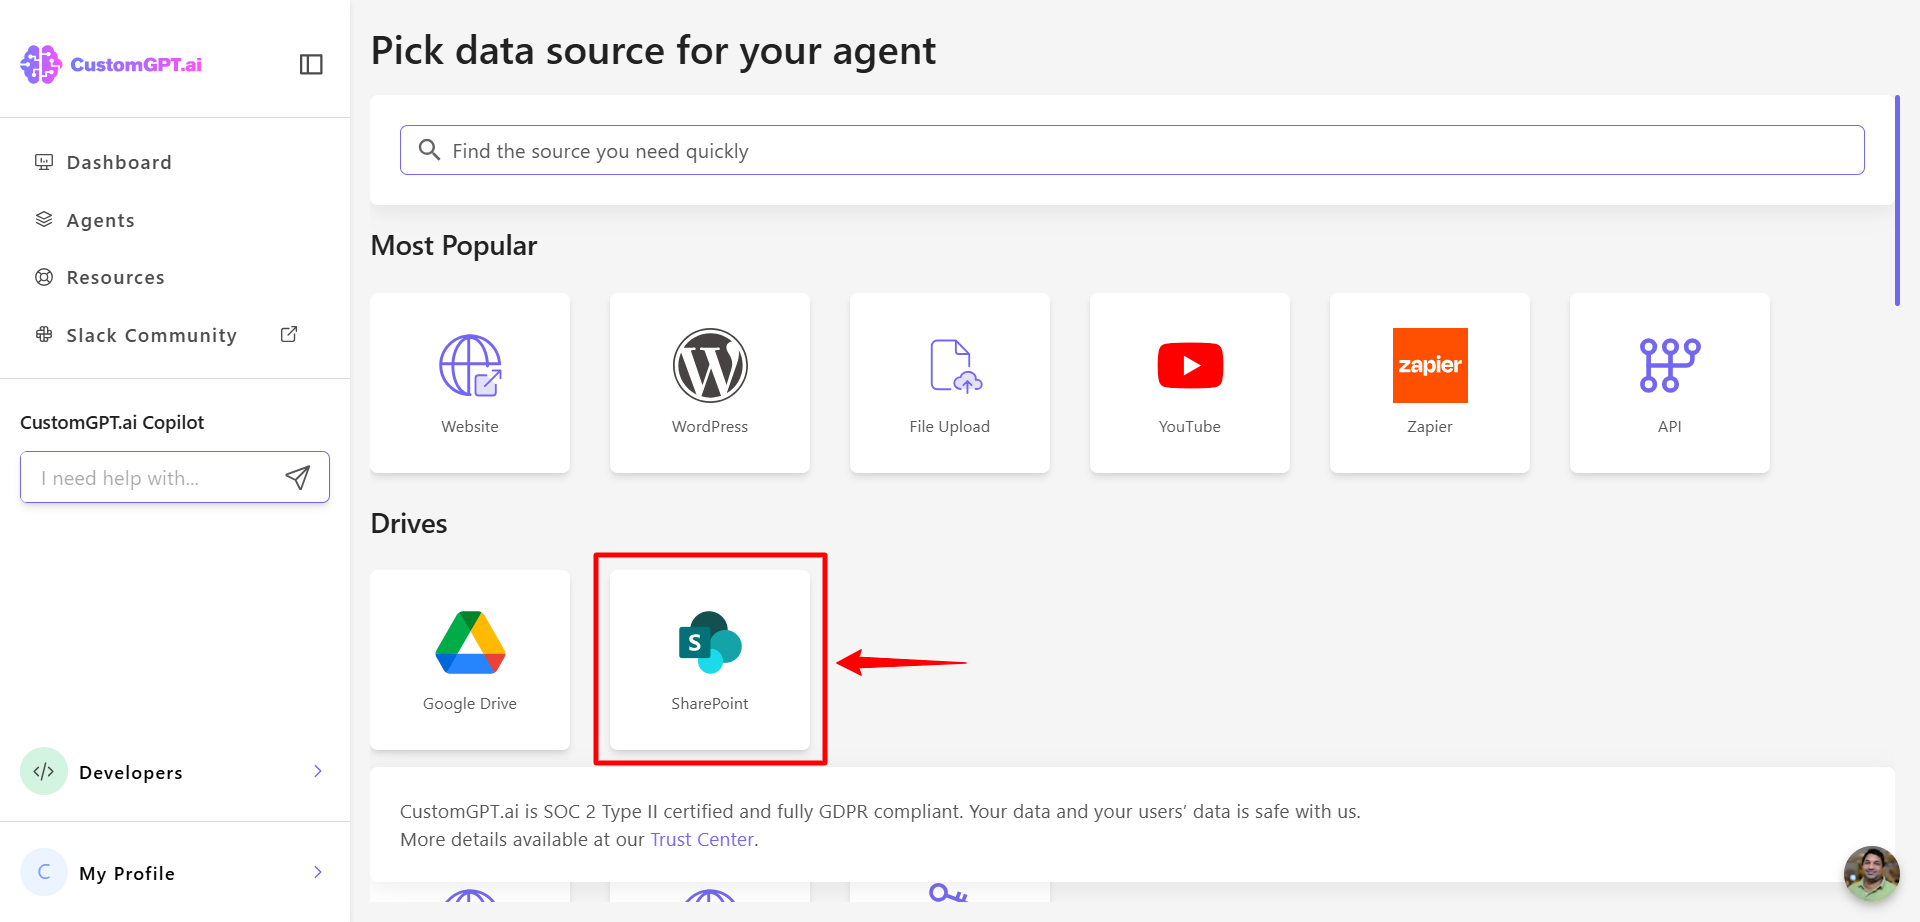
- Click SharePoint Sites to begin the integration process.

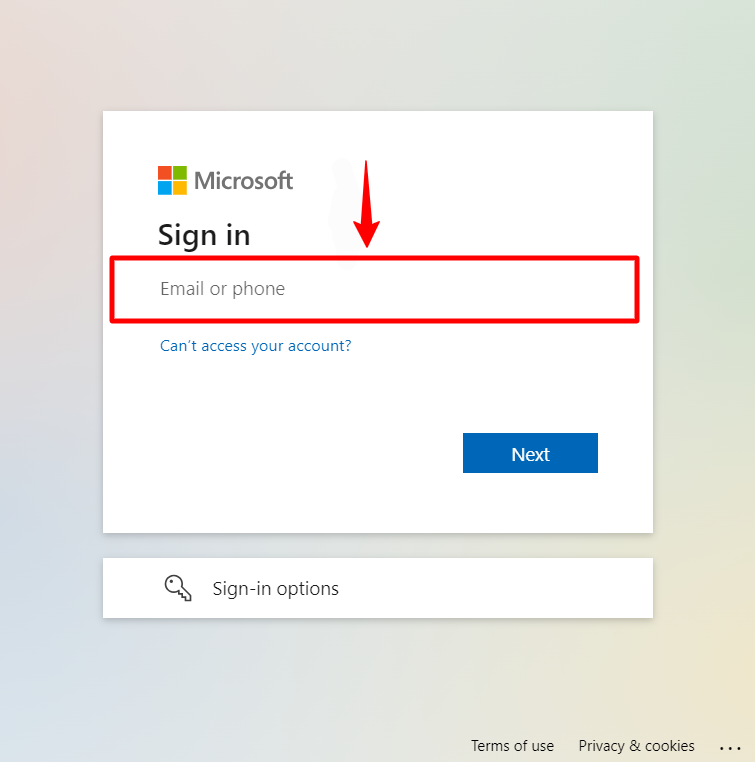
- Sign in using your SharePoint account credentials.
- When prompted, grant the following permissions to the CustomGPT.ai app:
Files.Read.All (Delegated)Sites.Read.All (Delegated)offline_access (Delegated)
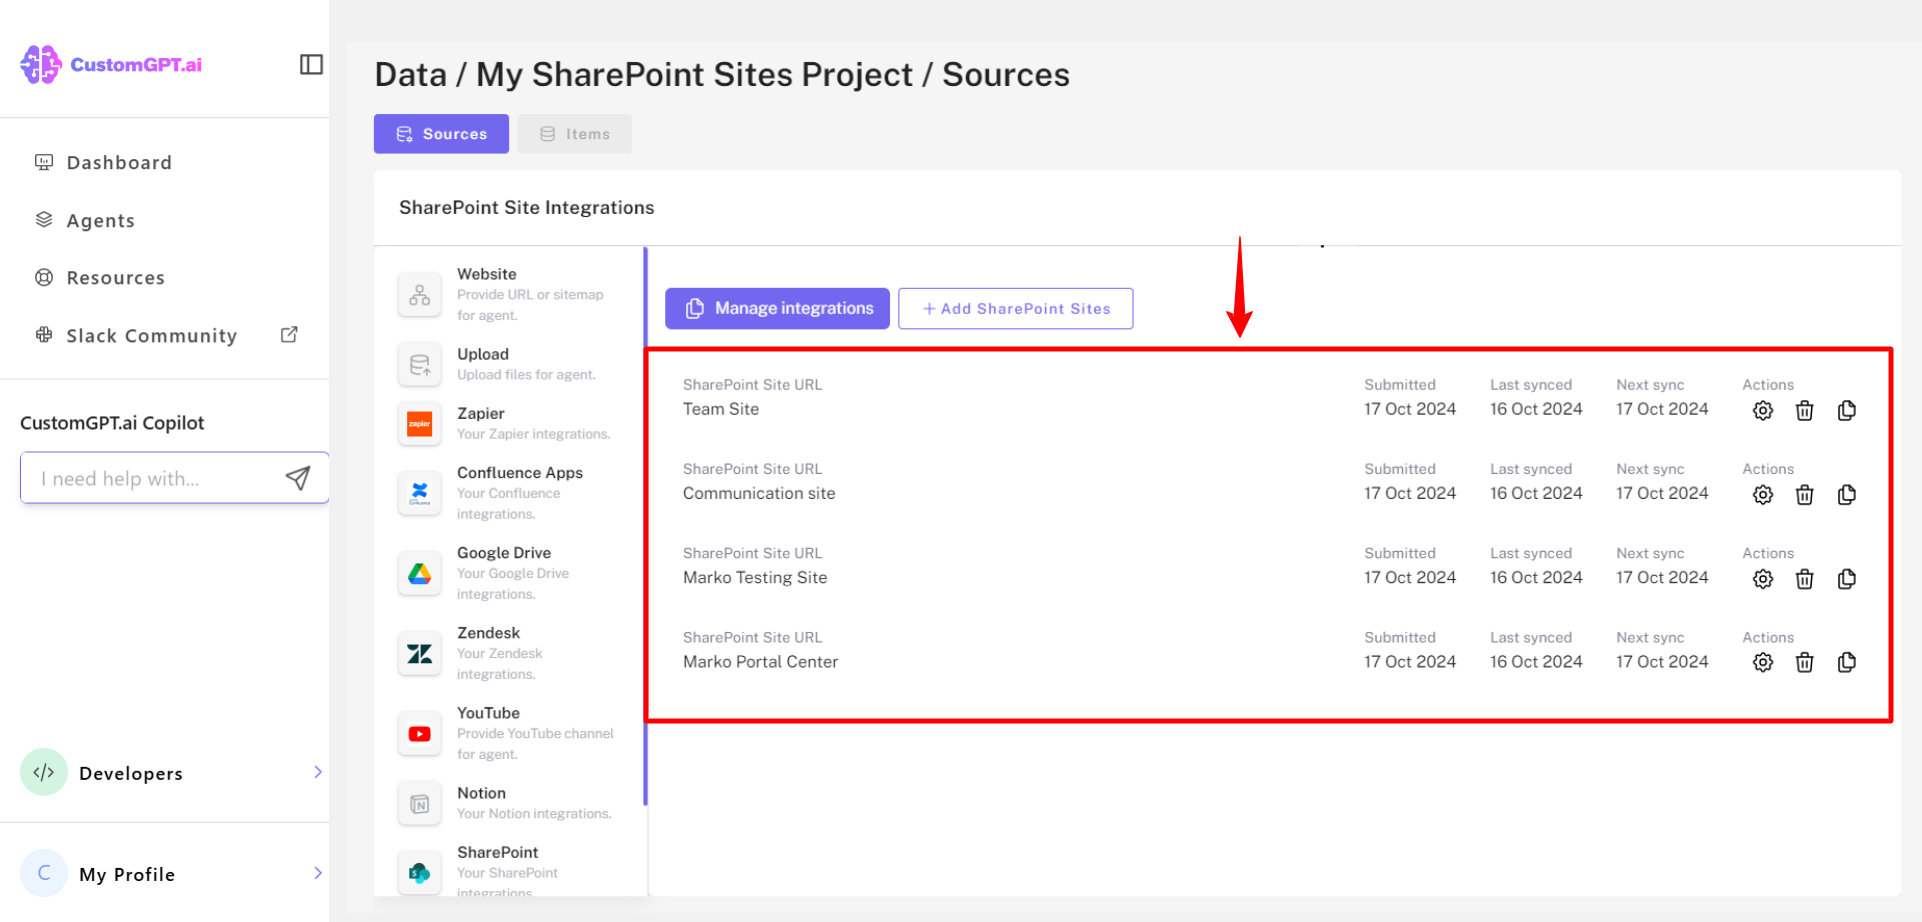
- Select the SharePoint sites you want to connect.
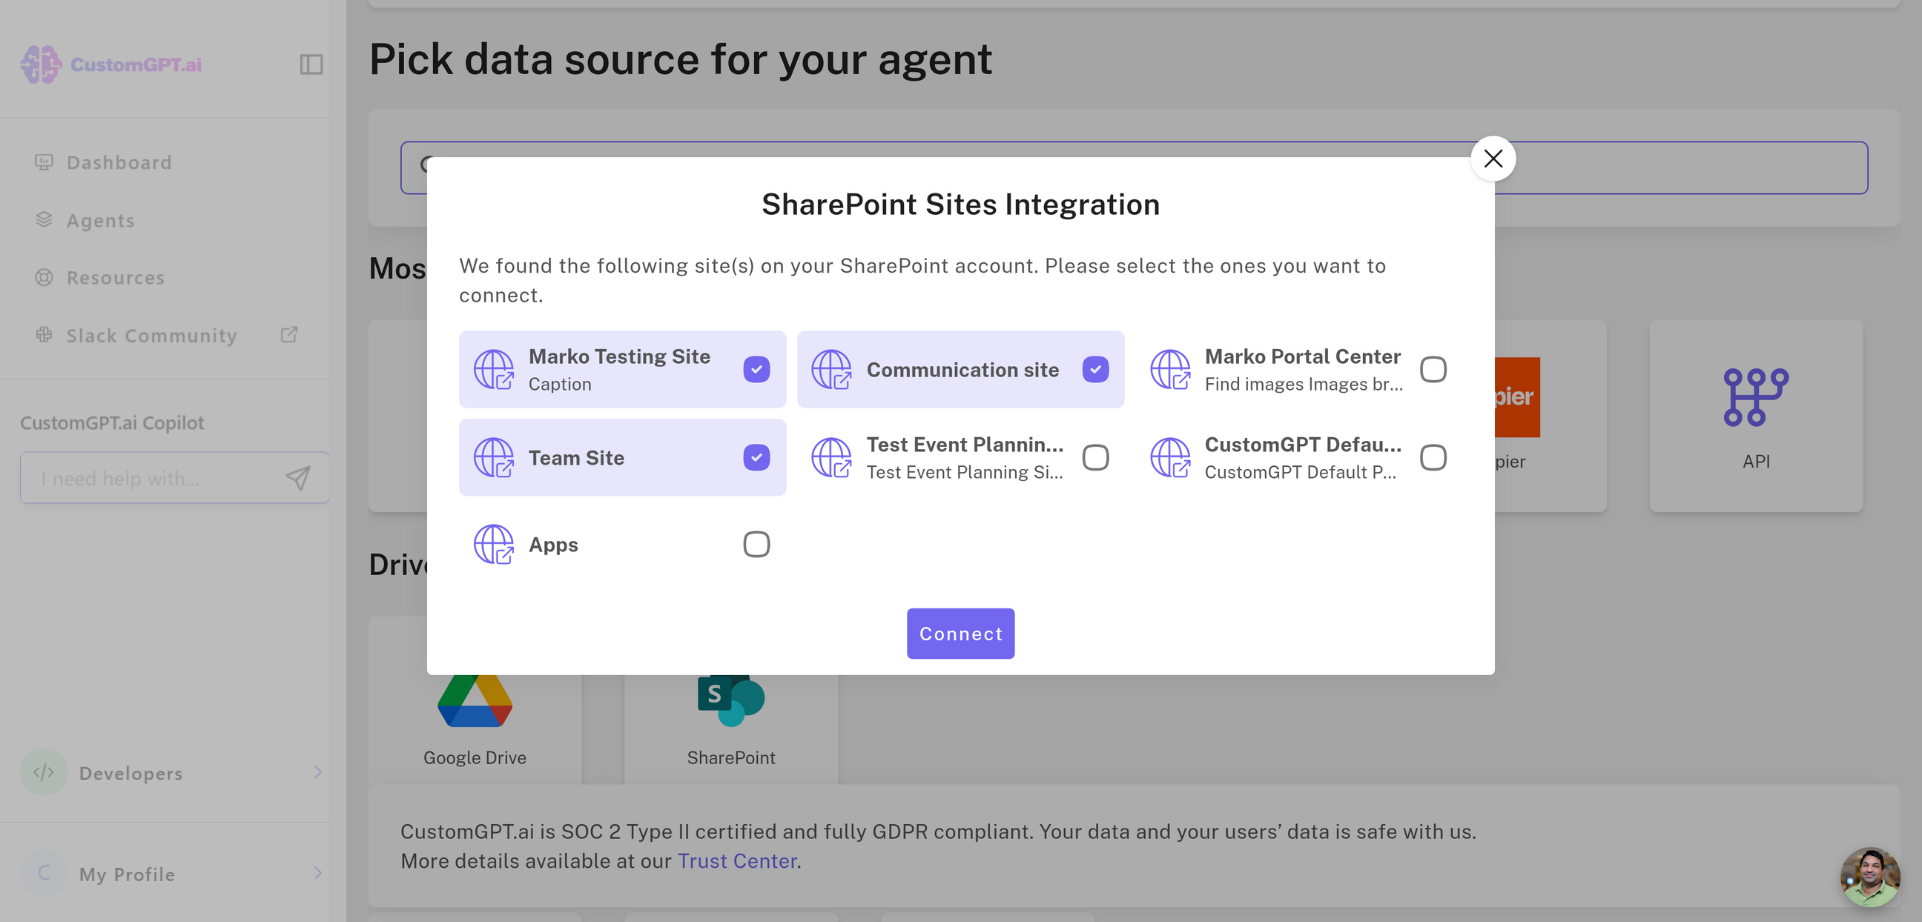
- Review the list of selected sites. You can remove existing ones or add more as needed.
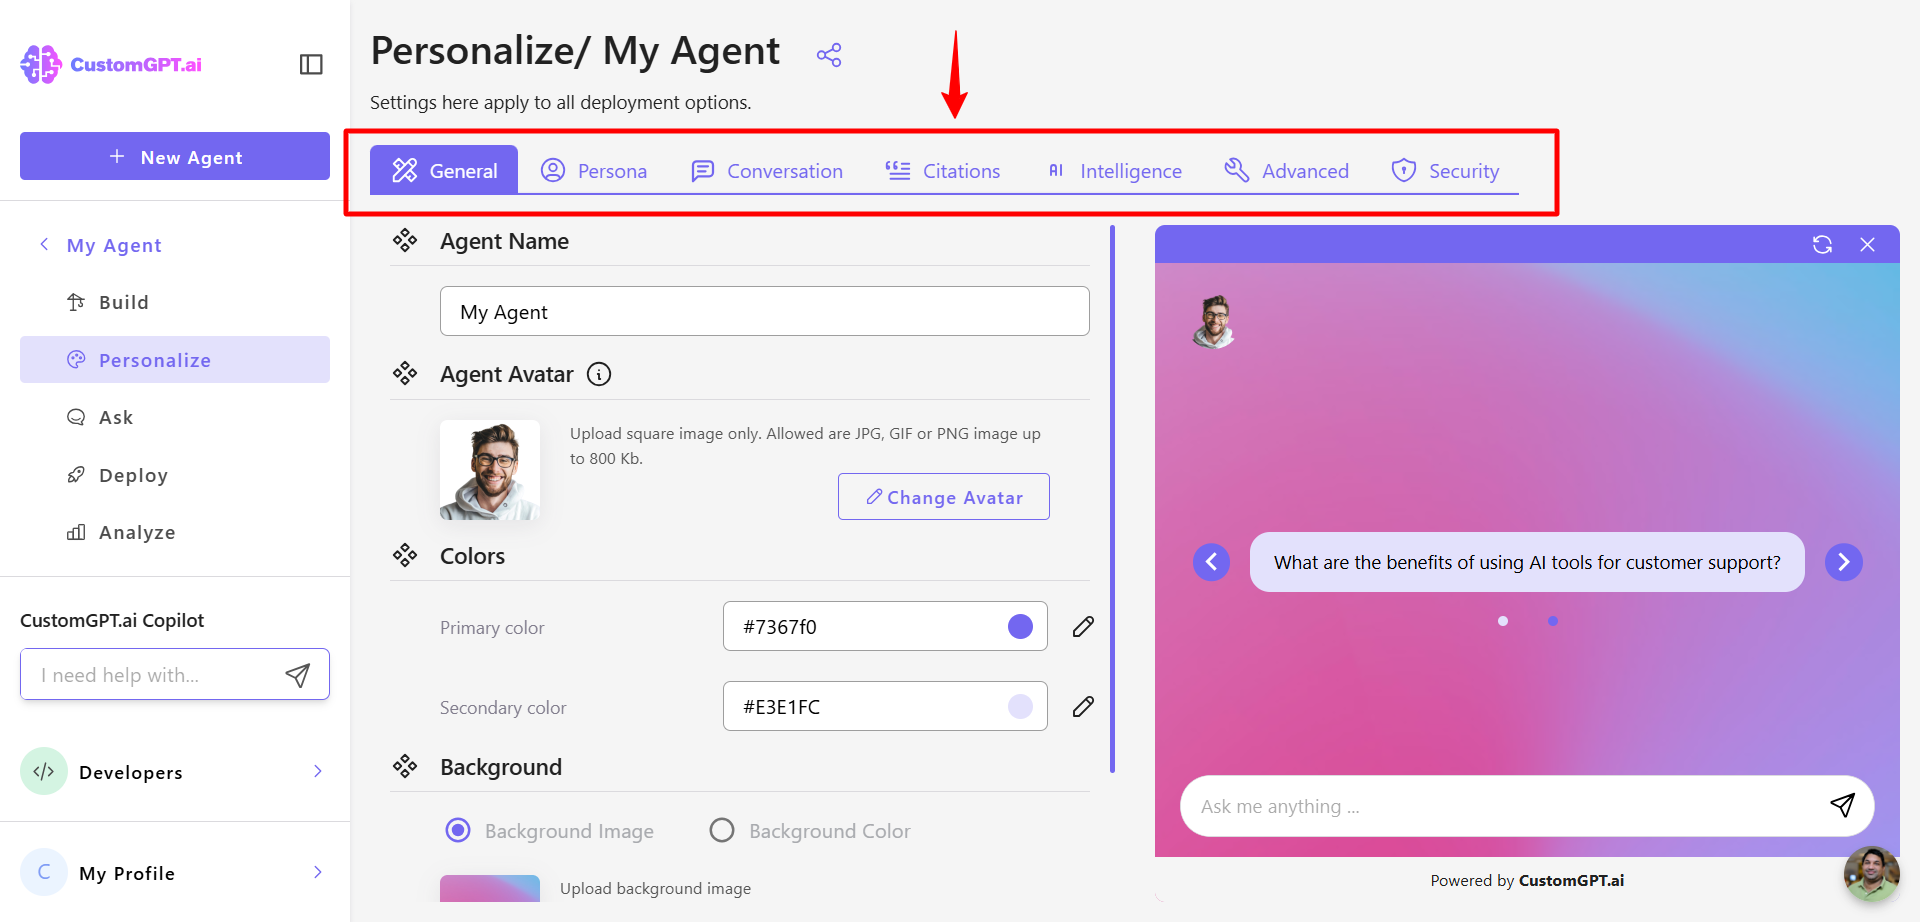
- Customize your AI agent in the Personalize settings and adjust its appearance, language, and style to match your brand.
Updated about 1 year ago
Did this page help you?