Enable and use custom context
This step-by-step guide explains how to enable and use custom context to make your agent more personalized, proactive, and context-aware across any deployment type.
What is Custom Context?
Custom Context allows you to pass additional text parameters to your agent at deployment time, and increase its context awareness, so it can better understand the user and tailor its responses. The agent will use this context to provide more personalized answers, be more proactive with problem-solving, and leverage available information to improve accuracy.
👉 Learn more about deployment options and parameters
Note:This is a premium feature.
What it does
When you provide a custom_context parameter in deployment options:
- The agent receives the text as part of the prompt before generating a response.
- It uses this information to enhance personalization and relevance.
- Examples of useful context include the user’s name, subscription status, order status, or profile information.
Note:If the provided text exceeds 500 characters, extra characters are automatically cut.
Default availability
- Works on all deployment types (Live Chat, API, integrations, etc.).
- No additional setup beyond enabling the toggle and adding the parameter.
- Data is used only during that request to preserve privacy — the agent does not store it. If you want the agent to keep having this context during a conversation, send it with every prompt.
How to enable and use Custom Context
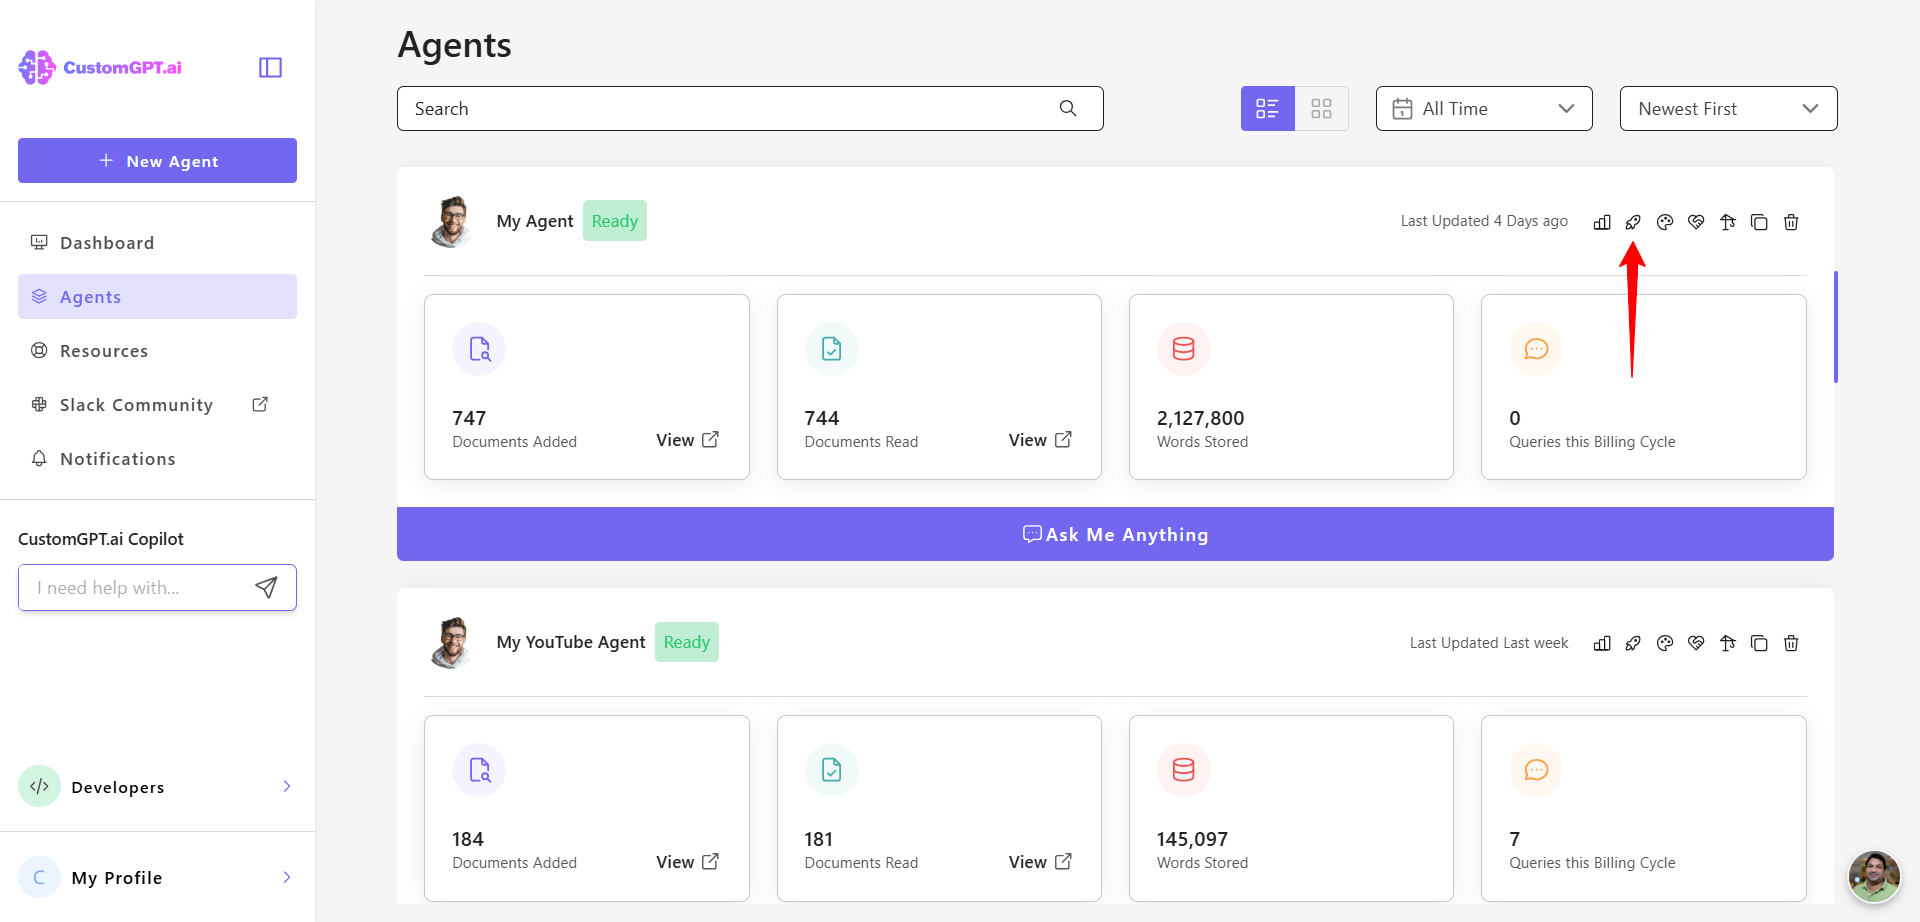
- Select the agent you want to update and click the Deploy Agent icon.
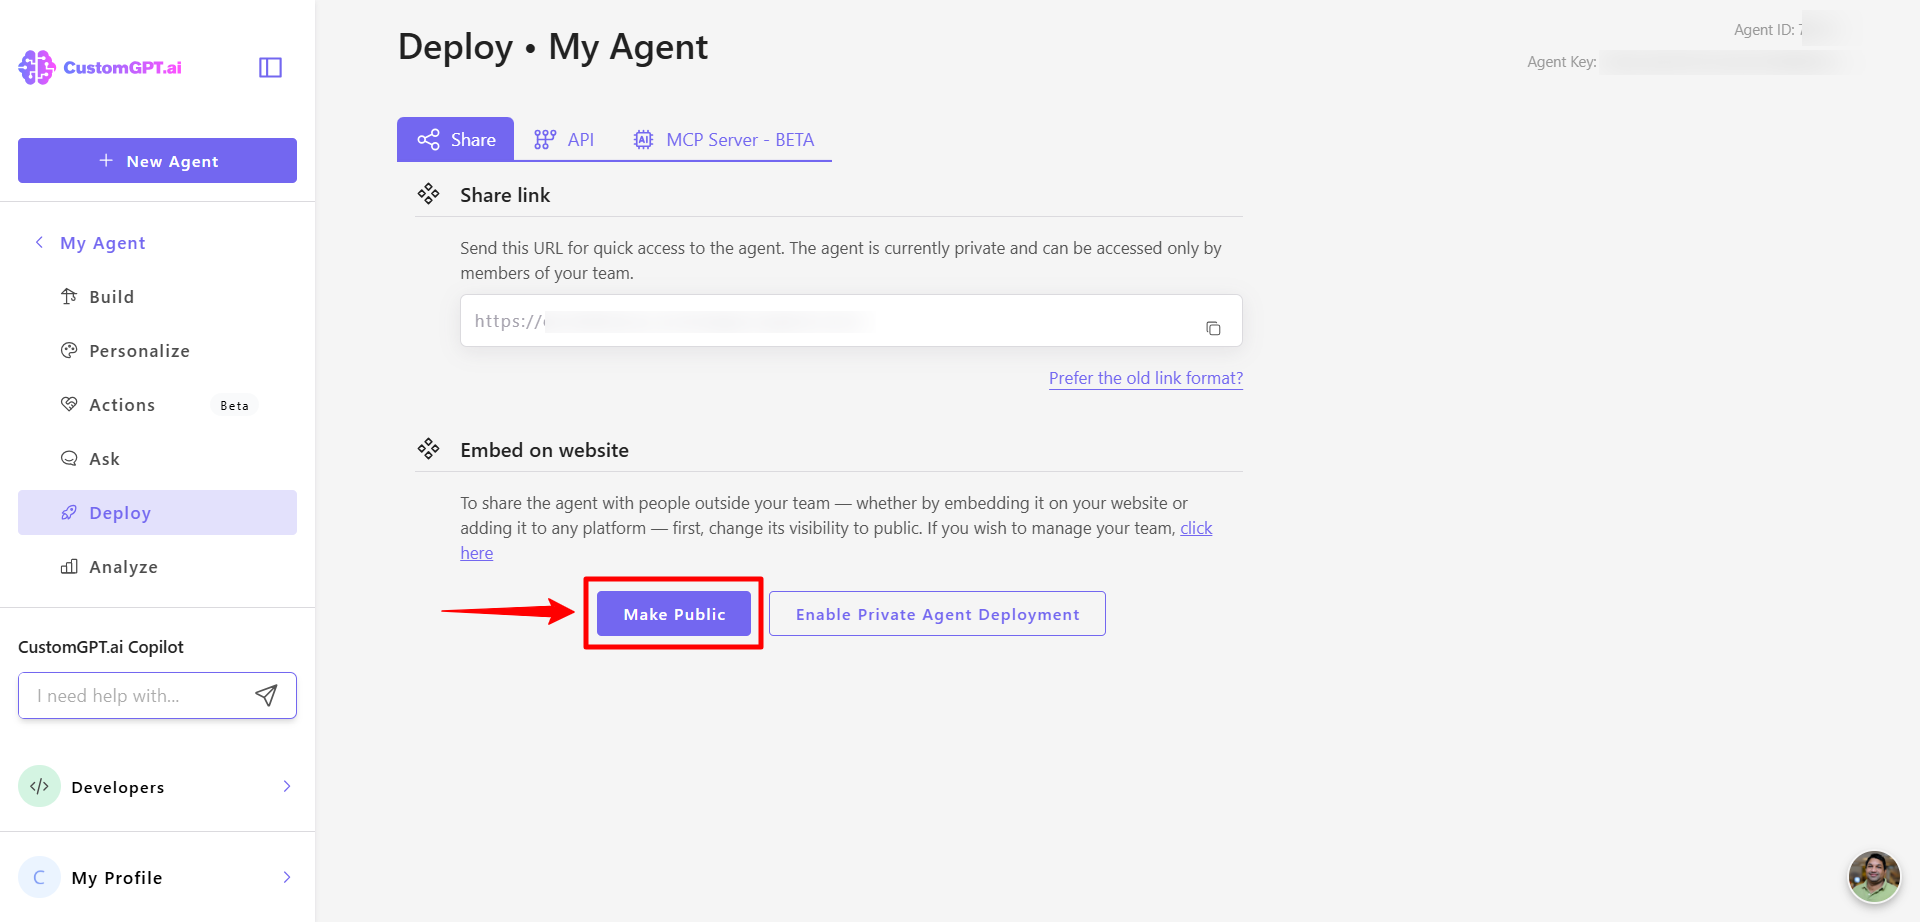
- If your agent is private, click Make Public. If it’s already public, continue to the next step.
- Select your preferred deployment method (except Search Generative Experience, which is not supported), then click the Settings (gear) icon.
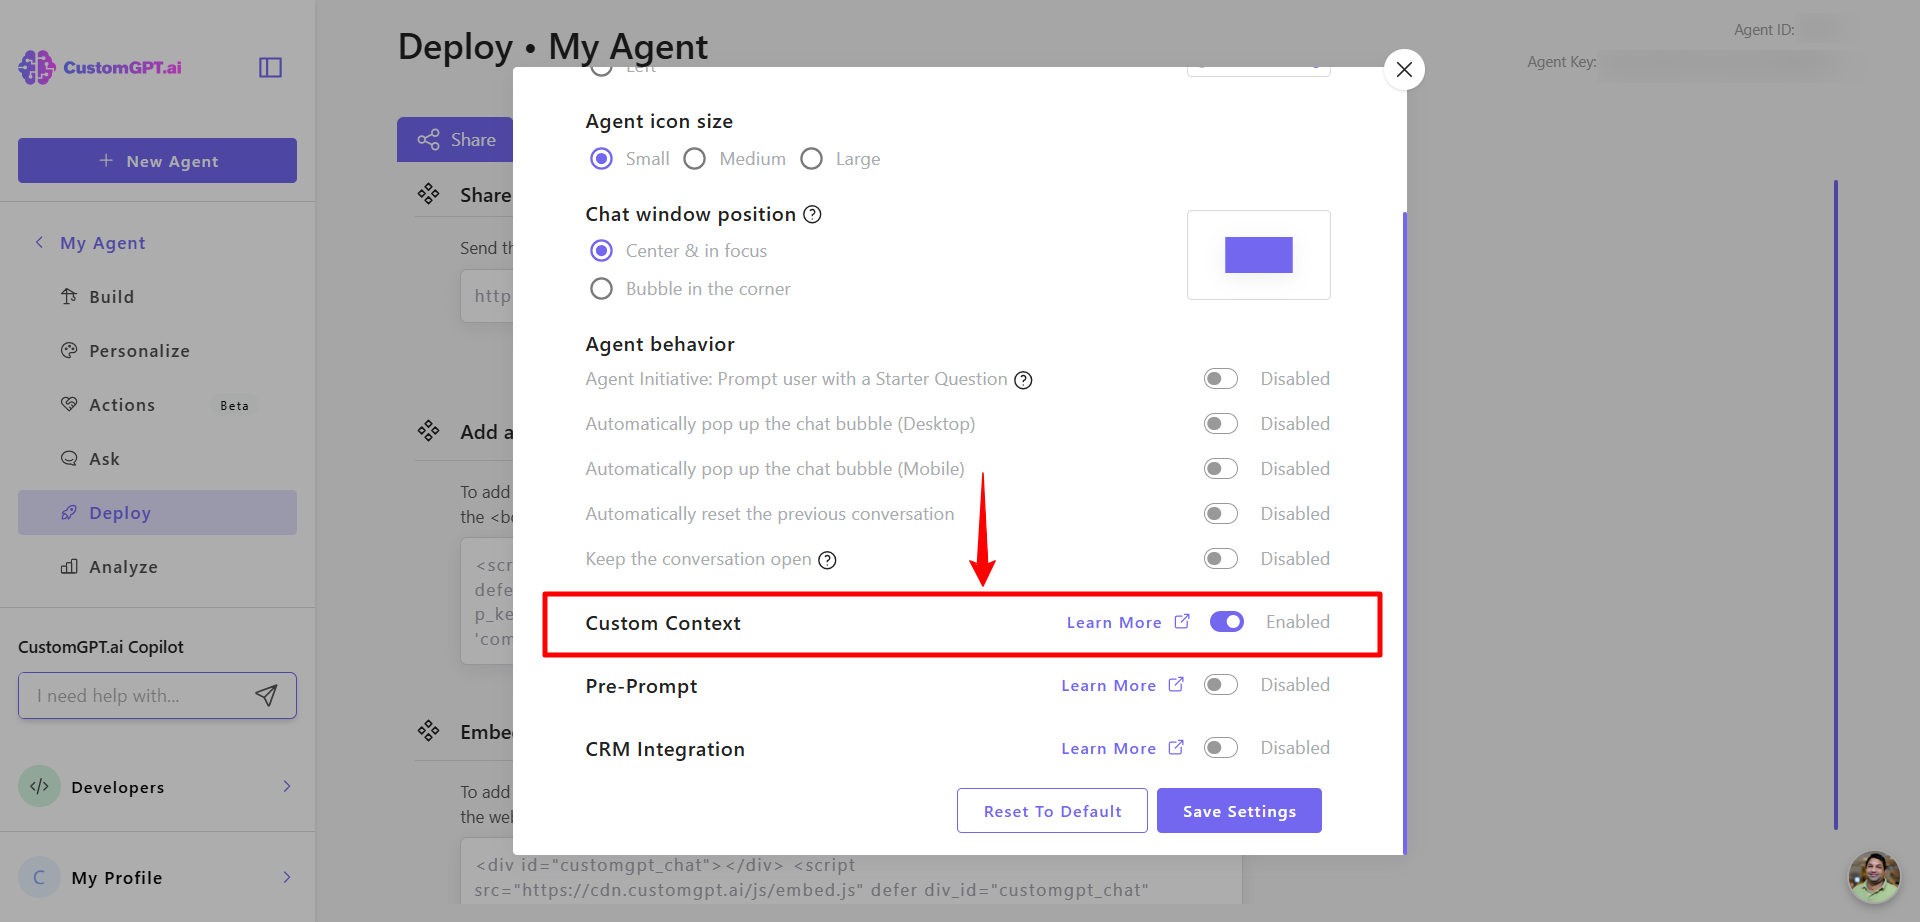
- On the configuration page, turn on the Custom Context integration.
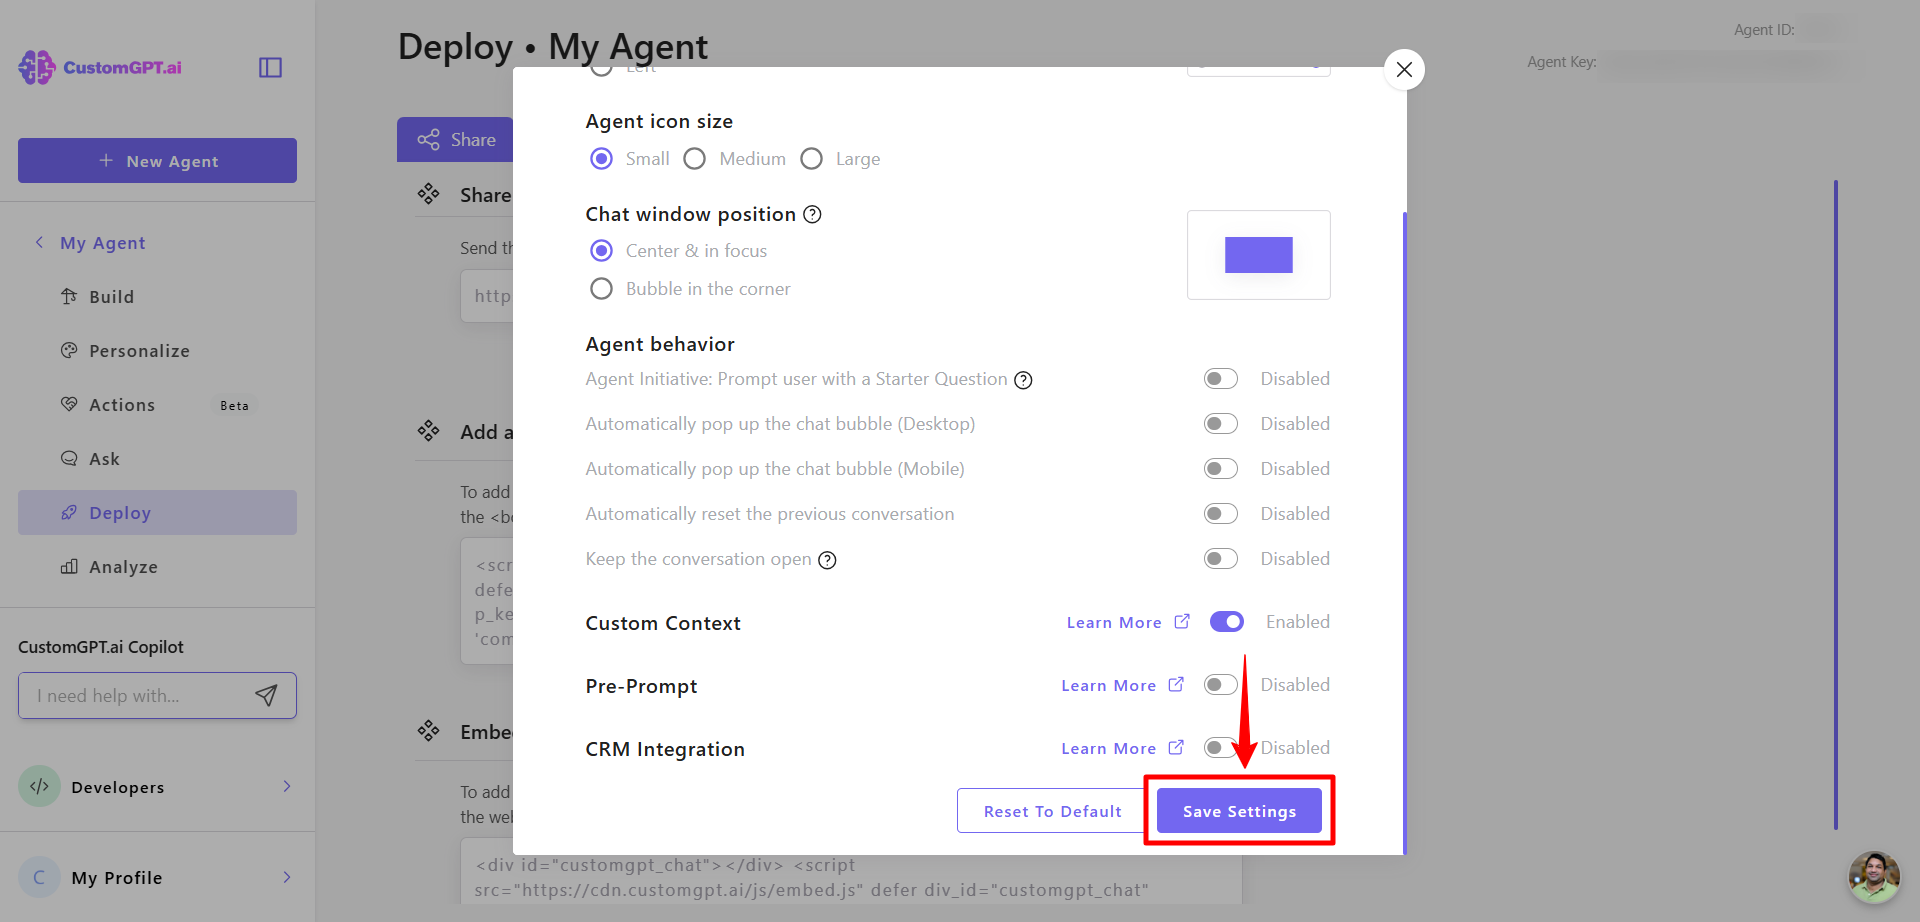
- Click Save Settings to apply the changes.
- Open your web page template, locate the embed code, add
custom_context="Important information you want to pass"to the embed snippet, and save the template. Example:
<div id="customgpt_chat"></div>
<script src="https://cdn.customgpt.ai/js/embed.js"
defer
div_id="customgpt_chat"
p_id="123456"
p_key="abcdefgh"
custom_context="Important information you want to pass"></script>
Note:Replace the values of p_id, p_key, and prompt with your specific Agent ID, key, and desired initial message.
Updated 12 months ago