Automatically sync Gmail emails to your agent's knowledge base
This step-by-step guide shows you how to automatically add incoming Gmail emails to your CustomGPT.ai agent's knowledge base using Zapier, so your agent always has access to the latest email content.
Why sync emails to your agent?
By connecting Gmail to your CustomGPT.ai agent, you can:
- Build a searchable knowledge base from customer inquiries, support requests, or internal communications
- Keep your agent up-to-date with the latest information shared via email
- Enable your agent to answer questions based on email content without manual uploads
Prerequisites
- A CustomGPT.ai account with an existing agent
- A Zapier account
- A Gmail account you want to sync emails from
- Your CustomGPT.ai API key
Step 1: Create Your Zap (Gmail Trigger)
- Log in to your Zapier account click Create Zap.
- Click on Trigger
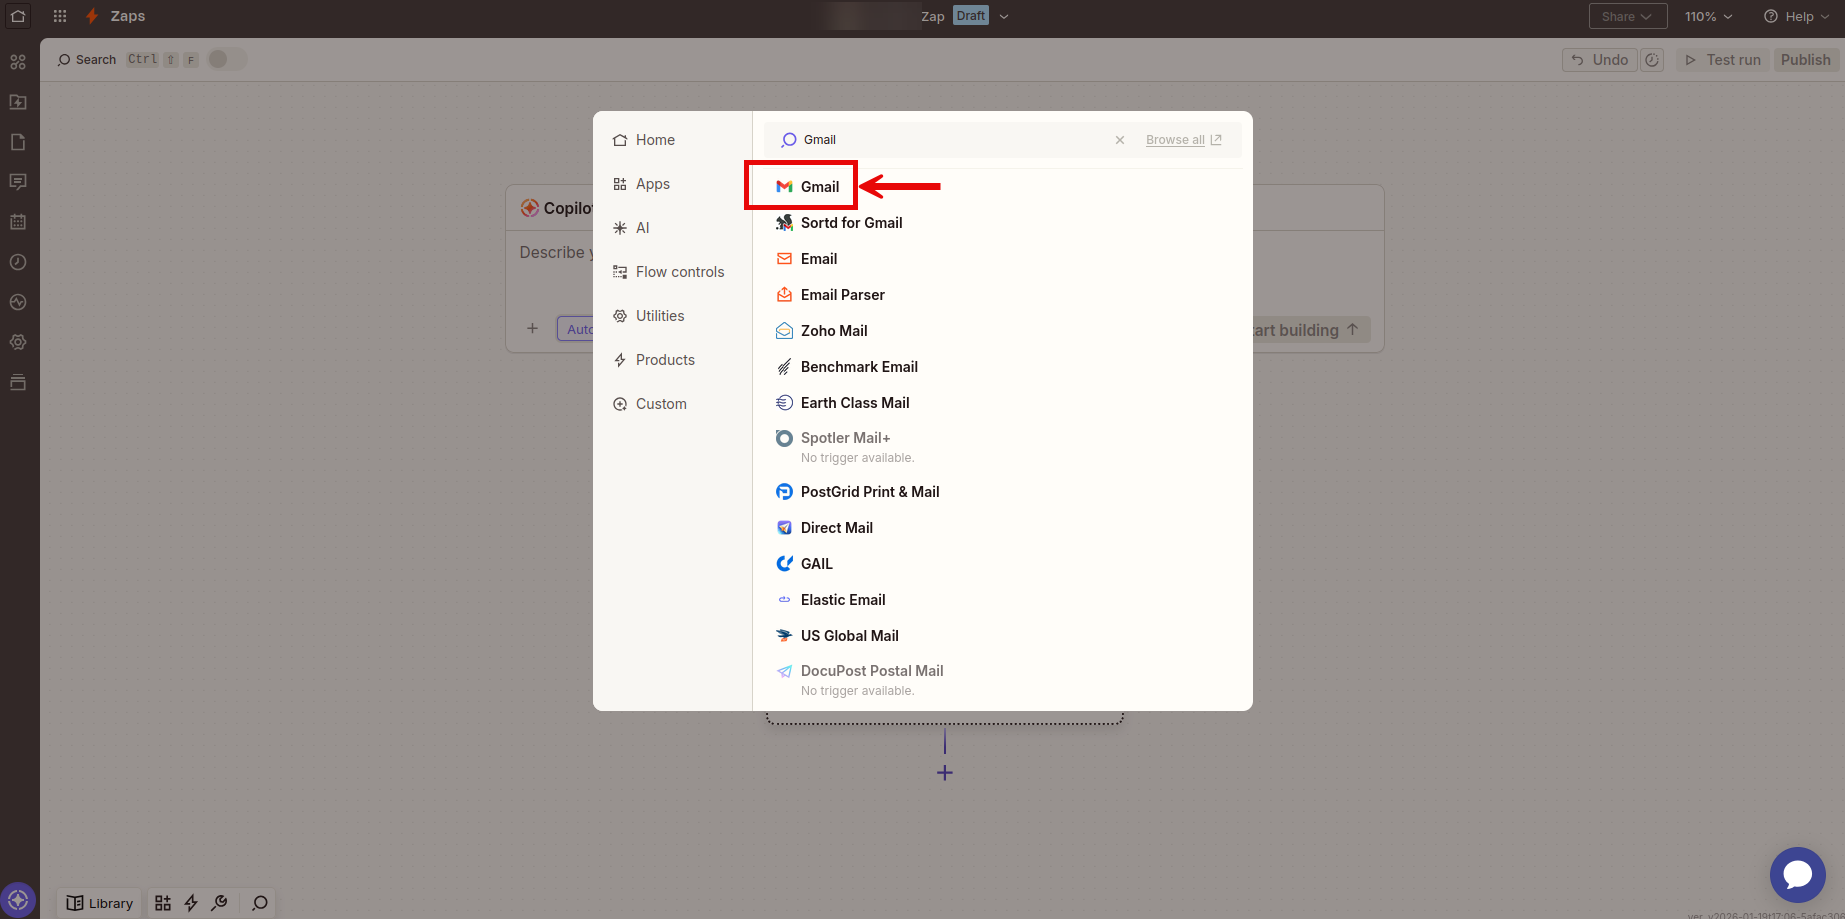
- Search for Gmail and select it
- From the trigger event dropdown, select New Email
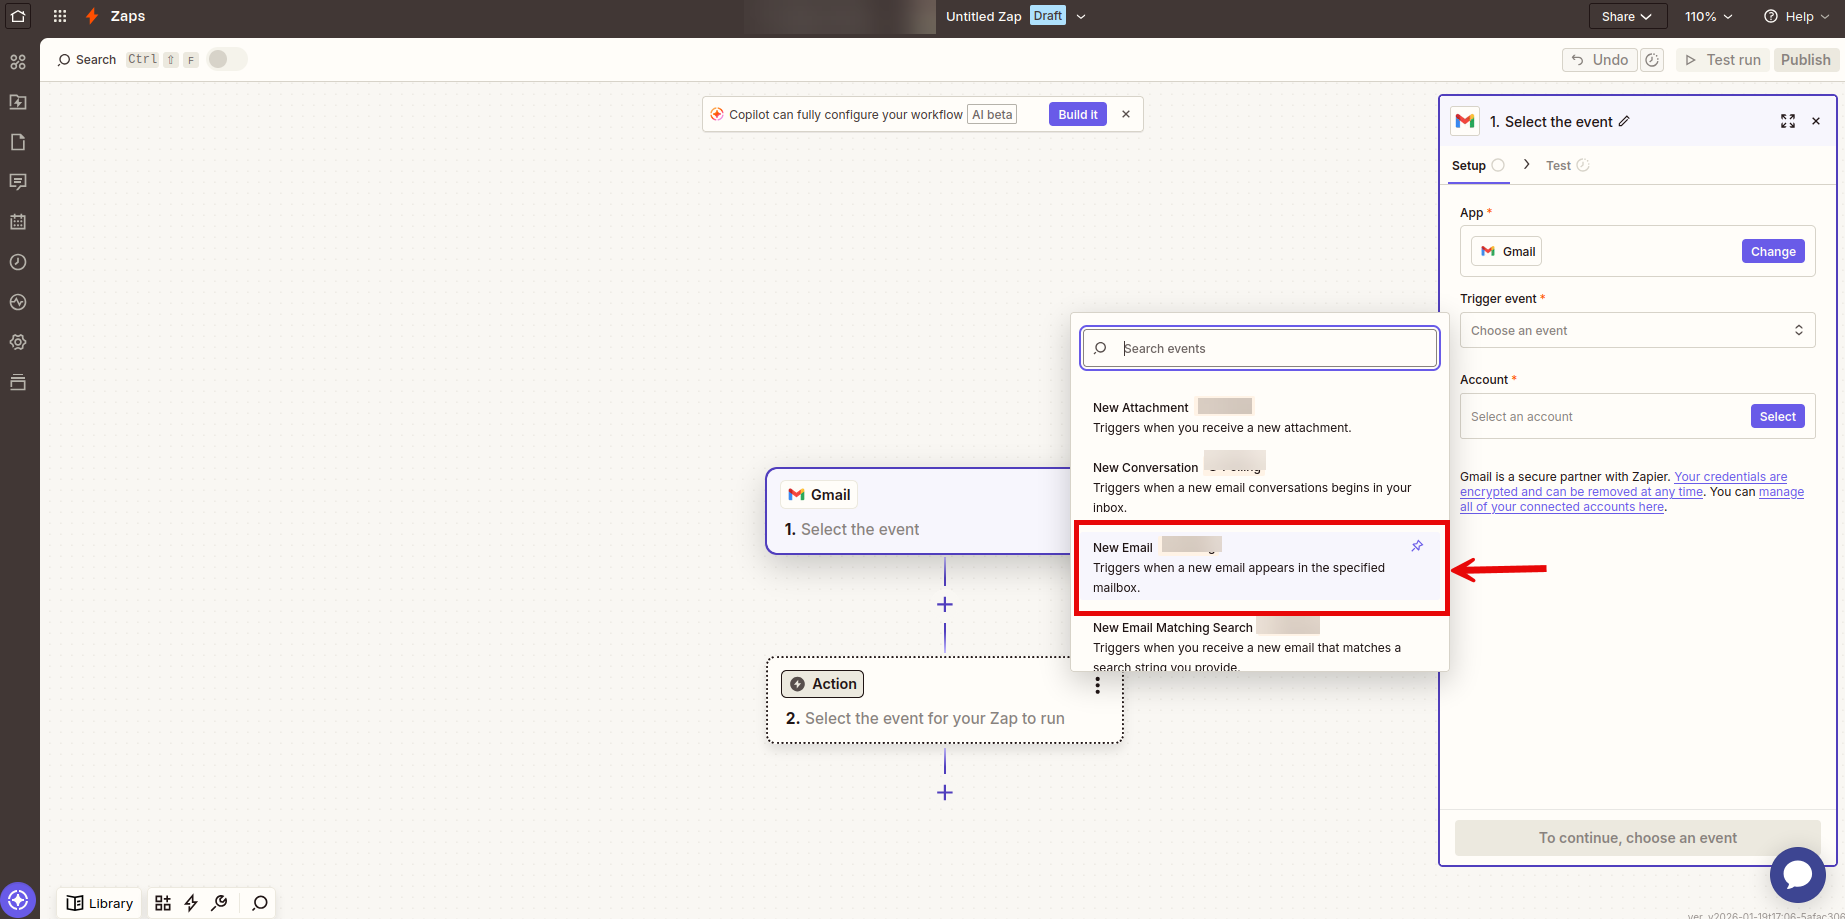
Tip: You can also choose New Labeled Email if you only want to sync emails with a specific label (e.g., "To Index" or "Support").
- Click Continue
- Sign in to your Gmail account when prompted
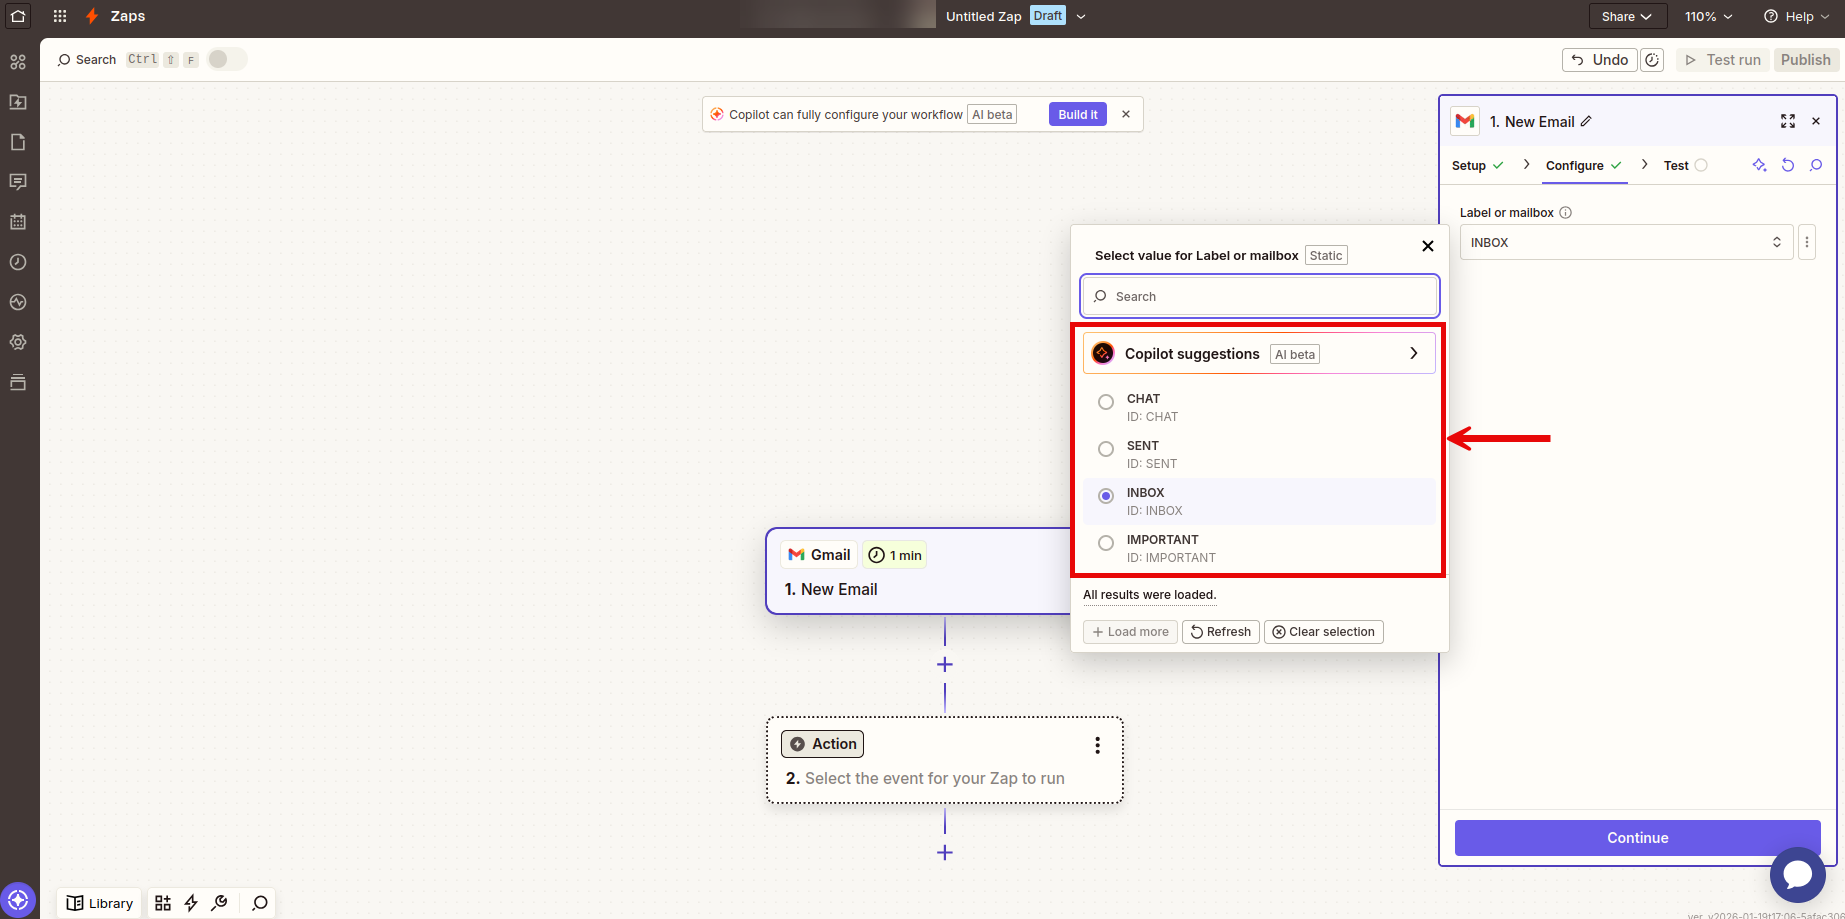
- Configure your trigger settings:
- Label/Mailbox: Choose which inbox or label to monitor (e.g., INBOX, or a specific label)

- Click Continue
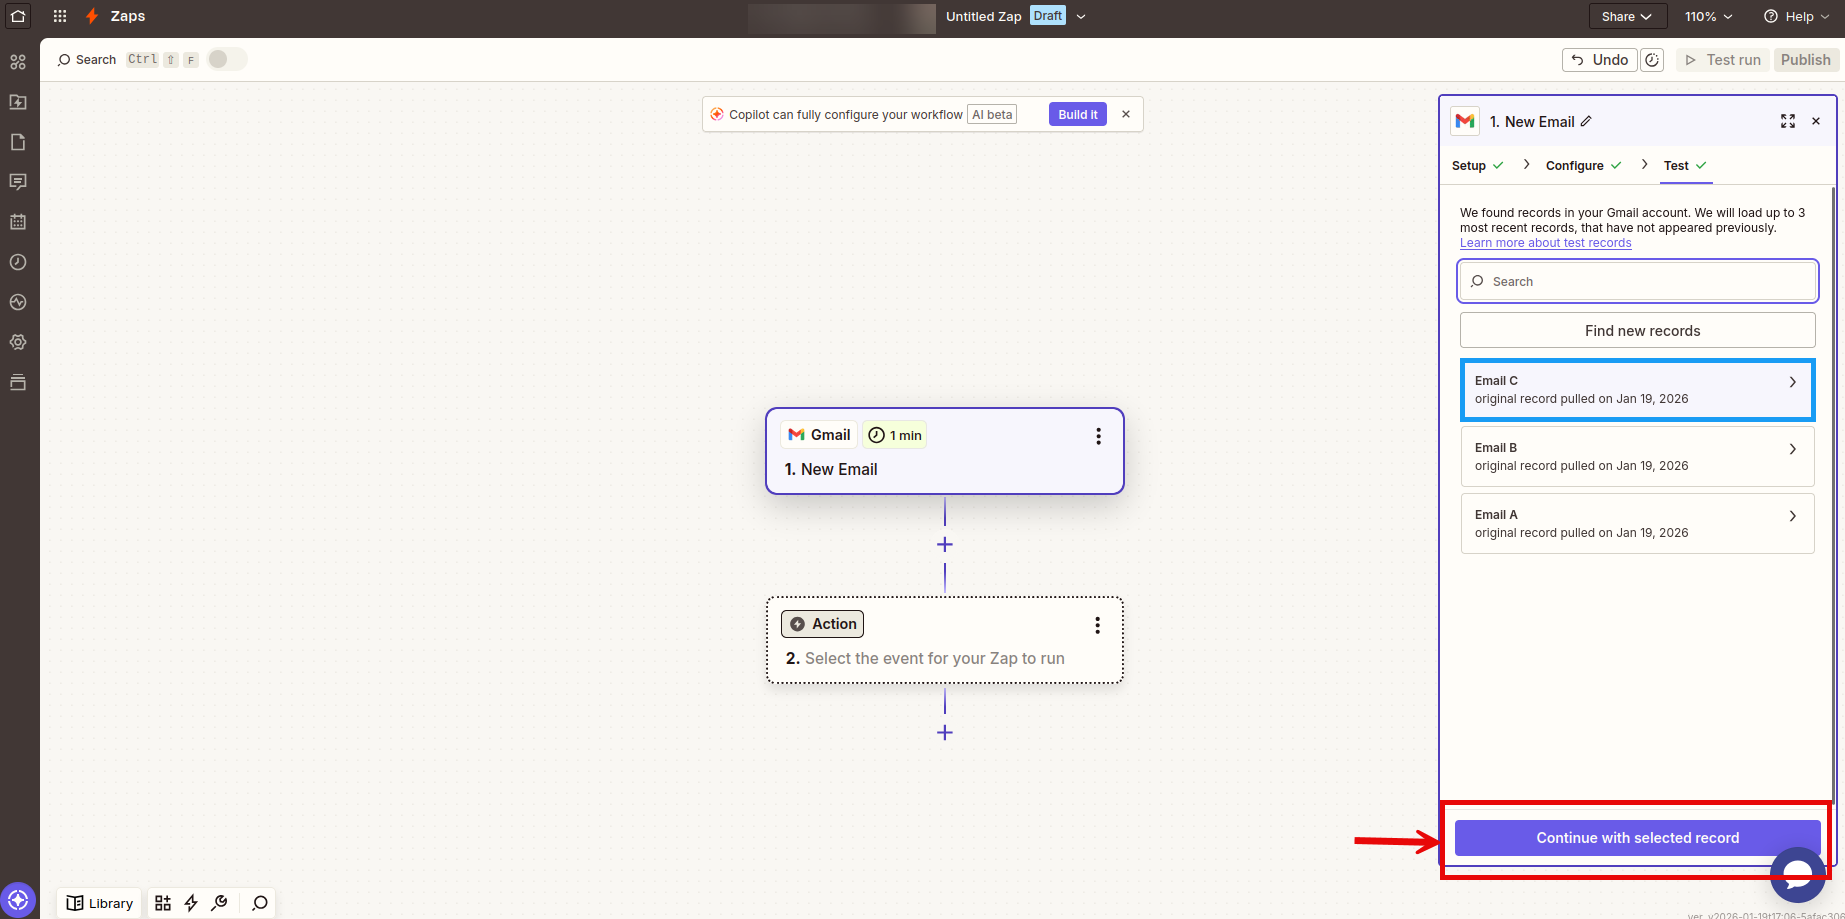
- Click Test trigger to make sure Zapier can find emails in your account
- Select a sample email from the results and click Continue with selected record
Step 2: Connect to CustomGPT.ai (Upload File Action)
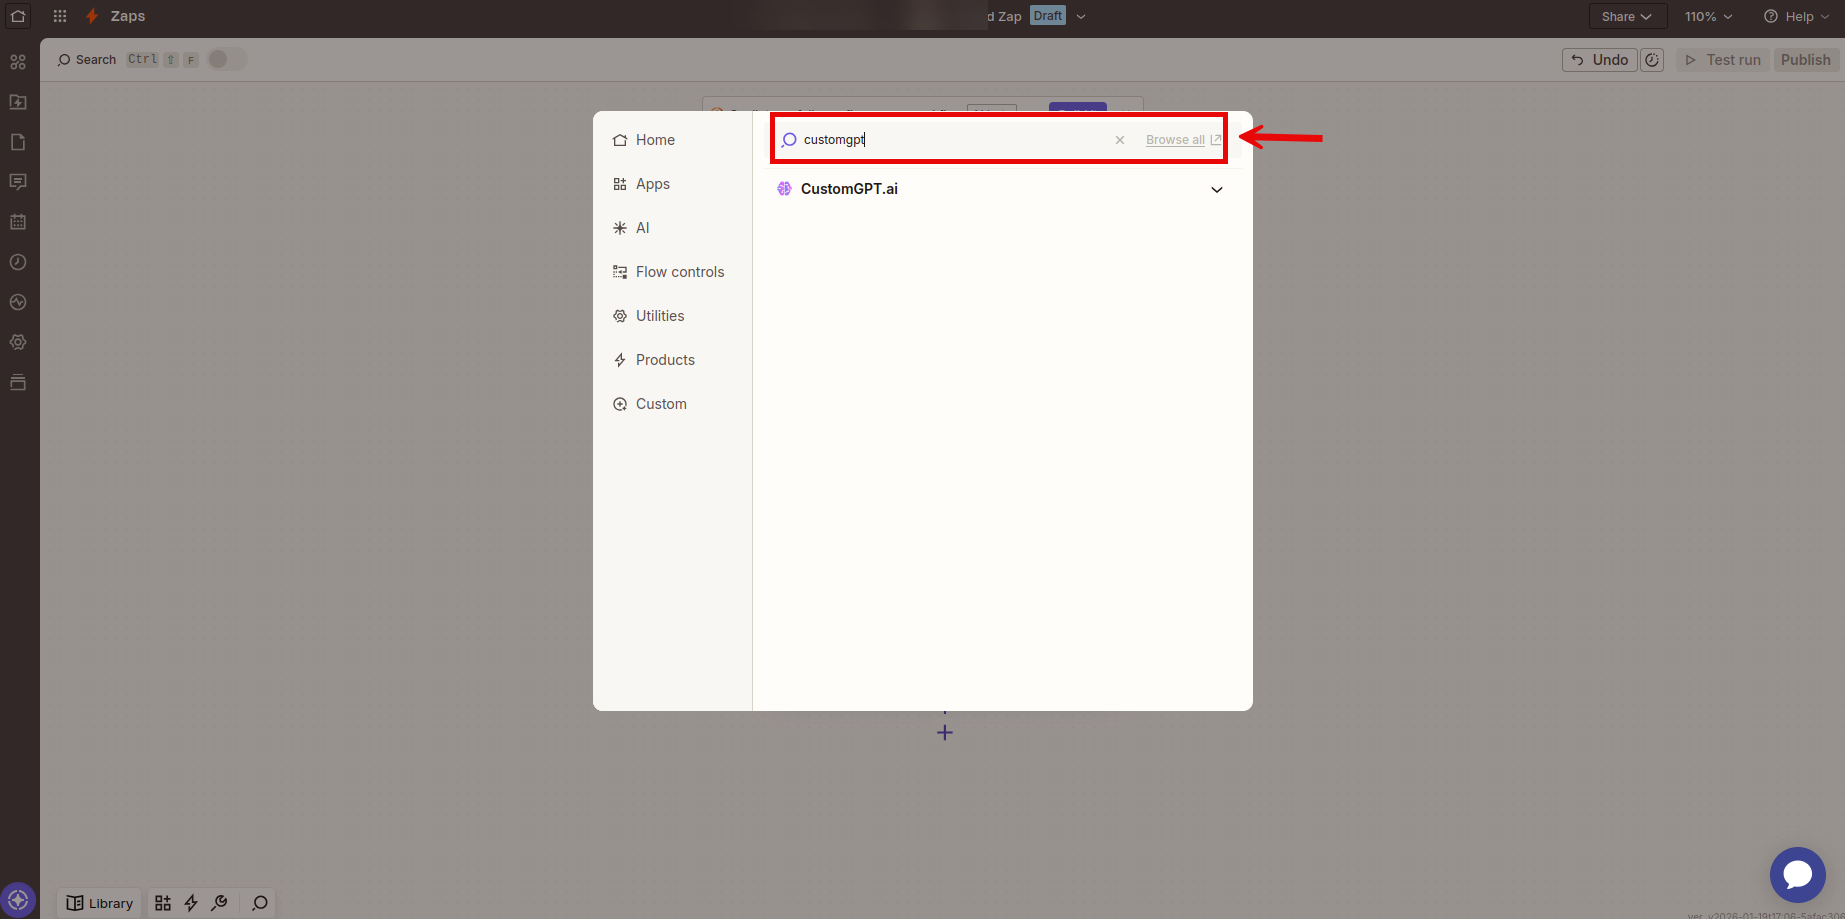
- Click the Action button, search for CustomGPT.ai and select it:
- From the Action event dropdown, select Upload File
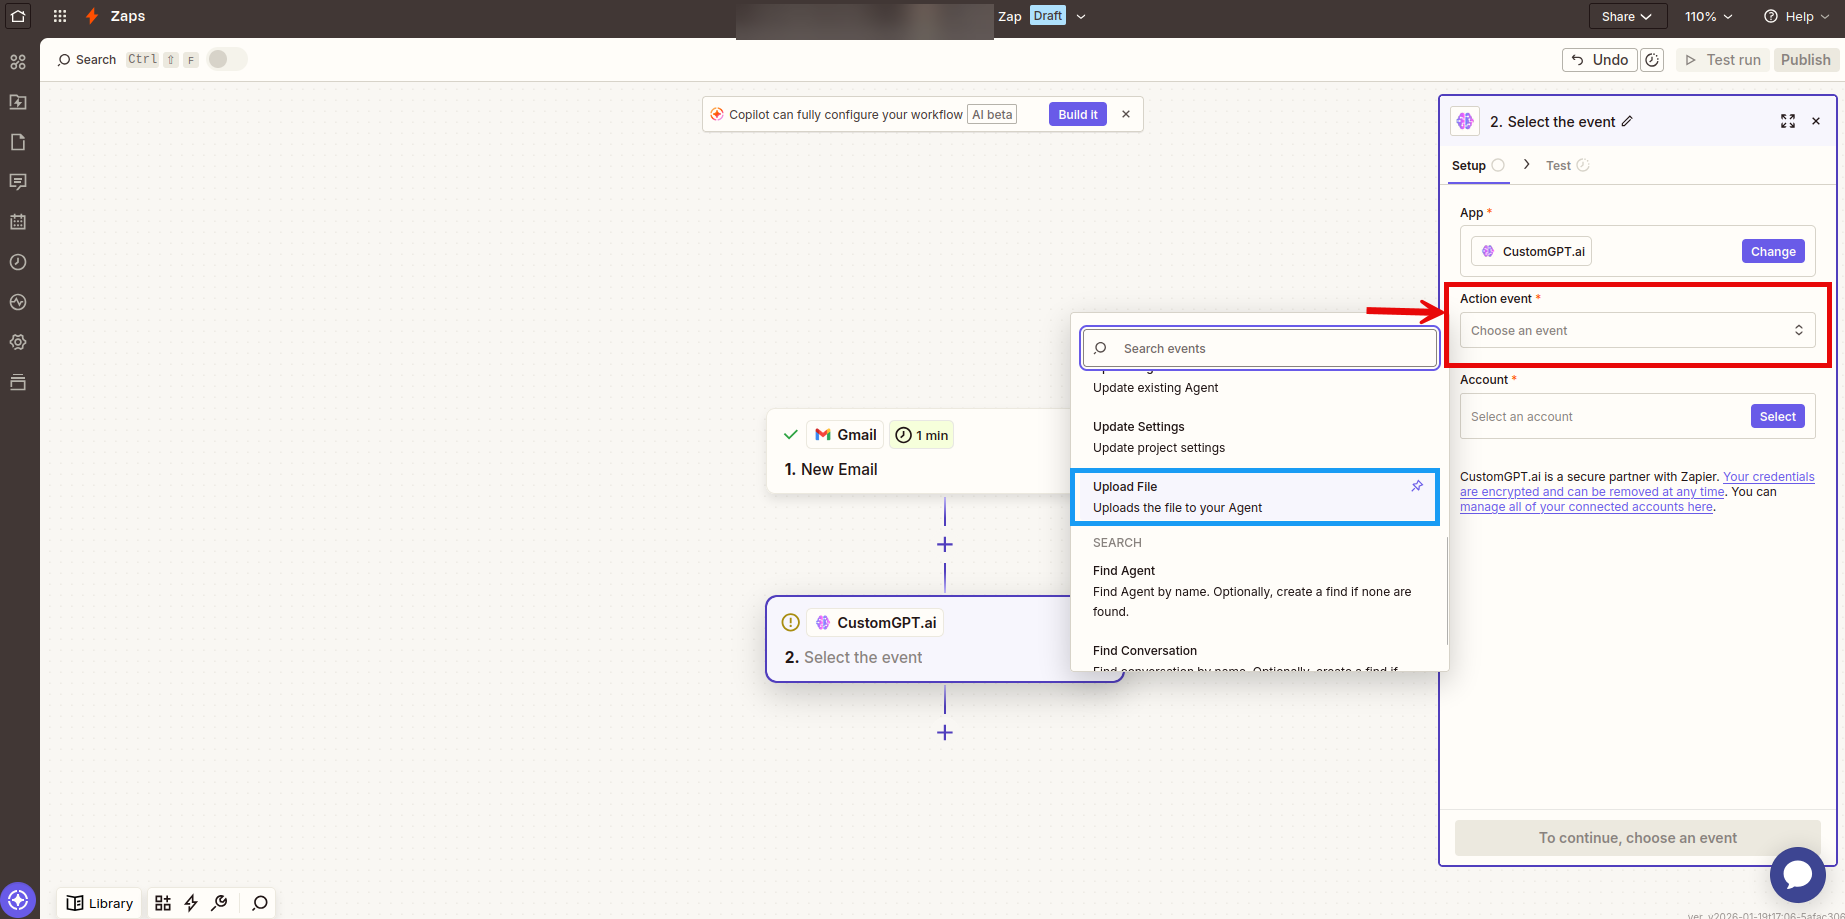
- Click Continue
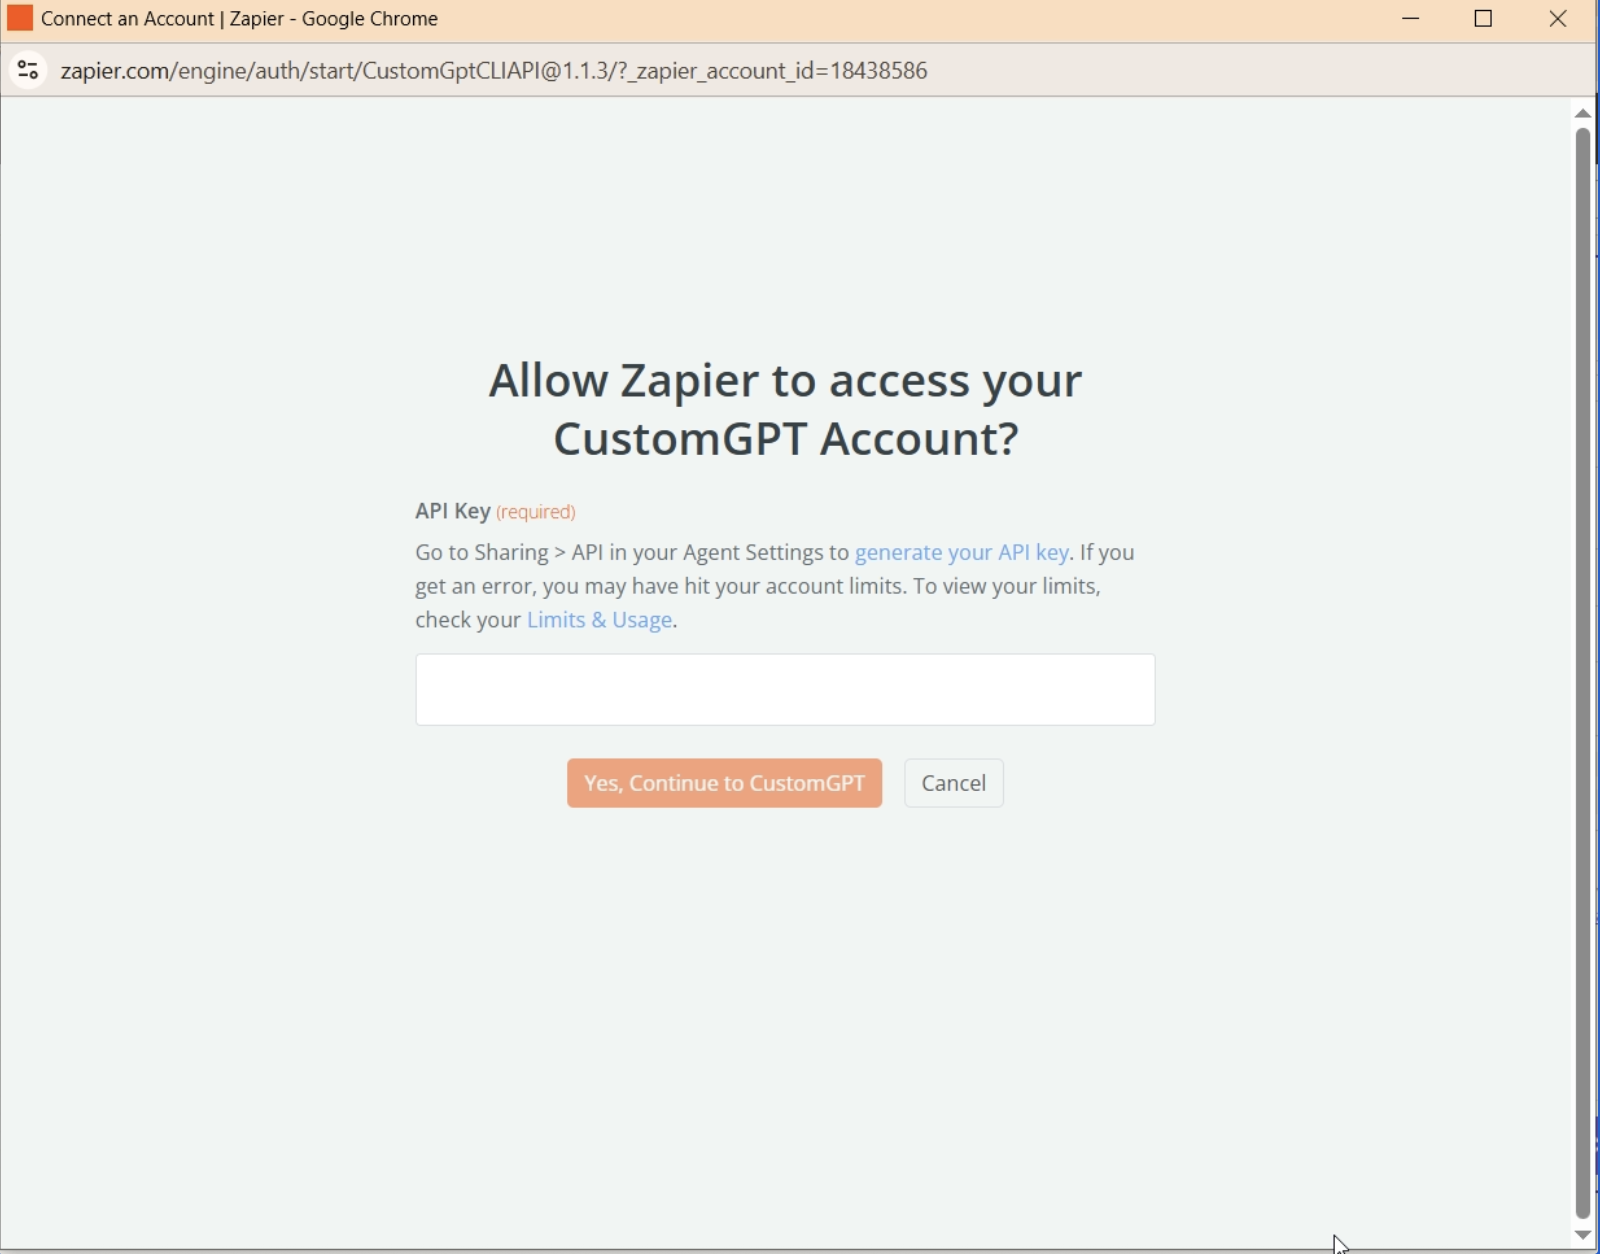
- Sign in with your CustomGPT API key:
- Go to your CustomGPT.ai dashboard
- Navigate to Deploy > API
- Copy your API key
- Paste it into Zapier and click Continue
- Configure the Upload File action with the following fields:
- Agent Name - Select the agent where you want to upload the email content.
- Data Retention Choose how to handle the uploaded file:
- Keep For Viewing In Results - When you want end users to see the original email content as a source
- Delete Immediately After Processing - When you only want to index the knowledge but keep the original email private
- Filename For Storing File Map this to a field from Gmail that identifies the email. Recommended options:
- Subject - Names the file based on the email subject line
- Date + Subject - Combines date and subject for unique filenames
- Example: Click the + button and select 1. Subject from the Gmail fields.
- File For Processing - Select the email content to upload. Choose from:
- Body Plain - Plain text version of the email (recommended for most cases)
- Body HTML - HTML version with formatting preserved
- Click Continue
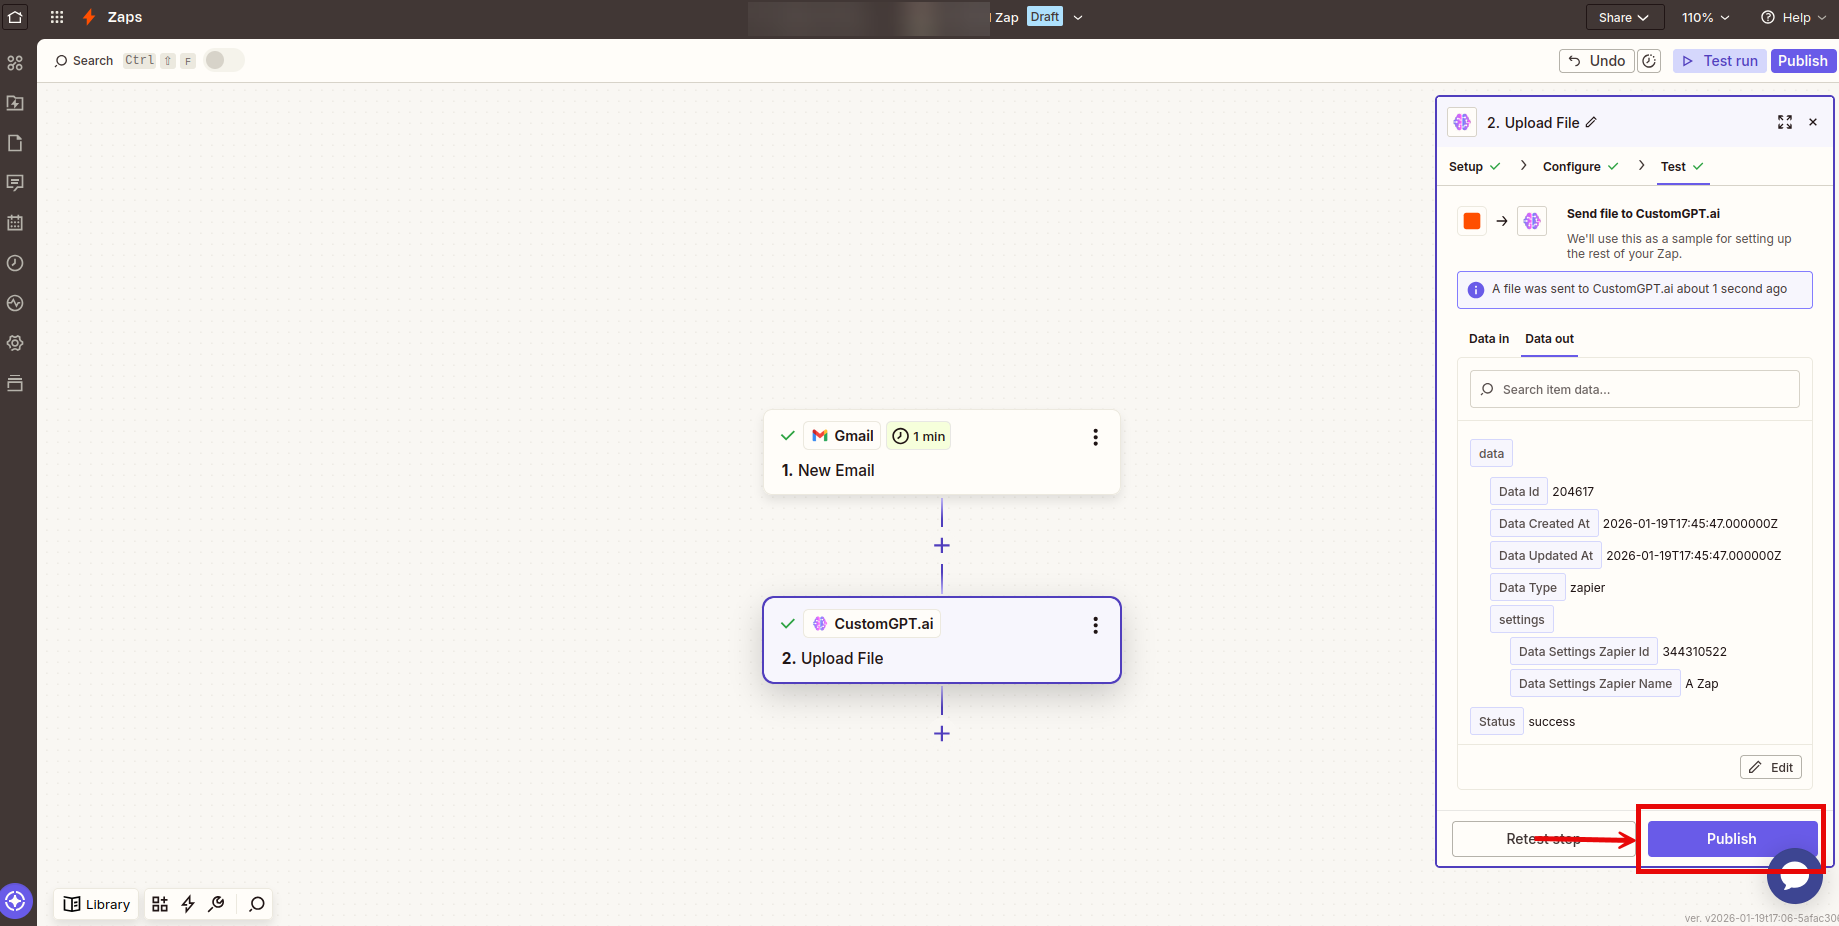
- Click Test step to verify the email uploads correctly to your agent
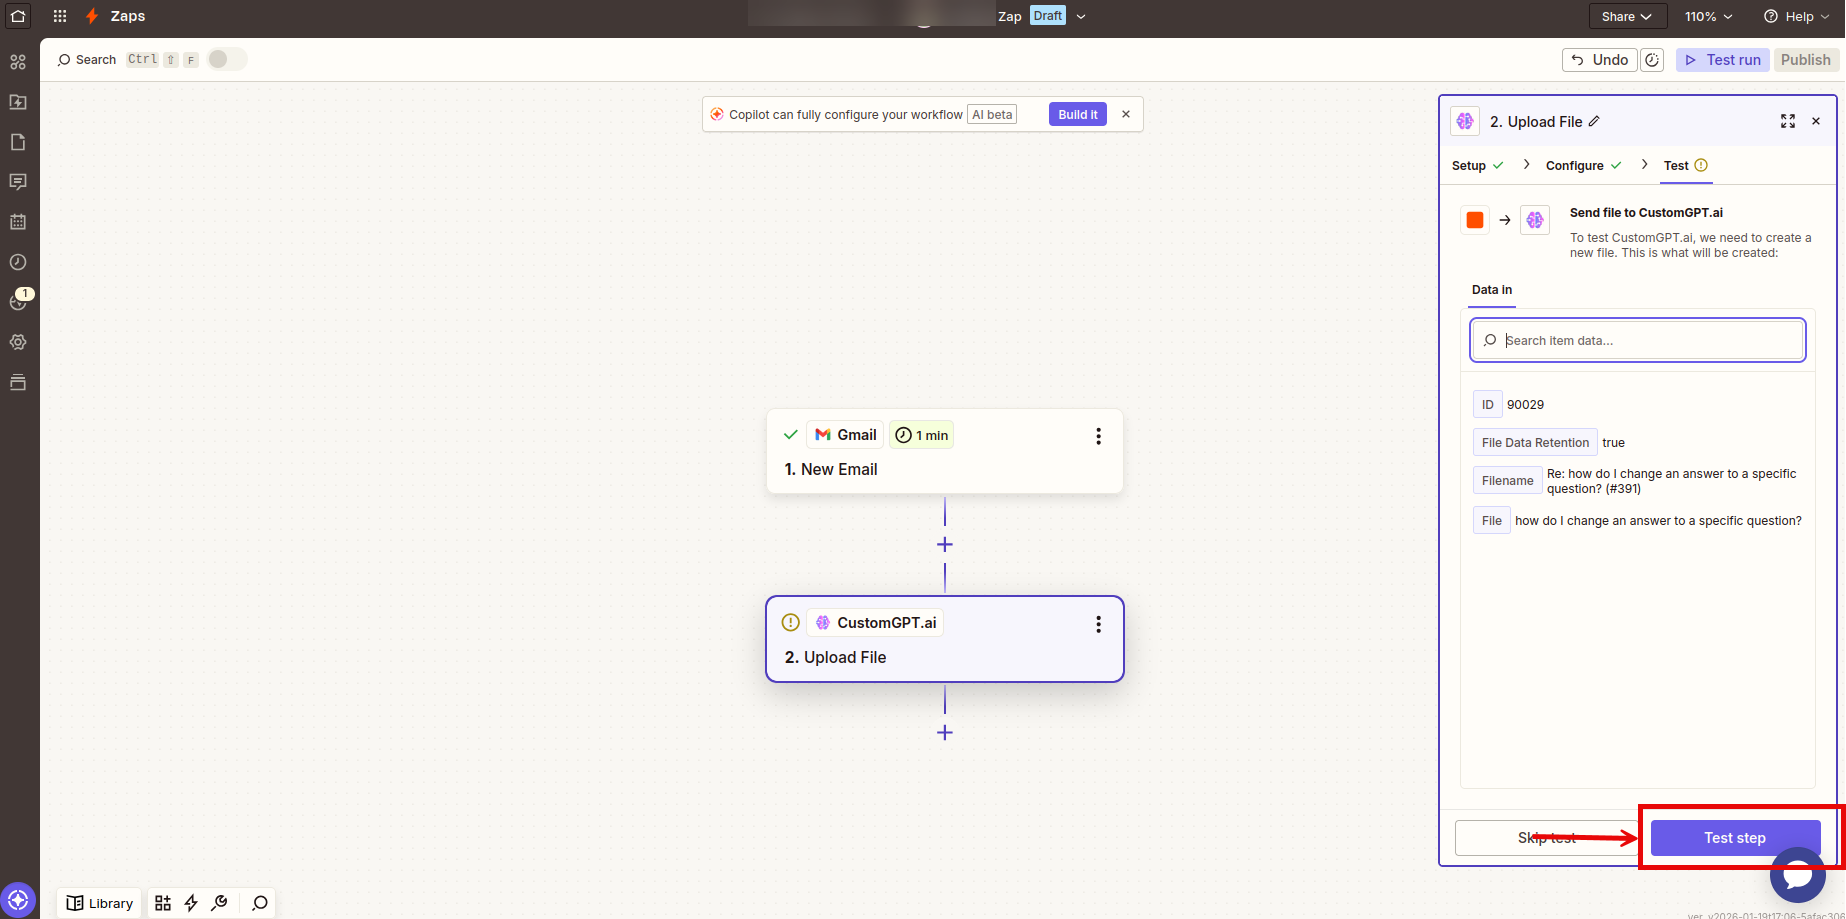
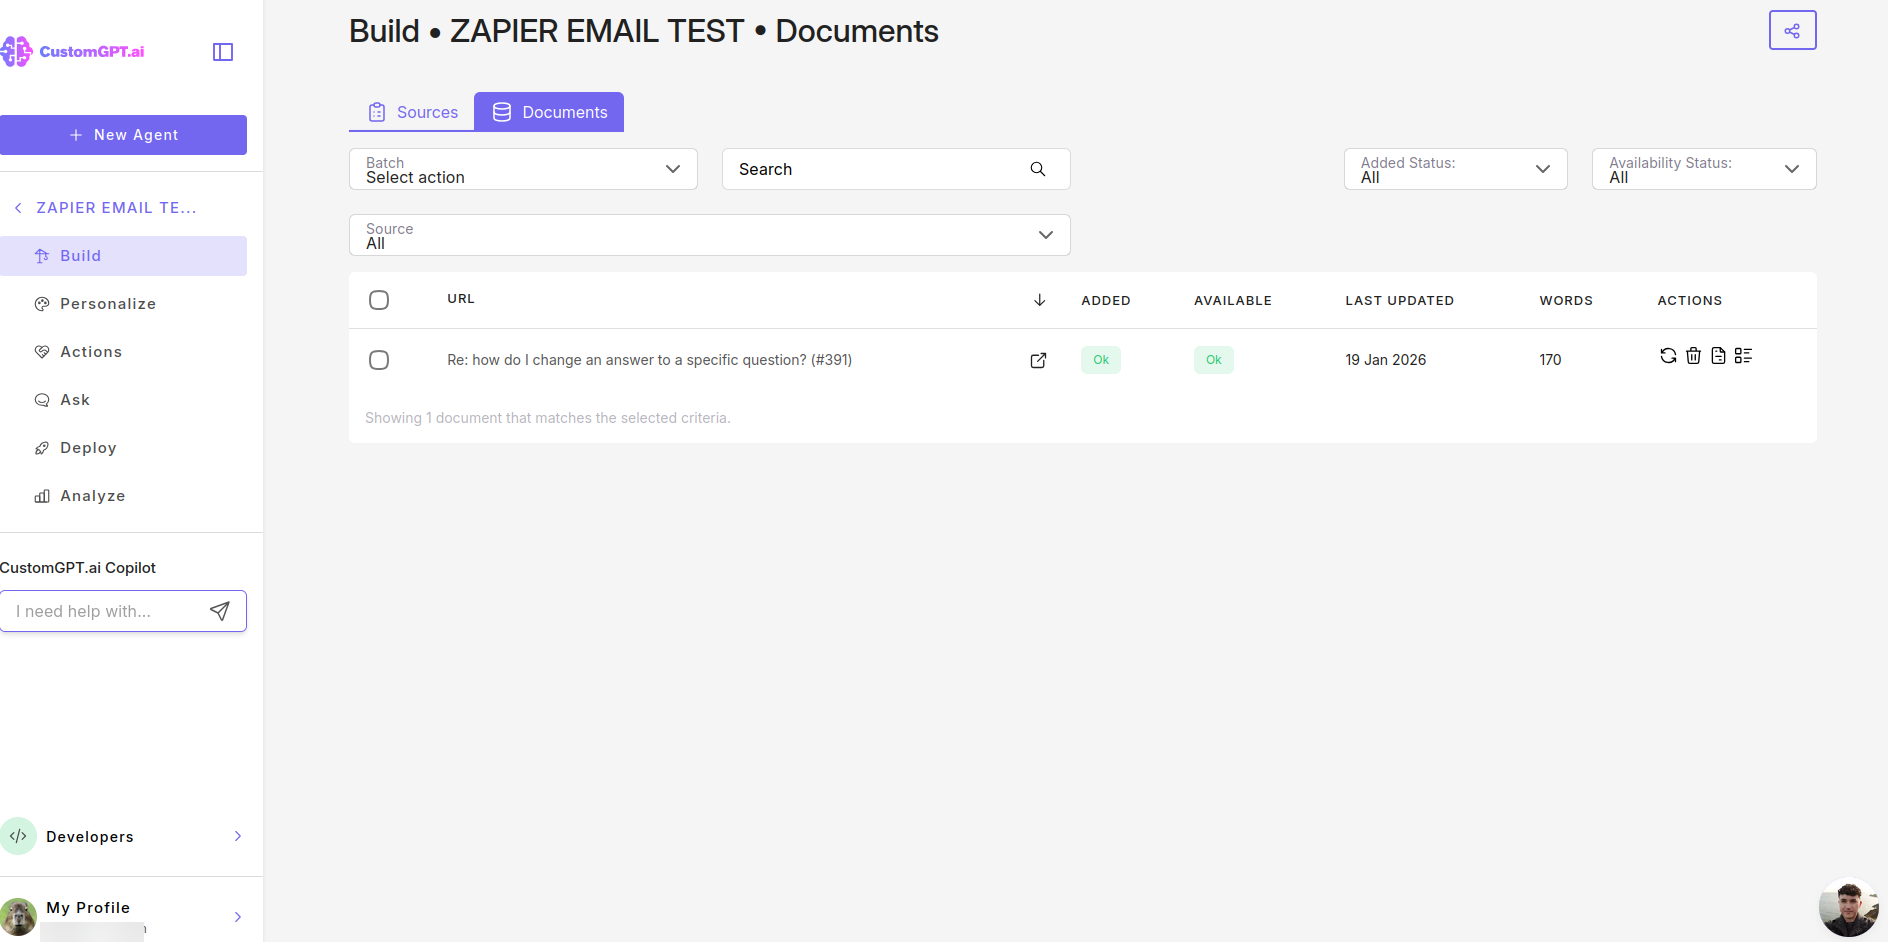
- Check your CustomGPT.ai agent's data sources to confirm the email content was indexed
- Once confirmed, click Publish to activate your Zap:
Troubleshooting
| Issue | Solution |
|---|---|
| Emails not syncing | Check that your Gmail trigger is set to the correct label or inbox. Test the trigger to ensure Zapier can access your emails. |
| File not appearing in agent | If Data Retention is set to "Delete Immediately After Processing," the file won't be visible but its content is indexed. Try asking your agent a question about the email content. |
| Upload fails | Verify your CustomGPT.ai API key is valid and your account is active. |
Related resources
Updated 6 months ago
Did this page help you?