Enable Confluence Auto-Sync for Your Agent
This step-by-step guide shows you how to enable the Confluence Auto-Sync feature in CustomGPT to ensure your agent always stays up to date with the latest content.
Note:This feature is available on our Enterprise plans. If you're interested in enabling it, please contact our sales team.
How to enable the Confluence Auto-Sync feature
- Click the three dots next to your agent’s name, then select Build.

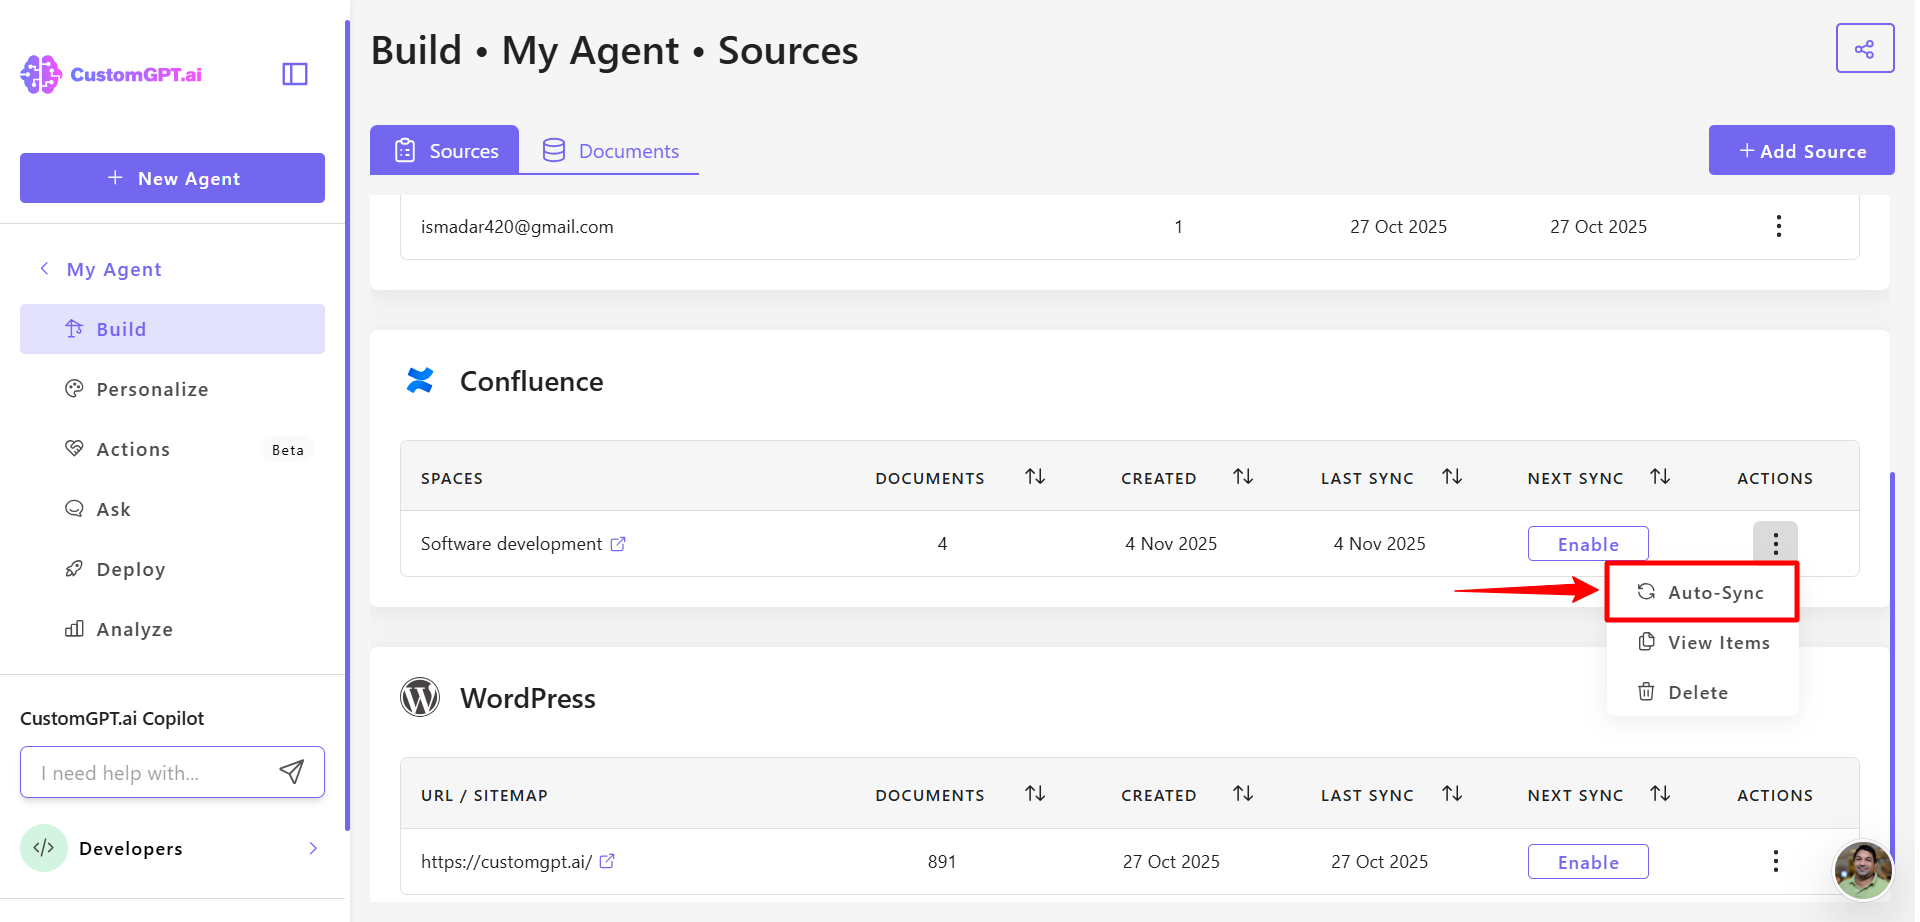
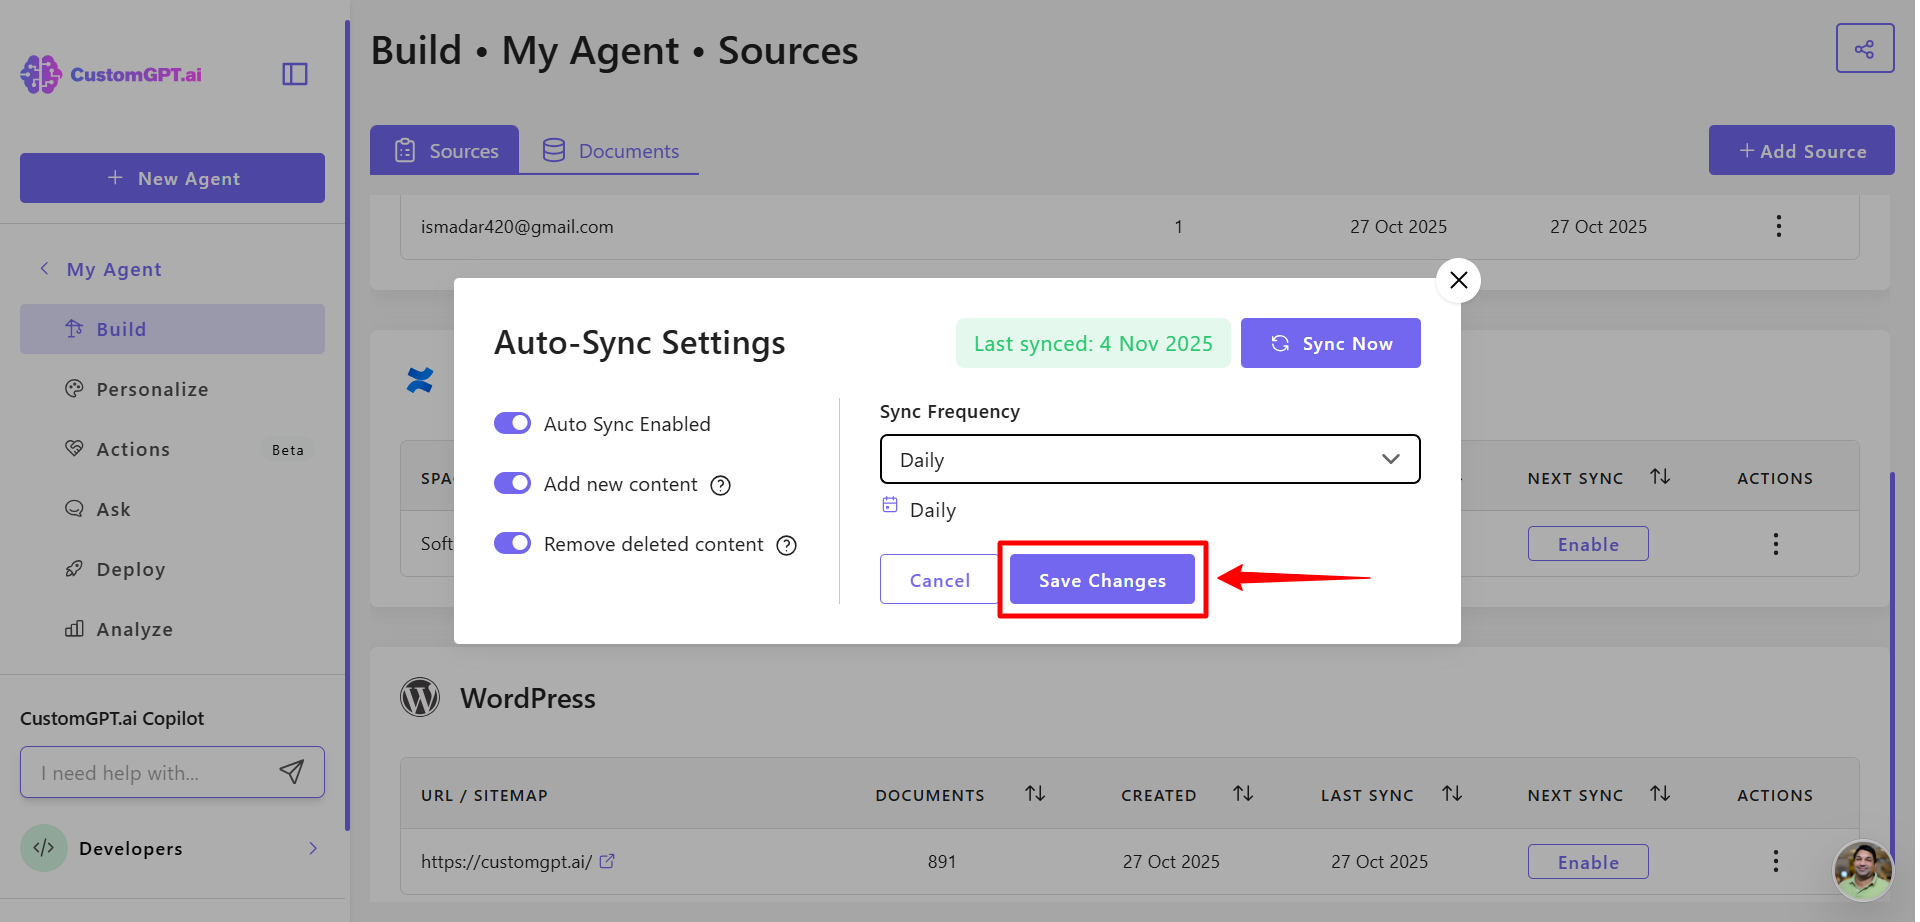
- In Confluence section, find your connected Confluence site, click the three-dot menu next to it, and select Auto Sync.
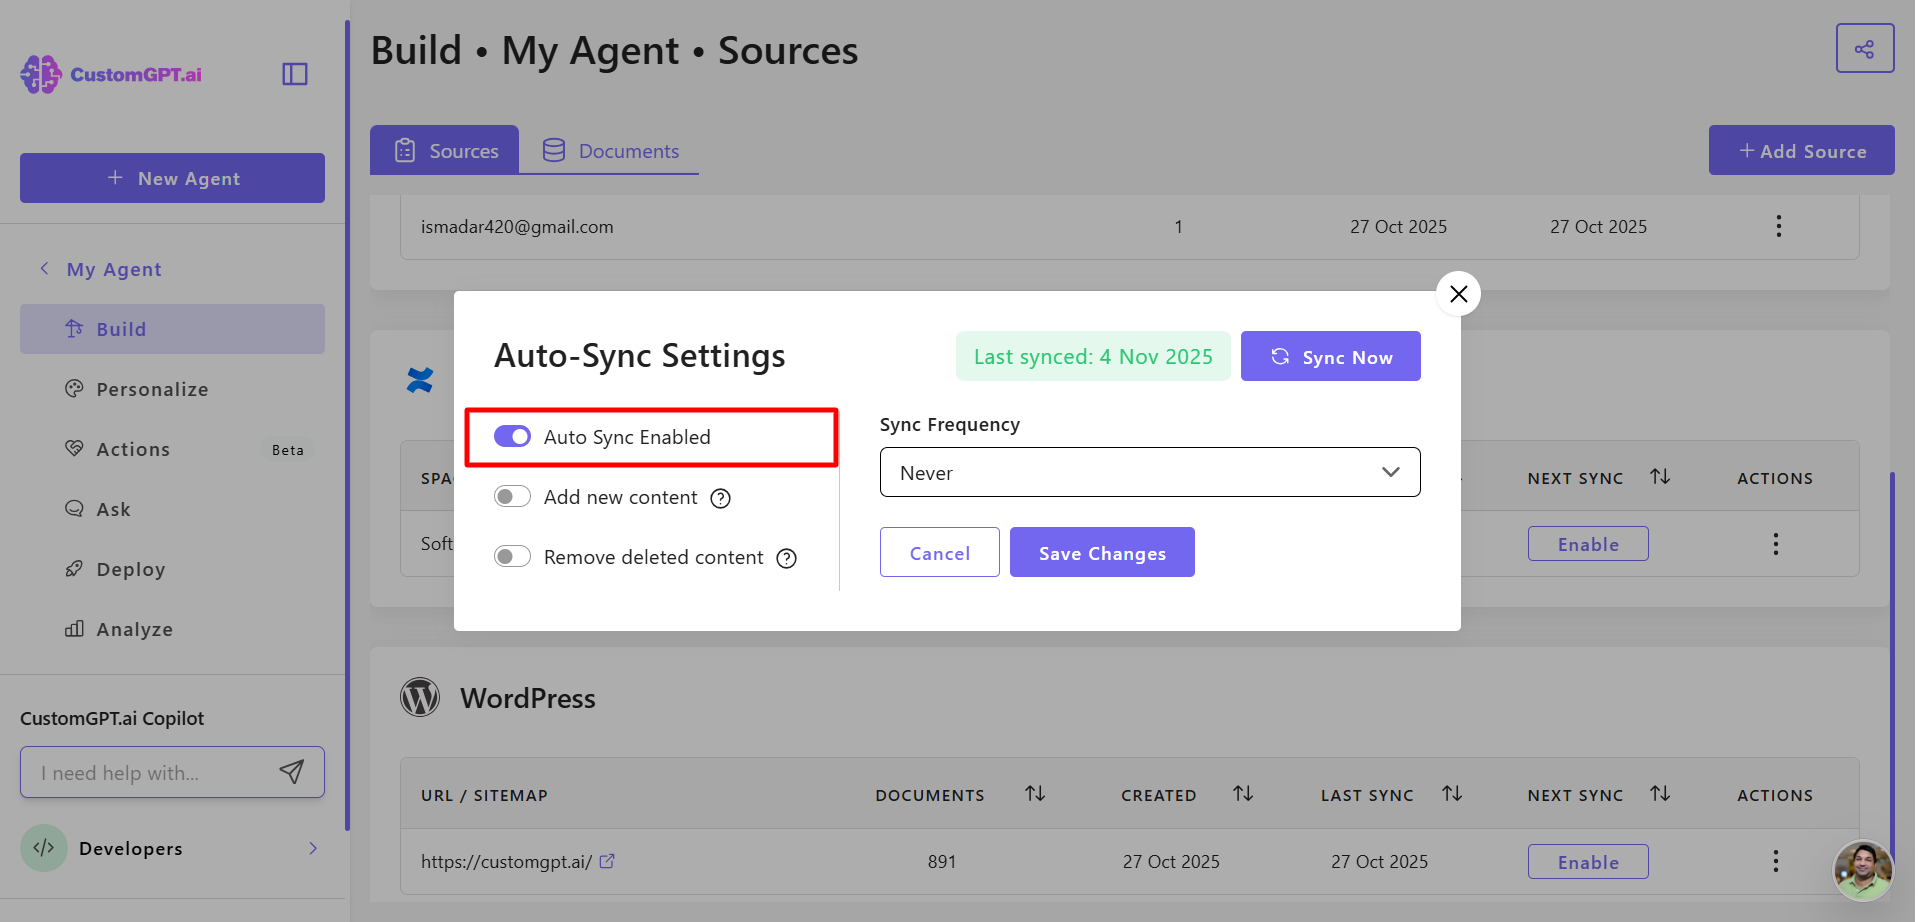
- Toggle Auto Sync to Enabled.
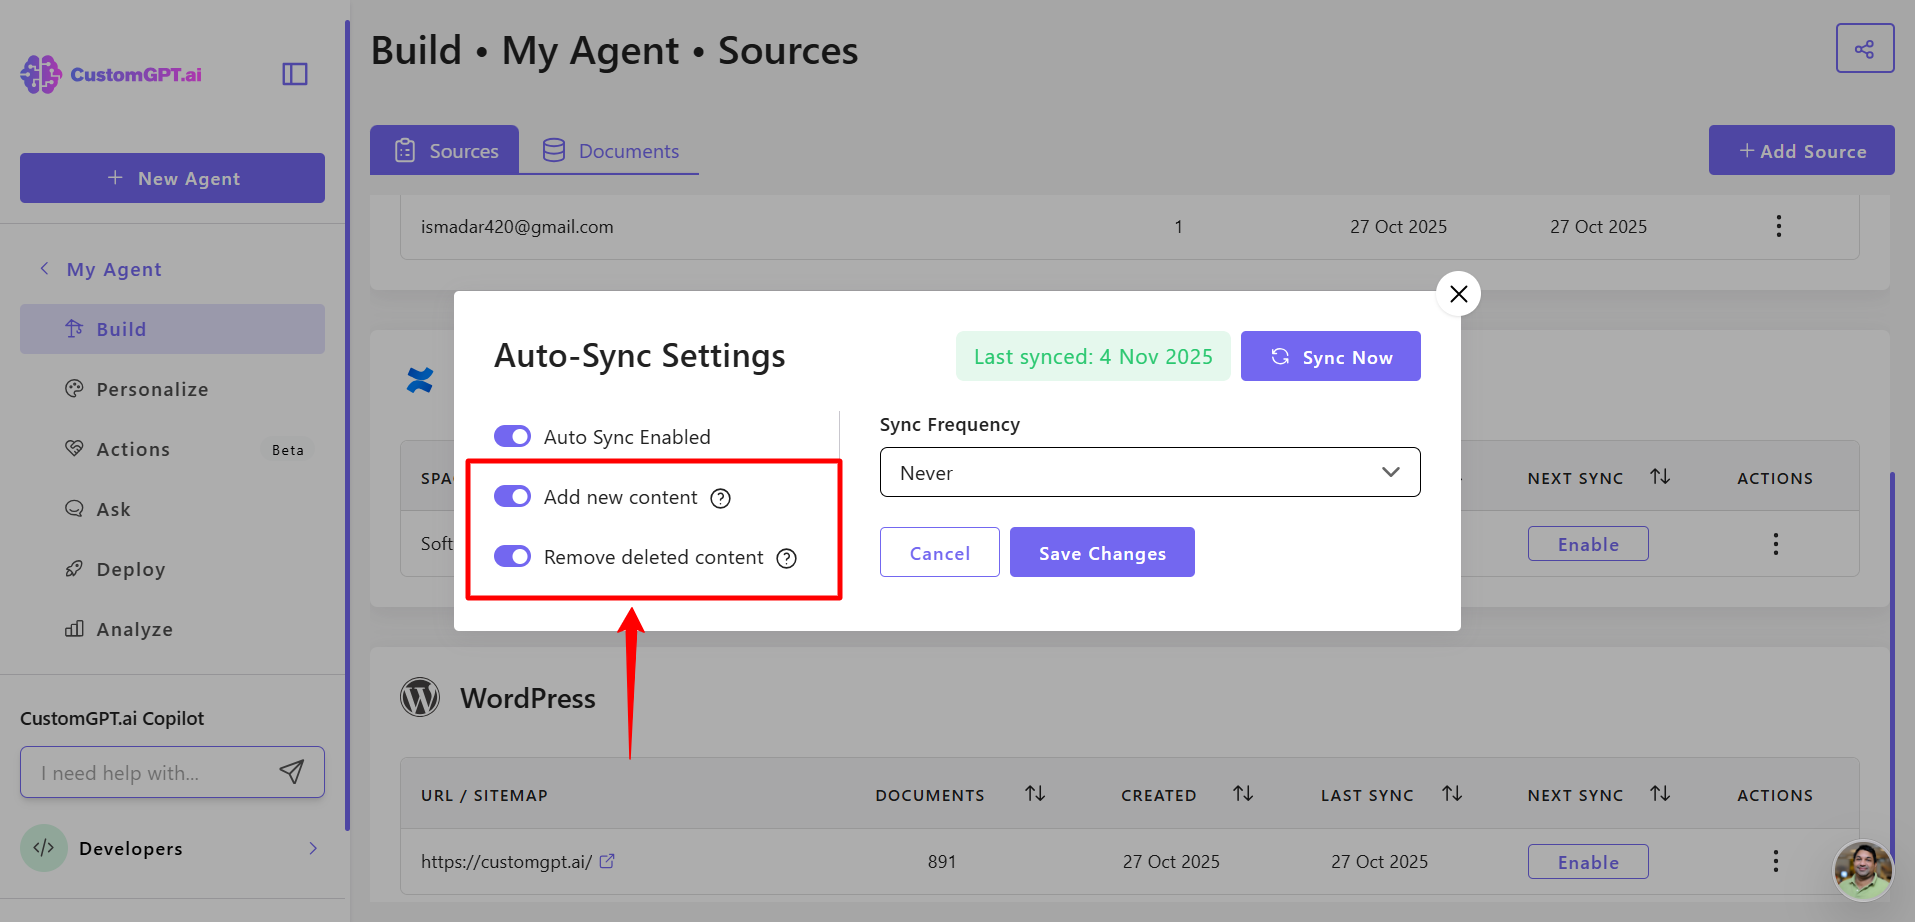
- Choose your sync options:
- Add new content to the agent
- Remove deleted content from the agent
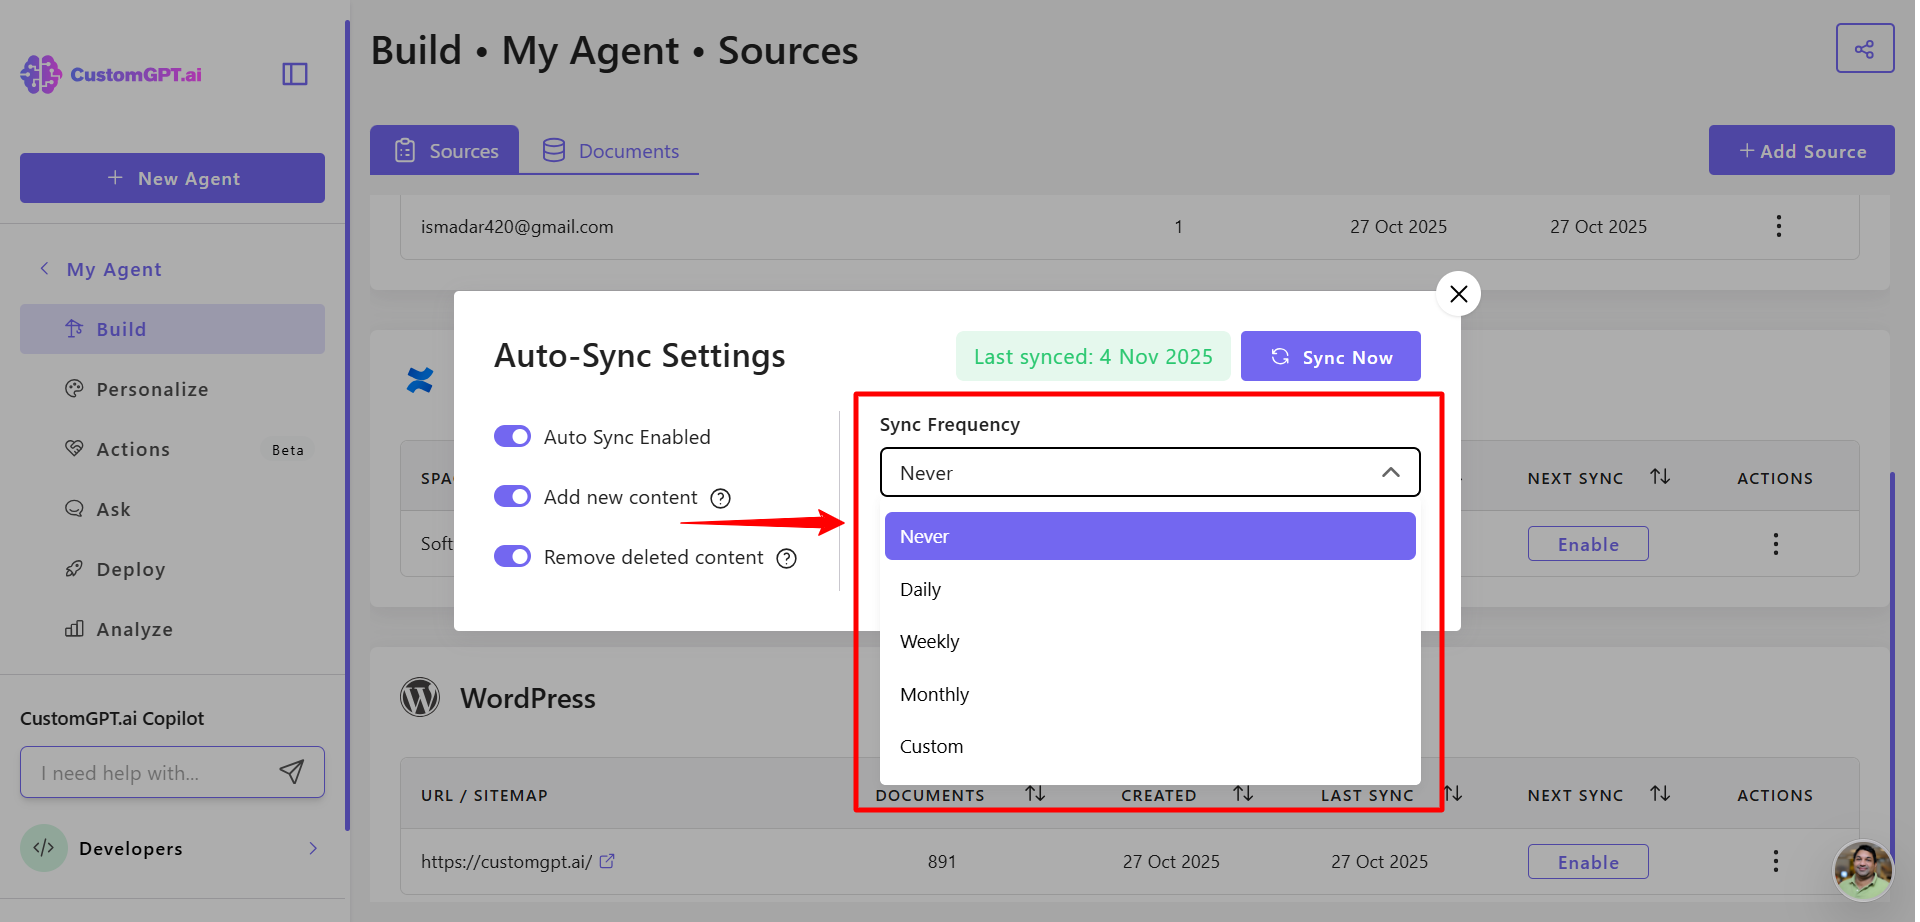
- Set your sync frequency to control how often Confluence content updates:
- Never
- Daily
- Weekly
- Monthly
- Custom
- Click Save Changes to apply your settings.
Sync all existing Confluence spaces automatically
You can also sync all spaces for an existing Confluence connection.
To sync:
- Go to Sources page
- Find your Confluence source
- Toggle Sync the entire account to ON
- All available spaces will be synced
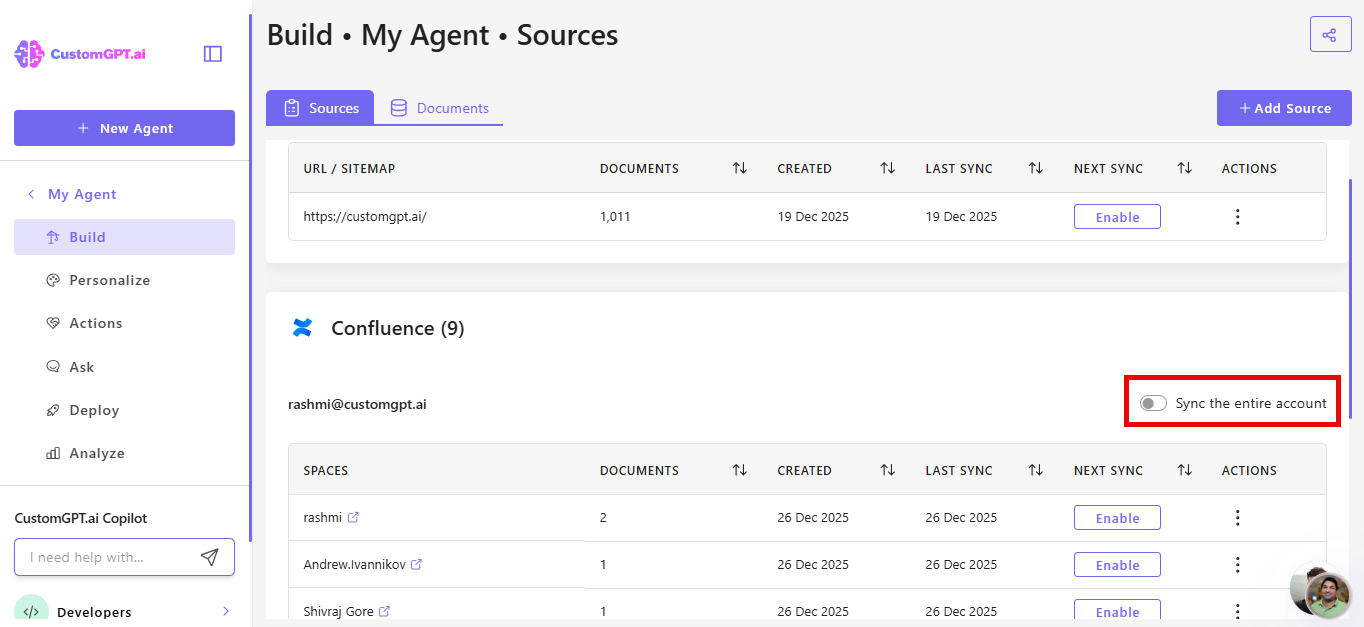
If Sync the entire account is enabled, all Spaces added to your account in the future will be synced with the agent automatically, while removed Spaces will be deleted.
Our system will check for new Spaces every day at 03:00 UTC.
Note: Auto-sync still needs to be configured for each Space individually!
Updated 6 months ago
Did this page help you?