Add a custom MCP action
This step-by-step guide explains how to add a new Custom Action to your AI agent. With Custom Actions, your agent can go beyond answering questions and perform real-world tasks using connected MCP servers.
What is a custom action?
A Custom Action connects your agent to an external system through an MCP (Model Context Protocol) server. This enables the agent to:
- Fetch live information (e.g., check order status).
- Trigger actions (e.g., create a support ticket).
- Integrate with third-party apps and workflows.
👉 Learn more about Custom Actions
How to add a custom action
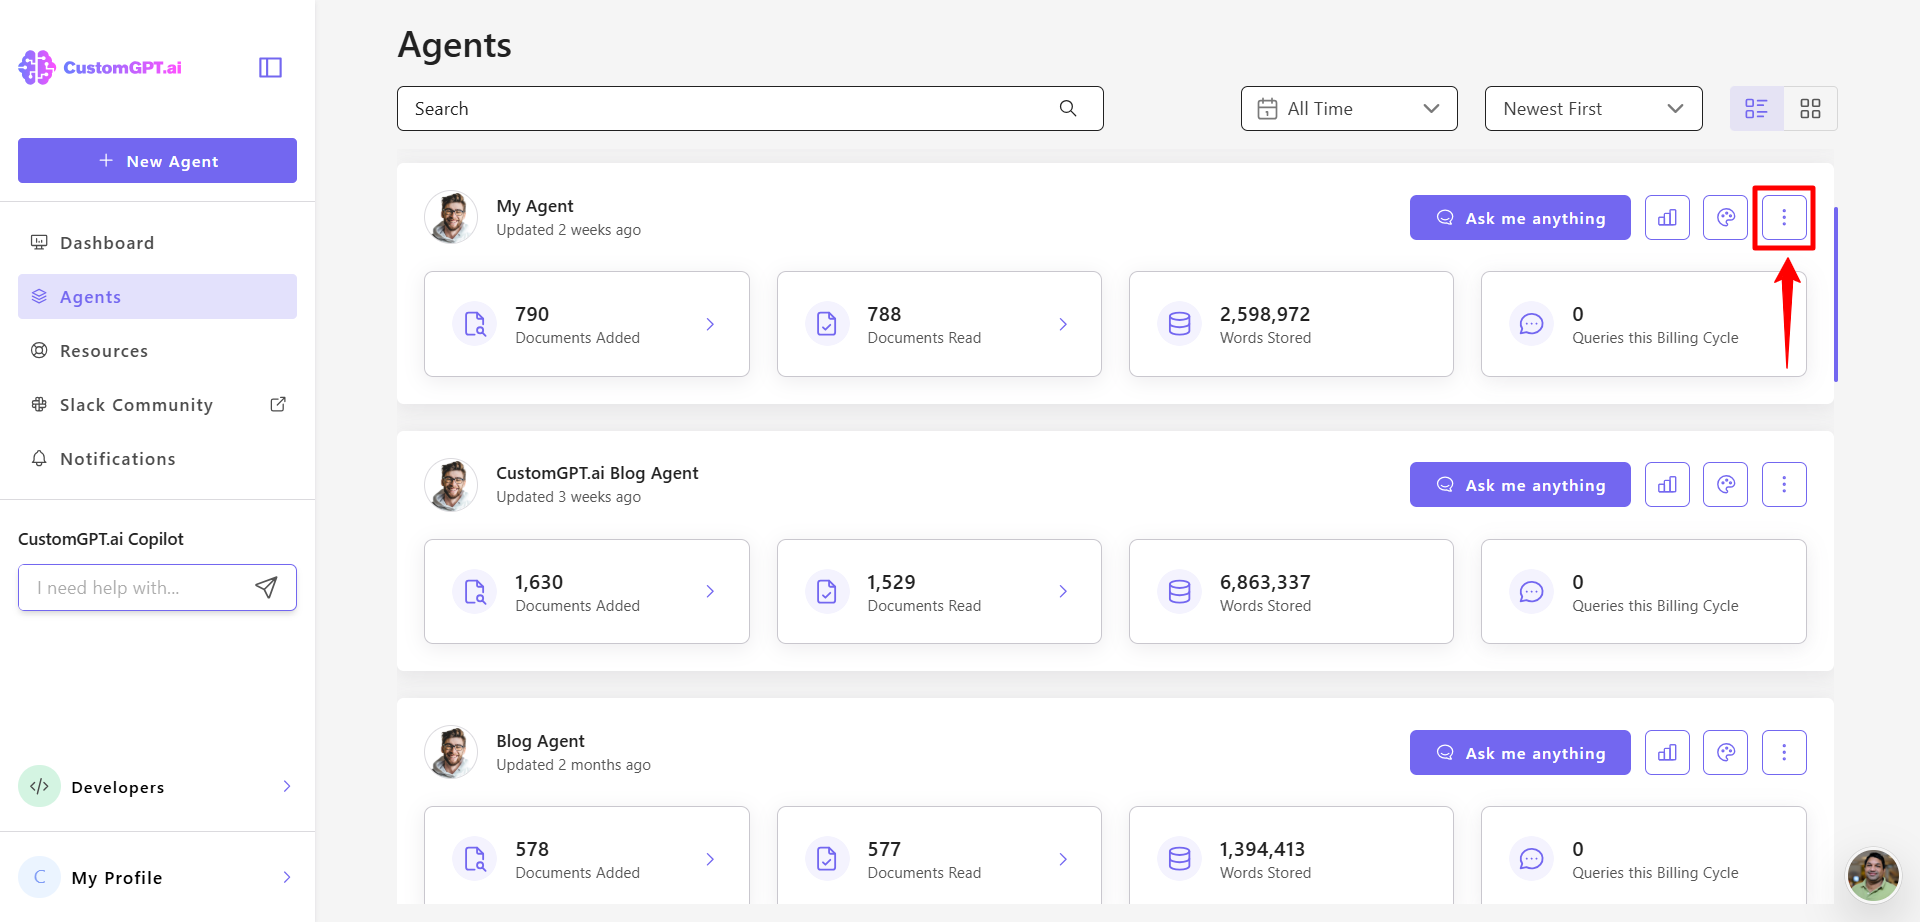
- On your CustomGPT.ai dashboard, click the three dots menu.
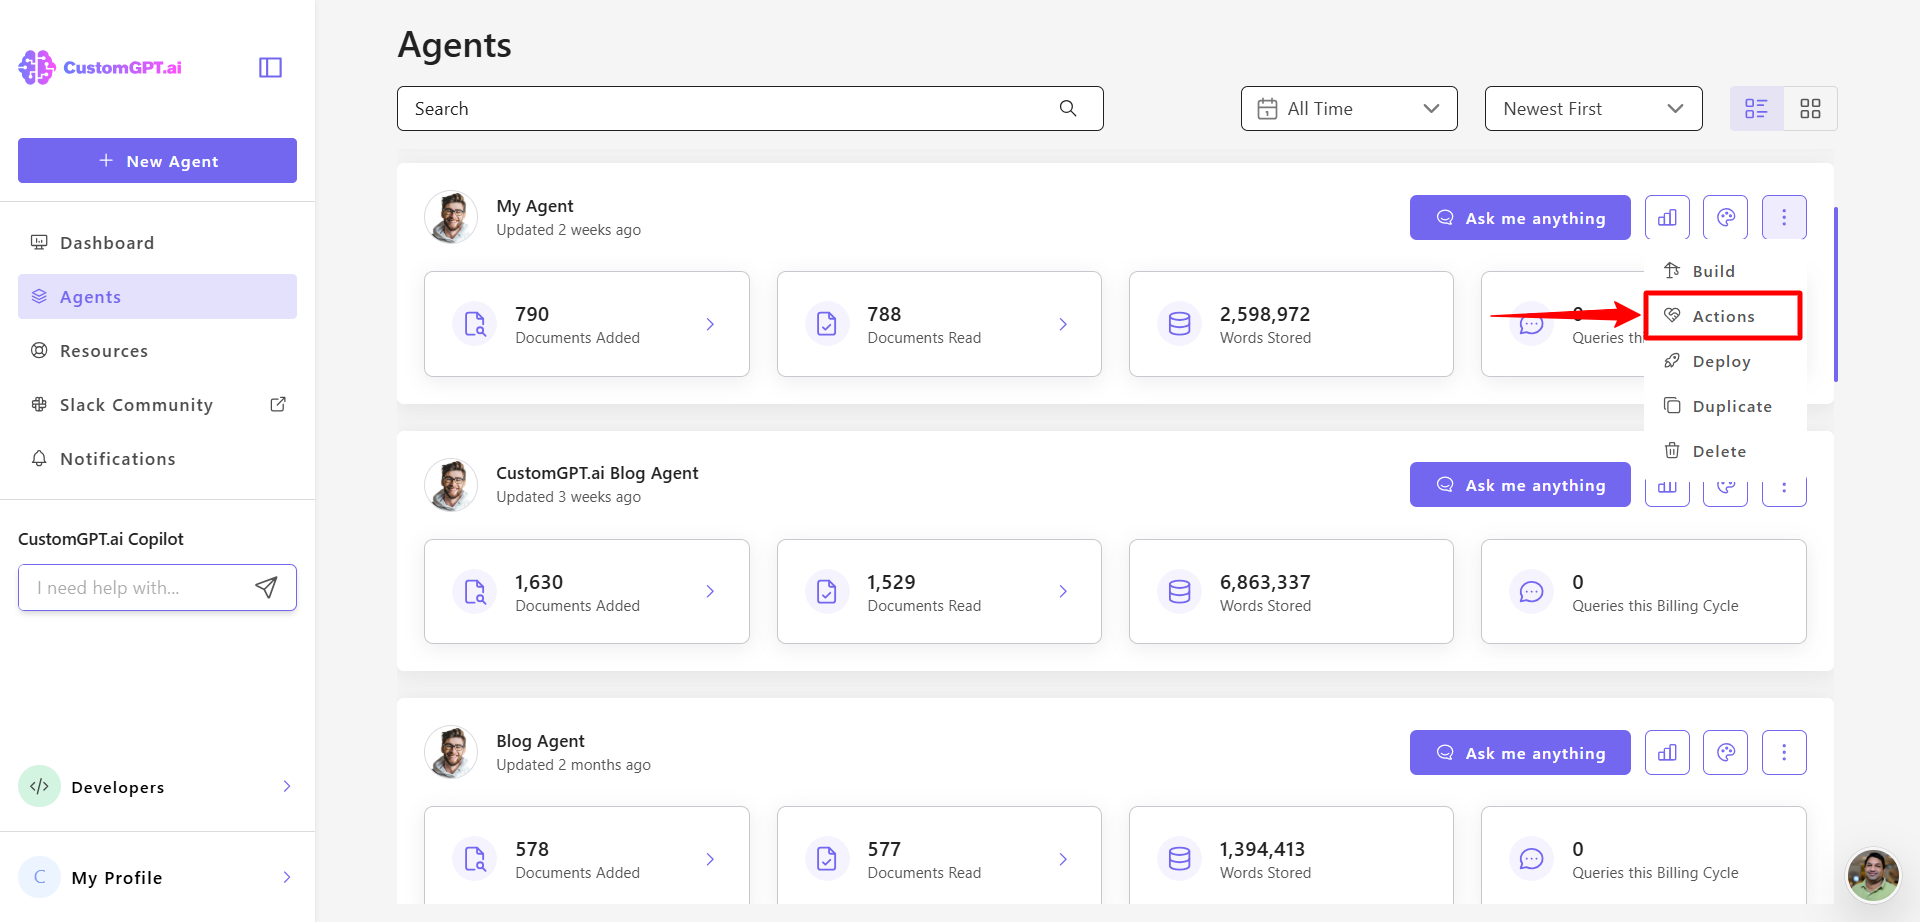
- Click Actions.
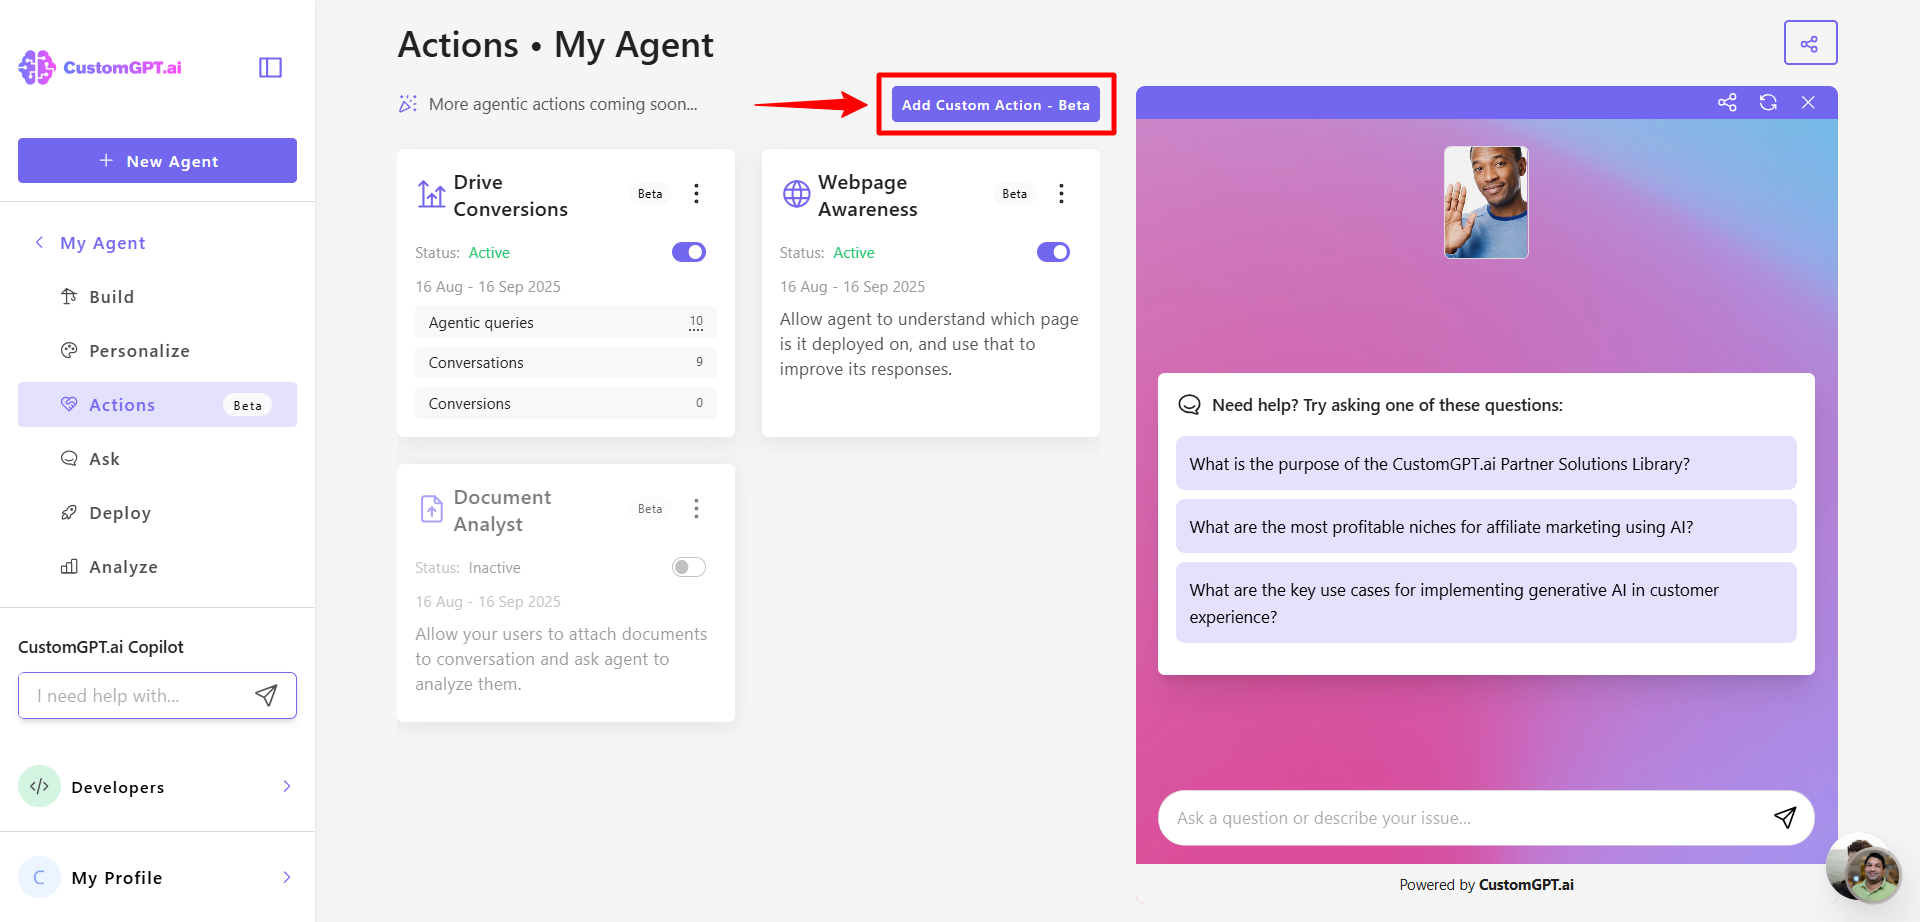
- On the Actions page, click Add Custom Action.
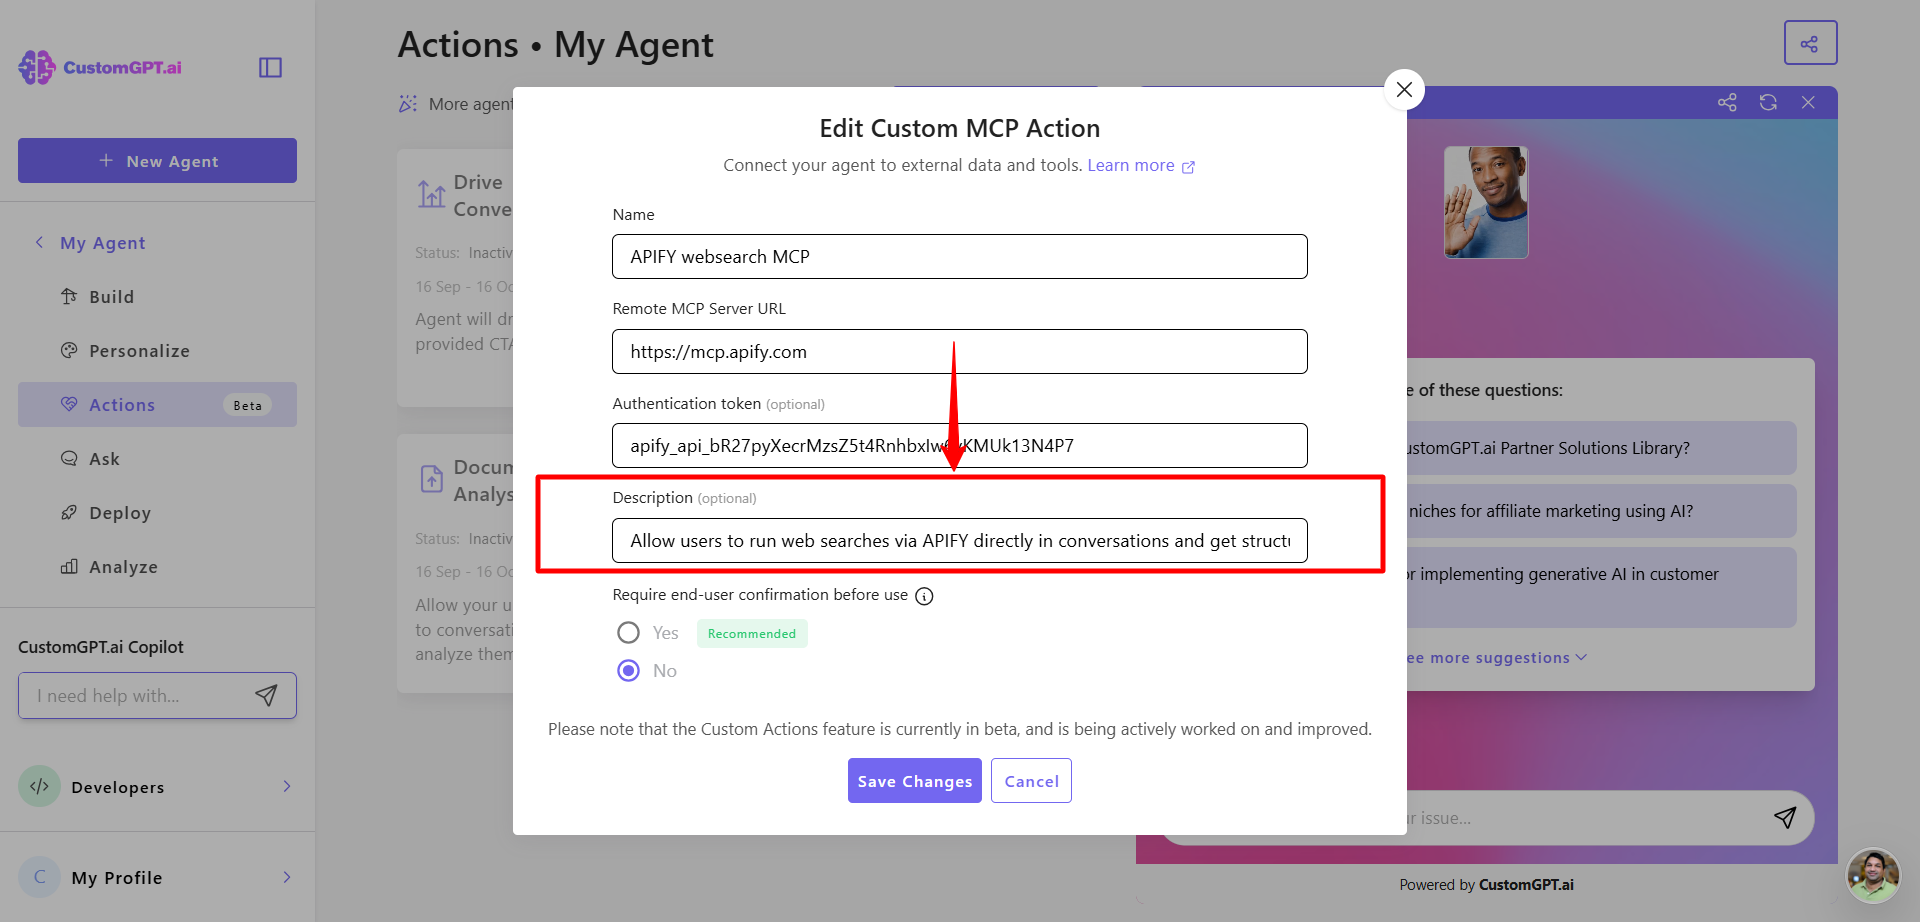
- Enter the name of custom action and MCP server URL.
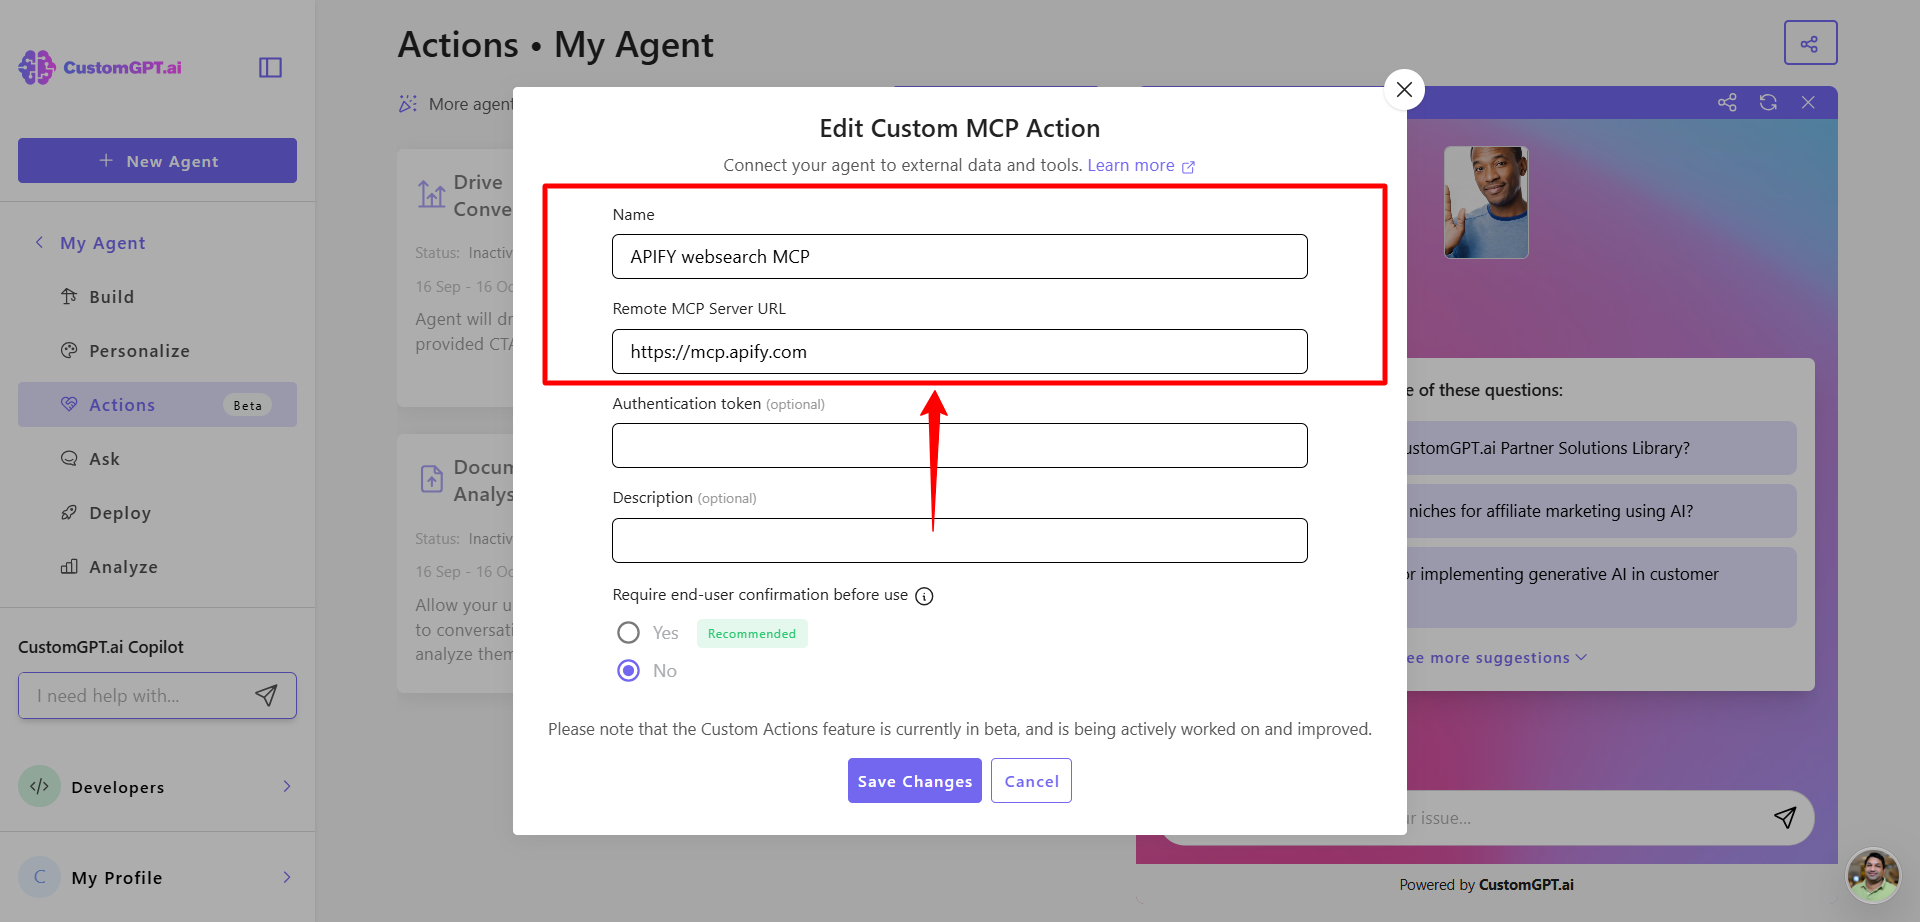
- If an MCP server requires authentication, you can provide an API token (OAuth support will be added soon).
Note:You can add up to 3 actions per agent. Learn more about Limits and cost.
👉 Explore publicly available MCP servers here: Awesome Remote MCP Servers
- Choose whether to Require end user confirmation before use:
- Yes: The agent will check if the action is suitable for a query and ask the user for confirmation before executing it. This happens every time and uses an additional query.
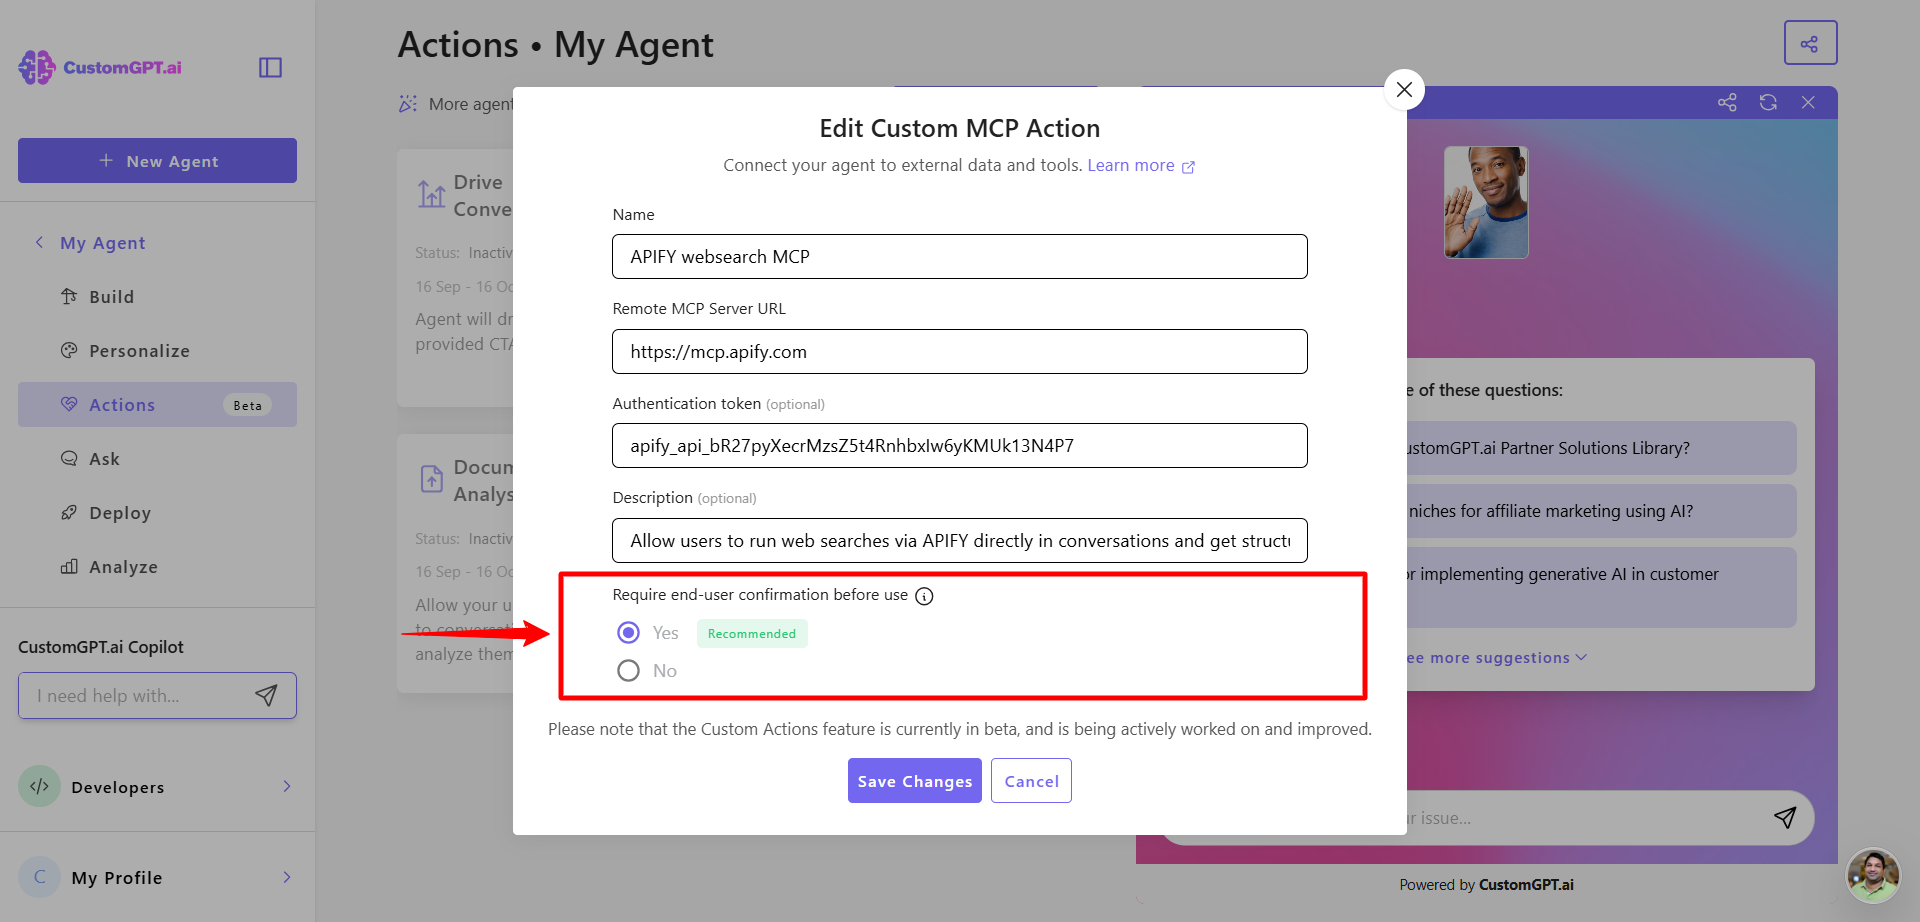
- No: The agent will execute the action automatically whenever it decides it is suitable.

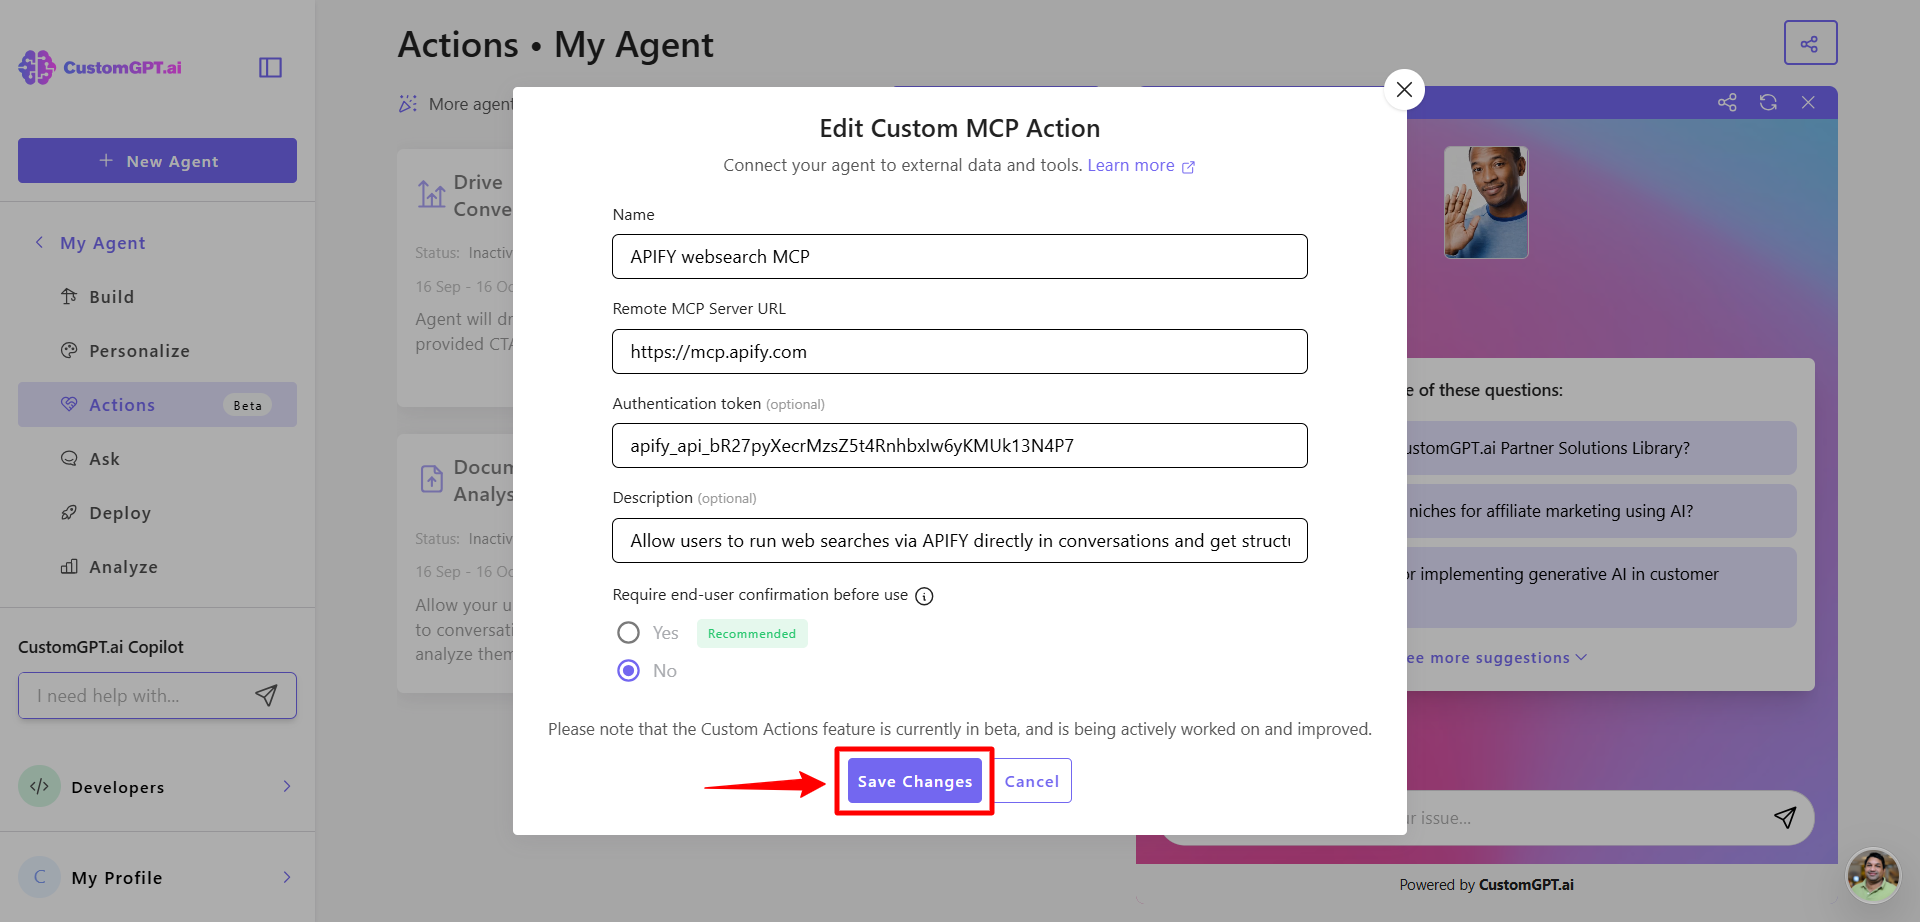
- Click Create Action to apply changes.
- Once added, your agent will automatically decide when to use the action, based on the conversation context.
Related articles
Updated 4 months ago
Did this page help you?