Connect to WordPress directly
This step-by-step guide explains how to integrate a CustomGPT.ai agent with your WordPress site to streamline content access and boost engagement through AI-driven interactions.
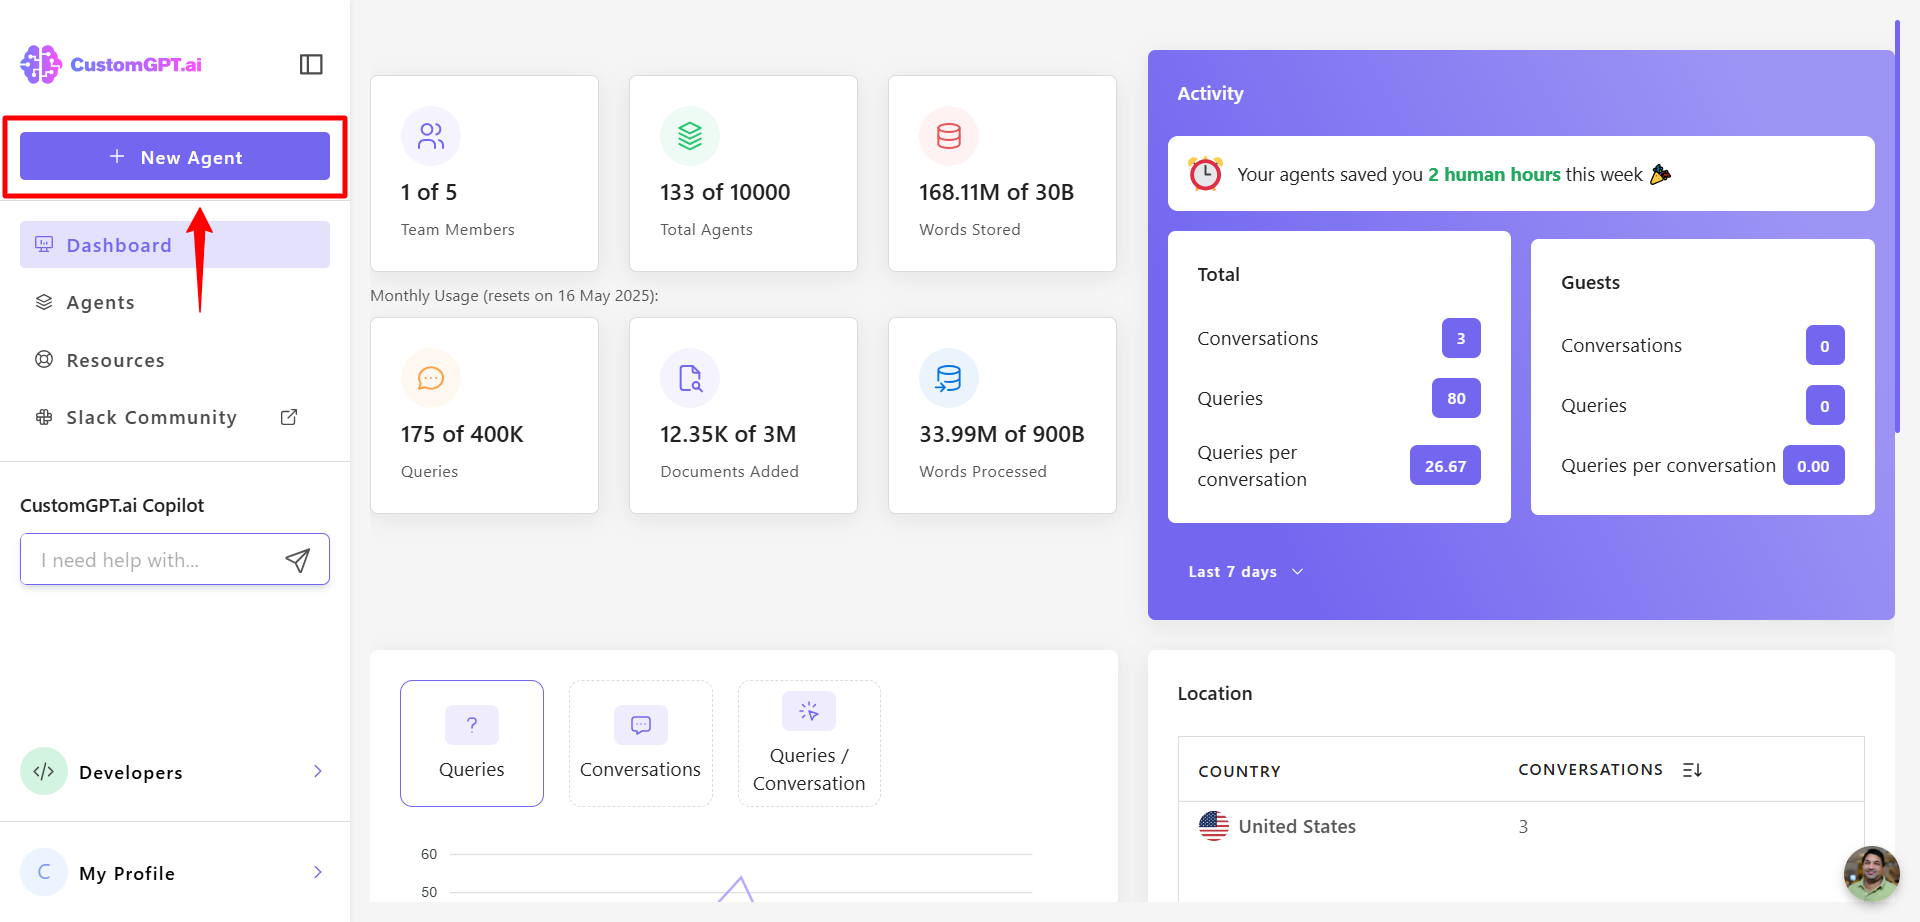
- Click New Agent to create a new AI agent.
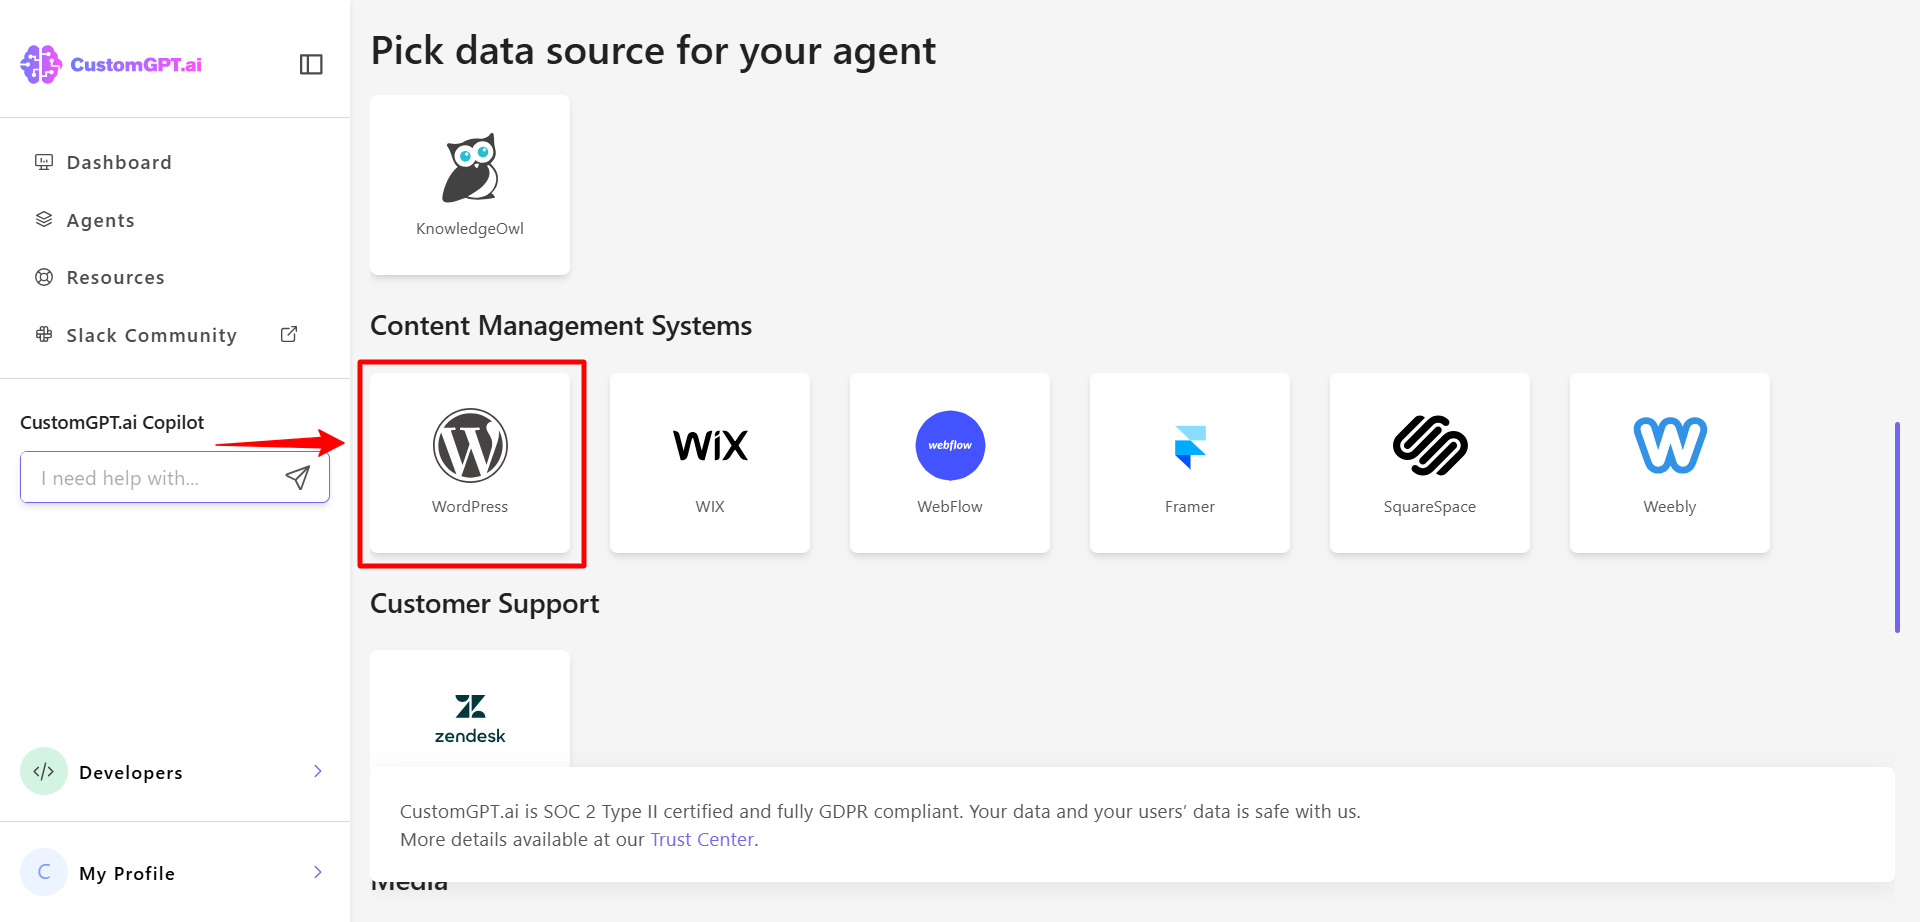
- Scroll to the Content Management System section and click WordPress.
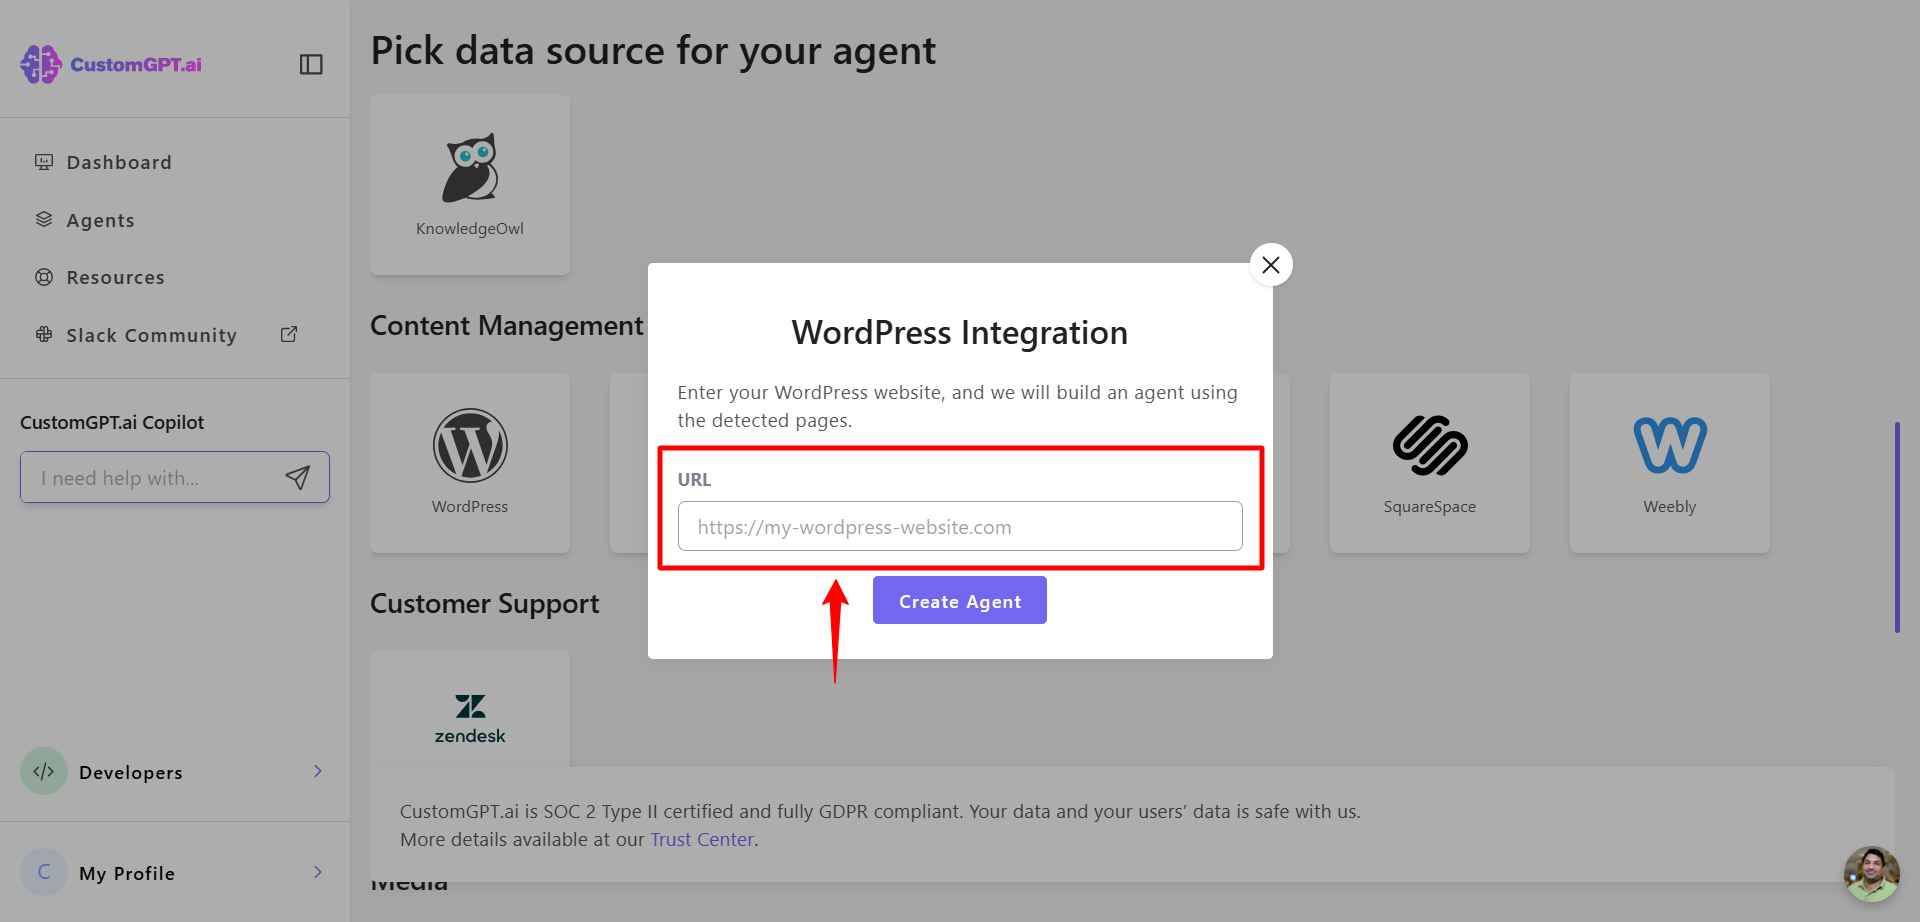
- Enter your WordPress website URL in the provided field and CustomGPT.ai will automatically detect the pages on your site.
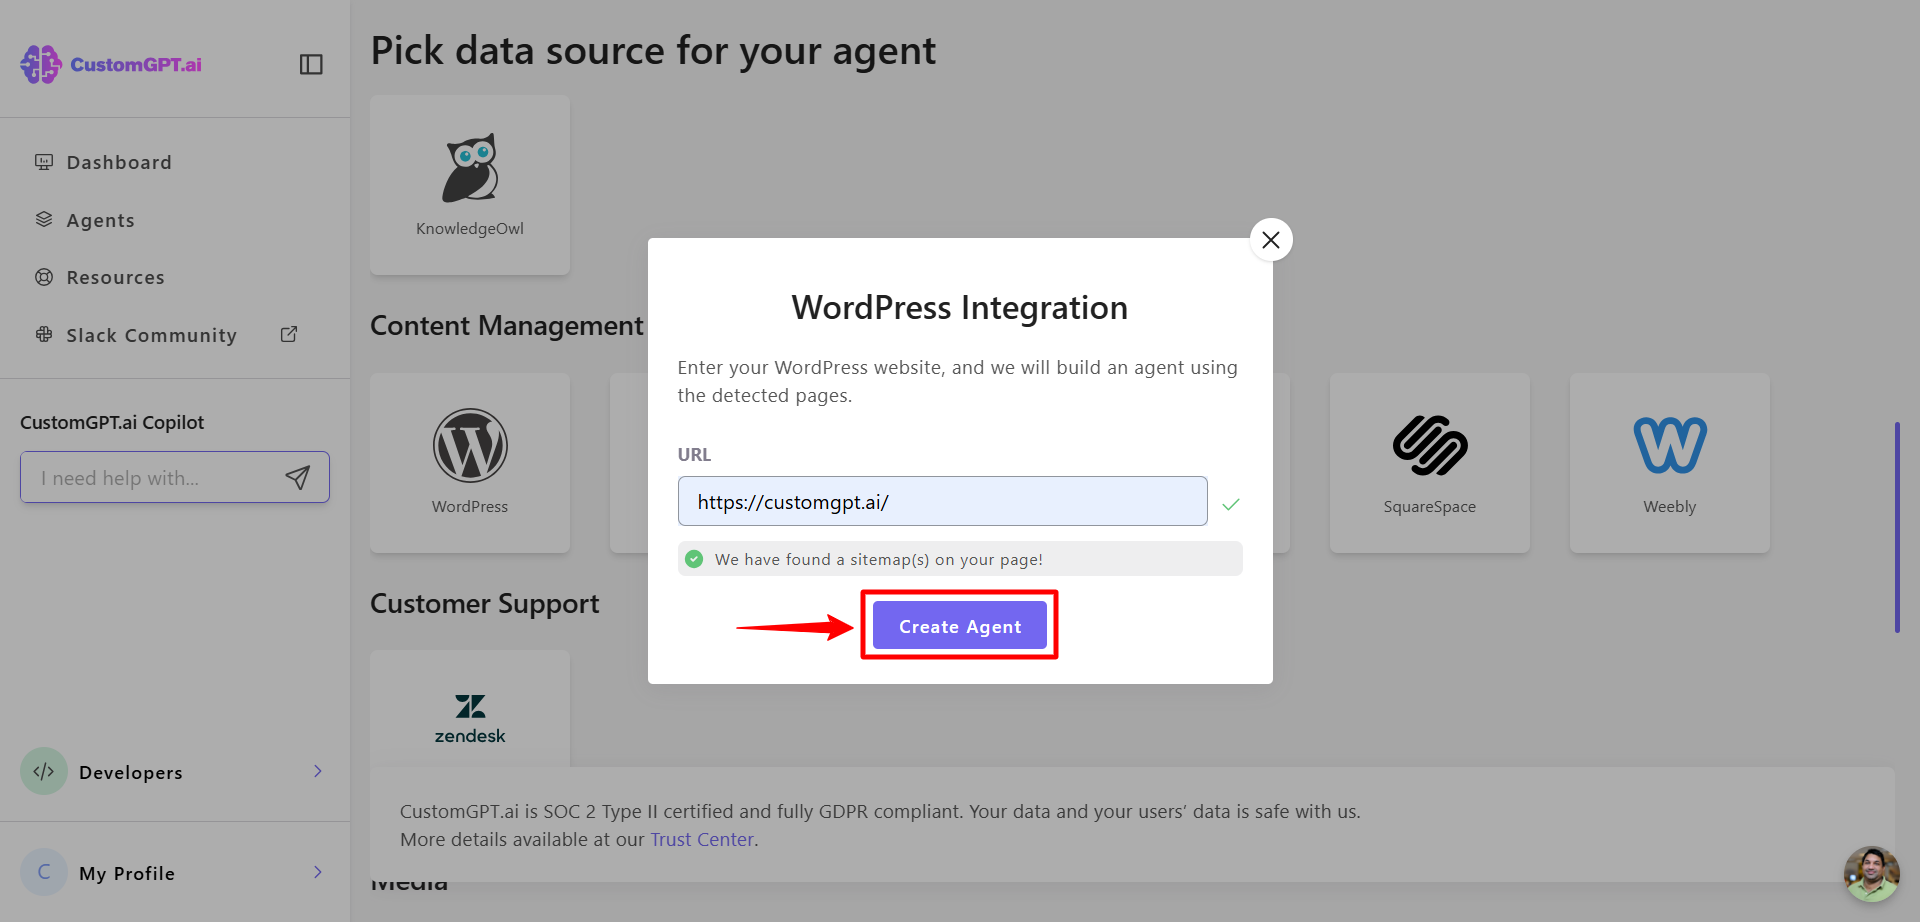
- Click Create Agent to build your AI agent using the detected pages.
- Customize your AI agent in the Personalize settings and adjust its appearance, language, and style to match your brand.

Updated about 1 year ago
Did this page help you?