
Enable Freshdesk auto-sync
Keep your Freshdesk source current by syncing new and updated content on a schedule.
When enabled, your Freshdesk source syncs on a schedule you choose, without you having to trigger it manually.
Before you start
- If you haven't connected a Freshdesk source yet, refer to Connect Freshdesk to your agent.
- Auto-sync is available on Enterprise.
Steps
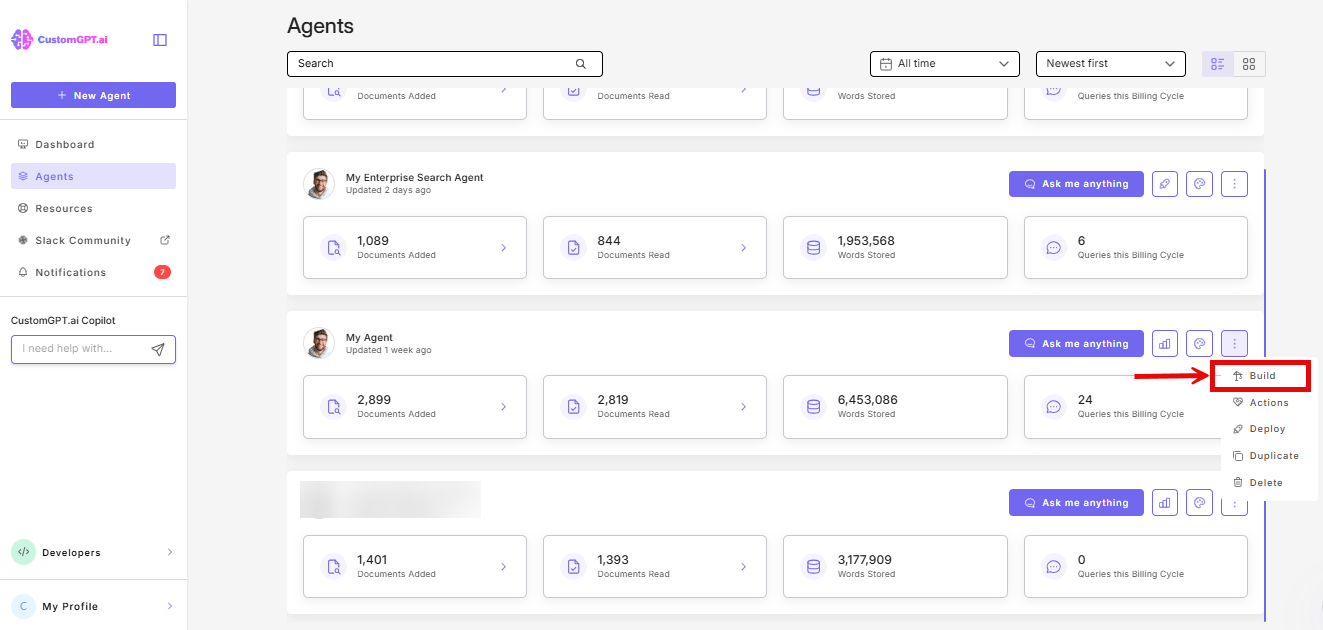
- On the agent you want to sync, click the three dots and select Build.
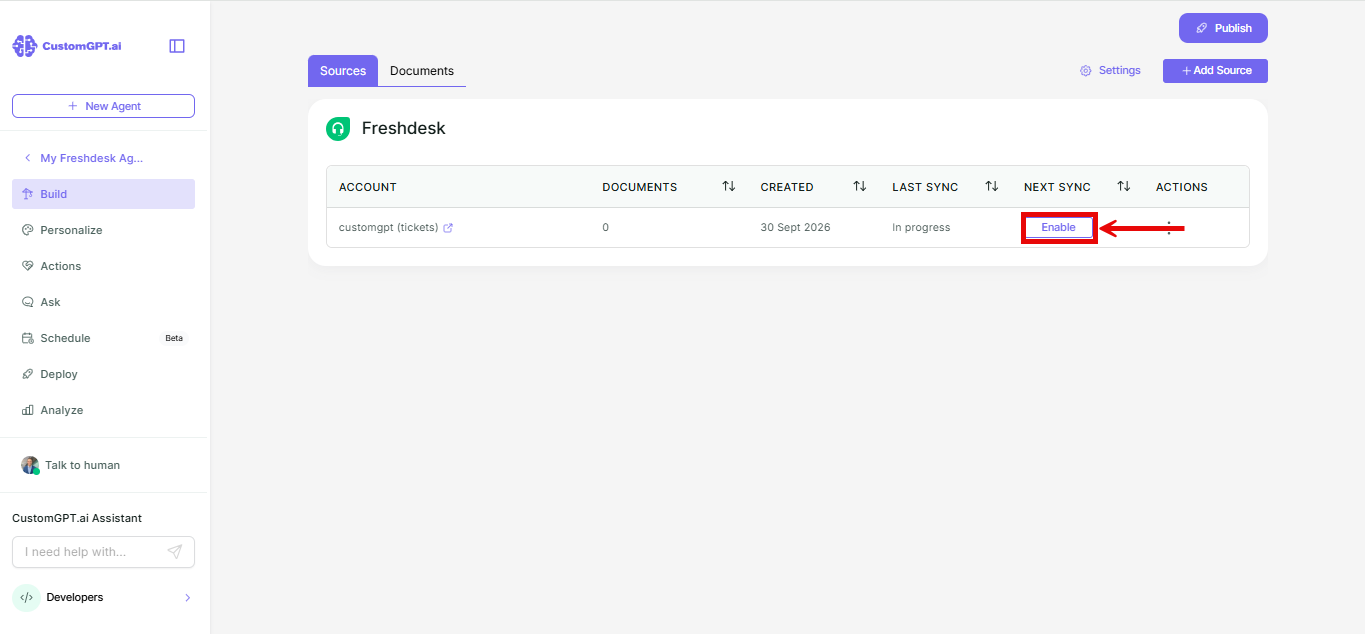
- Go to Sources, find the Freshdesk row you want to sync, and click Enable under the Next Sync column.
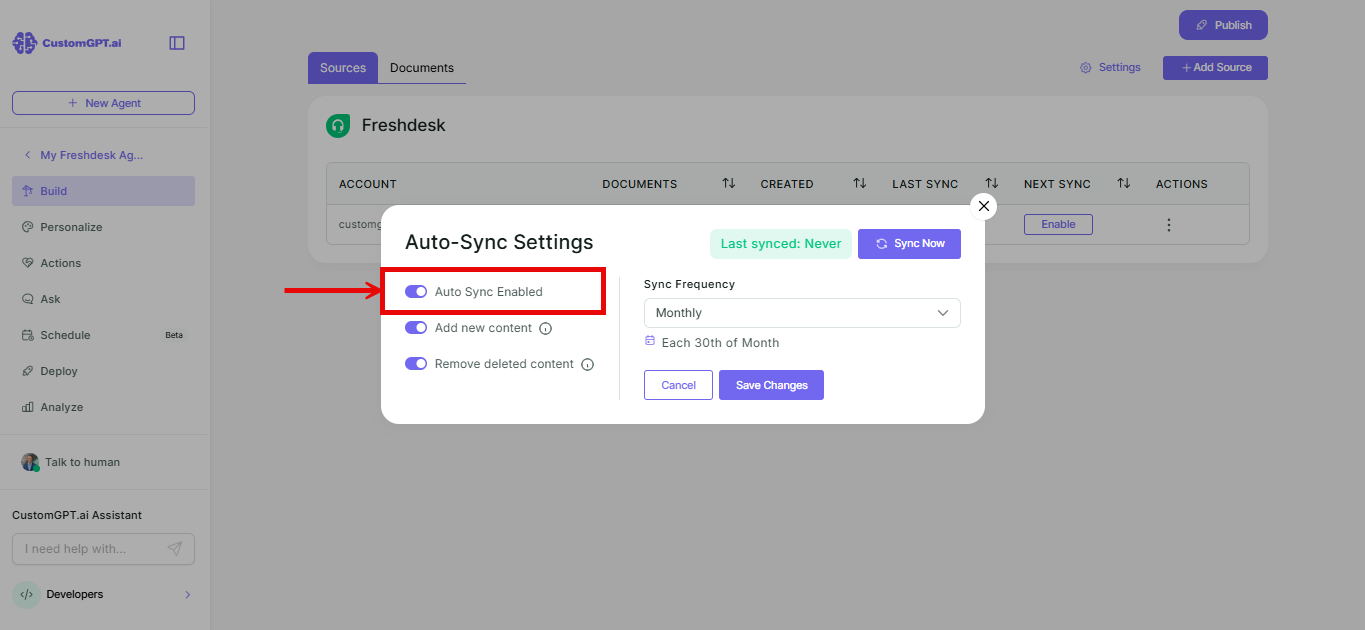
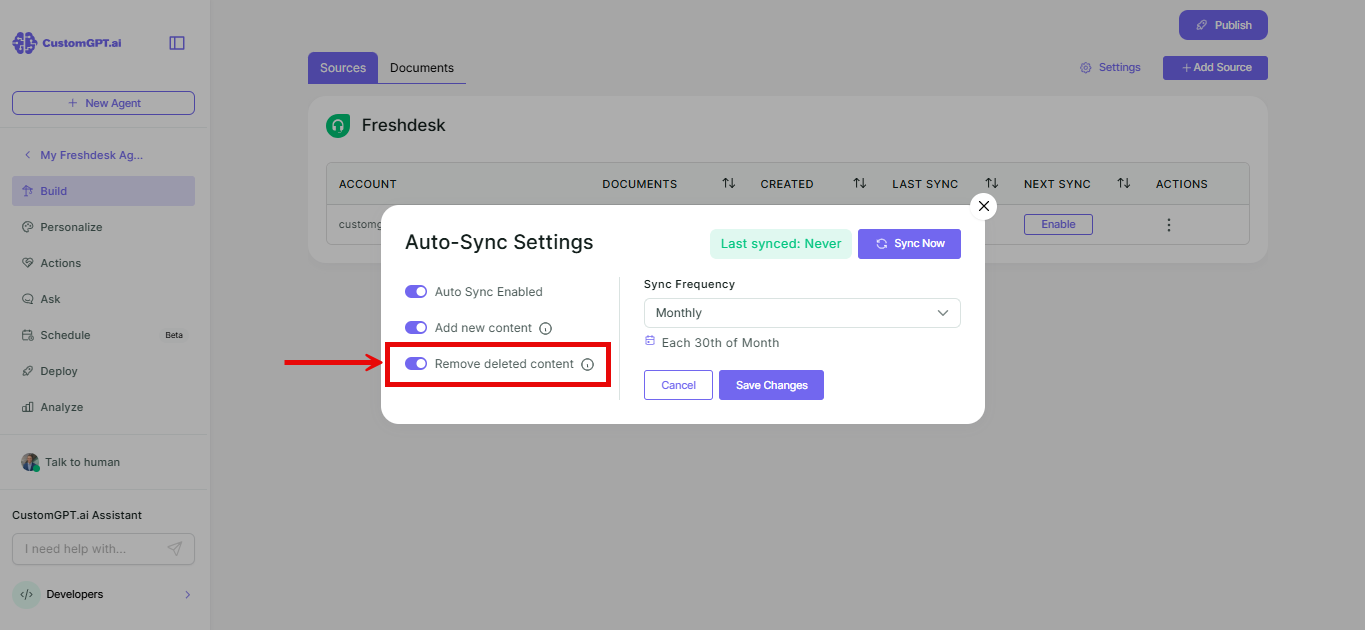
- In the pop-up window, toggle on Auto-sync enabled.
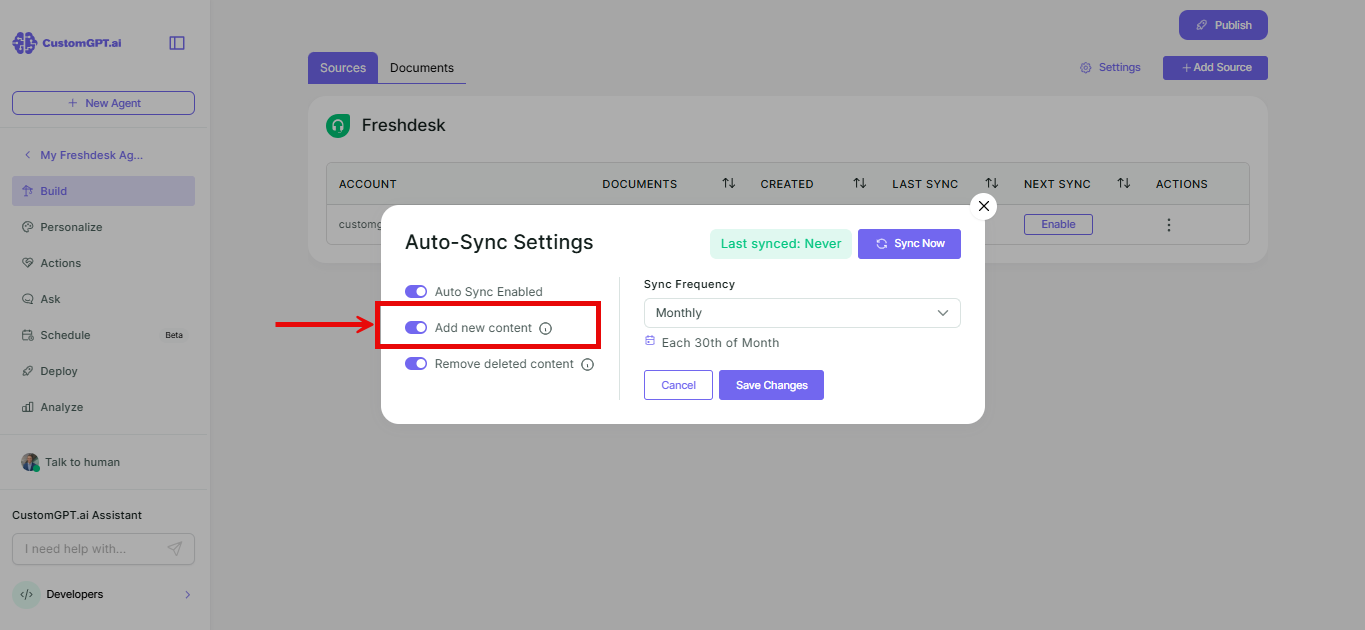
- Toggle on Add new content to automatically add new tickets when found.
- Toggle on Remove deleted content to remove tickets that have been deleted from Freshdesk.
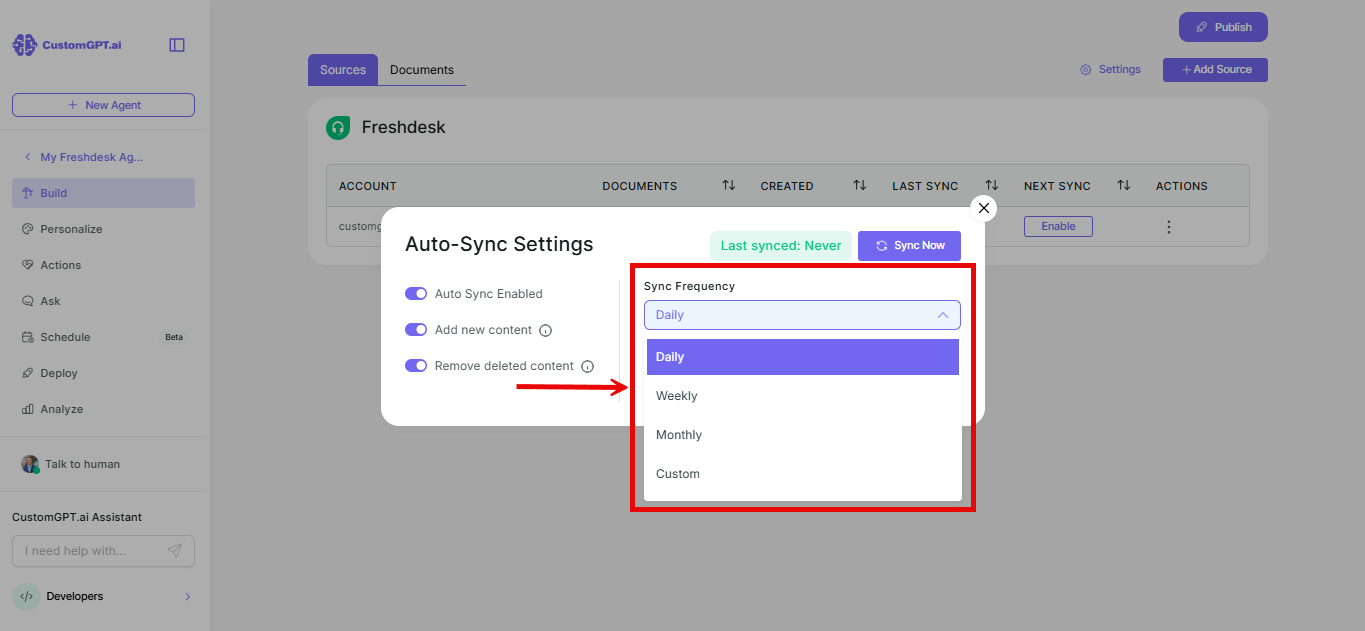
- Choose how often you want the sync to run: Daily, Weekly, Monthly, or Custom.
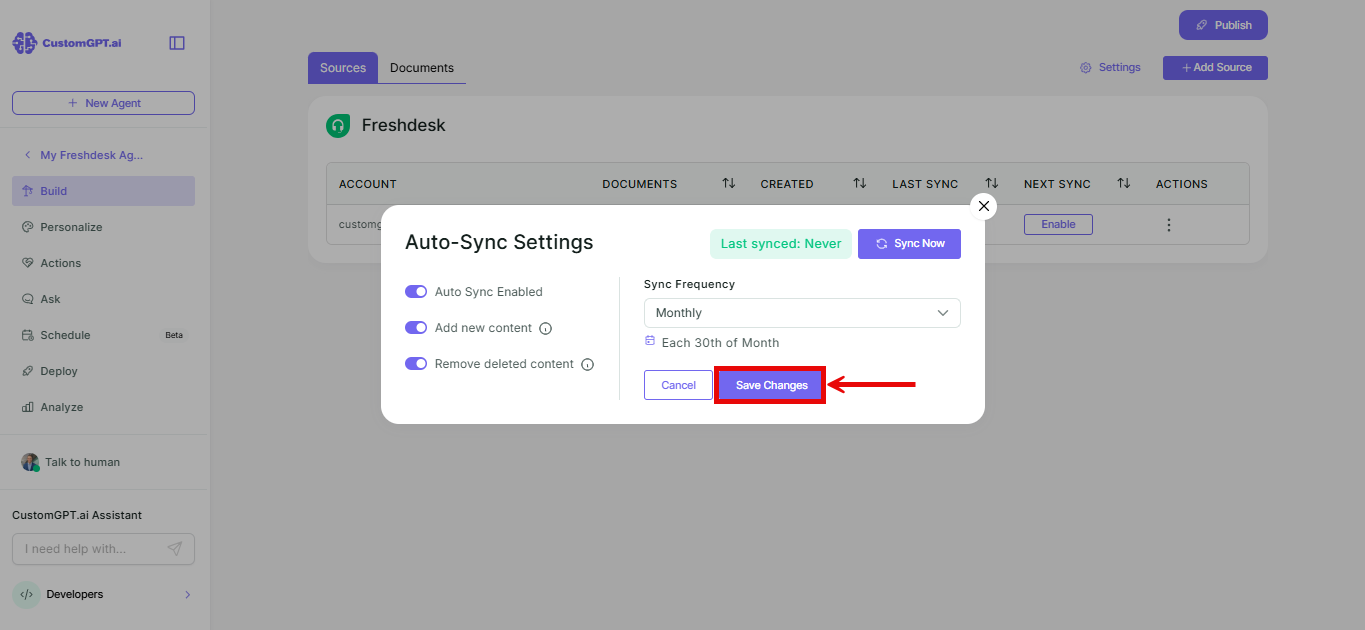
- Click Save Changes. Auto-sync is now active.
Things to know
- New and updated content shows up after your next scheduled sync runs.
- To change your API key or ticket anonymization setting, refer to Manage your Freshdesk connection.
Related articles
Updated 20 days ago
Did this page help you?