
Connect a CustomGPT.ai agent using Connectors
This guide shows you how to connect another CustomGPT.ai agent to your agent using Connectors.
Once connected, the other agent can read messages, access analytics, or send messages on your agent's behalf, depending on the permissions you grant. For example, this is how you'd connect an analytics agent to report on another agent's conversations - refer to Connect an analytics agent to your agent.
Connect a CustomGPT.ai agent
- Click the three dots menu on your agent.
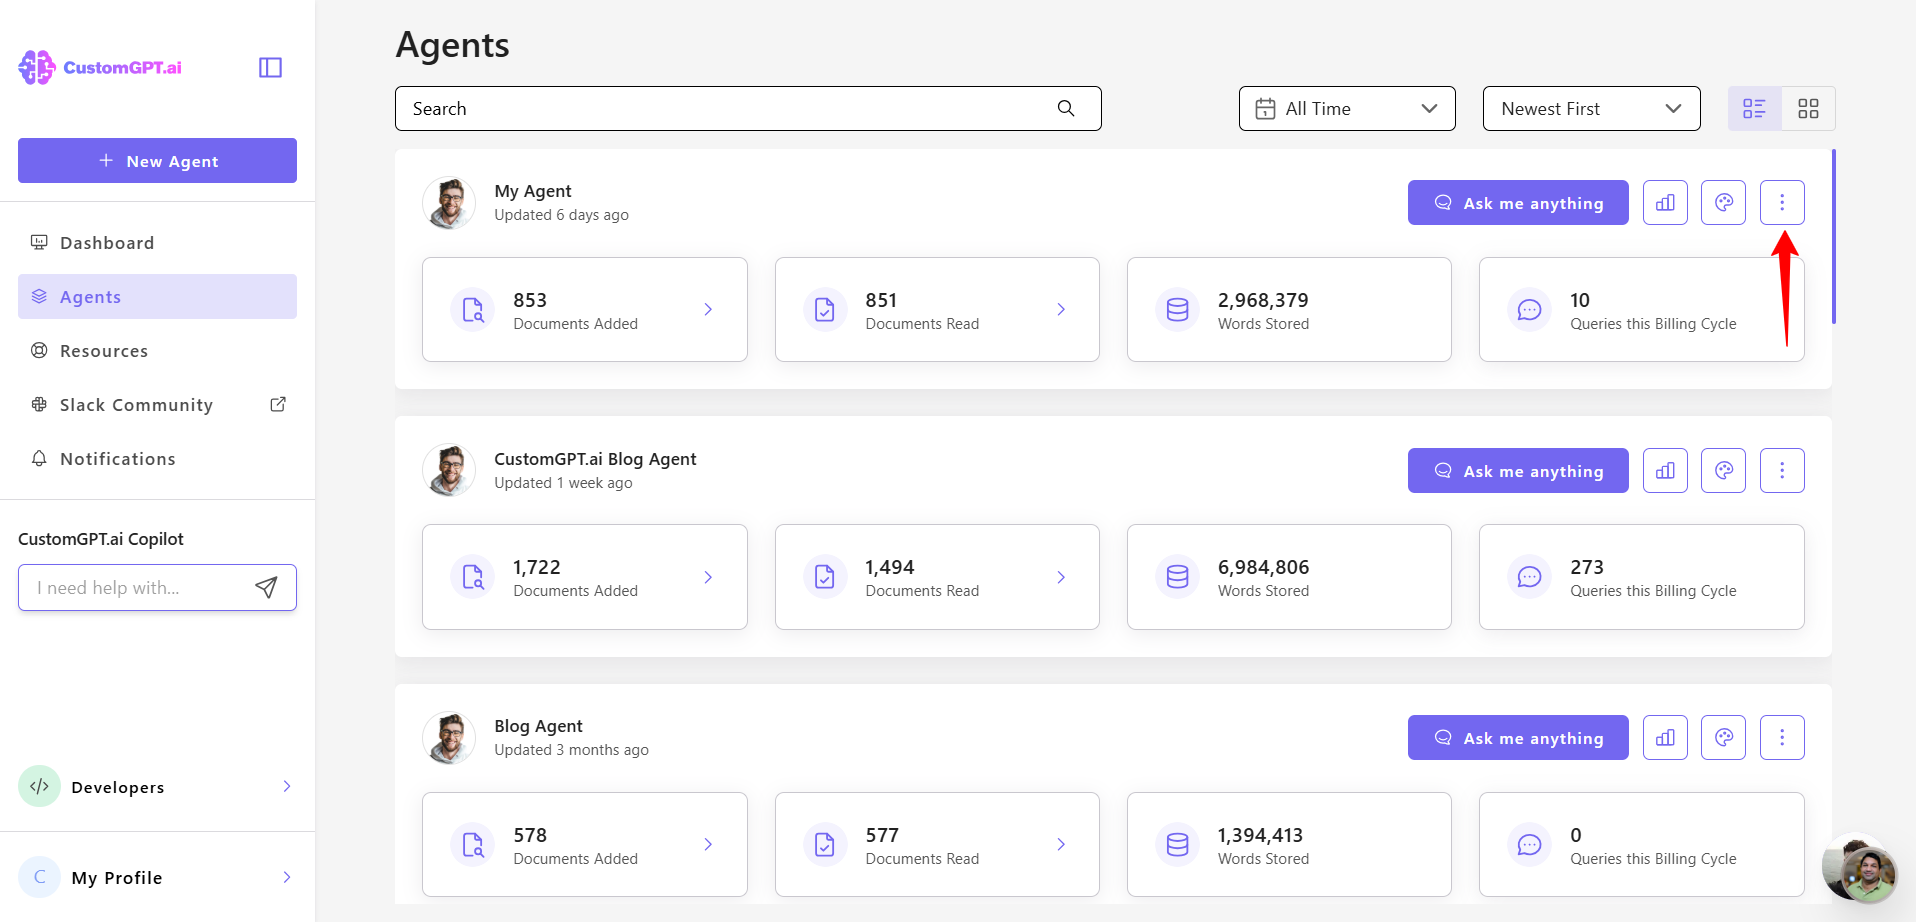
- Select Actions.
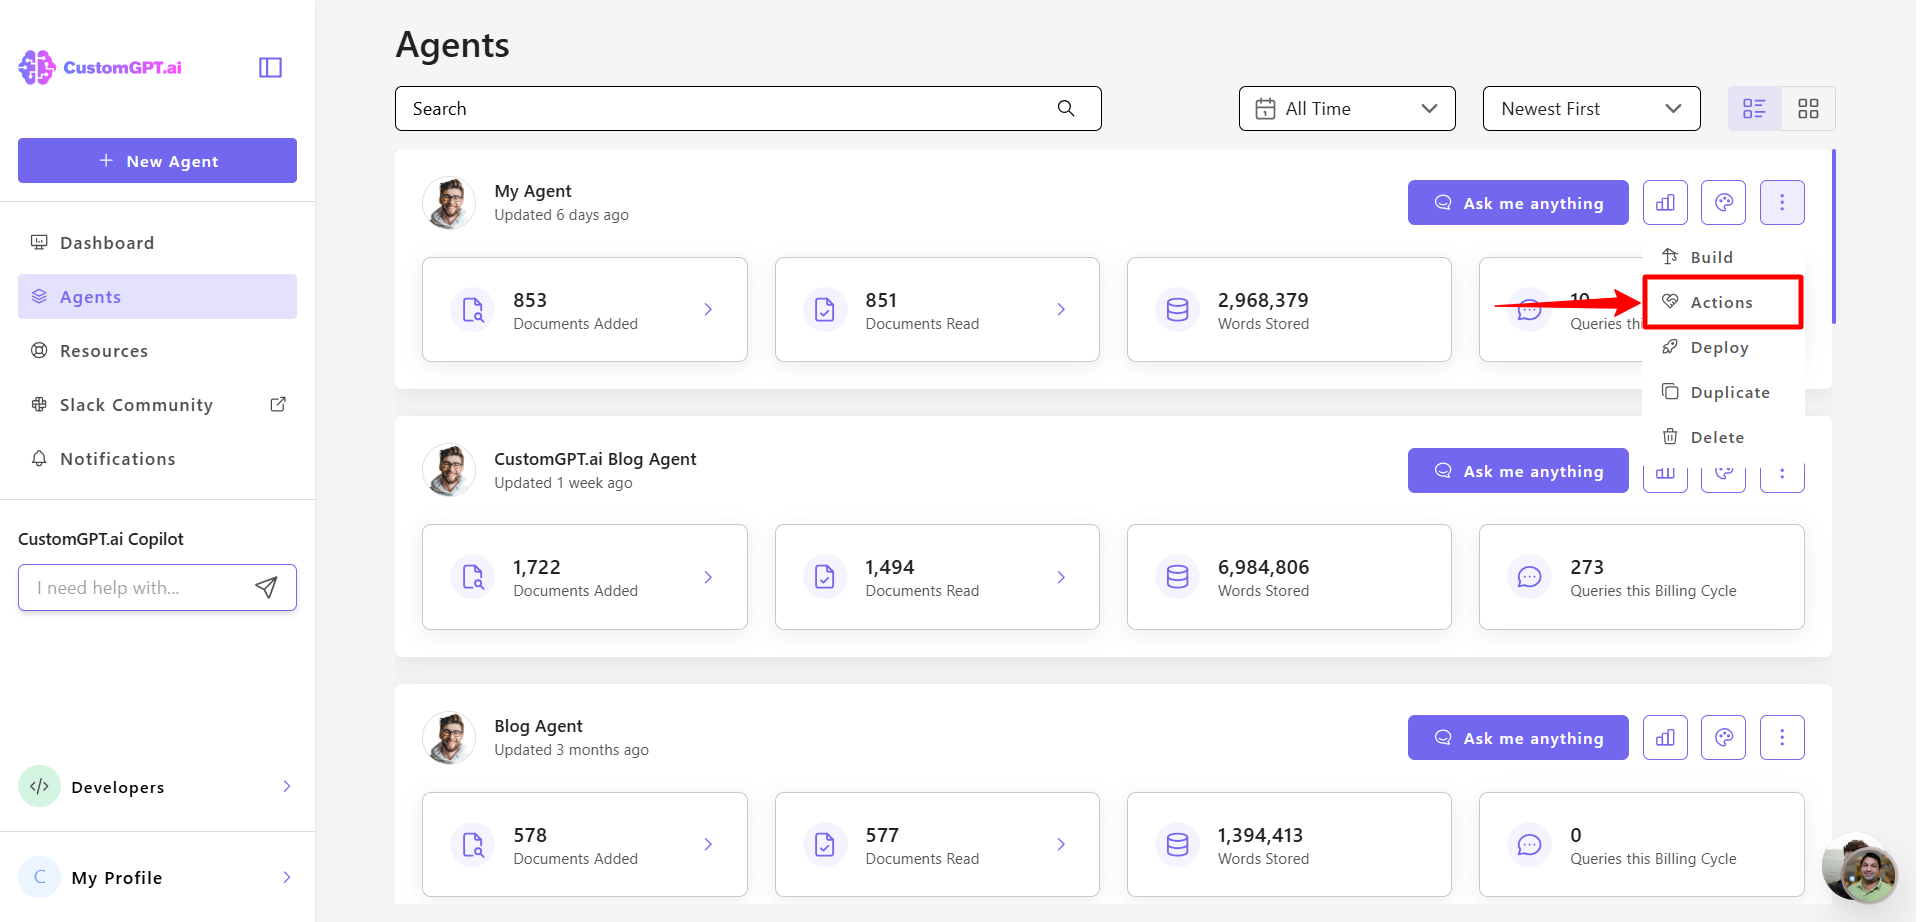
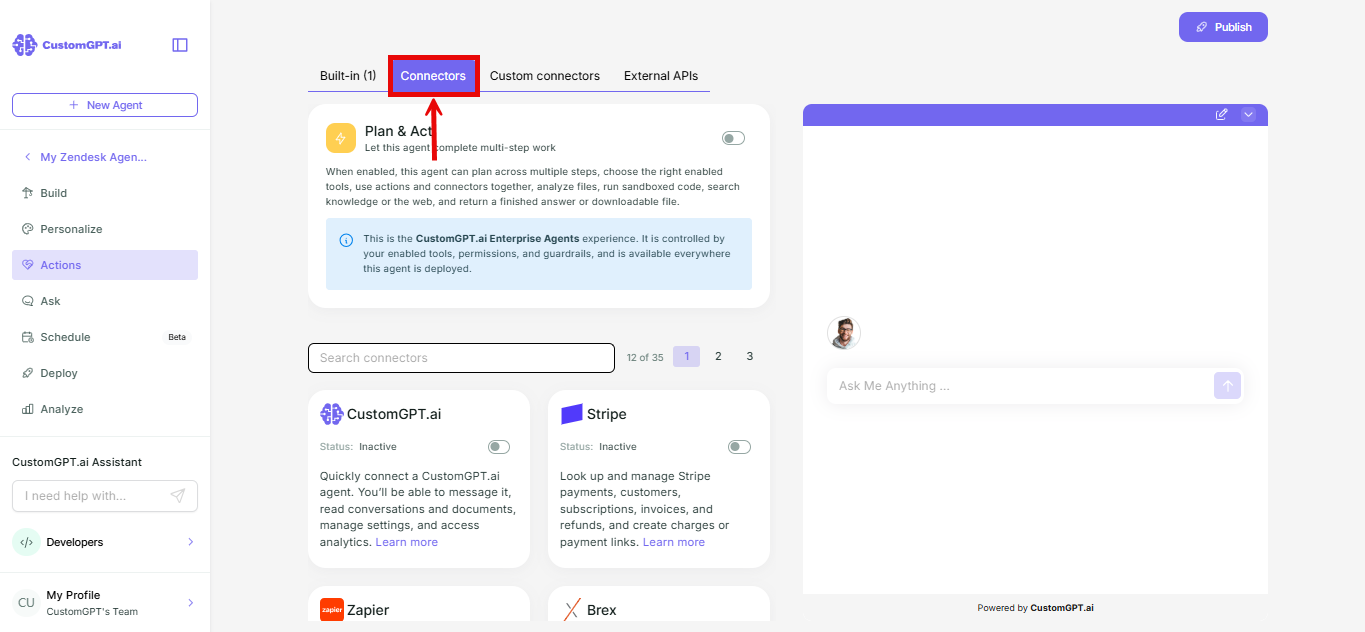
- Select the Connectors tab.
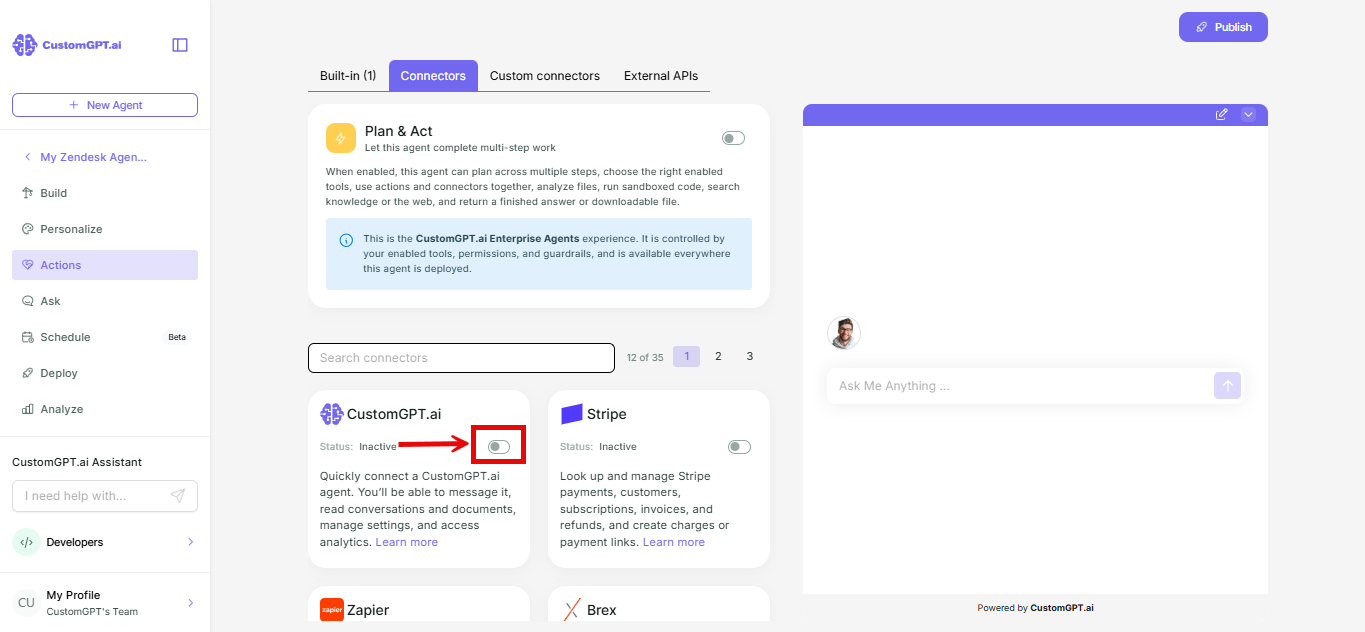
- Toggle on the CustomGPT.ai card.
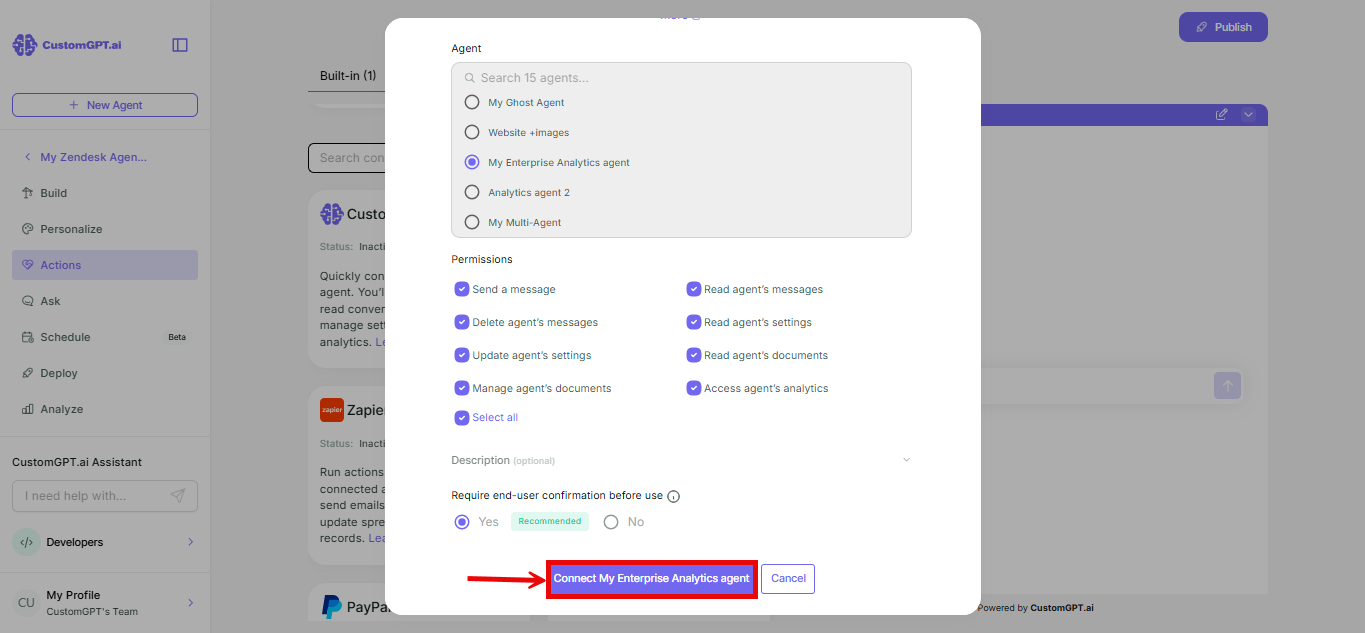
- Select the agent you want to connect from the list.
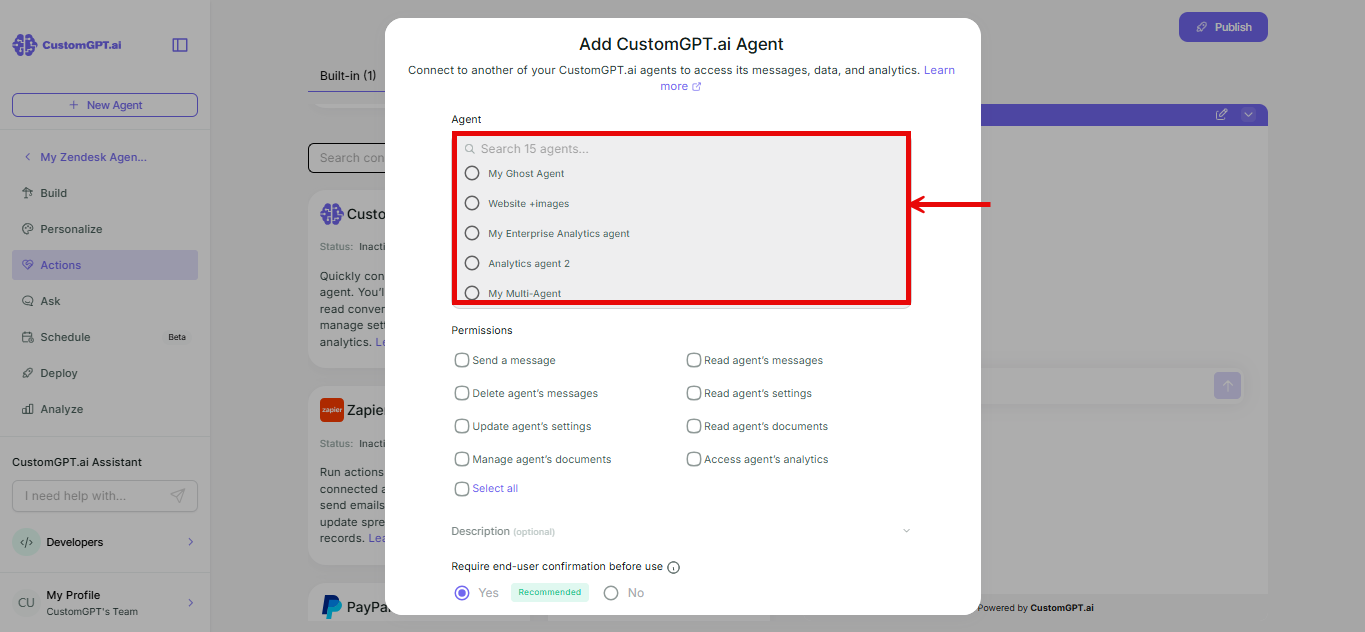
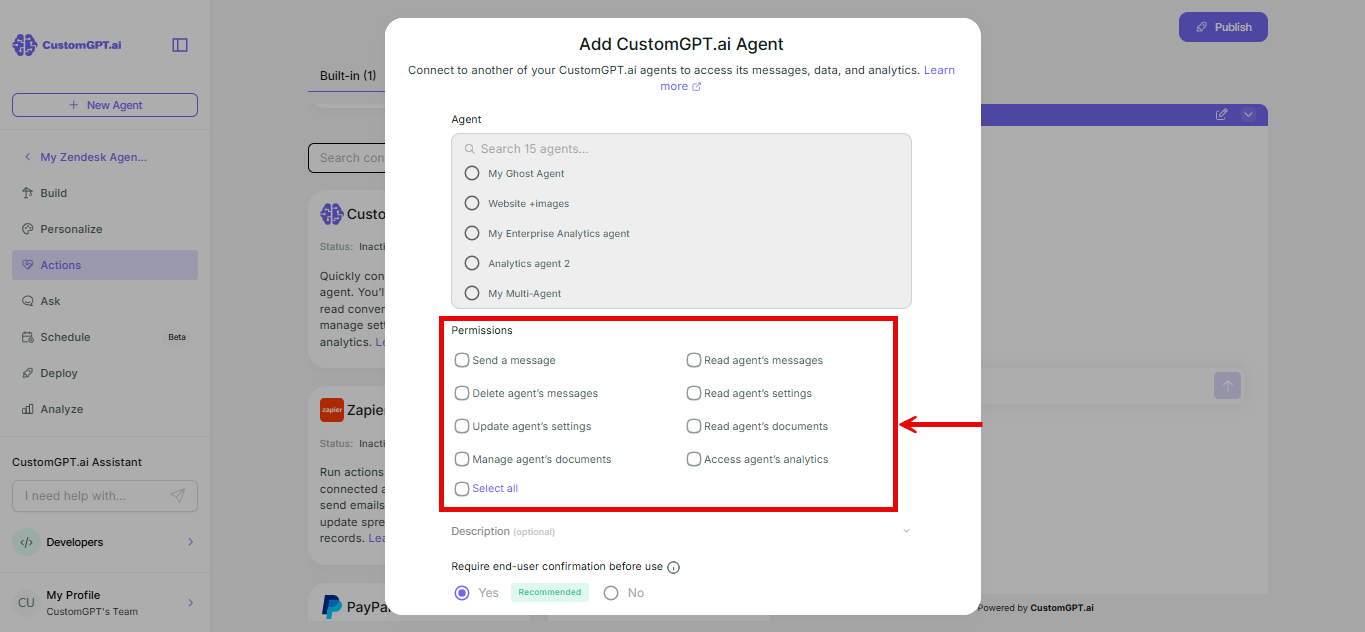
- Select the permissions to assign to that agent.
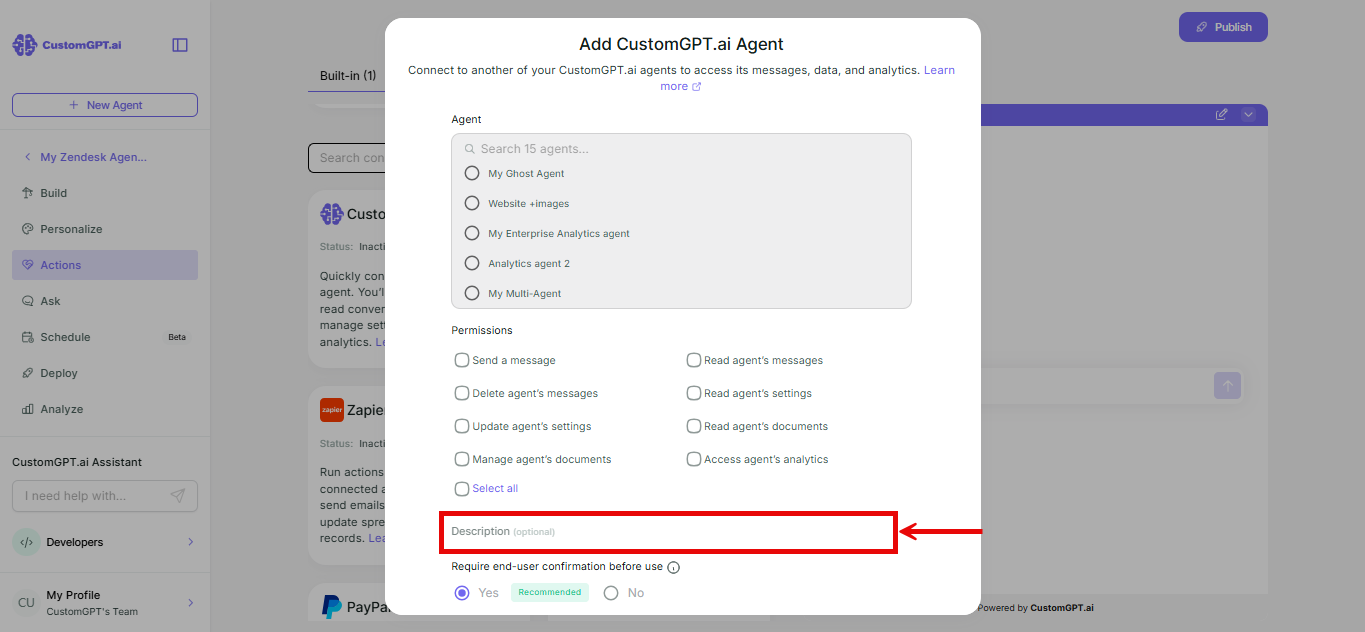
- Enter a description for the connection.
- Choose whether to Require end-user confirmation before use: Yes or No.
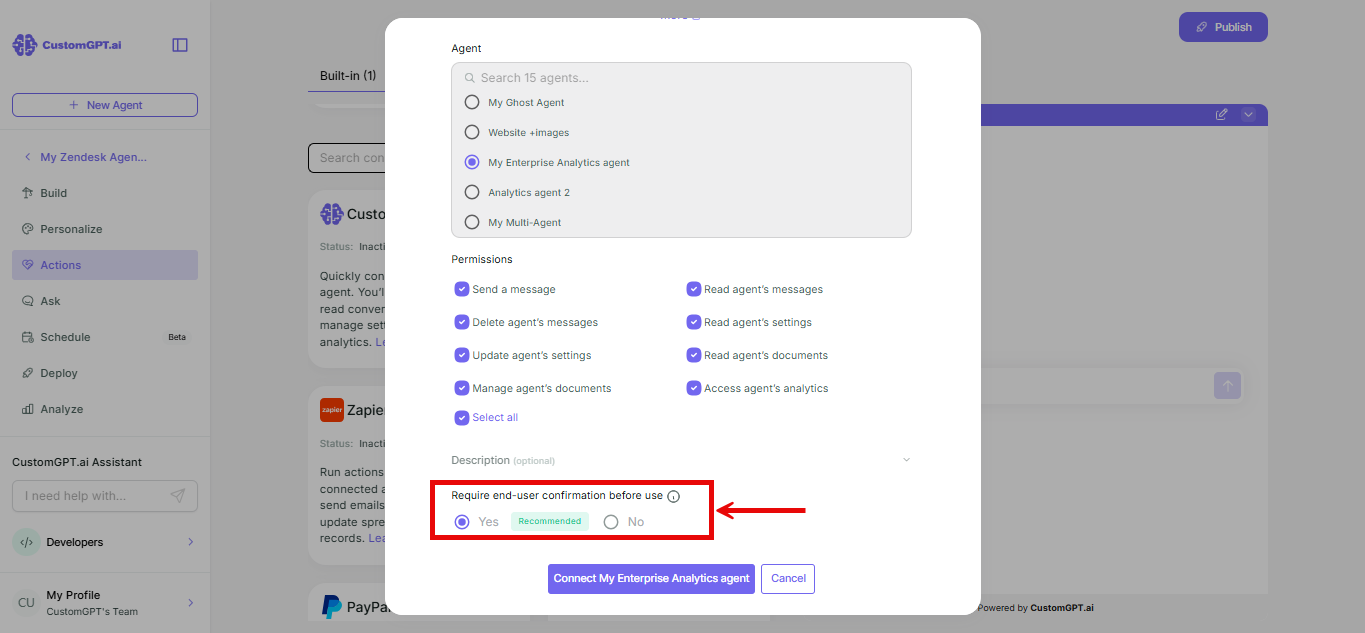
Note: Yes - the agent asks the end user to approve before executing an action against the connected agent. Each confirmation uses one additional query. No - the agent acts on the connected agent automatically.
- Click Connect my agent.
Things to know
- You can connect one CustomGPT.ai agent at a time. For more than one, connect the first one here and add the rest as Custom Connectors instead. Refer to Add a custom MCP connector.
- To check which agent is currently connected, look at the CustomGPT.ai card on the Connectors tab.
- Removing the connection disconnects the agent entirely.
- The permissions you grant here are separate from those on the connected agent's own Deploy > MCP server page. Changing one doesn't change the other.
- Once connected, a CustomGPT.ai agent behaves like any other connector: it counts toward your enabled-connectors limit and costs the same per use. Refer to Limits and cost for the exact numbers.
Related articles
Updated 20 days ago
Did this page help you?