
Connect your analytics agent with an API key
Connect your analytics agent to another agent using an API key, so it can read that agent's conversations and analytics.
This guide walks you through Method A of connecting an analytics agent: an API key. Takes about two minutes. If you haven't created your analytics agent yet, refer to Connect an analytics agent to your agent first.
Steps
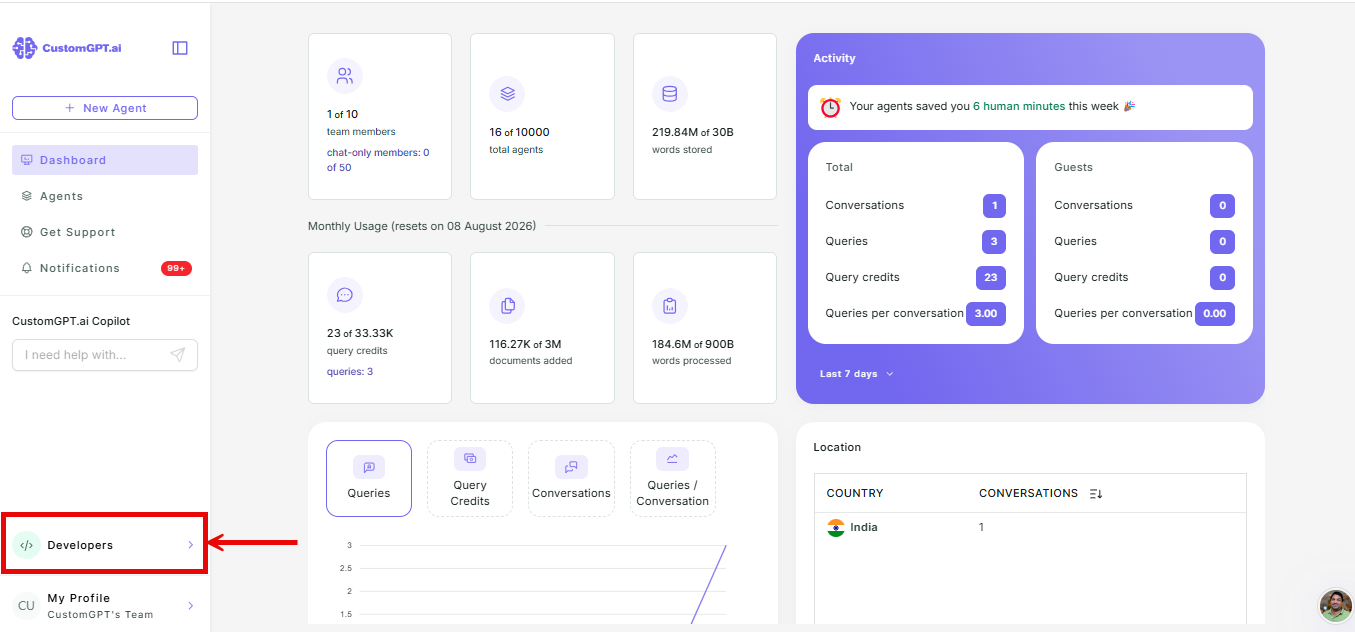
- From the dashboard, go to the Developers section.
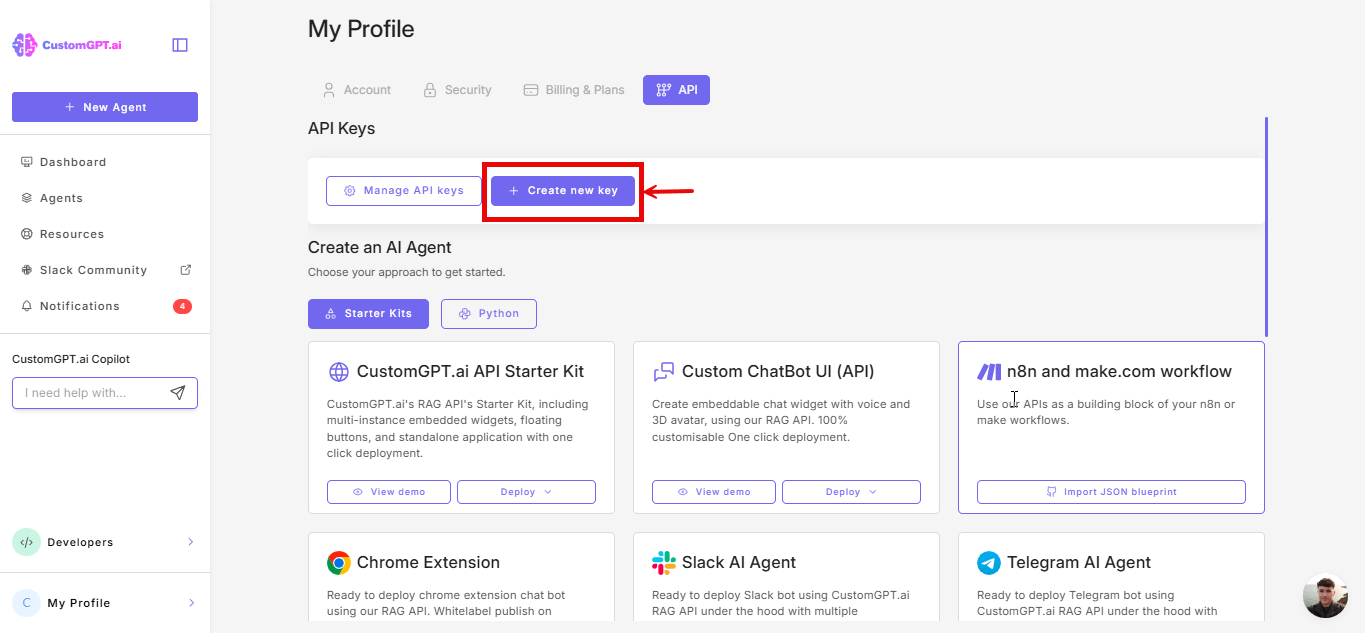
- Click Create new key. Give it a name you'll recognize later - for example,
Analytics key.
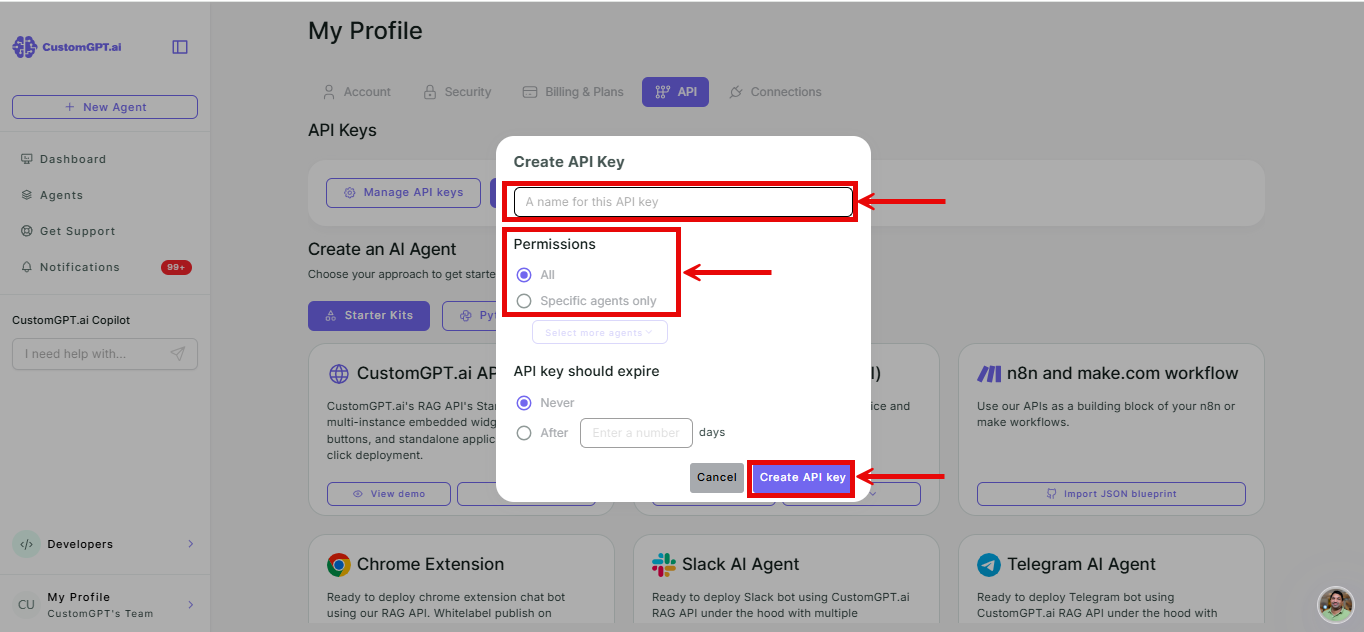
- Give it a name, and then set its scope and create the key.
-
Name: give it a name you'll recognize later - for example,
Analytics key. -
Scope: set this to all agents in your account, including any you add in the future. This way you won't need to come back and update the key every time you connect a new agent.
-
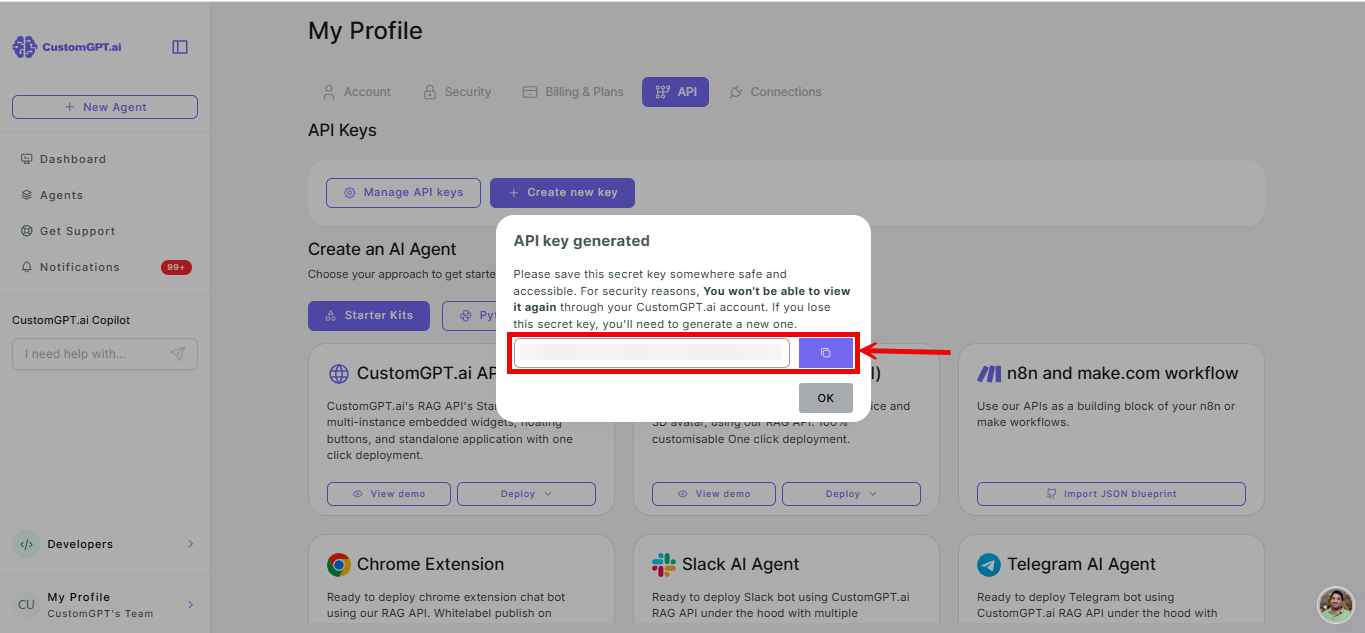
- Copy the key now. Most platforms only show the full key value once, at creation. If you navigate away without copying it, you won't be able to view it again and will need to generate a new one.
- Open your analytics agent - the one you created earlier - from the dashboard.
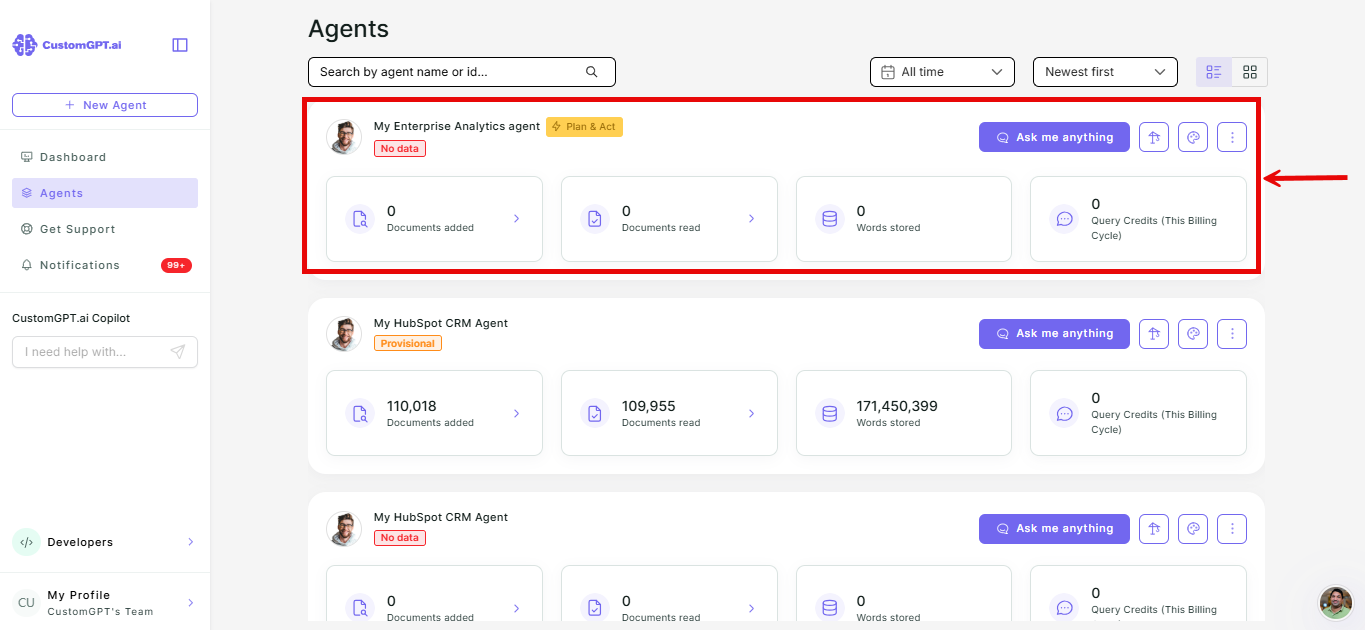
- Go to Actions.
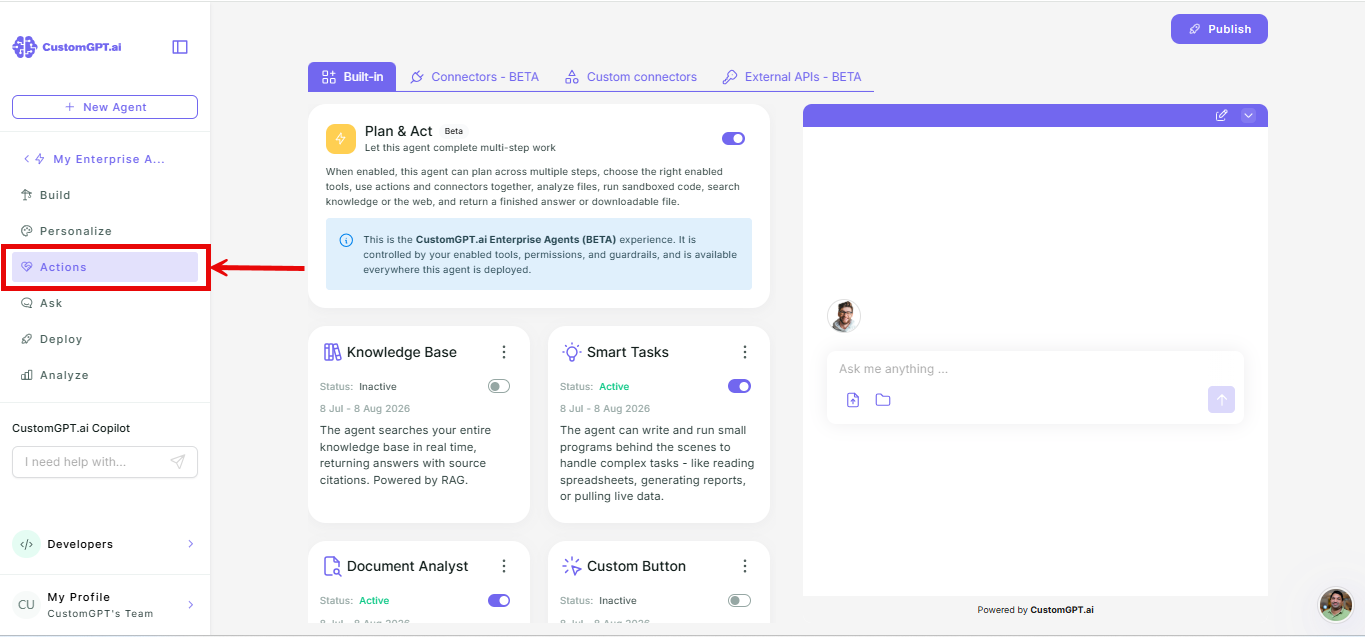
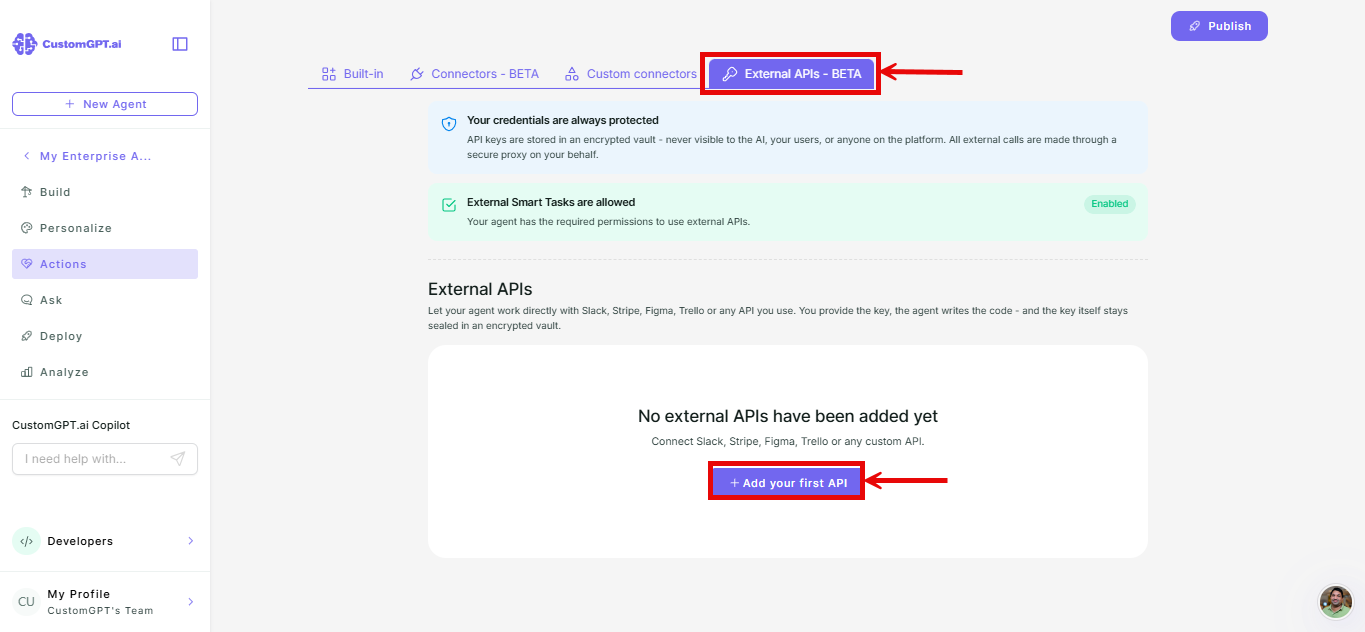
- Select the External APIs - Beta tab, then click Add your first API (or Add API if you already have integrations listed).
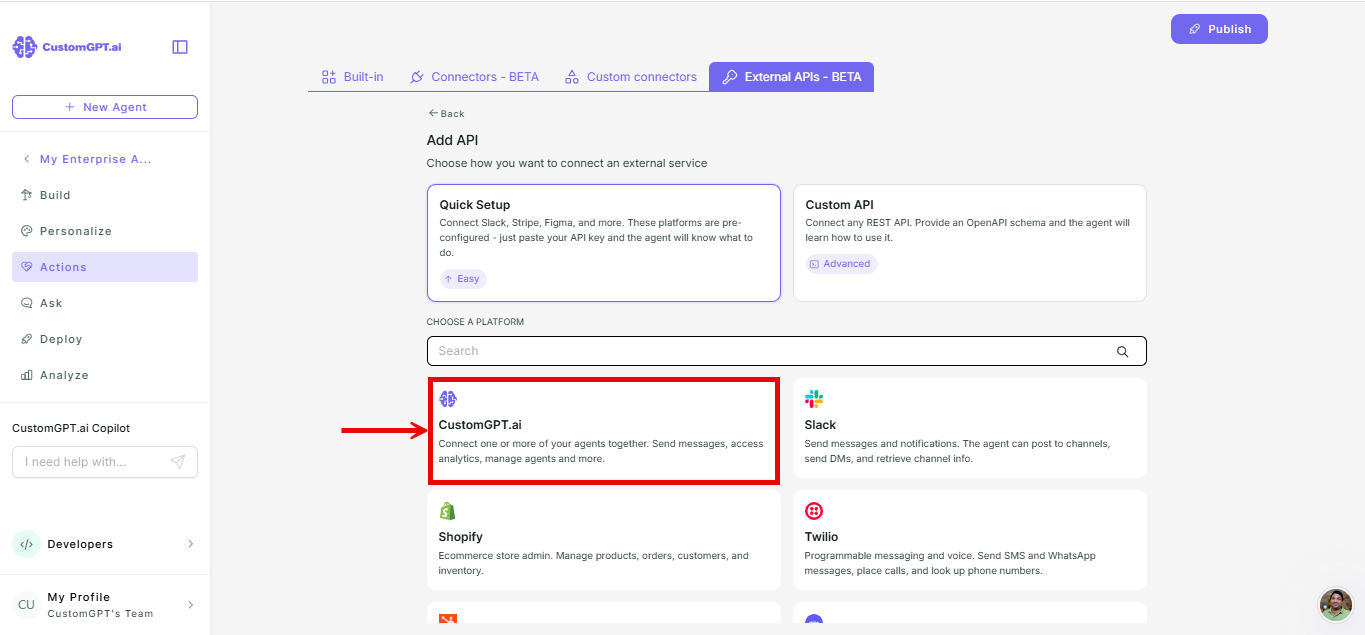
- Under Quick Setup, search for or select CustomGPT.ai from the platform list.
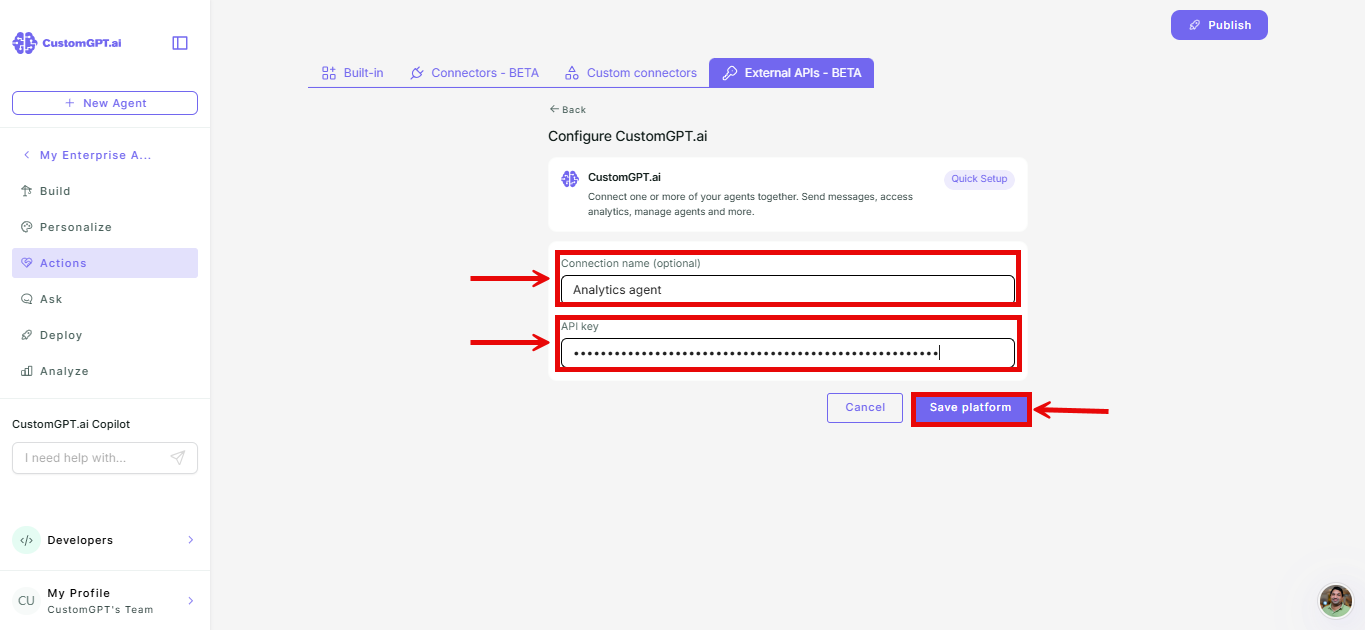
- Enter a connection name, paste your API key, and click Save platform. Then run the check in Verify it works below.
Note: Method A needs Smart Tasks enabled on your analytics agent, with the Make External Connections capability turned on. Without it, Add your first API stays greyed out. See Enable and configure Smart Tasks.
Keep your key secure
- Give it a name you'll recognize later.
- Store it somewhere secure, like a password manager - not in Slack or a shared doc.
- If you ever stop using the analytics agent, revoke the key from Developers.
What's next
Refer to 👉 Verify your analytics agent connection to confirm it's working.
Related articles
Updated 3 months ago