
Schedule a task for your agent
This guide walks you through creating, editing, pausing, and removing a scheduled task, so your agent runs a saved prompt automatically on a recurring schedule.
A scheduled task runs a saved prompt on a schedule you set, so your agent works without you there to start it.
Note: Scheduled Tasks is available on Premium and Enterprise plans, for your Enterprise Agents. If Plan & Act isn't turned on for the agent yet, refer to Enable Plan & Act mode first.
Schedule a new task
- On your agent, click the three dots.
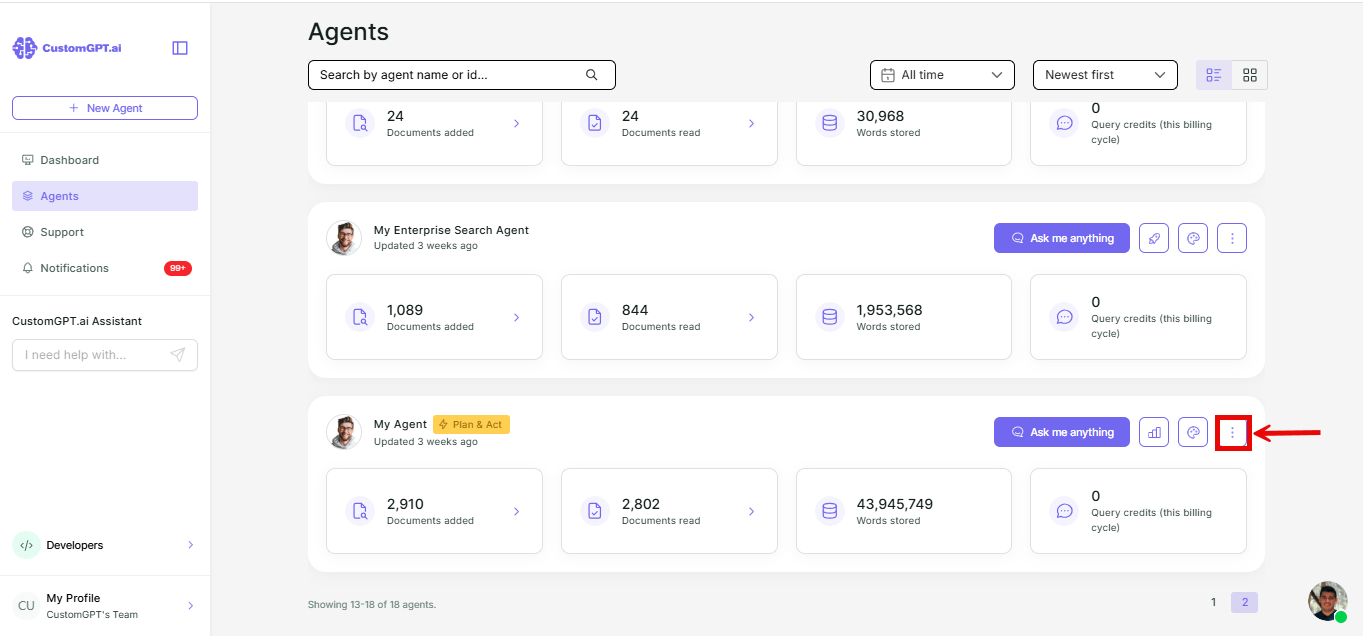
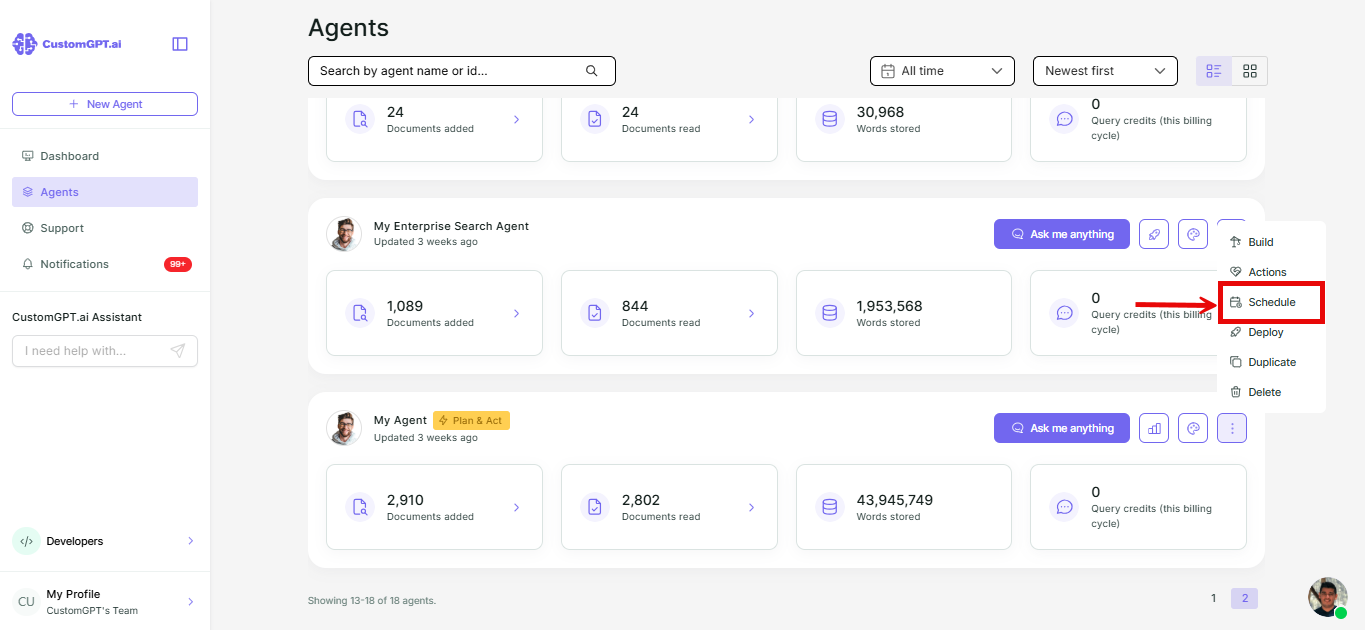
- Select Schedule from the dropdown.
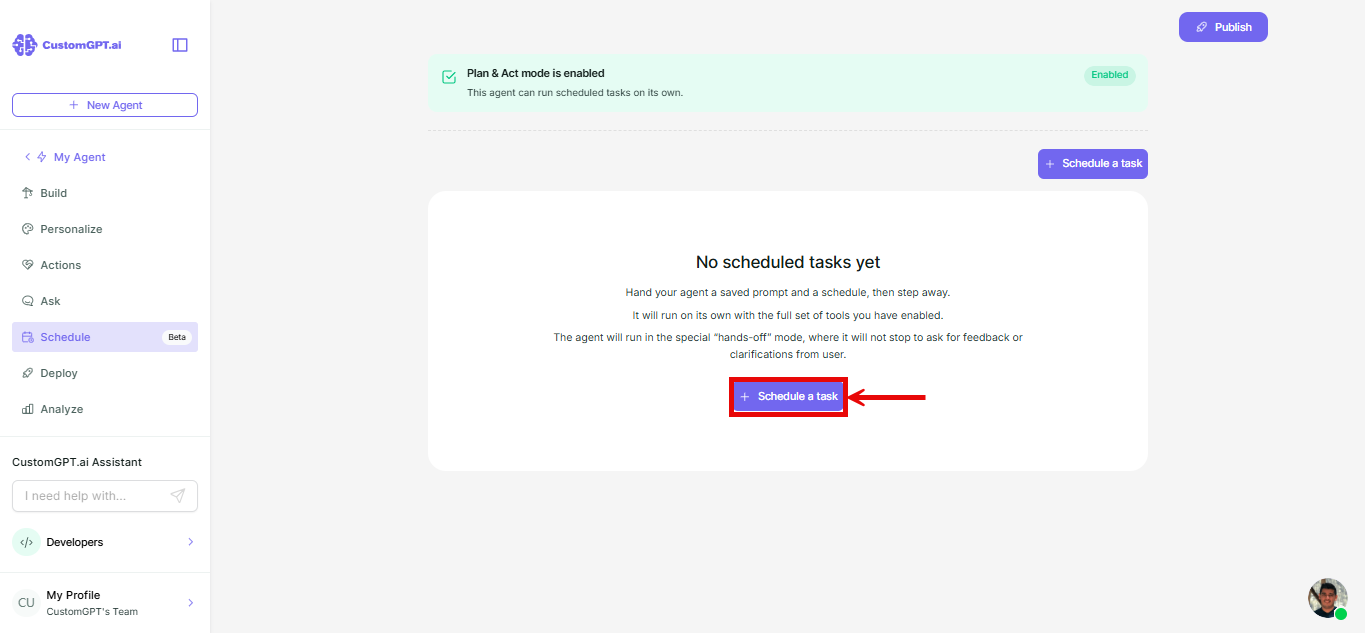
- On the Schedule page, click Schedule a task
- Enter a task name.
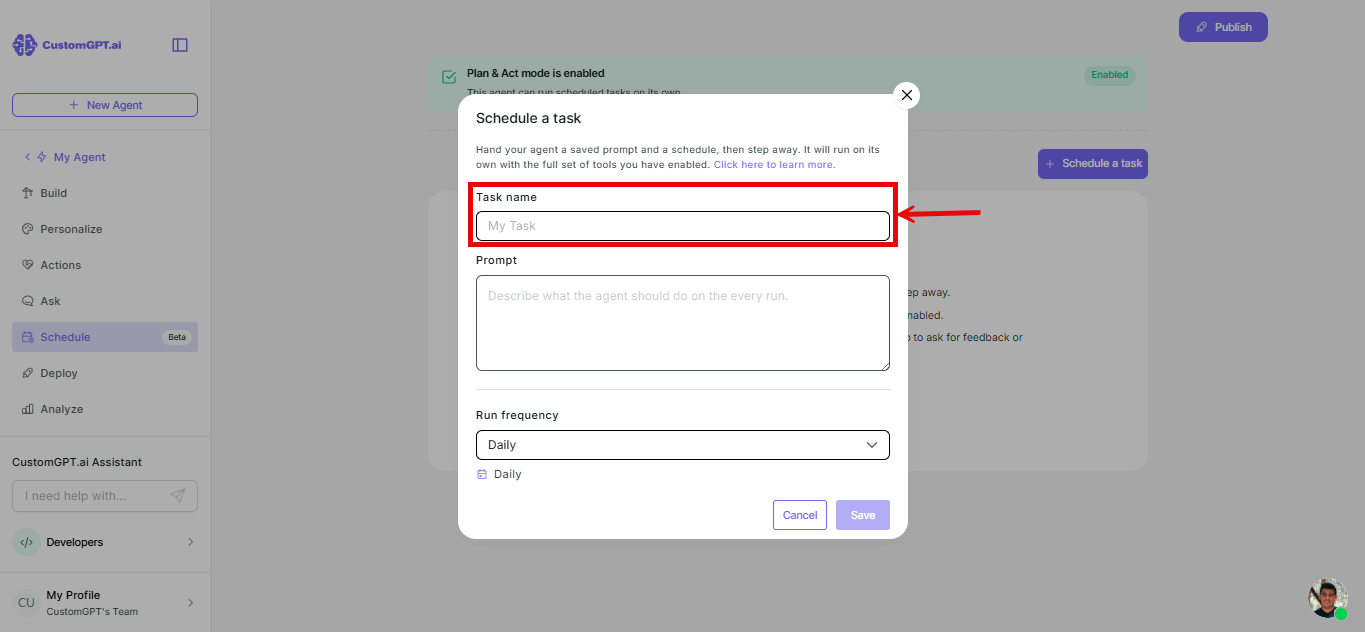
- Enter the prompt you want the agent to run.
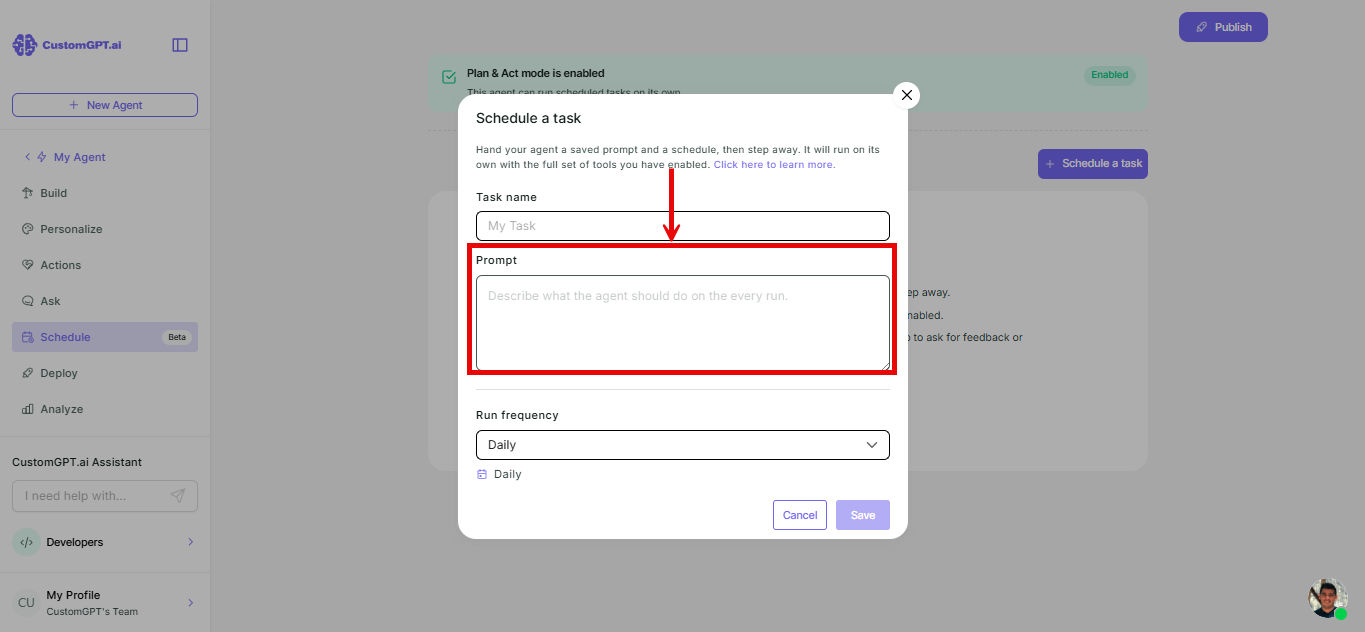
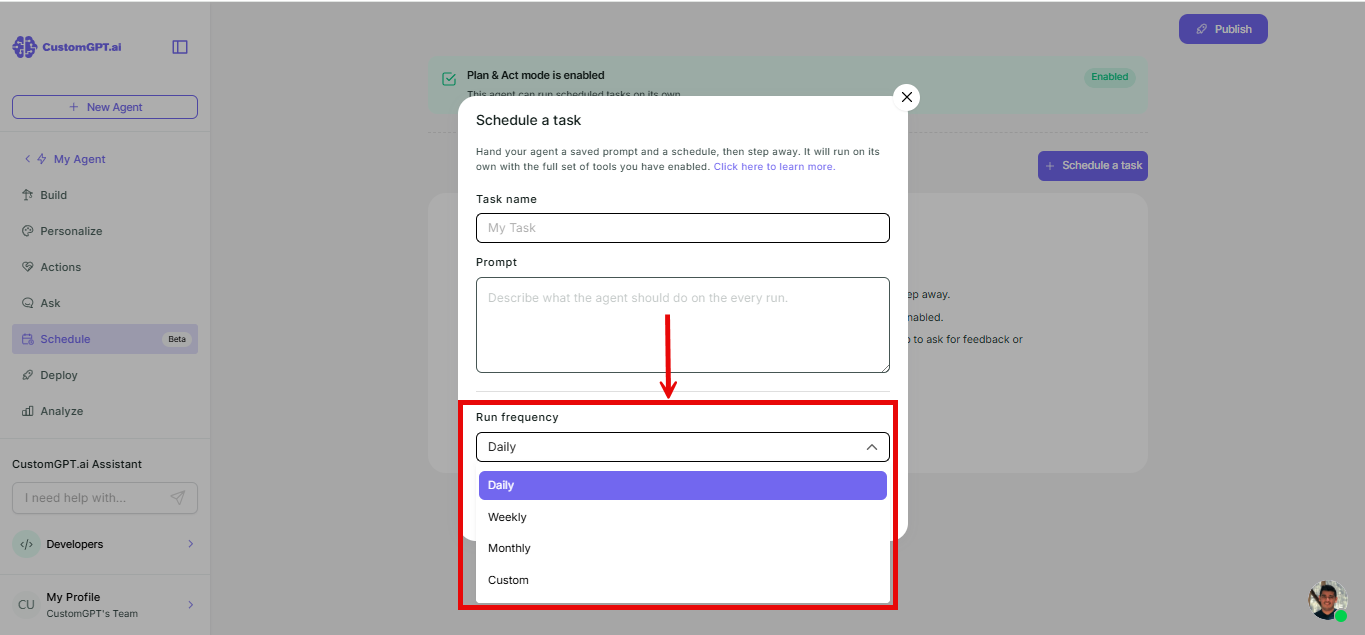
- Set Run frequency to Daily, Weekly, Monthly, or Custom. Custom lets you set Repeat on (which days) and Repeat (what time).
- Click Save.
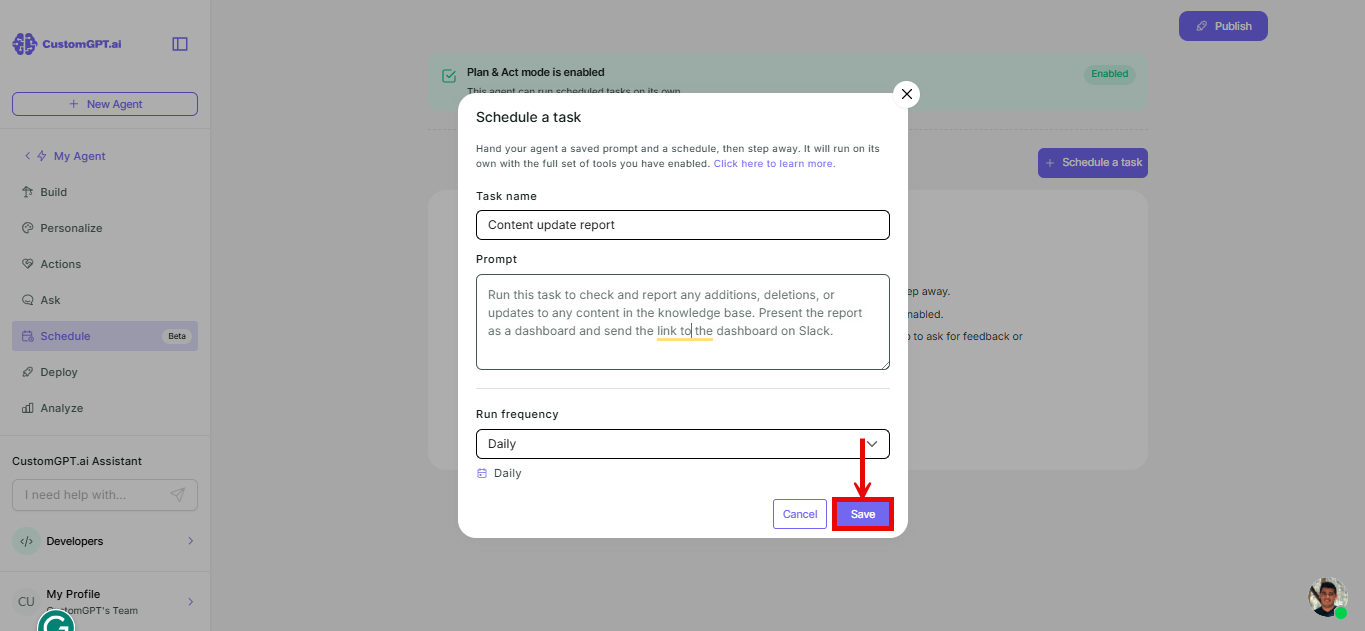
Note: Write your prompt as a complete instruction, with everything the agent needs to finish the job on its own. Refer to How Scheduled Tasks works for what that means in practice.
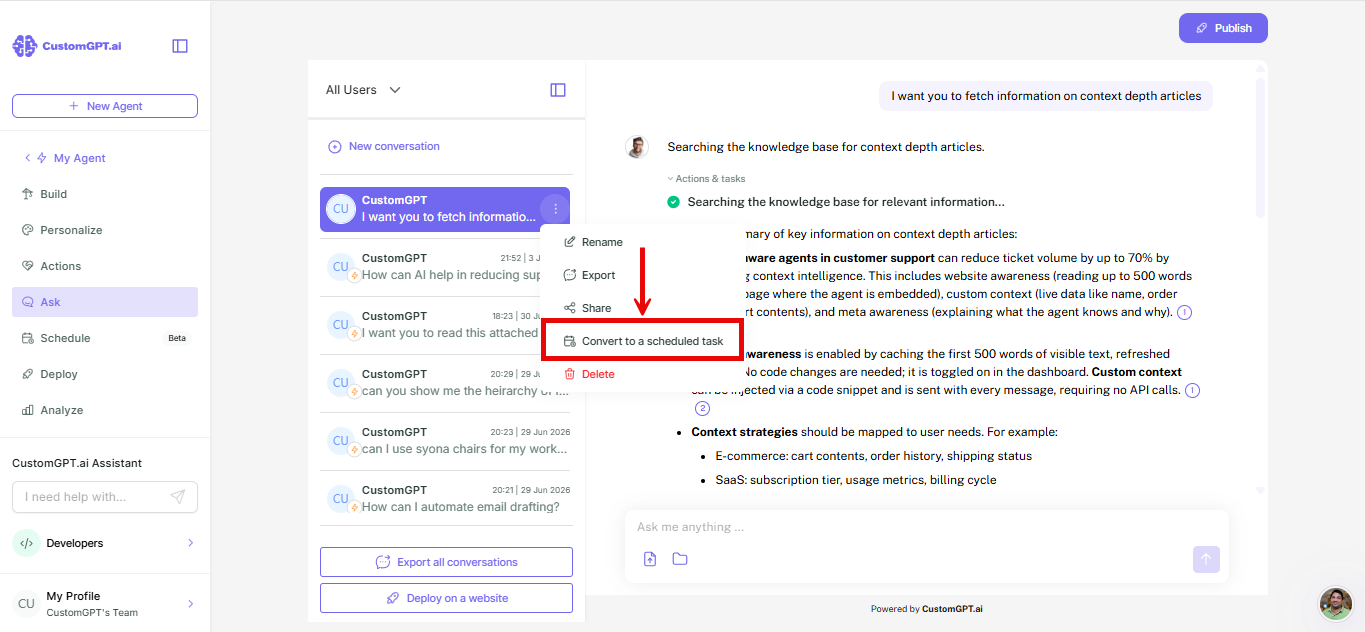
Turn an existing conversation into a scheduled task
Turn any conversation with your agent into a scheduled task. Its first message becomes the task's saved prompt. From there, enter a task name and set Run frequency to Daily, Weekly, Monthly, or Custom, the same as for any other scheduled task.
Notes
- Connect delivery platforms before writing them into the prompt. Telling the agent to email or Slack the result only works if it's already connected to that platform as an Action. Connect one through Quick Setup, a custom API, or an MCP connector.
- You can have up to 10 tasks per agent right now. Contact sales if you need more.
- Schedules run in UTC. Account-level time zones aren't supported yet.
Related articles
Updated about 1 month ago